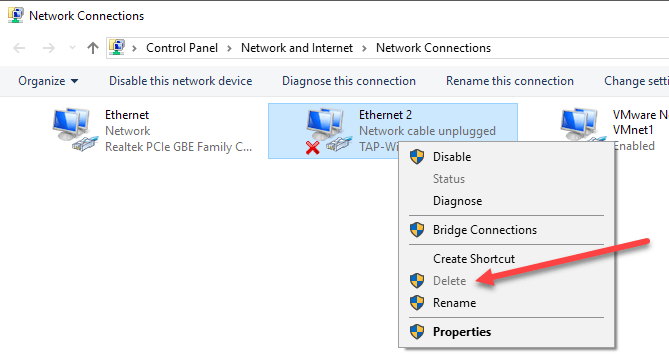
Recently, I uninstalled some VPN software off my system because I was no longer using it, but the virtual network adapter created by the software didn’t get removed automatically. When I tried to delete the network adapter from the list of adapters, the delete option was greyed out.
After quite a bit of troubleshooting, I was finally able to remove the network adapter from my Windows 10 system. In this article, I’ll mention all the different methods you can try, starting from the easiest and moving to the more technical. If you need to edit the registry, make sure you backup the registry first.
So, specifically, here’s the issue I had. I opened Control Panel, went to Network and Sharing Center and clicked on Change adapter settings. When I tried to right-click on the adapter I wanted to remove, the Delete option wasn’t available.
Method 1 – Use Device Manager
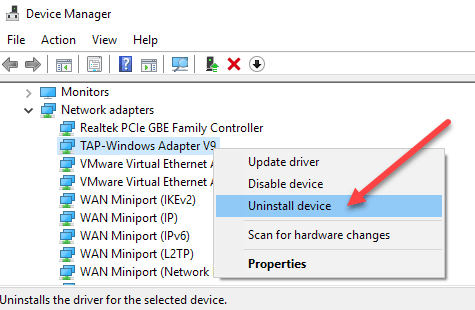
The first thing you can try to do is open Device Manager (click on start and type device manager), expand Network Adapters, and then right-click on the network adapter you want to remove.
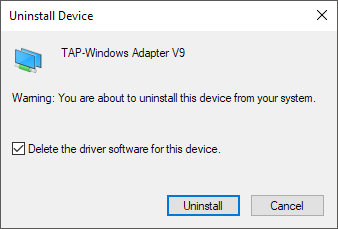
Here, you will see an option called Uninstall device. This should hopefully not be greyed out. If it is, continue to the next method. When you select uninstall device, another window will appear asking to confirm the uninstall.
You’ll also see an option to delete the driver software for the device. If you want to completely remove the network adapter, I suggest selecting this option to remove the driver also. If all goes well, you should see that the adapter has been removed from both Device Manager and the list of network adapters in Control Panel.
If you don’t see the device listed here, you can try to click on View and then Show hidden devices.
Method 2 – Delete Network Profile
We can also try to delete the network profile via the command line and then try Method 1 again. First, you have to open an elevated command prompt by clicking on Start, typing in CMD and then right-clicking on command prompt and choosing Run as Administrator.
Now type in the following command to see all wired (Ethernet) adapters:
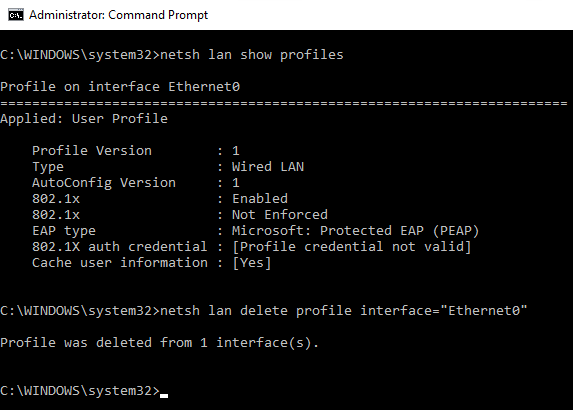
netsh lan show profiles
If you need to remove a wireless adapter, type this command:
netsh wlan show profiles
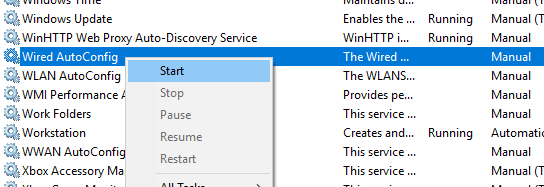
If you get some error message about the Wired or WLAN AutoConfig service not running, then click on Start, type in services.msc, right-click on the appropriate service and choose Start.
Now when you run the command, you should see a list of profiles. In my case, I only have one profile on this computer.
Next, type in the following command, which will delete the desired interface.
netsh lan delete profile interface="InterfaceName"
Again, if it’s a wireless interface, use wlan instead of lan. The interface name is listed at the top of each heading (Profile on interface name) when you ran the show profiles command. Once the profile has been deleted, restart your computer and try Method 1 again.
Method 3 – Remove Adapter Settings via Registry
In addition to deleting the network profile, you can also try to remove the adapter settings via the registry. After you remove the settings, you can go back to method 1 and try to remove the adapter. To remove the settings, open the registry editor (click on Start and type in regedit.msc), and navigate to the following key:
HKEY_LOCAL_MACHINE - SYSTEM - CurrentControlSet - Services - Tcpip - Parameters - Interfaces
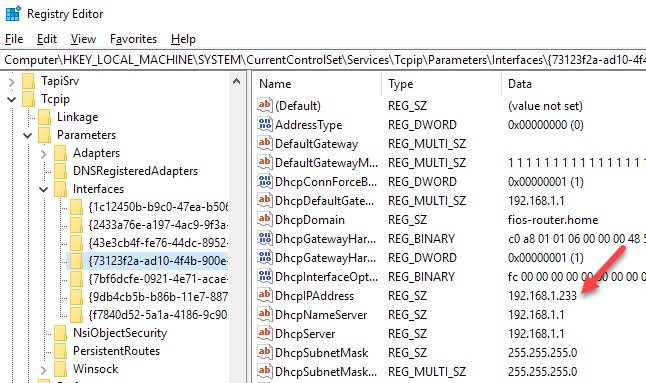
You’ll see several items listed with a long series of random numbers. If you click on each one, you’ll see the IP address that is assigned to that network adapter.
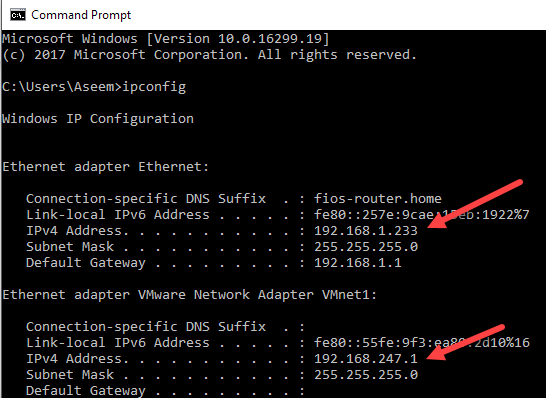
You can confirm which network adapter corresponds to that registry key by opening a command prompt (Start and type cmd) and typing in ipconfig.
As you can see, Ethernet adapter is the one that has an IP address of 192.168.1.233. So you would delete the key under Interfaces that starts with {73123f2a-ad10-4f4b-900e…}. If you click on a different interface, one of them will have the IP 192.168.247.1, which corresponds to the VMWare Network Adapter on the computer. Again, this only deletes the settings for the adapter, not the adapter itself. Restart the computer and try Method 1 again.
Method 3 – Reset Network Settings
In Windows 10, you can also reset your network settings, which will delete all network adapters and then reinstall them. You’ll have to reconfigure any settings on those adapters, but it can help remove outdated or old network adapters.
To do this, click on Start, then Settings and then click on Network & Internet.
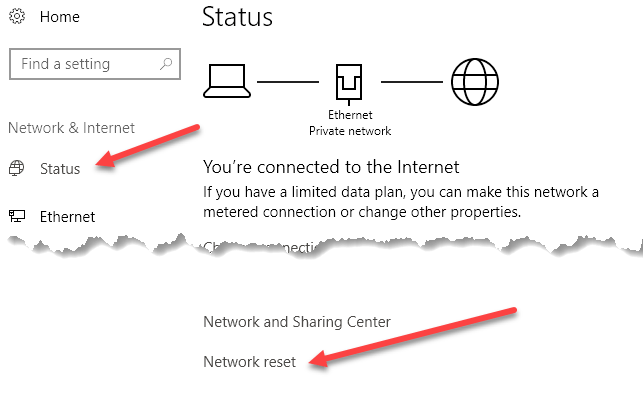
Click on Status in the left-hand menu and then scroll all the way down to the bottom till you see Network reset. You’ll be asked to confirm and then your computer will restart. If the adapter in question is gone after the restart, then great! If not, try Method 1 again.
Method 4 – Disable in BIOS
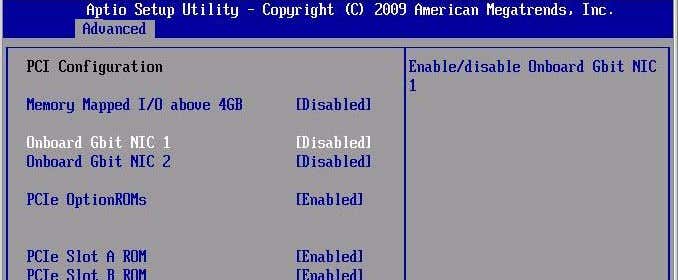
If the network adapter in question is built onto the motherboard, then you can also try disabling the network adapter in the BIOS. Read my previous post on how to access the BIOS if you’re not sure how.
Once you are in the BIOS, you’ll have to search around for the section that lets you disable hardware. You’ll usually see something like Onboard Gbit or Onboard LAN with the option to disable.
Hopefully, one of these methods helped you to get rid of an old or outdated network adapter on your Windows machine. If you are still having problems, feel free to post a comment and I’ll try to help. Enjoy!
Related Posts
- Preparing for Windows 10 End of Support: Upgrading to Windows 11
- How to Fix a “This file does not have an app associated with it” Error on Windows
- How to Fix an Update Error 0x800705b4 on Windows
- How to Resolve “A JavaScript error occured in the main process” Error on Windows
- How to Fix the Network Discovery Is Turned Off Error on Windows
