Changing your screen brightness is supposed to be a simple thing, but sometimes the option doesn’t work in Windows 11. Let’s look at some ways to overcome the issue.
The problem with an error like this is that it is impossible to tell why exactly it has occurred. Anything can be wrong, from the display drivers to an internal Windows issue, so we need to try out multiple methods and see what works.
Fix 1: Restart Your Computer
We know you have heard this a lot, but it bears repeating – Windows 11 doesn’t really shut down your computer. Like ever.
Every time you hit the shutdown button, you’re just putting it in a sort of sleep mode. While this does make rebooting your PC faster, it also means that unless you manually Restart your PC, it is not getting a fresh start.
And when you are dealing with some weird bugs or glitches, a fresh start is exactly what you want to give to your computer. So before trying anything out, take a moment to restart your computer first.
Fix 2: Plug-in Your Laptop
This one is obviously only applicable to laptop computers, but that’s most PCs. And in most laptops, the brightness settings are tied to the power.
Not only do laptops have separate brightness profiles for when they are plugged in or running on battery, but they also tend to tone down the brightness during battery saver mode. This is why when your laptop’s charge starts dipping to a critical level, you will often notice brightness levels (and even performance) tanking as the system activates battery saver to try and conserve power.
So the first thing to do if you are unable to adjust the brightness on a laptop is to plug it in and see if that fixes things. Only when that doesn’t work should you move on to the other fixes.
Fix 3: Try All Methods of Adjusting Brightness in Windows
Let’s review some ways to change the brightness in Windows 11. If you have not tried any of the methods here, give it a chance to see if one of them fixes the problem.
Method 1: Try the Dedicated Button
Most laptops (and even a few branded desktops) will have a pair of buttons for lowering or raising the brightness. These often override any other Windows setting and can be a great way of modifying the screen brightness when the normal methods don’t work.
Laptops aside, some external keyboards also have such features mapped to the Function Keys which you can trigger by holding the Fn buttons and pressing the dedicated key.
Method 2: Adjust Brightness From Settings
Physical buttons aside, there is always the option to adjust your brightness from Windows Settings. Note that both end up modifying the same setting, so you will see the position of this slider change when you hit the keyboard button too.
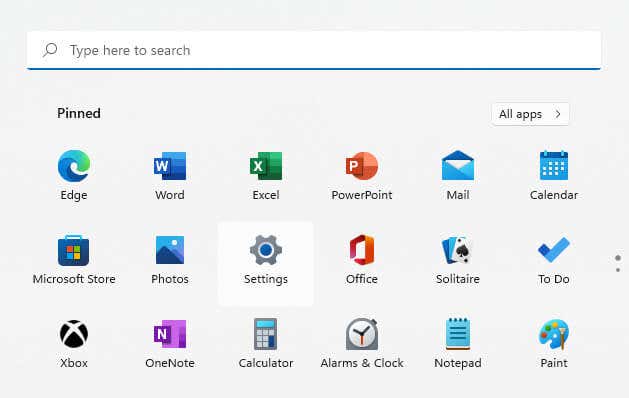
- Bring up the Start menu and hit the gear-shaped icon to open Settings.
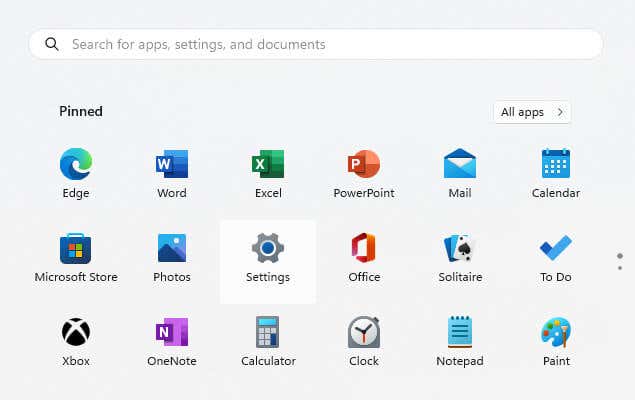
- Switch to the System tab, and select Display.

- You will see a brightness slider at the top. Drag the slider around to increase or decrease your system brightness. You can also select the slider and use the arrow keys instead of the mouse.

Fix 4: Disable Auto-Brightness
Windows 11 (and Windows 10 too) has an auto-brightness setting, supposed to set the screen brightness to appropriate levels based on the time of day and external luminosity. This normally disables the manual brightness adjustment, making it seem like the setting is broken.
The good news is that it is pretty easy to toggle on or off, and we suggest doing just that.
Keep in mind though that this feature is not available on every PC, since not every system will have the required sensors. Only the ability to change brightness based on content is available for all Windows 11 computers.
- Head to the Start menu and click on Settings (the gray gear icon).
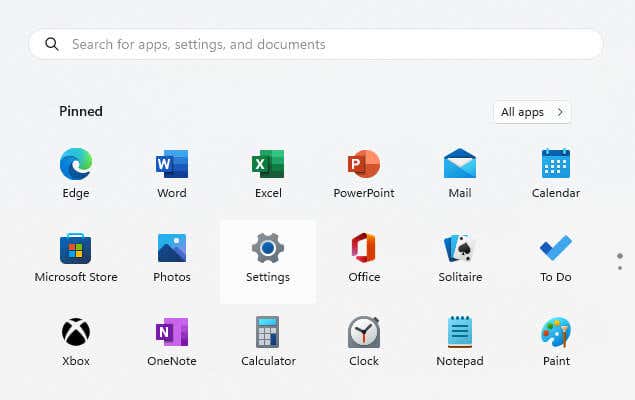
- Select System from the categories listed on the left, and then Display from the options presented on the right.

- The brightness slider appears on the top, but any additional automatic brightness settings must show up right below that, if available. Click on the downward pointing arrow on the right of the slider to expand the section completely.

- As you can see, your test computer only has the content-aware brightness option, and that too is only enabled when the system is running on Battery. But if you are having trouble changing the brightness and notice the option to adjust brightness based on lighting is enabled, click on it to check it off.

Fix 5: Update Graphics Drivers
If none of the methods before have worked, it’s time to dig deeper. There may be an issue with the drivers that run your display itself, and updating them can easily fix such bugs.
Many call them display drivers or monitor drivers, but in truth, it is not your monitor that decides the drivers; it is your video card. Windows includes some generic drivers that can run any display, but it is always better to install the specific drivers meant for your device.
- To find the right drivers for your device, head to the manufacturer’s official website. For a desktop computer, this means the GPU manufacturer’s page (Nvidia, AMD, etc) while for laptops the drivers are also hosted by the laptop brand itself. For an Acer laptop, for example, we just headed to Acer’s drivers page.
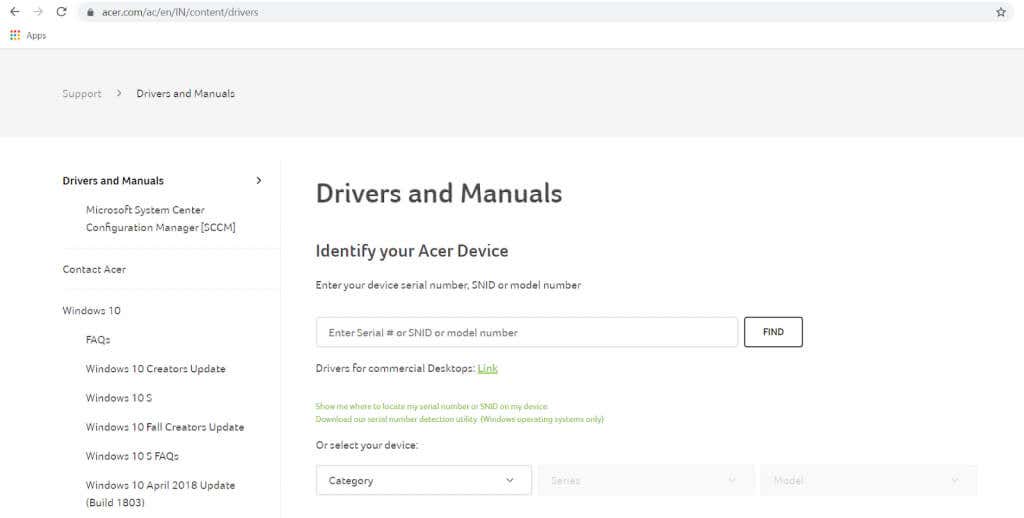
- The correct drivers can be found by entering the model number of your laptop, found on its box, or a sticker below the laptop.

- Scroll down this list of drivers to find the graphics drivers. They are sometimes named video card drivers or VGA drivers as well. And in case your laptop has a discrete graphics card, you will see two sets of drivers – one for the integrated graphics, the other for the GPU.

- Usually, the GPU driver is the only one that needs updating, but if you are unsure you can always download both to be safe.

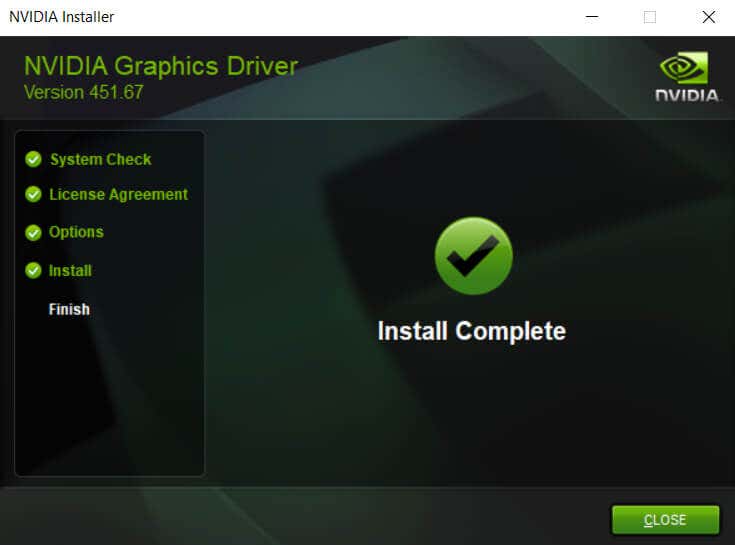
- Run the downloaded setup to install the new drivers on your system.
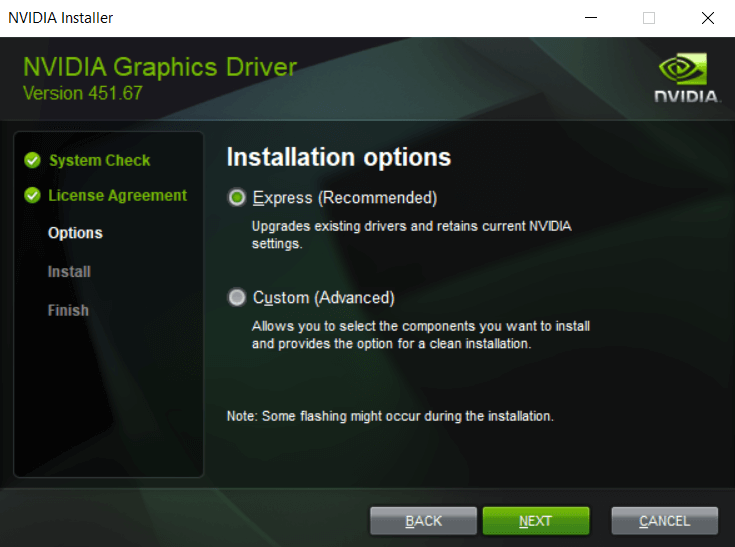
- Most installers will check your system to ensure the drivers are compatible and detect any older versions already on the system. Select the option that upgrades your drivers.
- Restart your PC once the installation is complete for the new drivers to take effect.
Fix 6: Install Windows Updates
Like any software, bugs can show up in an operating system like Windows as well. Windows Updates are designed to patch any such reported problems and add new features, ultimately making your system more stable over time.
By default, Windows Updates are supposed to be automatic, but many users often disable this auto-update due to internet restrictions or other reasons. When this continues, your PC can fall behind on critical updates, possibly causing errors like not being able to adjust brightness.
This is why whenever you run into any problem in Windows, a good step is to ensure your PC is up-to-date and install any pending Windows Updates.
- To check if you have any pending Windows Updates, open Settings from the Start menu.
- Switch to the Windows Update tab (the last on the left), and click on the Check for Updates button. Available updates are also listed below this button.
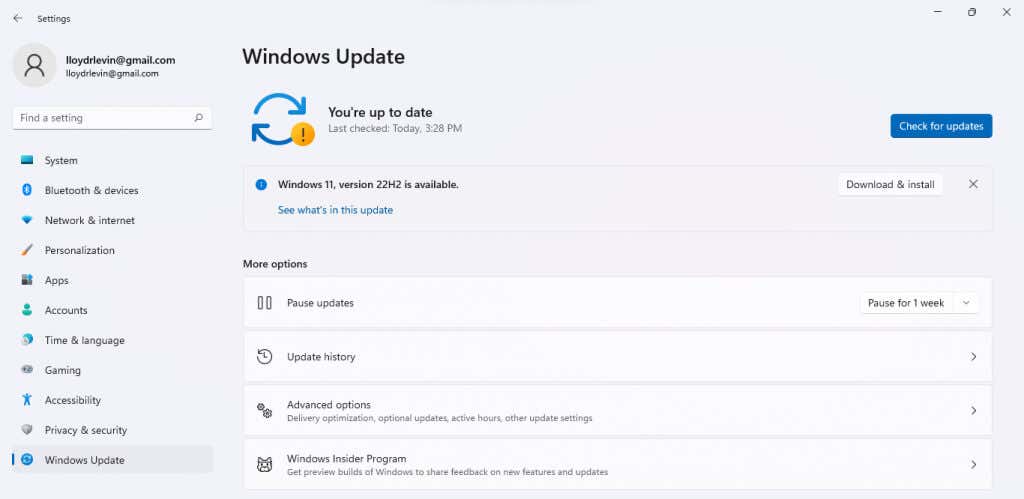
- Click on Download & install to get the update on your PC. You will see the update being downloaded. You can now quit Settings and do something else; the update will be installed in the background.

Fix 7: Use System Restore
Windows Updates can fix many issues, but occasionally, they can also cause them. New features rolled out with an update can conflict with other software and settings on your PC, creating problems in your smoothly running system.
But that’s why we have the System Restore utility. Using this setting you can roll back recent updates, restoring the system settings to their stable configuration.
Don’t worry – System Restore does not delete any files or other user data. It only restores the core system itself, leaving your applications untouched. And while you can always create manual System Restore points, the OS creates restore points for every major update as well.
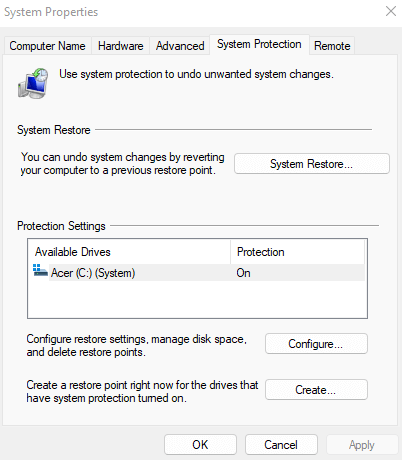
- To use System Restore, search for the utility in your Start Menu. The option will say Create a restore point, but that’s alright – it will also let you restore to previously created points.
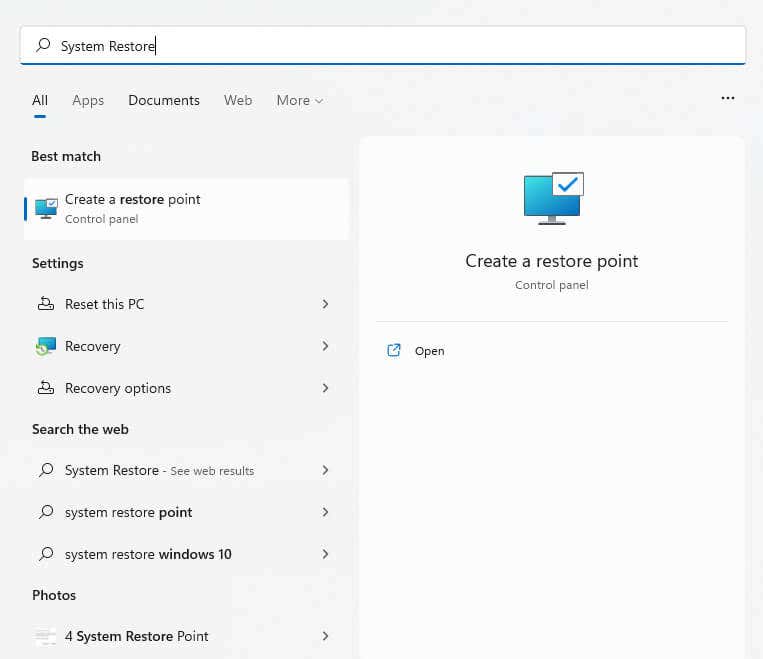
- This will open the System Properties window, where you will see the System Restore button. Click on it.
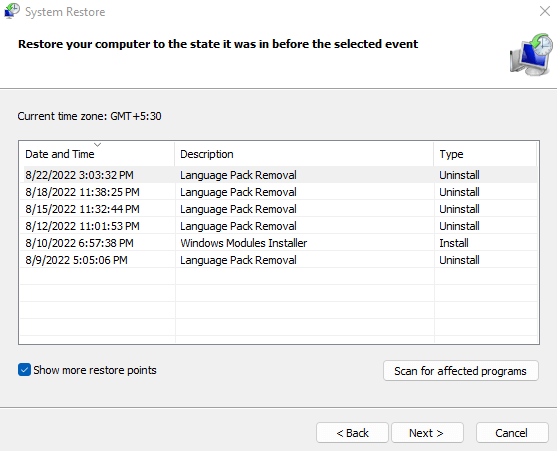
- The System Restore window will now open with a list of recent restore points. Even if you haven’t created any restore points manually, you will see all recent updates represented here.
- Select the restore point you want to revert to and select Next.
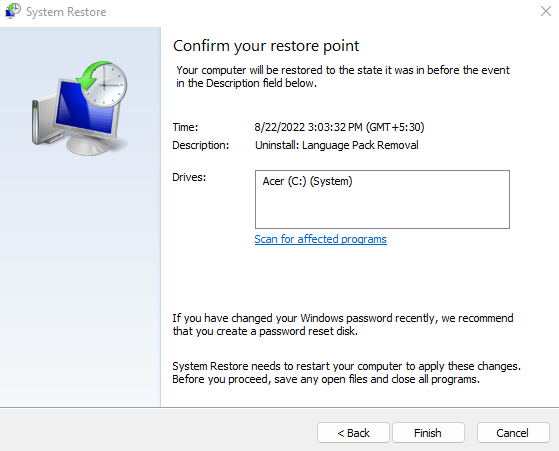
- You will be asked to confirm your choice. Select Finish when you want to go ahead. Your system will be reverted to its older configuration.
Fix 8: Repair System Files
When your issue persists even after the drivers have been updated, the culprit might be the Windows system files themselves. Before you rush to reinstall Windows, know that you can easily fix the system files using some built-in utilities.
SFC (System File Checker) is a command line utility that can scan the underlying system files and verify their integrity, restoring any corrupted or missing data from a backup Windows Image. Occasionally even the system image may be corrupted, which is why it is usually recommended to first run a DISM scan to verify its integrity.
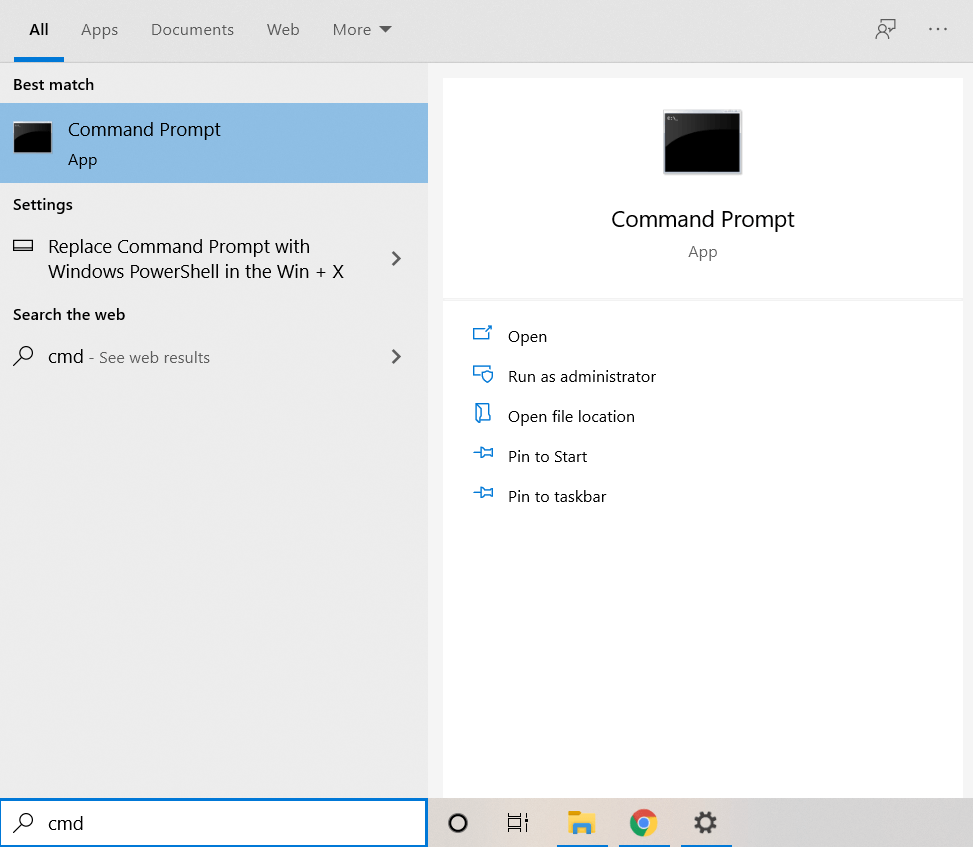
- To use SFC and DISM to repair your system files, first open the Command Prompt as an administrator. You can do this by searching for cmd in the Start menu and selecting the appropriate option.
- Start with a DISM scan to ensure that the system image is in perfect condition. Just type the command:
DISM /Online /Cleanup-Image /RestoreHealth
and press Enter.

- This will trigger a download of a fresh copy of the system image from Microsoft’s cloud servers, which will then be used to repair your existing image.

- Once DISM has done its work, it is time to use the SFC command. Enter the following:
sfc /scannow

- Now you just have to wait while the System File Checker goes over all the Windows system files and replaces any file found to be missing or corrupted. Restart your PC after the scan is complete.

What’s the Best Way to Fix Brightness Adjustment Issues in Windows 11?
The advice of “Restart your PC” is a cliche, but for a very good reason – a lot of bugs disappear with a proper restart. It is only when that doesn’t work should you start looking for a fix.
Start with the simple things first; restarting the PC, trying the brightness adjustment keys on your keyboard, etc. After that come the more involved fixes like reinstalling drivers or Updating Windows.
If nothing else works the problem lies with your system files, so you should try using Windows Restore or scanning the PC with CHKDSK to restore the Windows system files to their correct configuration.


