Safeguarding essential files and documents is crucial, and Windows has a handy feature to help you. File History, a built-in tool for Windows users, ensures you don’t lose those precious memories or important work documents due to accidental deletion or system crashes.
Enabling and using File History is simple and doesn’t require a technical background. You can easily set up this feature and enjoy peace of mind knowing your valuable files are backed up and easily accessible. So, sit back and let us guide you through the process, ensuring you’ll never lose a file again.
What Is File History in Windows?
File History is a feature in Windows that provides an easy and efficient way to back up your files automatically. File History works by periodically saving copies of your personal files, such as documents, photos, and videos, to an external drive or a designated network location. This ensures that even if you accidentally delete a file or encounter a system issue, you’ll have a backup available to restore your lost data.
The beauty of File History lies in its simplicity. It runs quietly in the background, requiring minimal input from the user once it’s set up. By default, File History backs up your files every hour, but you can customize the frequency according to your needs.
File History also keeps track of the different versions of your files, allowing you to access and restore previous versions if needed. This is particularly useful if you want to revert to an earlier version of a document or if a file becomes corrupted.
How to Enable File History
You’ll need to enable File History before you can use it. To enable File History, you must have your external drive plugged in.
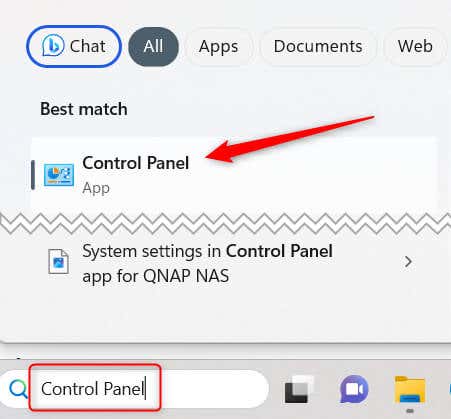
- Type Control Panel in Windows Search and then choose Control Panel from the search results.
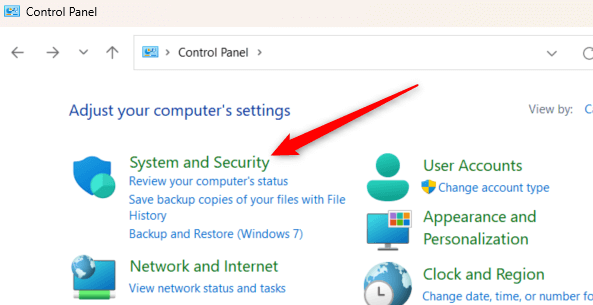
- In the Control Panel, choose System and Security.
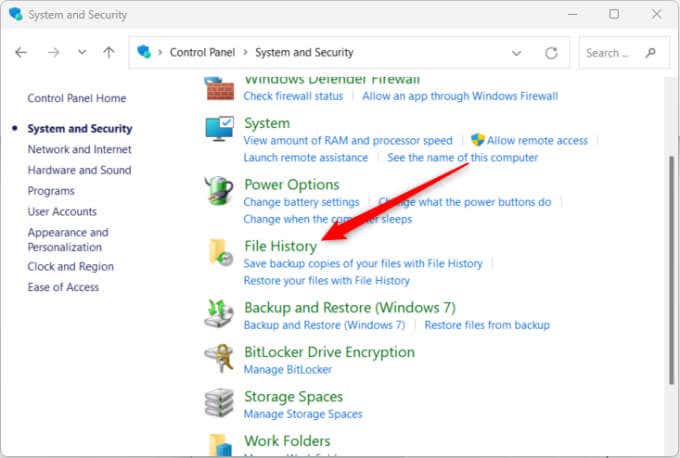
- Click File History.
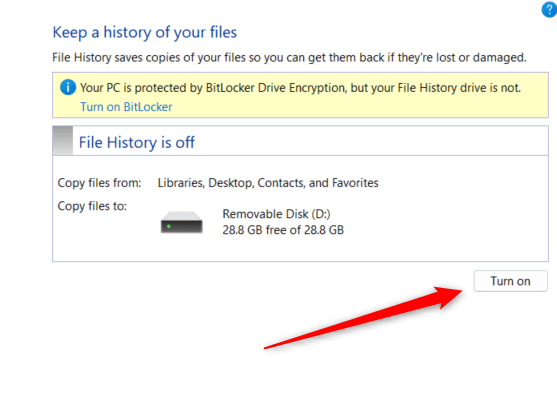
- Select Turn on to enable File History.
How to Use File History
Once you enable File History, it will automatically back up files from Libraries, Desktop, Contacts, Favorites, and a few other folders. However, there are other things you can do, such as selecting other folders to backup, setting backup frequency, and more.
How to Add Folders to Backup
You can back up a folder not in one of the default libraries, directories, or folders backed up by default.
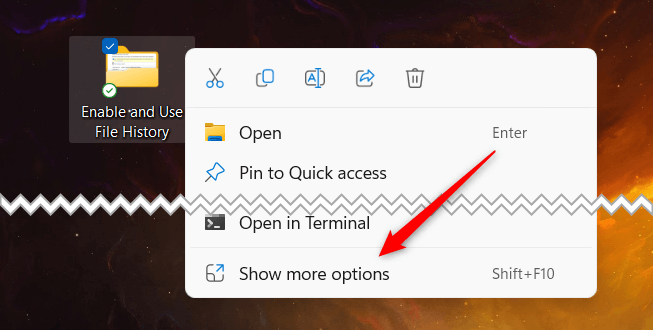
- Right-click the folder you want to add to Backup in File History.
- Select Show more options from the bottom of the context menu.
- Hover your cursor over Include in library and then select the relevant directory from the sub-menu.
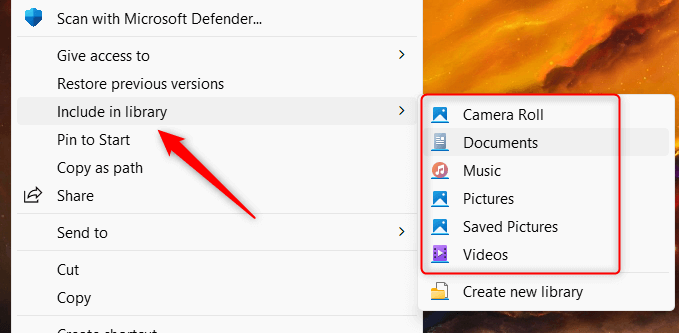
The folder will automatically back up when added. The “Include in library” option is only available for folders, so you can’t use this for individual files.
How to Exclude Folders From a Backup
You can also exclude certain folders from being backed-up. Here’s how.
- Head back to File History from the Control Panel. Here’s the file path:
Control Panel\System and Security\File History
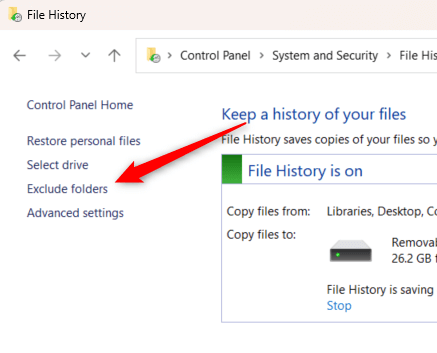
- Select Exclude folders in the left-hand pane.
- Click Add in the bottom-left corner of the window.
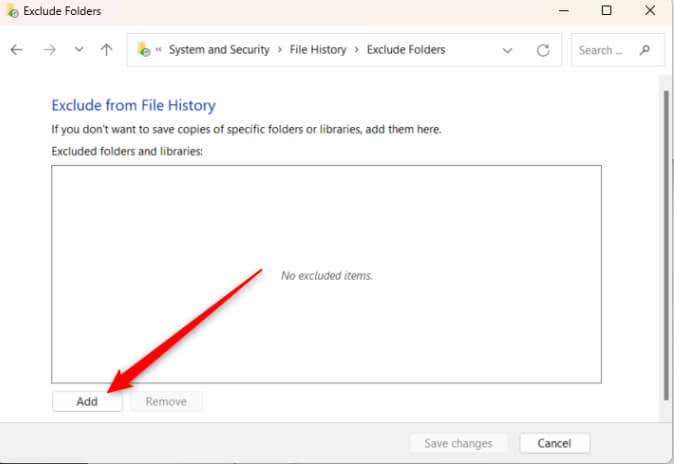
- Choose a library from the group and then click Select Folder.
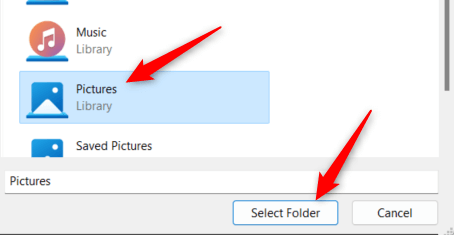
The selected folder is now excluded from File History.
How to Set Backup Frequency
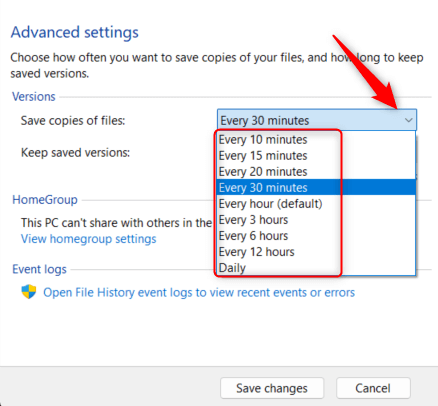
File History runs quietly in the background, saving copies of your files every hour by default. However, if it’s running a little more (or less) than you’d like, you can adjust the frequency it saves your files.
- Head back to File History from the Control Panel. The file path is:
Control Panel\System and Security\File History
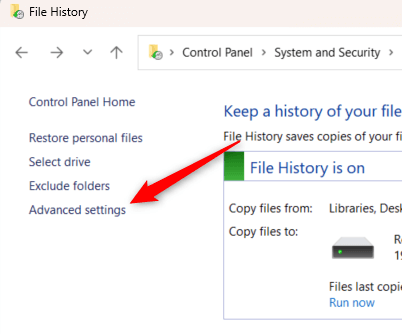
- Click Advanced Settings in the left-hand pane.
- Click the drop-down next to Save copies of files and choose an interval from the menu.
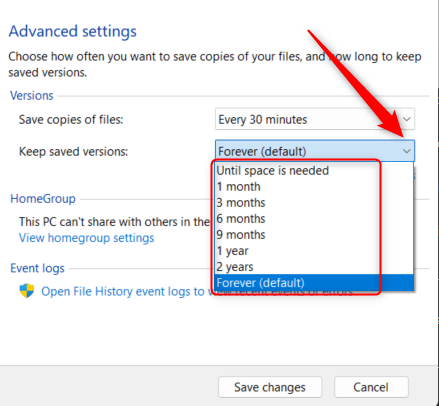
- You can also choose how long you want to keep saved copies of files. Click the drop-down next to Keep saved versions and select an option from the menu.
- Finally, click Save changes for the changes to take place.
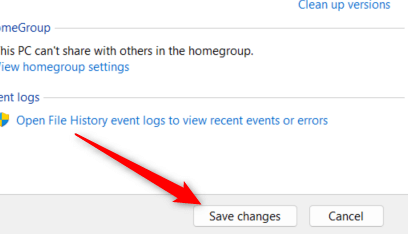
File History will now run, as well as delete copies, at the times you set.
Always Have a Backup
Enabling and understanding how to use File History allows you to delve into secure file management and amplifies your digital backup capabilities. File History allows you to customize your backup preferences and create reliable restore points for various data types.
You shouldn’t stop there, though. Having multiple backups is always better than one, so take advantage of the cloud or even invest in a network-attached storage solution to always keep your files safe and accessible.
