Windows Update errors are nothing new, and the 0x80248007 error is just another in a long line-up of similar Windows Update issues. The good news is that they also tend to be easy to fix. Here’s how.
One frustrating aspect of errors like this is that there is no way to tell exactly what went wrong. So, while the fixes are easy, you usually have to keep trying them one by one until something actually works.
Fix #1: Restart Windows Update Service
Whenever there is an issue with a Windows update, your first stop should be checking in on the Windows Update Service. As the service that is dedicated to checking for and installing the latest Windows Updates, most update-related errors originate from it.
You don’t need to do much; simply restarting the service forces it to check for updates again and attempt a fresh download.
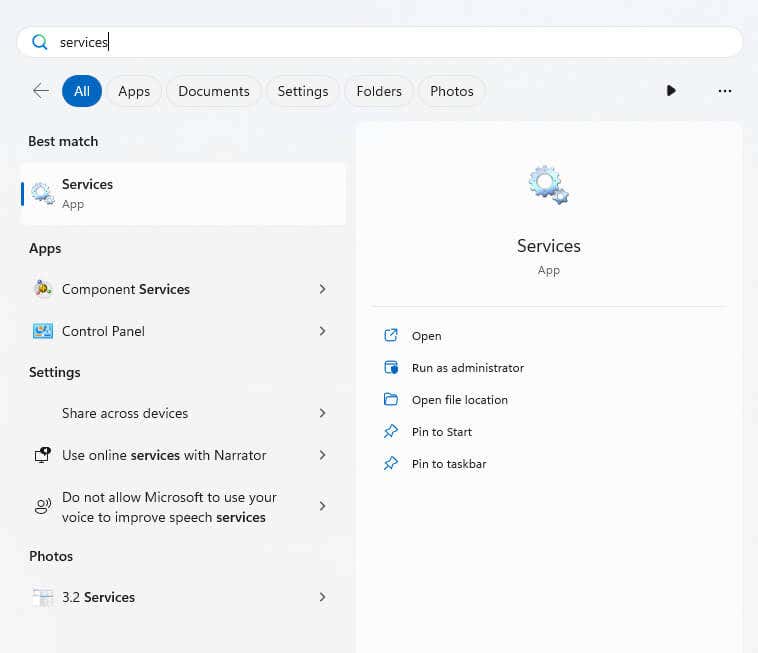
- Run Services by searching for it from the Start Menu.
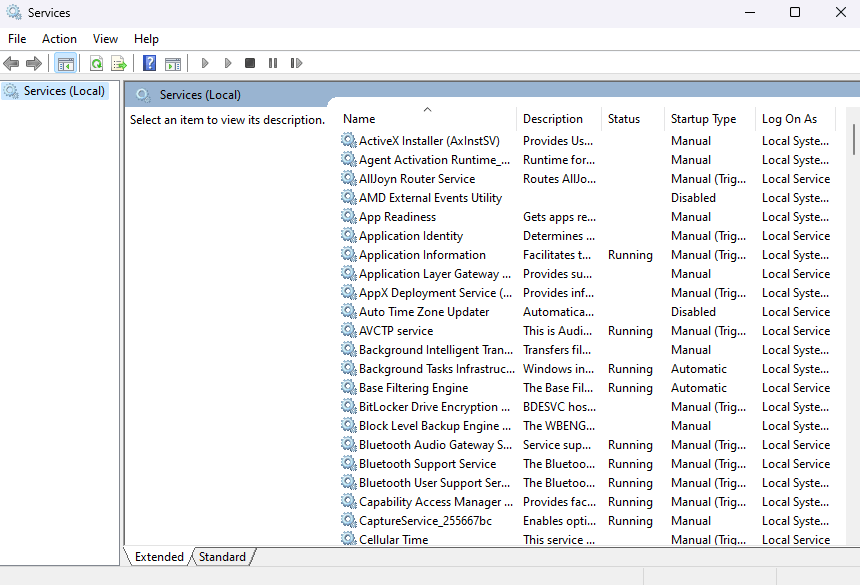
- Locate the Windows Update service in the list of all the system services on the list. Since the list is alphabetical, you will find it near the bottom.
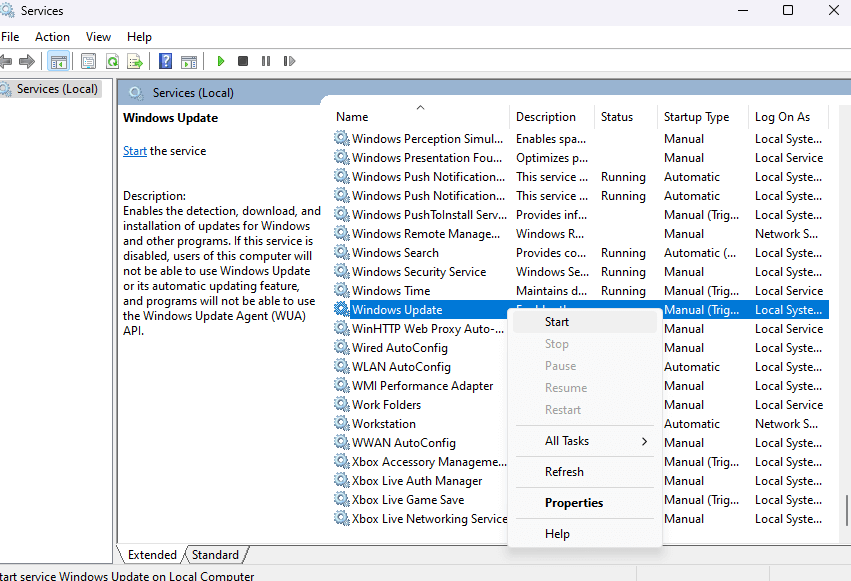
- Right-click on the service and select Restart, or Start if it isn’t running at all.
Fix #2: Start the Windows Installer Service
The Windows Installer Service should be running by default, but in case it has stopped due to some reason (either a bug or by manually killing its process earlier) it can give you an error when installing Windows updates.
To fix this, you have to manually start the service.
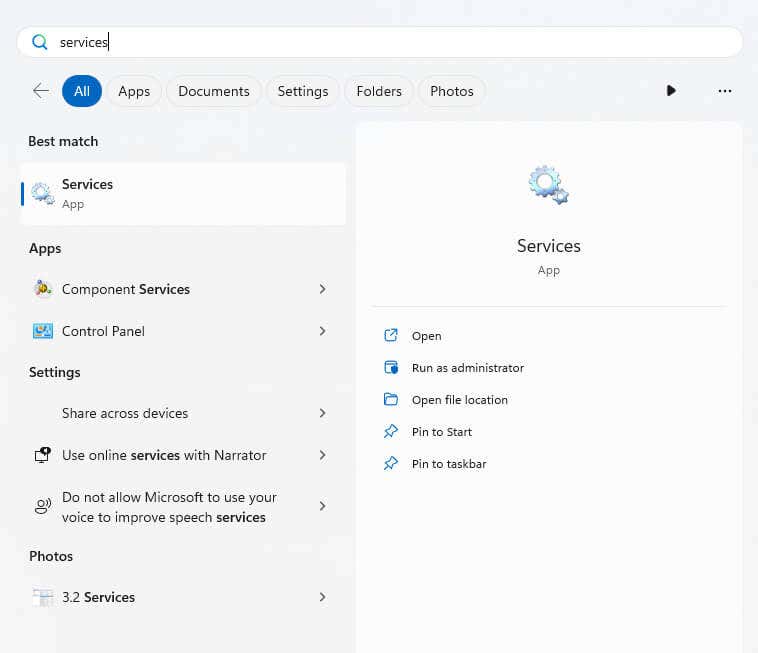
- Open Services by searching for it in the Start Menu.
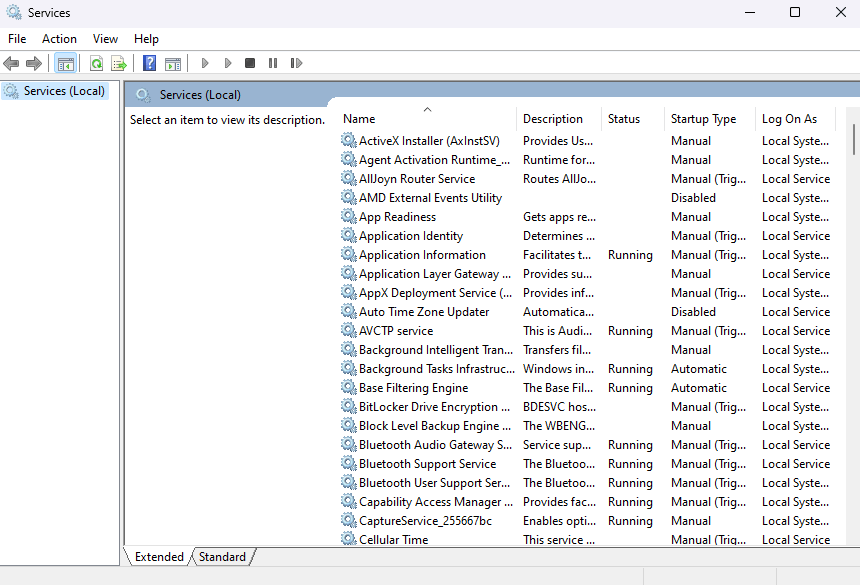
- This lists all the Microsoft services along with their status. Scroll down to find the Windows Installer service (the list is alphabetical, so just find the “w” section).
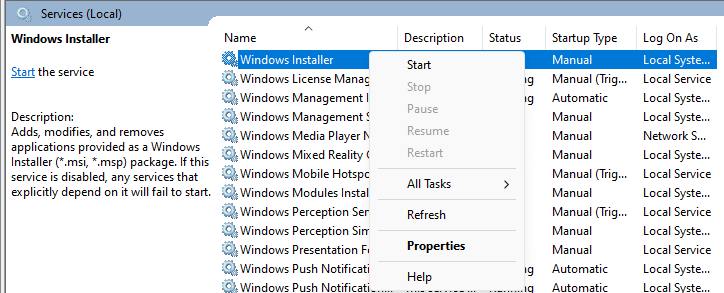
- Right-click on the service and select Start.
Fix #3: Run the Windows Update Troubleshooter
Windows troubleshooters have a poor reputation in general, being unable to fix most issues or even detect them correctly. But their performance has improved over time, and can often find and fix simple errors without much trouble.
This is why it can be a good idea to run the Windows Update troubleshooter before we go into the more involved fixes.
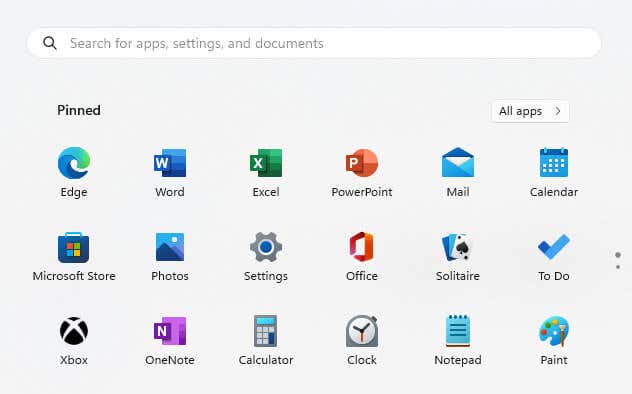
- Open Settings by clicking on the gear icon in the Start menu or searching for it.
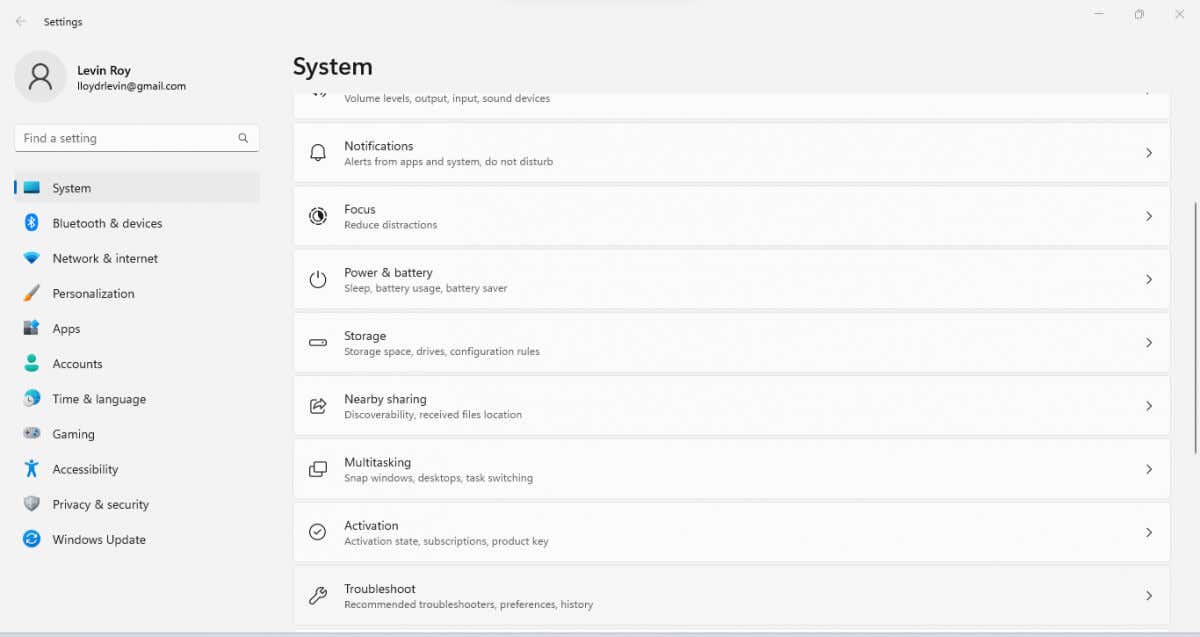
- In the System tab (which should be the default), scroll down to the Troubleshoot option and select it.
- Next, select Other troubleshooters.
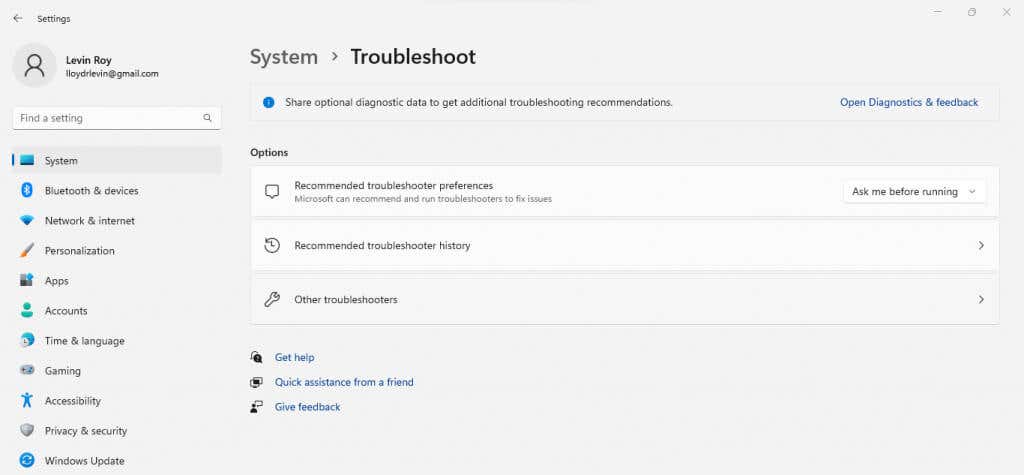
- This finally brings us to a list of troubleshooters, including the one for Windows Update. Hit the Run button to start the troubleshooter.

Fix #4: Clear the Software Distribution Folder
When the Windows Update service detects a new update, it starts downloading the required Windows update components as temporary files in the SoftwareDistribution folder. Once the download is complete, these files are used to install the update and then cleaned up.
But in case the download gets stalled or encounters an error, the update can remain stuck since the service keeps getting hung up on the incompletely downloaded files. An easy way to break it out of that cycle is to clear the SoftwareDistribution folder, forcing it to begin downloading the updated files anew.
- Start by navigating to C:\Windows\SoftwareDistribution by entering this address in the file explorer or manually clicking your way through.
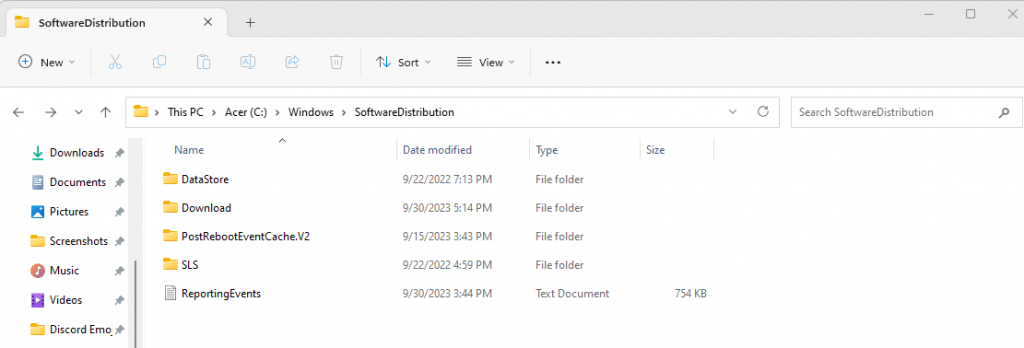
- Head into the DataStore and Download folders and delete everything in them.

Fix #5: Run SFC and DISM Scan
So far, we have talked about fixes that deal with stuck downloads or random bugs. But what if the update services are broken due to corrupted or missing system files?
To repair the system files on your PC and ensure they are working perfectly, you need to run an SFC and a DISM scan. Ideally, you want to run DISM (Deployment Image Servicing and Management) first, as it will download a fresh system image from Microsoft’s servers to repair the local image stored on your PC.
After that, you run SFC (System File Checker) to scan all the system files themselves, verifying them against the system image to fix any inconsistencies. By the end, you can confidently say that your Windows Installation has no corrupted or broken files.
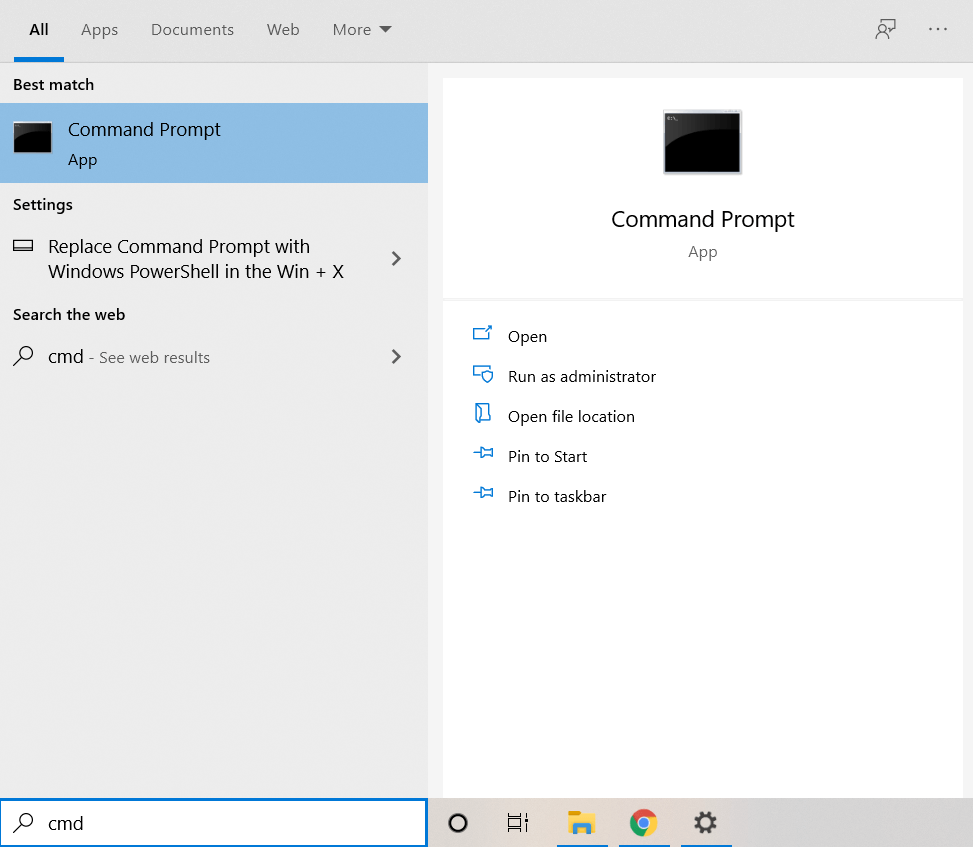
- As both SFC and DISM are command-line utilities, open Command Prompt as administrator. You can find it by typing “cmd” in the Start Menu. Make sure to pick the Run as Administrator.
- First, we will run the DISM command.
Dism /Online /Cleanup-Image /RestoreHealth
- This will download a fresh system image from Microsoft’s servers and use it to patch up the existing one currently on your computer.

- After DISM has completed the process, it is time to run an SFC scan. Type sfc /scannow and press Enter.

- SFC will now use the updated system image to verify the integrity of every system file, replacing them if any mismatch is found. Wait while the scan is underway.

Fix #6: Manually Install Update From Microsoft Update Catalog
If you keep getting the Windows update error 0x80248007 every time you try to update Windows, you can always head to Microsoft’s Update Catalog and manually download the required update. All Windows Updates are available on the website through individual installers, allowing you to install them as any other software package.
- To manually download a Windows Update, head to the Microsoft Update Catalog.
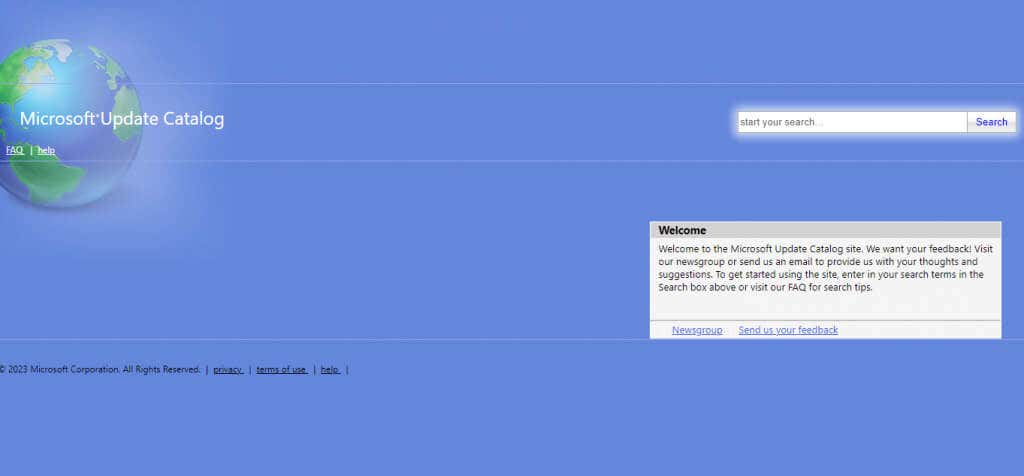
- Enter the serial number of the update you are seeking (it starts with a KB). All matching updates will be listed along with their sizes.

- Download the correct update based on your processor type. This opens a separate dialog box (just Microsoft things) from where you can download the .msi file.
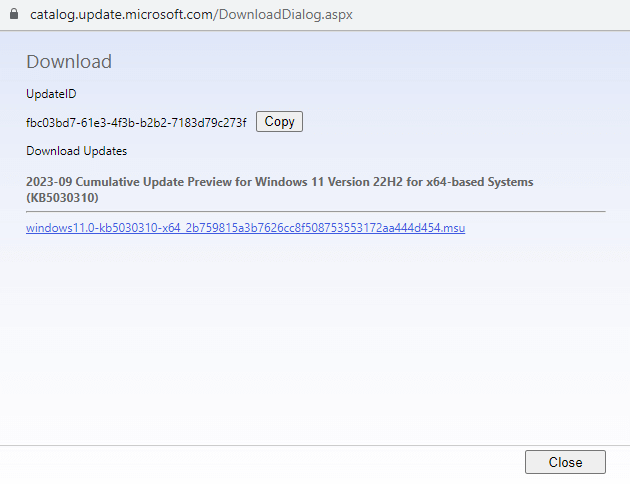
- Once the file finishes downloading, run the package to install the update on your PC and restart the system.
What Is the Best Way to Fix the Windows Update Download Error 0x80248007?
In most cases, Windows update errors can be fixed simply by restarting the Windows Update or the Windows Installer services. It’s only when these methods don’t work that you have to dip into the more complicated fixes.
Any corrupted or missing system files can be fixed with a DISM and SFC scan, and clearing the SoftwareDistribution folder can force a re-download of the update. Should all other methods fail, manually installing the update from Microsoft’s website almost always works as the last resort.
Related Posts
Levin Roy is a software engineer who loves writing about technology. Whether it is Windows tips-and-tricks or in-depth guides about application development, Levin uses his practical experience and technical skills to create articles that can help solve tricky problems. Read Levin’s Full Bio

