Ever since the introduction of Windows 8 in 2012, Microsoft’s operating systems have become increasingly online-oriented. Windows 11 is no exception. Whether it’s authenticating your digital license, using the various built-in Microsoft apps and services, or syncing settings and activity across devices, you need a Microsoft Account for a seamless Windows PC experience.
But if you have privacy or other concerns, you can remove your Microsoft Account from Windows 11. The instructions in this tutorial show what you must do to switch to a local user account, including how to avoid signing into a Microsoft Account the next time you set up Windows 11 from scratch.
Should You Remove Your Microsoft Account from Windows 11?
Using a Microsoft Account with Windows 11 allows you to sync (or back up) your PC settings, download age-restricted games and movies from the Microsoft Store, upload photos and documents to OneDrive, and so on. Most importantly, it’s free.
However, if you rarely use Microsoft’s services, value your privacy, or prefer the simplicity of an offline account, you can sign out of your Microsoft Account whenever you want. You can also opt for a local account while setting up the operating system.
Note: If your Windows 11 license is digitally linked to your Microsoft Account, signing out will not deactivate your PC.
Despite switching to or creating a local account, you can continue to use your Microsoft Account separate from the operating system. For example, you shouldn’t have any problem backing up stuff to OneDrive even if you aren’t signed into Windows 11.
Remove Microsoft Account After Signing In
Removing your Microsoft Account from your Windows 11 PC requires a brief visit to the Settings app in Windows 11. The following steps apply to the Professional and Home editions of Microsoft Windows.
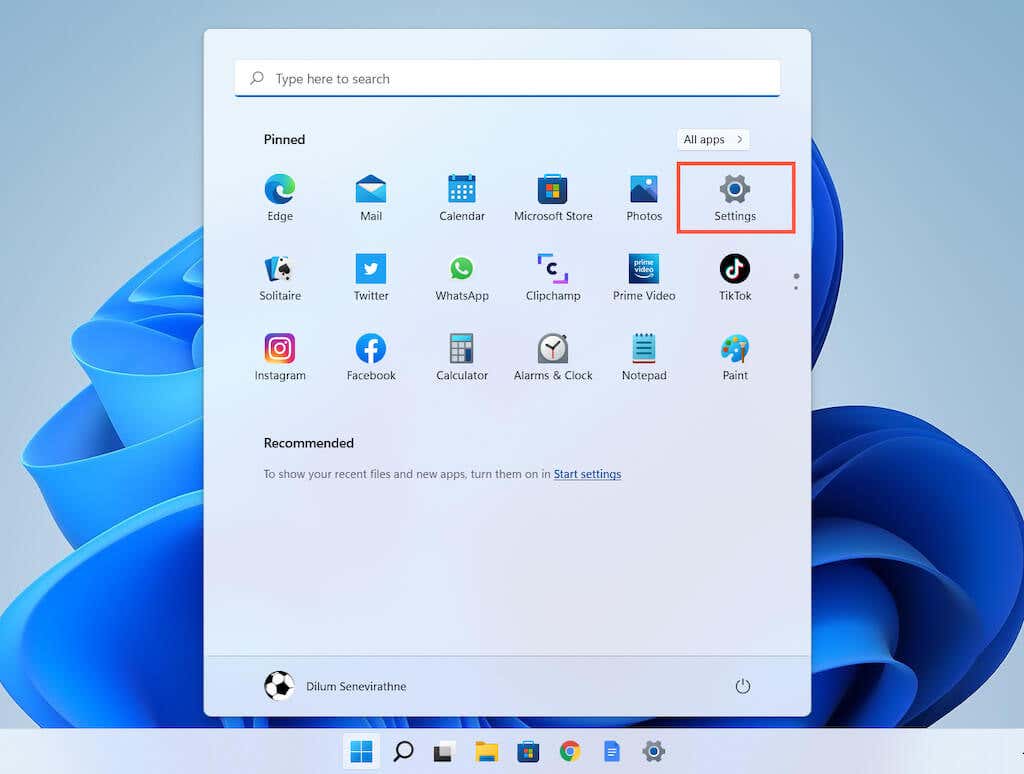
1. Open the Start menu (or press the Windows key) and select Settings.
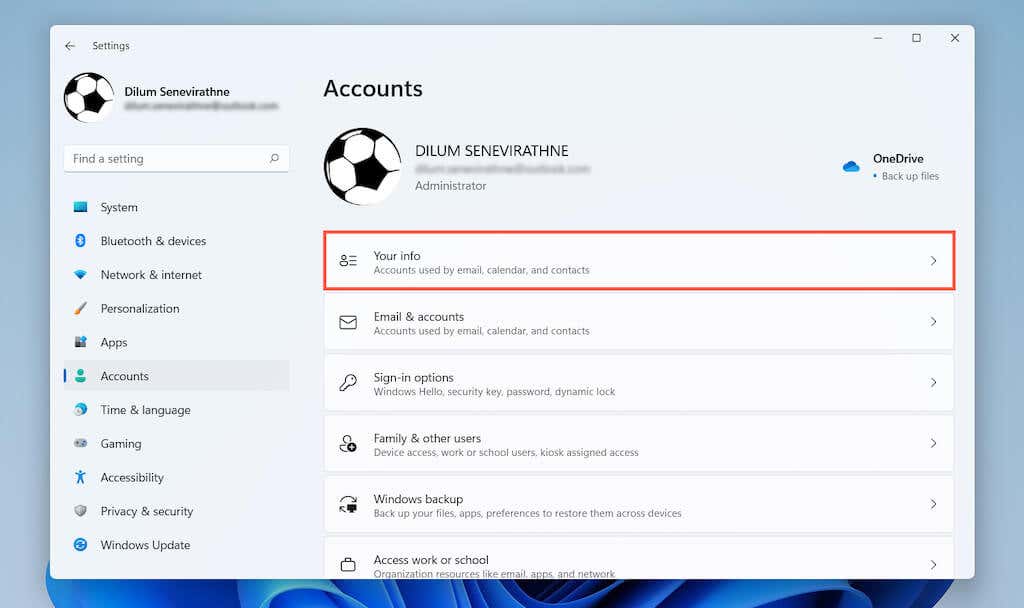
2. Select Accounts on the sidebar to view your account options. Then, select Your Info.
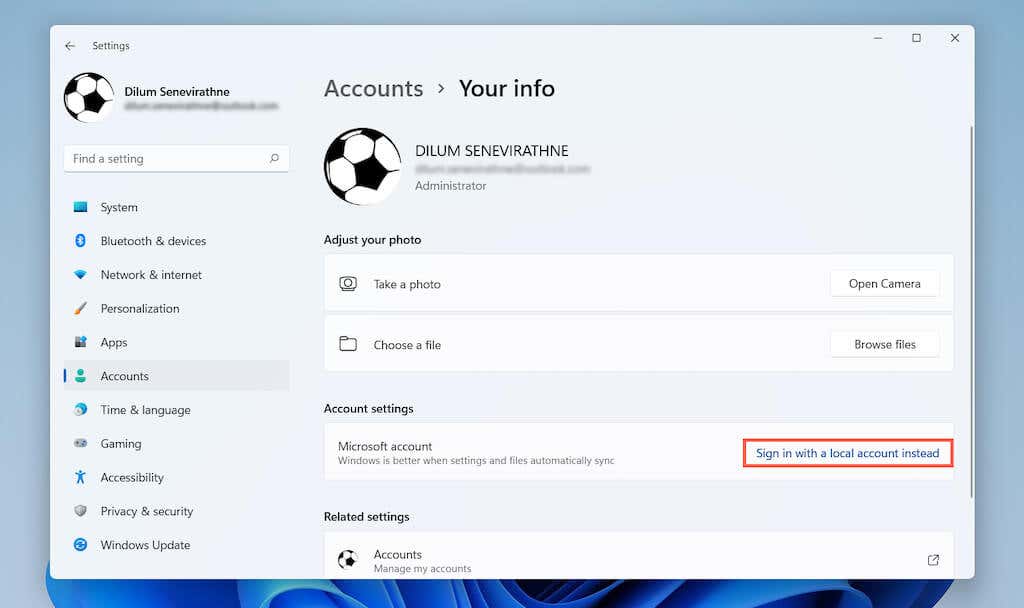
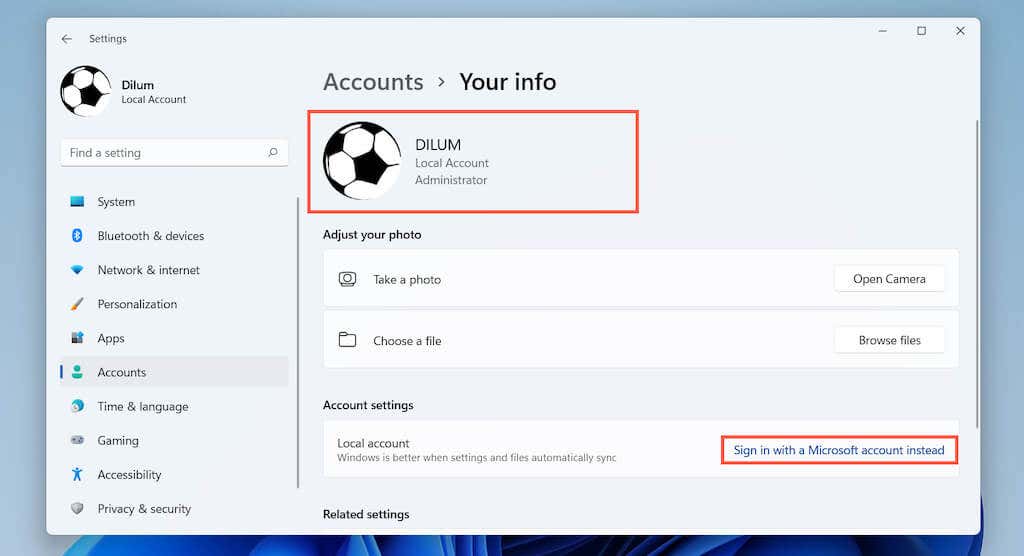
3. Under Account settings, select Sign in with a local account instead.
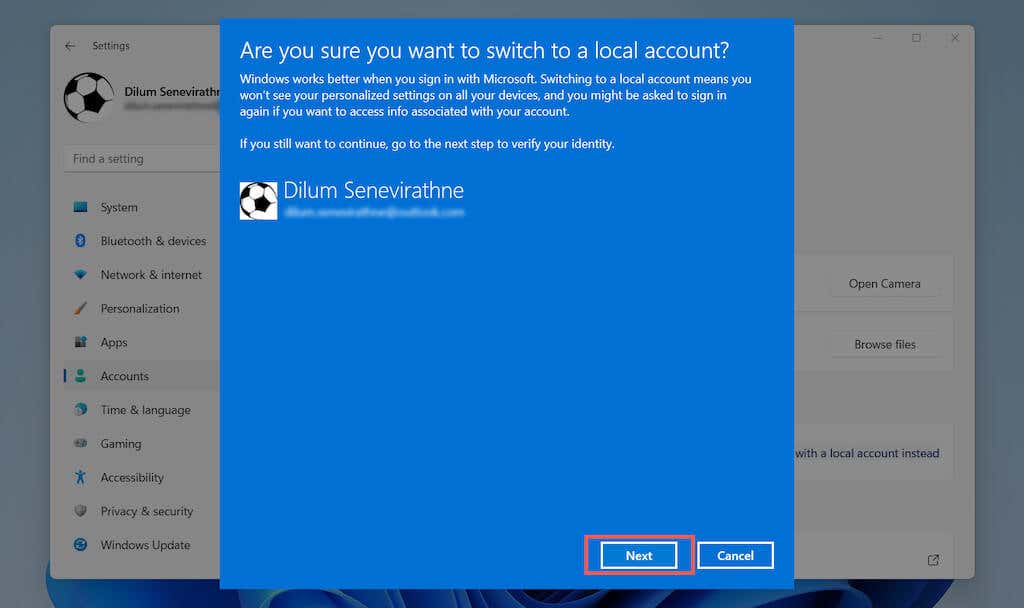
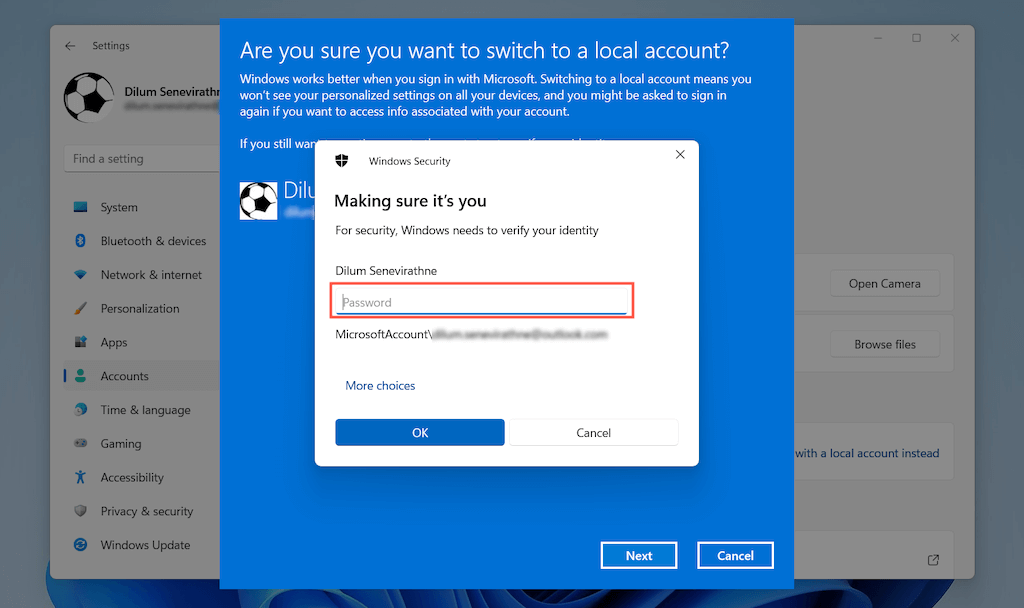
4. Select Next to confirm you want to sign out of your Microsoft Account.
5. Enter your Microsoft Account password and select OK.
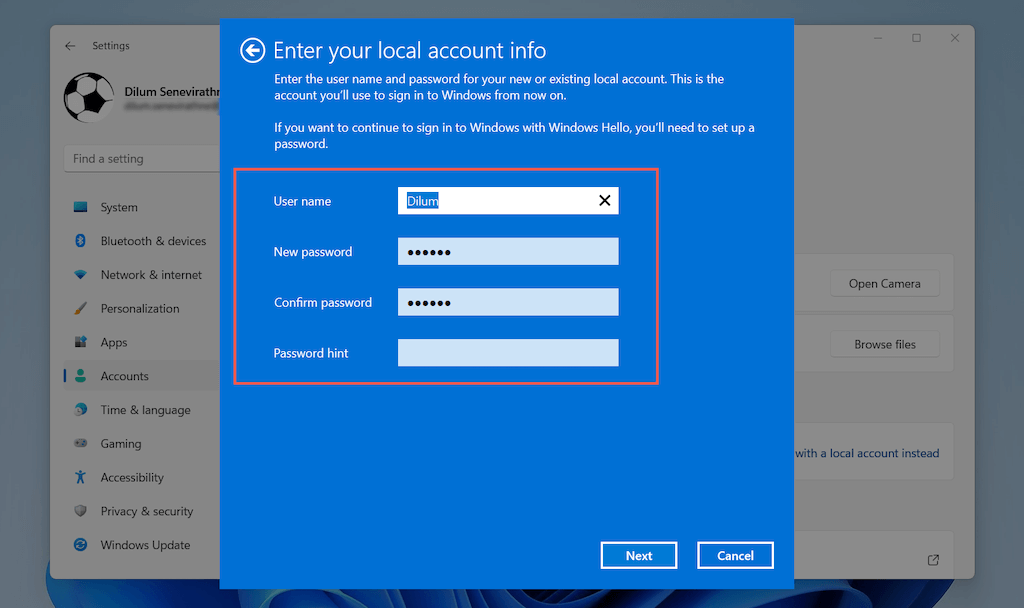
6. Create a username and password and select Next.
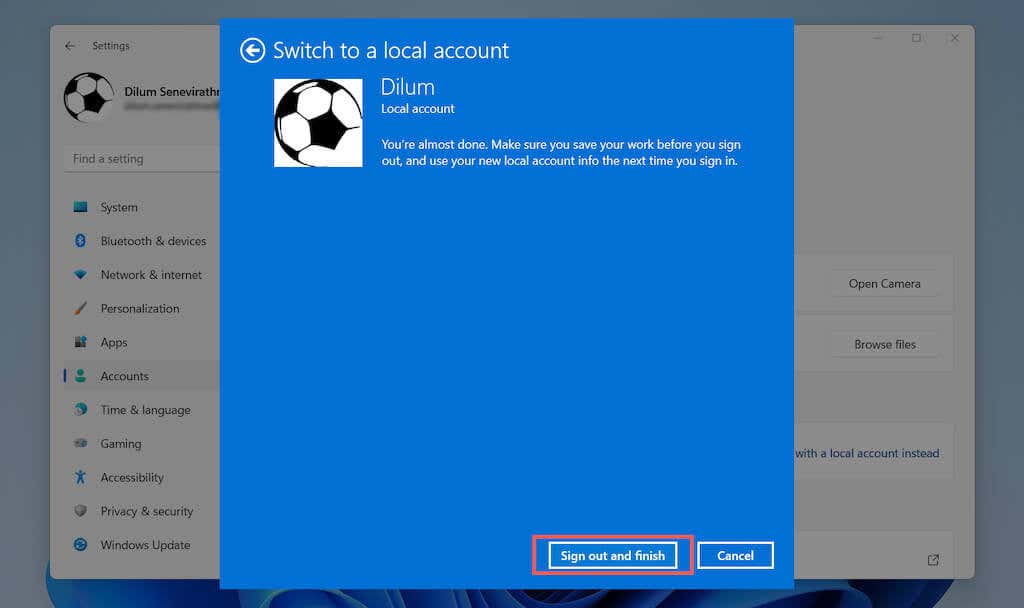
7. Select Sign Out and Finish.
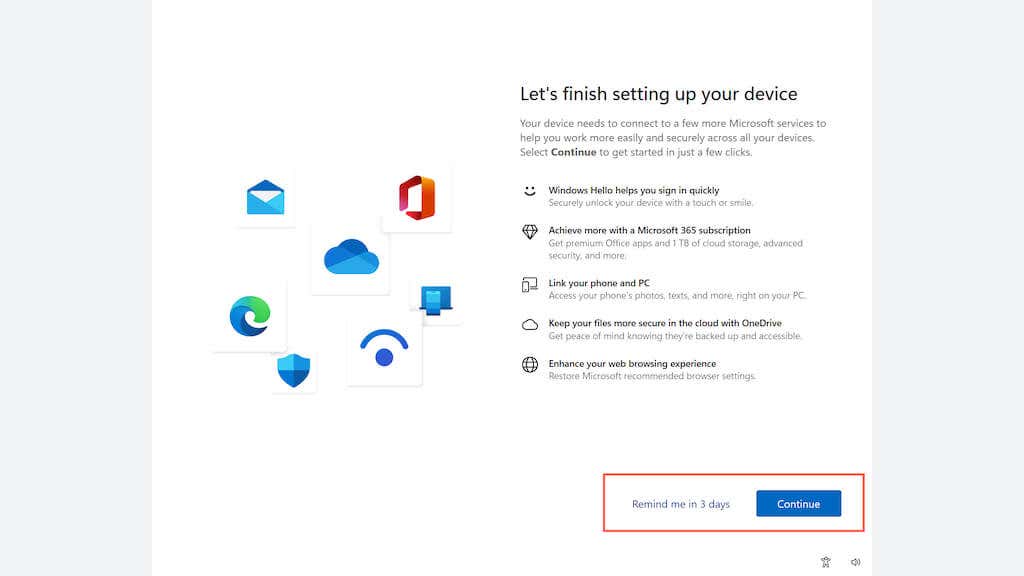
8. Sign in with the local account credentials you just created. Then, specify your account preferences again or ask Windows 11 to remind you to do that later.
9. Re-open the Settings app and go to Accounts > Your Info. You should now see the Local Account tag listed under your Windows username. If you want to sign back in later, select Sign in with a Microsoft account instead under Account settings.
Even after signing out of the operating system, Microsoft apps and services—such as the Microsoft Store, Photos, and Mail—continue to use your Microsoft Account. You can sign out of each program one by one, but a faster way is to go to Settings > Accounts > Email Accounts, select the Microsoft Account, and select the Remove button to sign out from everywhere.
Note: An exception is OneDrive. If you want to sign out of OneDrive, select the OneDrive icon on the menu bar and go to Help & Settings > Settings. Then, switch to the Account tab and select Unlink This PC.
Create a New Local Account in Windows 11
It’s also possible to stay signed in to your Microsoft Account in Windows 11 and create a separate local standard or administrator account in Windows 11 (for yourself or someone else).
1. Open the Start menu and select Settings.
2. Select Accounts > Family & other users.
3. Scroll down to the Other users section and select Add account.
4. Select I don’t have this person’s sign in information on the Microsoft account pop-up.
5. Select Add user without a Microsoft Account.
6. Create a username and password. Then, select Next to finish creating the account.
7. Select the account and choose Change account type.
8. Set the Account type drop-down menu to Standard (default) or Administrator and select OK.
Note: An alternative way to create or remove user accounts is by using the older User Accounts panel. You can access it via the Control Panel. Or, type netplwiz into the Start menu to get to it faster.
Avoid Signing In at Windows Setup
You can avoid signing into a Microsoft Account while installing Windows 11. In Windows 11 Professional, that’s pretty easy—you just need to specify you want to create an offline account. However, Windows Setup forces you to add a Microsoft Account in Windows 11 Home (similar to Windows 10 Home). You can avoid that by disconnecting from the internet.
Alternatively, you can sign in with a Microsoft Account (a good idea if it contains your digital license) and remove it via the above instructions later.
Windows 11 Professional
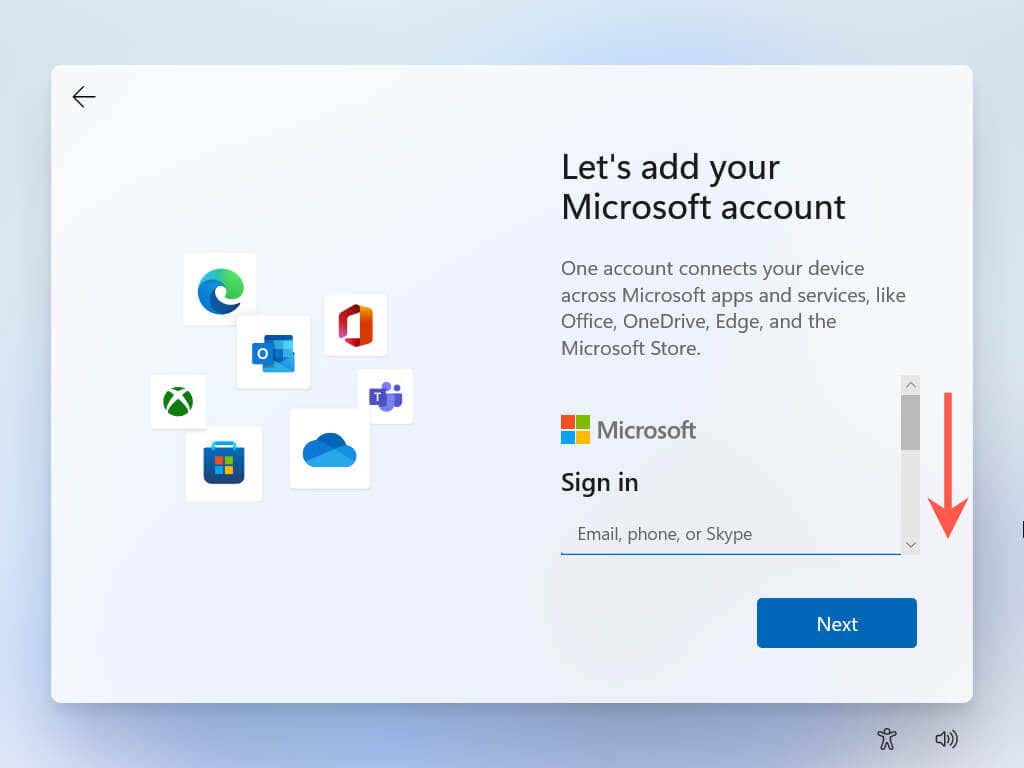
1. Work your way through the Windows Setup until you get to the Let’s add your Microsoft account. Then, scroll down the login screen to access additional sign-in options.
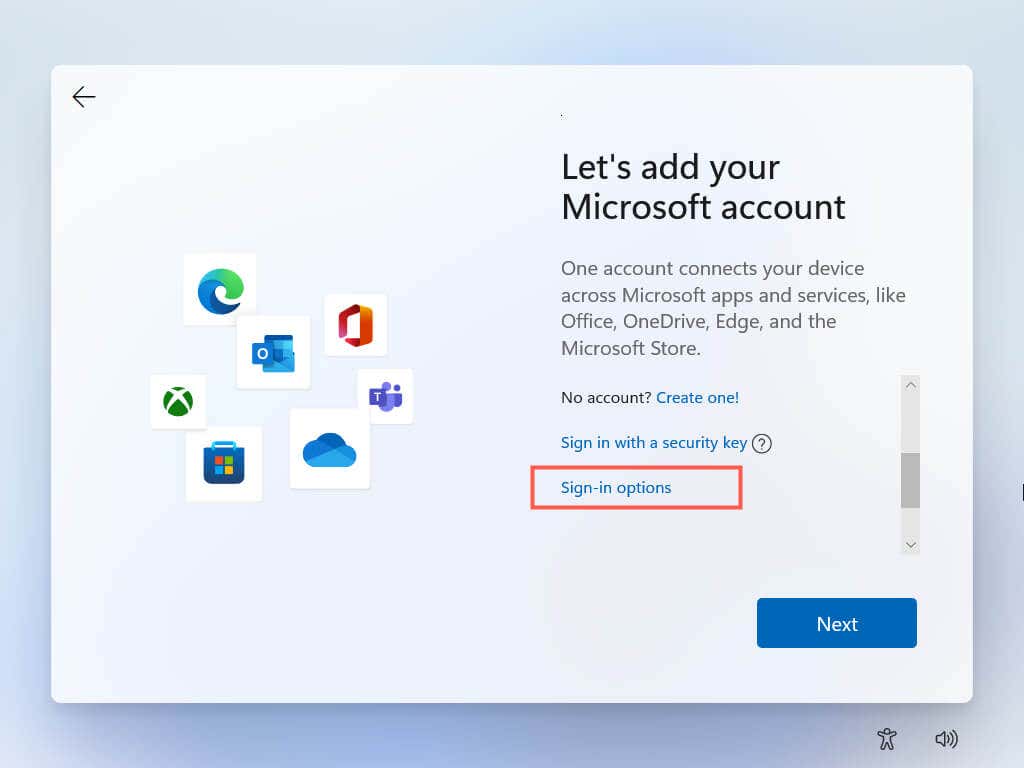
2. Select Sign-in options.
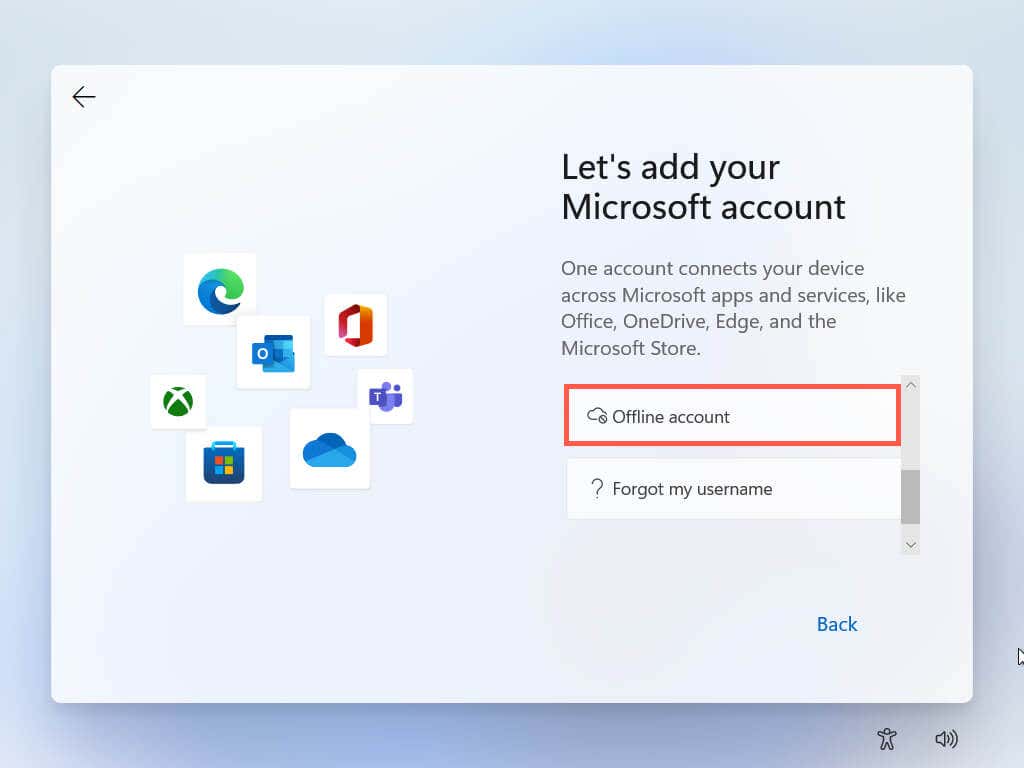
3. Select Offline account.
4. Enter an account name and select Next.
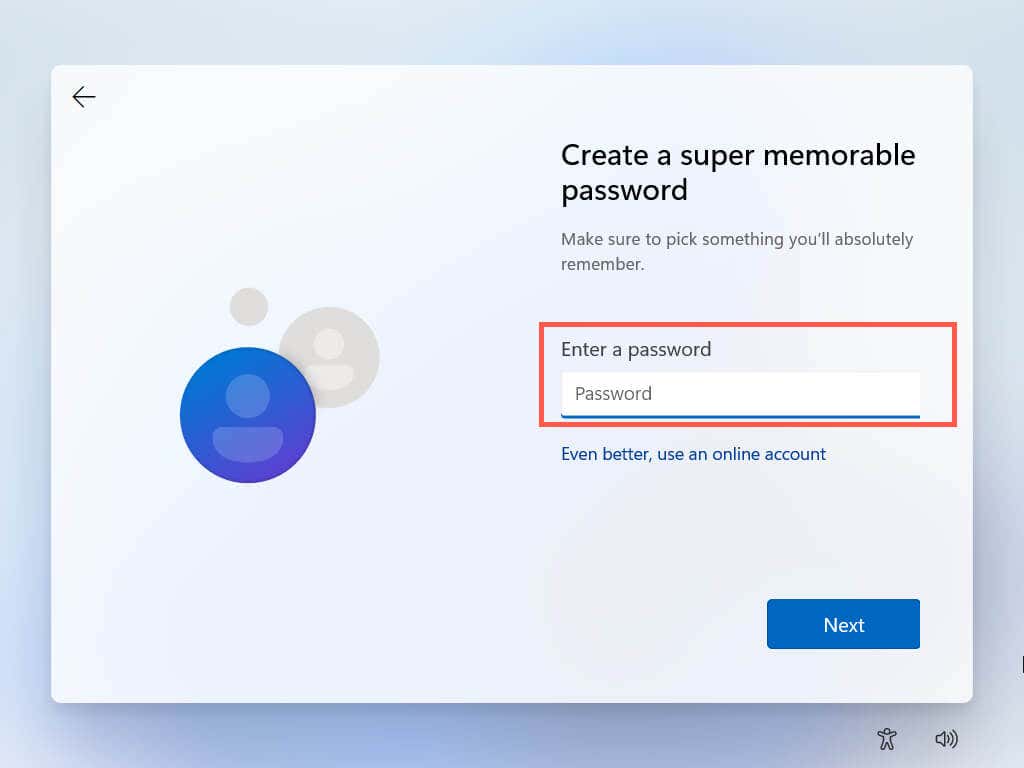
5. Create a password and select Next.
You’ve finished creating a local account. Work your way through the remaining onscreen instructions to finish setting up Windows 11.
Windows 11 Home
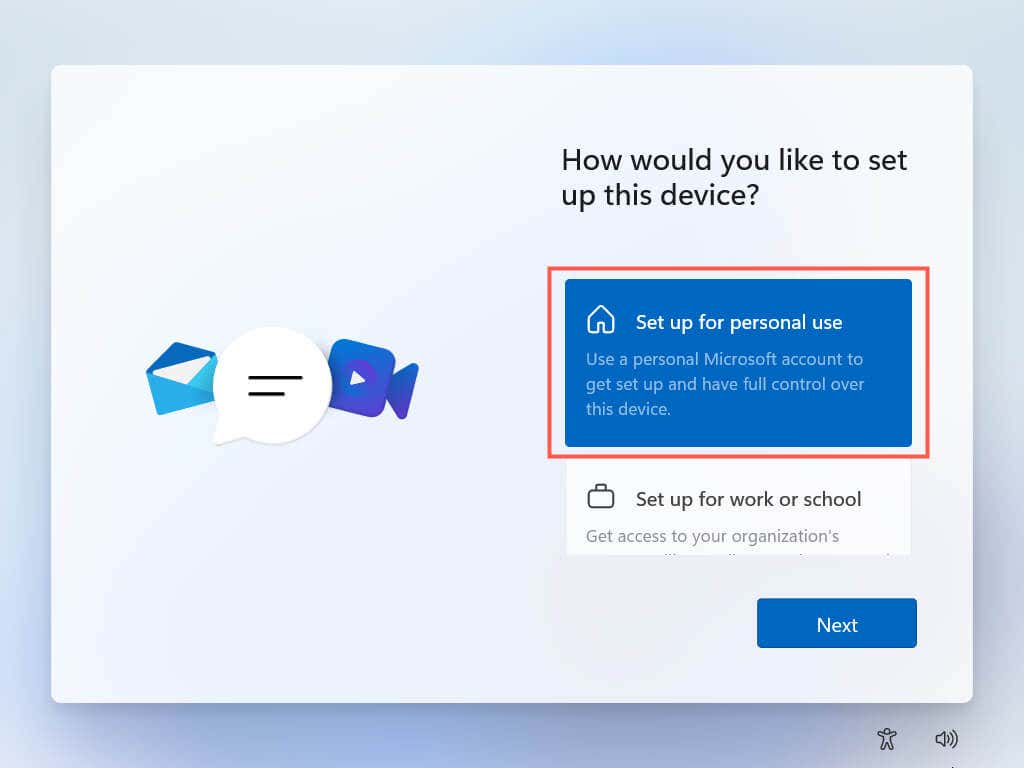
1. Work your way through the on-screen instructions until you get to the screen labeled How would you like to set up this device?
2. Activate Airplane Mode on your laptop, turn off your Wi-Fi router, or disconnect your PC’s Ethernet cable. Then, select Set up for personal use and select Next.
The Windows Setup will attempt to communicate with the Microsoft servers. When that fails to detect an active internet connection, it will immediately prompt you to create an offline account.
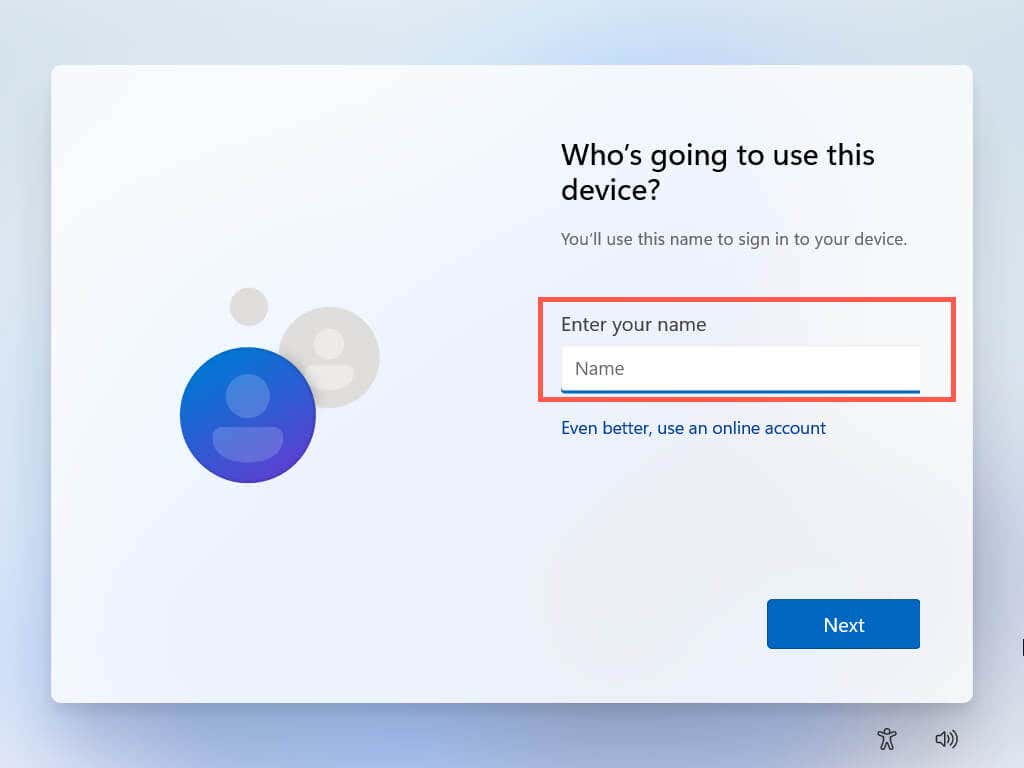
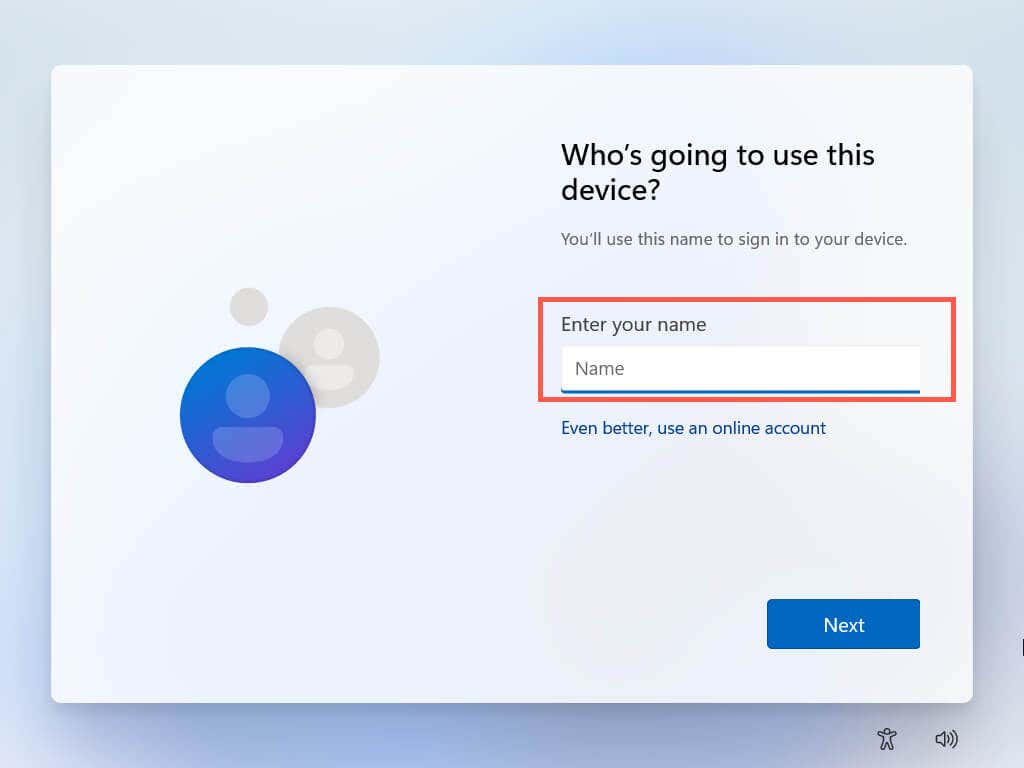
3. Enter your name and select Next.
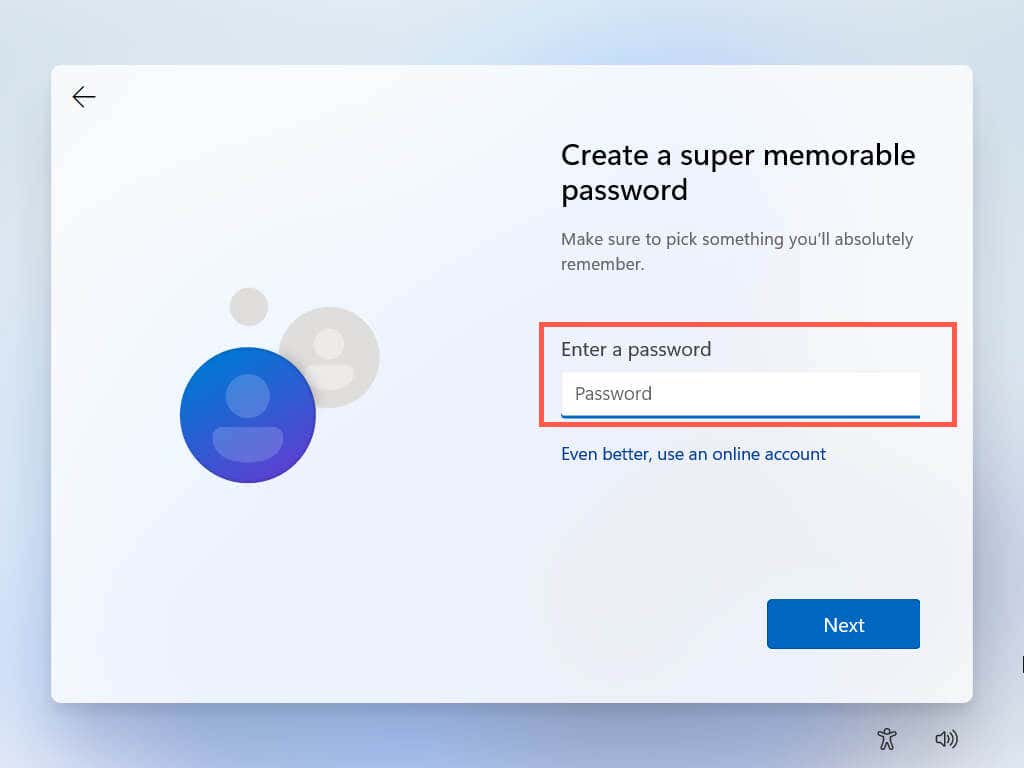
4. Create a password and select Next.
You’ve finished creating a local account. Reconnect to the internet and work your way through the remaining onscreen instructions to finish setting up Windows 11.
Stay Off the Grid
As you just saw, it’s easy to remove your Microsoft Account from Windows 11. You can always sign in with your Microsoft Account if you change your mind later. Also, don’t forget that you can sign in (or stay signed in) to various Microsoft Store apps and services even while using a local account. It’s also possible to delete your Microsoft Account entirely if that’s what you want.
