If you use a Windows 11 PC, you’re probably familiar with Windows Update, a service that automatically downloads and installs software updates from Microsoft. These updates include service packs, patches, and other essential system files to improve performance and security.
However, there are situations where you might want to customize how Windows Update works. This can be achieved through modifications in the Windows Registry, a hierarchical database that stores low-level settings for the operating system and for the applications that opt to use it.
Accessing the Registry
Before you proceed, it’s crucial to understand that the Registry is a powerful tool, and incorrectly modifying it can cause serious problems that may require you to reinstall your Windows 11 operating system. To avoid data loss or irreversible damage, make sure that you back up the Registry and your computer before making changes.
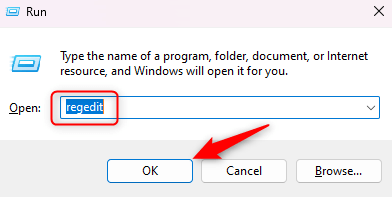
If you’re sure you want to edit the Registry, press Windows + R to open the Run app, type regedit in the text box, and then click Ok.
The Registry Editor will open.
Customizing Windows Update Registry Settings
There are several ways you can customize Windows Update through the Registry. Here are some of the more popular edits.
How to Disable Automatic Updates
Windows Updates are enabled by default to ensure your Windows 11 system stays secure and up-to-date. However, there may be times when you want to control when these updates occur, such as when you’re on a metered or slow internet connection.
Here’s how you can disable automatic updates using the Windows Registry.
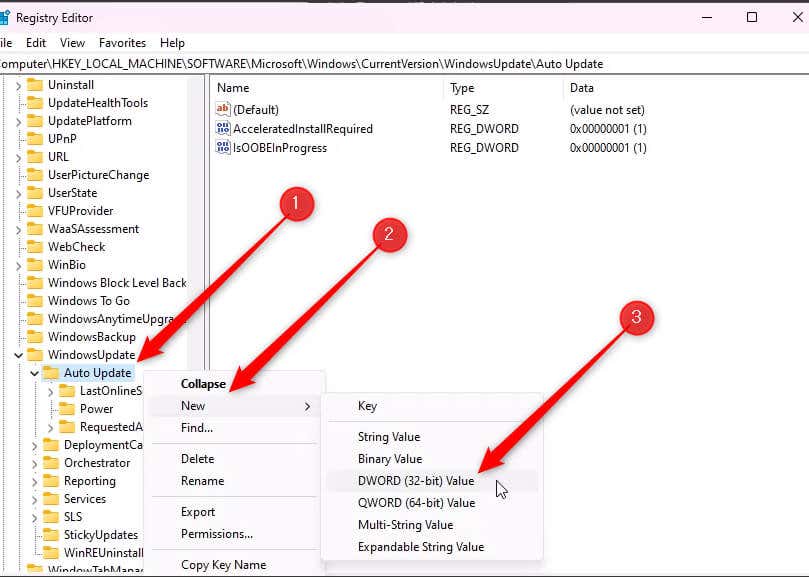
- Navigate to this file path in the Registry Editor:
HKEY_LOCAL_MACHINESOFTWAREMicrosoftWindowsCurrentVersionWindowsUpdateAuto Update
- Right-click the Auto Update file, select New from the context menu, and then select DWORD (32-bit) Value.
- Name the new key AUOptions and then double-click it to open its properties dialog.
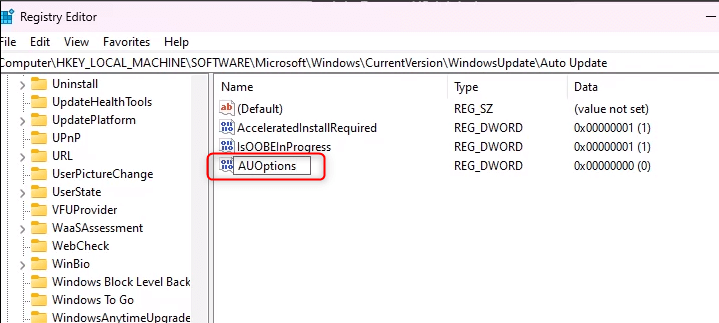
- Enter 2 in the Value data field and click OK.
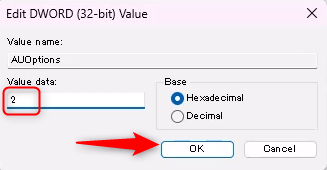
By setting the value to 2, you’re telling Windows Update to check for updates but not download or install them without your permission.
How to Change the Windows Update Service Startup Type
The Windows Update Service Startup type determines when and how the Windows Update service is initiated. Here’s how to change the Windows Update service startup type using the Windows Registry.
- Navigate to this file path in the Registry Editor:
HKEY_LOCAL_MACHINESYSTEMCurrentControlSetServiceswuauserv - Double-click Start in the right-hand pane to open its properties dialog.
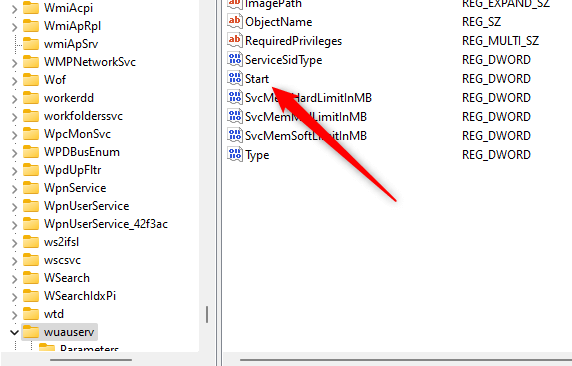
- Change the number in the Value data box to one of the following:
2: Automatic
3: Manual
4: Disabled
The value is 3 by default. If you set the value to 2, the Windows Update service will start automatically when your system boots. If you set it to 4, the service will be disabled and won’t start unless manually triggered.
Click OK after you’ve set the value.
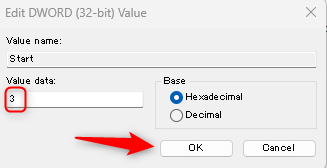
The changes should take effect immediately.
How to Restrict Windows Updates Over Metered Connections
A metered connection is a network connection where you have limited data usage per month. Windows lets you set your network connection as metered to help control data usage. When set to a metered connection, Windows Update will only download priority updates to save data and won’t download most updates automatically.
- Navigate to this file path in the Registry Editor:
HKEY_LOCAL_MACHINESOFTWAREMicrosoftWindows NTCurrentVersionNetworkListDefaultMediaCost
- At this point, if you try to modify the DefaultMediaCost key, you’ll be given a permissions error. You’ll need to adjust a few settings to enable permissions. First, right-click the DefaultMediaCost key and select Permissions from the drop-down menu.
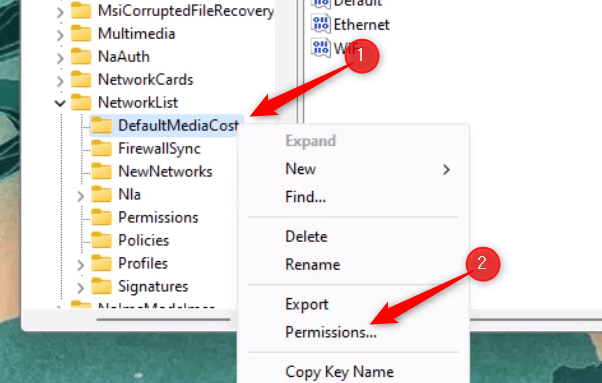
- In the Permissions for DefaultMediaCost window, click Advanced.
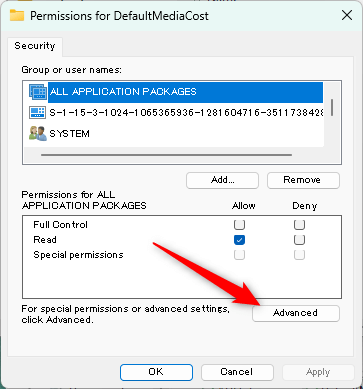
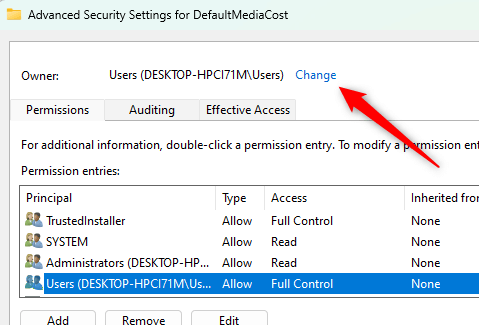
- Now we need to change the Owner. By default, this is TrustedInstaller. We need to change the owner to Users. Click Change.
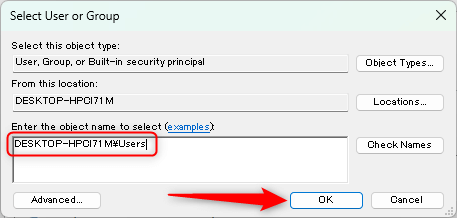
- Enter the user’s path in the text box. In our case, that would be DESKTOP-HPCI71MUsers. You can find this info next to Users in the previous step. After you enter the name, click OK.
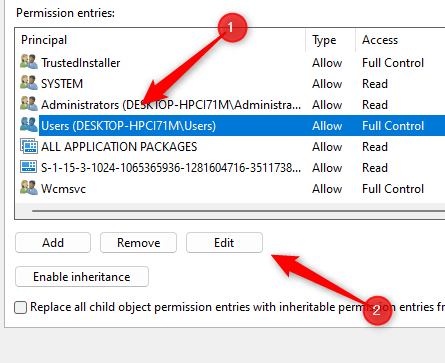
- Now that the Users is the owner, select Users from the Permission entries list and then click Edit.
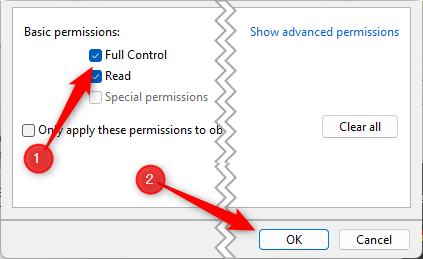
- Check the box next to Full Control and then click OK.
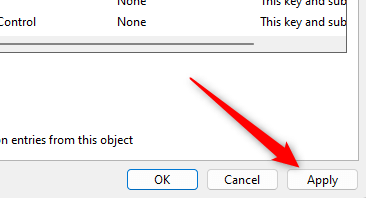
- Finally, click Apply to apply the settings.
- You can now edit the DefaultMediaCost key. Each value, such as Ethernet, WiFi, 4G, etc., represents a different connection. To set a connection as metered, double-click the value to open its DWORD window, and then set the Value data to 2.
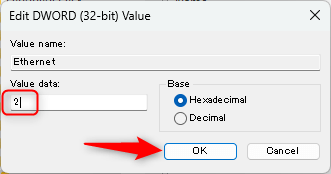
The value is now set as metered. You can switch it back to metered by setting it to 1.
How to Control Reboots After Updates
Windows has an automatic restart feature that can restart your computer after an update is installed. This can be inconvenient if you’re in the middle of something important. Here’s how to control the automatic restarts.
- Navigate to this file path in the Registry Editor:
HKEY_LOCAL_MACHINESOFTWAREPoliciesMicrosoftWindowsWindowsUpdateAU
- Double-click the NoAutoRebootWithLoggedOnUsers.
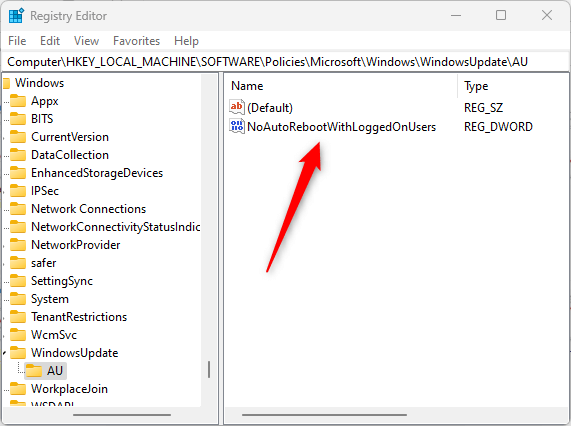
- Change the Value data to 1 and then click OK.
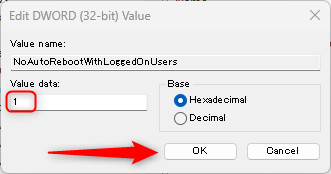
Windows will now no longer restart after an update. Remember that even if you download and install an update, you’ll need to manually restart your system for some of those updates to take place.
How to Disable Automatic Driver Updates
Automatic driver updates can sometimes cause problems, particularly if you have specific drivers that you wish to use. Disabling automatic driver updates gives you more control over what is installed on your system.
- Navigate to this file path in the Registry Editor:
HKEY_LOCAL_MACHINESOFTWAREMicrosoftWindowsCurrentVersionDriverSearching
- Double-click the SearchOrderConfig value and edit its Value data to 0. Click OK.
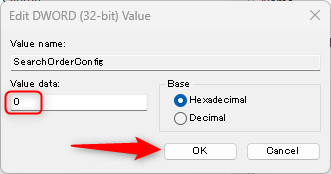
Automatic driver updates are now disabled.
How to Set the Frequency of Automatic Updates Checks
Text
- Navigate to this file path in the Registry Editor:
HKEY_LOCAL_MACHINESOFTWAREMicrosoftWindowsCurrentVersionWindowsUpdateAuto Update
- Right-click an empty space, select New > DWORD (32-bit) Value, and then create a new value called ScheduledInstallDay. Repeat this process and create a new value called ScheduledInstallTime.
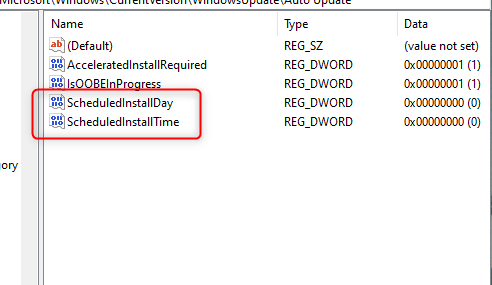
- Double-click ScheduledInstallDay and set the Value data to 1 through 7. 1 represents Sunday, 2 represents Monday, 3 represents Tuesday, and so on. Click OK.
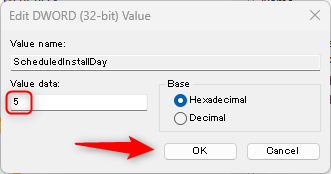
- Double-click ScheduledInstallTime and set the Value data to 1 through 24. The value represents the hour of the day in 24-hour format. Click OK.
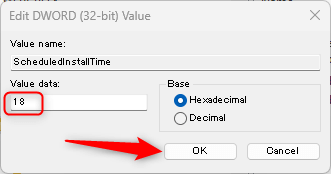
So, in our example, we set the day to 5 and the time to 18. That means the update check will be on Thursday and 6 PM.
Enhancing Control Over Windows Updates With the Registry
Customizing Windows Update Registry settings can give you a greater level of control over your computer’s updates, enabling you to manage your data usage, disable automatic updates, control restarts after updates, and much more.
However, it’s important to approach this process with caution and ensure your computer and the Registry are backed up before making any changes. The Registry is a powerful tool and mishandling it can lead to serious issues requiring a reinstallation of your operating system.
The ability to personalize your Windows Update experience is there, just make sure that you use this tool wisely to avoid potential complications.
