The hosts file is a text-based file located in the same place in all modern Windows versions. Most people don’t ever need to get into it, but if you do, you’ll need to know how to open and edit the hosts file.
However, in some versions of Windows, editing the hosts file directly isn’t allowed. In fact, you’ll get an error if you try to save the changes. Fortunately, there’s a simple tip you can use to edit the hosts file in Windows 10, 8, 7, Vista, or XP.
What Does The Hosts File Do?
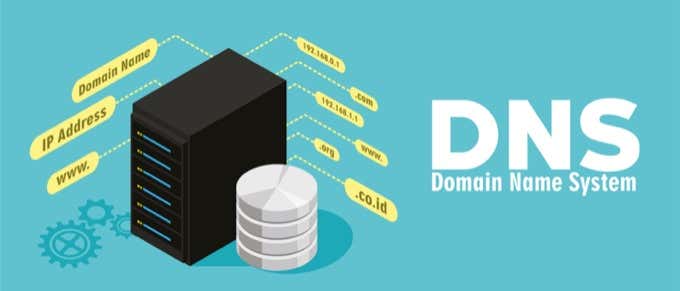
The purpose of the hosts file was originally to be what DNS servers do now – map friendly domain names to unfriendly IP addresses.
It’s much easier to remember a domain name like YouTube.com than an IP address like 172.217.1.238. Instead of having to type the IP address into the address bar each time you want to watch YouTube videos, you can just enter the domain name, and the DNS server your device is using will map the name to the right address so you can get to the webpage a lot easier.
The hosts file, since it serves as a sort of DNS server, works the same way. You can enter an IP address that a domain name should be resolved to. In other words, you could order your computer to load a different IP address than the DNS server would, essentially letting you do a few cool things.
Why Edit The Hosts File?
One reason to edit the hosts file is if you want a super basic way to block websites from loading on your computer. Enter an invalid or wrong IP address for the site you want to block, and each time you try accessing it, the hosts file will load the IP address you chose. Depending on what you picked, it might completely block the website.
You can use the same technique to make the hosts file block malicious sites. There are even lists of hosts file entries (such as this one) you can download and import into your hosts file to block hundreds of malicious sites or ads.
Another use for the hosts file is to speed up your web browsing. If the DNS server you’re using is down or not working quickly enough, manually entering the IP address and domain name mappings in your hosts file lets your computer find those addresses nearly instantly instead of relying on the DNS server.
Tip: Learn how to use alternate DNS servers to get faster internet access.
Windows Hosts File Location
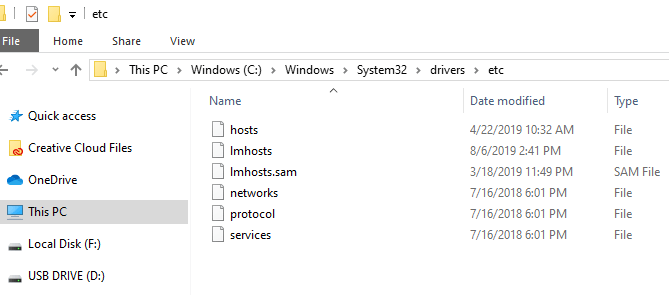
You need to know where to go to find the hosts file before you can open it for editing. This is the hosts file location in Windows 10 through Windows XP:
C:Windowssystem32driversetc
How To Edit The Hosts File
The hosts file is a text file, meaning that you need a text editor to make changes to it. However, since the hosts file is super basic and doesn’t need to deal with hyperlinks, images, etc., you can use a basic text editor (i.e., there’s no need to use a full-fledged editor like Microsoft Word).
Opening The Hosts File
Let’s start with simply opening the hosts file. We’ll use Notepad, which is built into Windows 10 down through Windows XP.
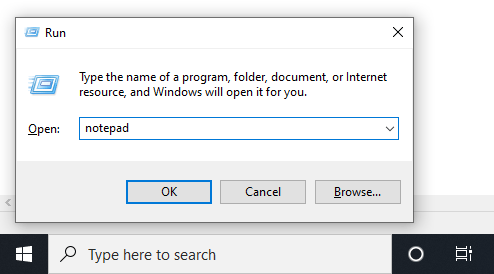
- Open the Run dialog box by holding down the Windows key and then pressing R once.
- Type notepad and
then press Enter to open the
program.
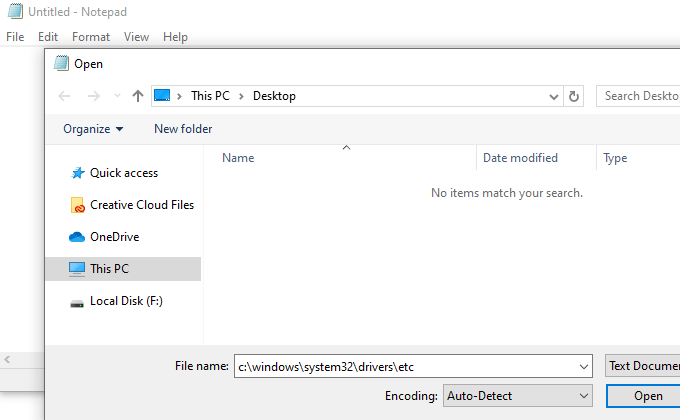
- Go to File > Open.
- In the file name text box at the bottom, type (or copy and
paste) the hosts file location shown above and then press Enter.
- Select the menu to the right of the text box to change Text Documents (*.txt) to All Files (*).
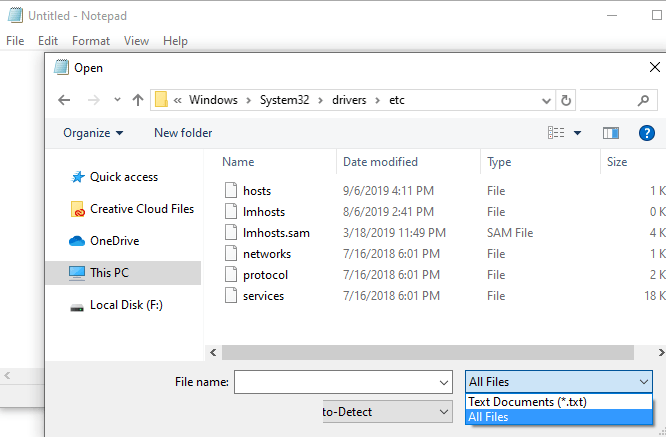
- Double-click hosts from the list of files to open
the hosts file for editing in Notepad.
Editing The Hosts File
There are a few examples in the hosts file to show you how to format your entries. You have to put the IP address first followed by the domain name, and the two have to be separated by at least one space (a tab is a good way to format them).
Here are some examples:
127.0.0.1 www.google.com
13.249.79.104 www.bing.com
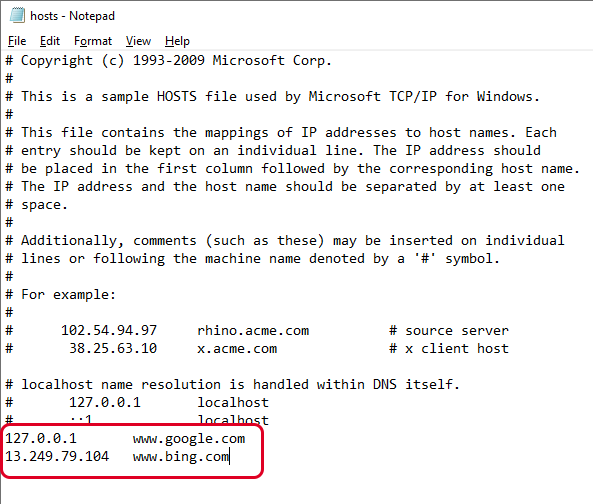
As you can see in the image above and read from the directions in the hosts file, the # symbol is used as a comment, meaning that anything that follows it is avoided. This is why the two example lines we give above are useful in this hosts file; they’re not being followed by that symbol.
Related: Edit Hosts File to Add Local DNS Lookup
If you want to block websites with the hosts file, such as YouTube, Amazon, Google, Reddit.com, etc., you can enter a false IP address like 0.0.0.0.
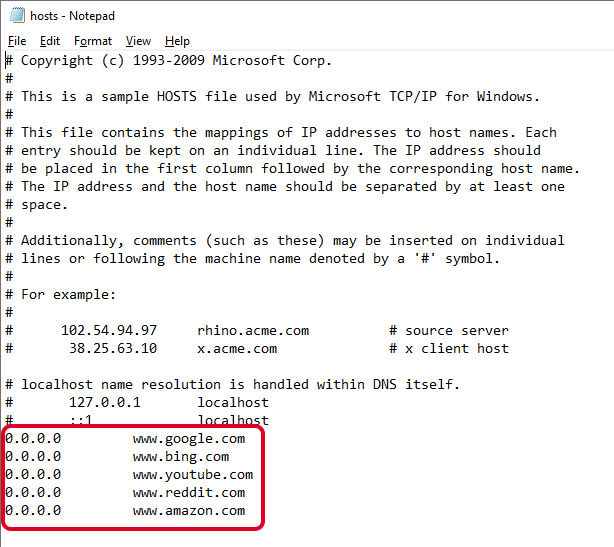
Note: When you enter the URL of the site you want to associate with a specific IP address, be sure to exclude the beginning part and only type the subdomain, such as www or whatever it happens to be for the site you’re adding.
Saving The Hosts File
Here’s how we’ll save the hosts file to make sure it works no matter which operating system you use, which text editor you picked, or how your Windows settings are configured:
- Go to File > Save As.
- Change the Save as
type option to All Files (*). - Rename the file to hosts.backupfile,
and then save it to your desktop.
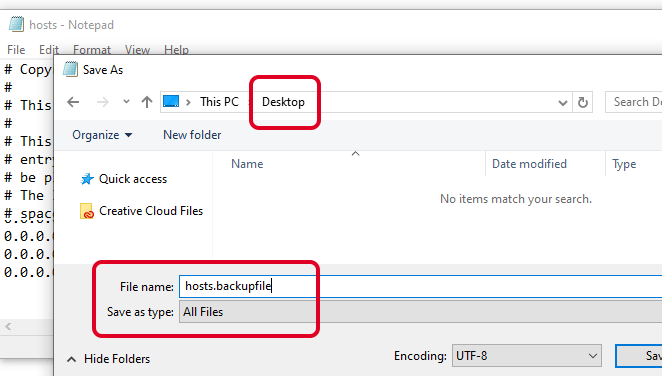
- Close Notepad and then find the hosts file you just created
on the desktop. You want to delete the .backupfile
part of the name and leave only hosts
(with no period or text after the word).
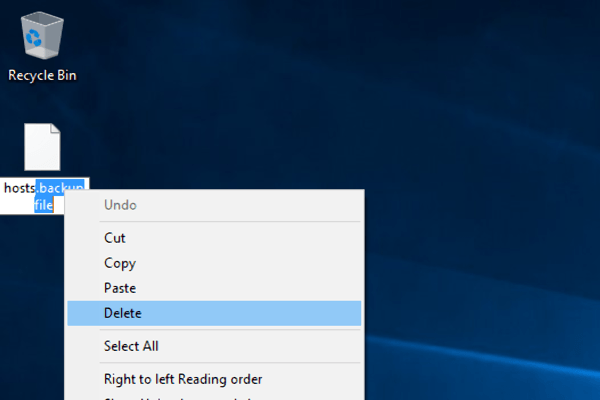
- After you do that, click away from the file to something else
on the desktop, and confirm the name change when asked. - Copy the hosts file.
- Open the hosts file location you had open before (the etc folder).
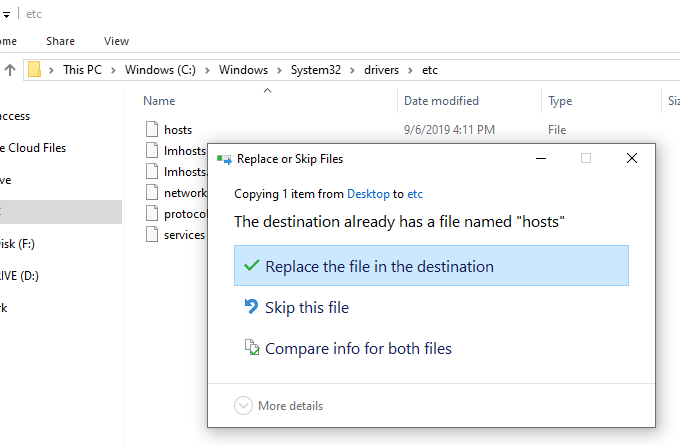
- Paste the hosts file you copied from the desktop, and confirm
any overwrite prompts if you see them.
