When you import data into Microsoft Excel or have more than one person working on a sheet, you can easily end up with messy data. This data can have extra spaces at the beginning, end, or middle of a cell’s content.
We’ll show you how to remove spaces from an Excel cell so you can clean up your data. With a few different methods to do so, you can use whichever is most appropriate at the time.
Remove Leading, Trailing, and Extra Spaces
One method for removing spaces in Excel is using the TRIM function. With it, you can eliminate leading, trailing, and spaces in the middle of text with a single formula.
The syntax for the formula is TRIM(text) where you can enter the cell reference or actual text for the argument. Keep in mind that this function only removes extra spaces, not single spaces between text, and uses a separate cell for the result.
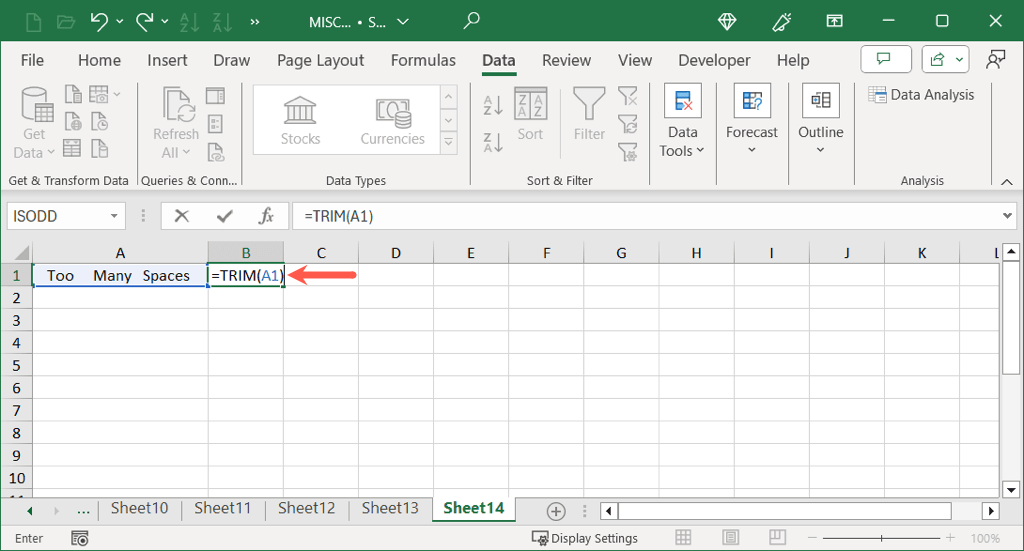
Choose the cell where you want to enter the formula and receive the result. For example, we pick cell B1 to trim the text in cell A1.
Enter the following formula replacing the cell reference with your own. For our example, we type the following:
=TRIM(A1)
Use Enter or Return to apply the formula and see your result.
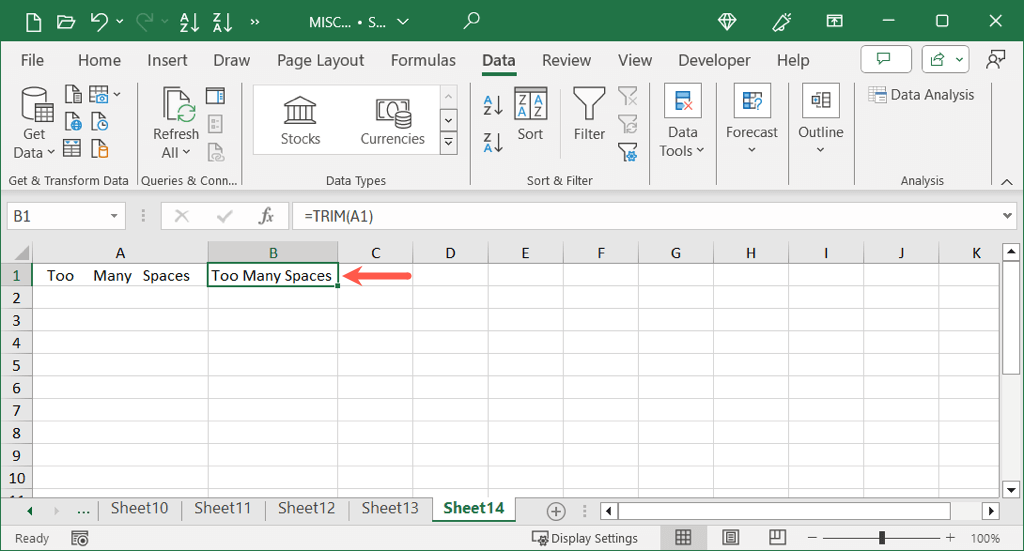
As you can see, the TRIM function removed the extra spaces at the beginning, in the middle, and then at the end of the text in cell A1.
Substitute Spaces
Another way to eliminate extra spaces in Excel is to use the SUBSTITUTE function. This function lets you substitute existing spaces with a different number of spaces or an empty string, but also requires the results in a separate location.
The syntax is SUBSTITUTE(text, old, new, instance) where only the first three arguments are required, and you can use a cell reference or actual text for the first argument. Optionally, you can use the instance argument if you only want to substitute certain occurrences.
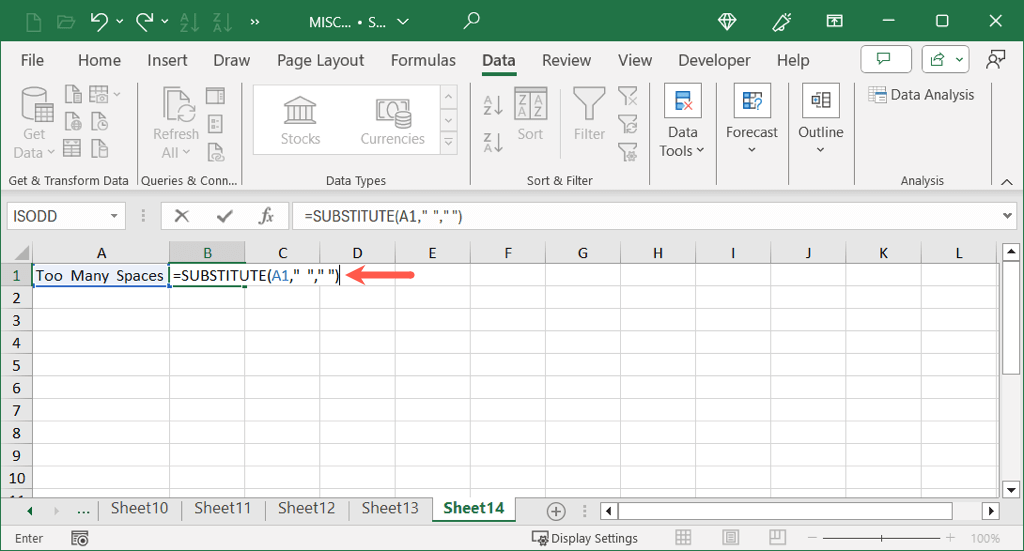
Choose the cell to enter the formula and receive the result. As an example, we pick cell B1 to substitute spaces in cell A1’s content.
Using this formula, you can substitute two spaces for one space. Within the first set of quotes, enter two spaces. In the second set of quotes, enter one space.
=SUBSTITUTE(A1,” “,” “)
When you use Enter or Return to apply the formula, you’ll see your updated content.
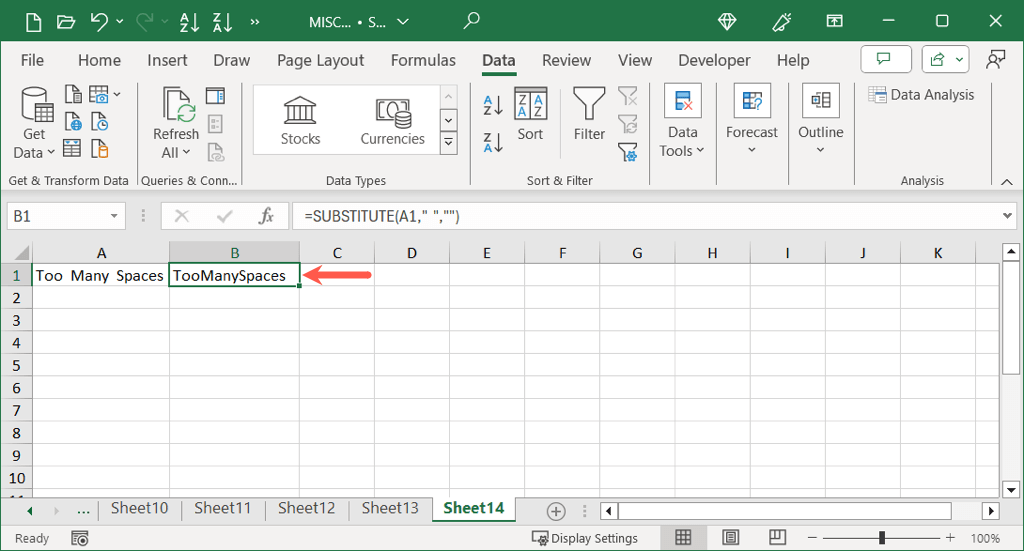
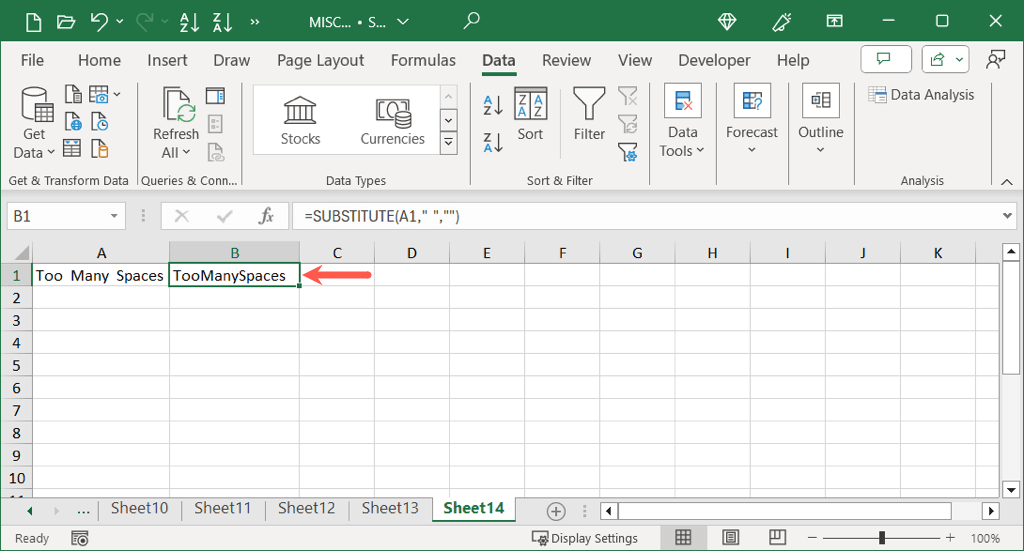
If you want to replace spaces with a blank string instead, simply leave the second set of quotes empty as follows:
=SUBSTITUTE(A1,” “,”“)
Find and Replace Spaces
While the above functions do a great job at eliminating extra spaces, you may not want to use separate cells for your updated content. In this case, you can use the Find and Replace feature in Excel.
With Find and Replace, you’ll enter the number of spaces you want to both remove and replace, can apply it to selected cells or the whole sheet, and receive the results directly in the data-filled cells.
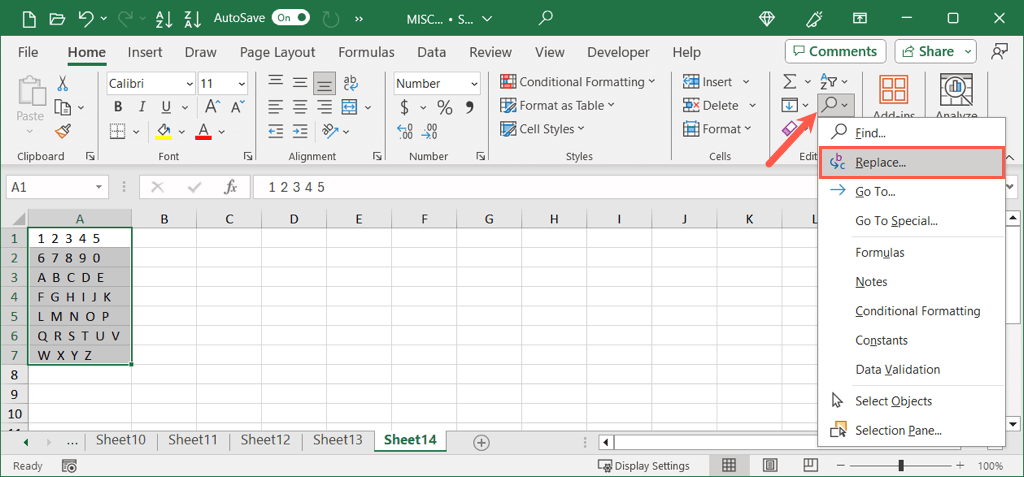
To apply the change to a particular cell or range, be sure to select it. Otherwise, the tool finds and replaces all spaces in the spreadsheet.
- Go to the Home tab, open the Find & Select menu in the Editing section, and pick Replace.
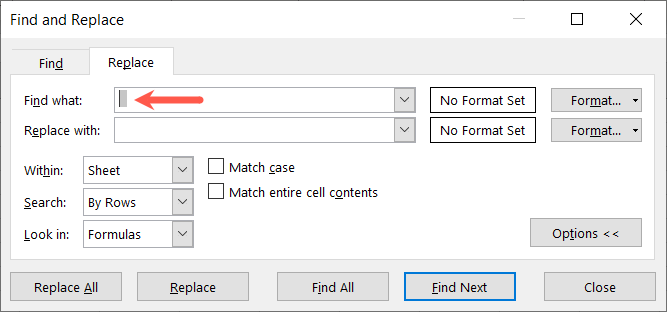
- When the box opens, enter the number of spaces you want to remove in the Find what field.
- Next, enter the number of spaces to replace those with in the Replace with field. To completely remove the spaces, leave the Replace with field blank as shown below.
- Choose one of the following:
- To replace all spaces without seeing the cells first, select Replace All.
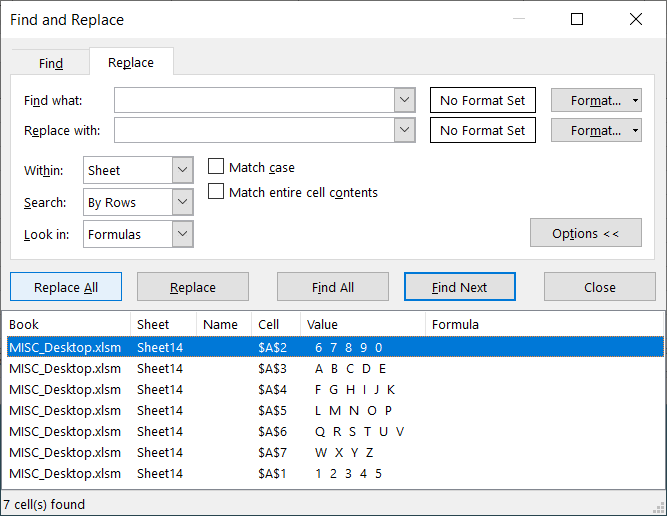
- To review the cells before replacing the spaces, select Find All and then Replace All when you’re ready.
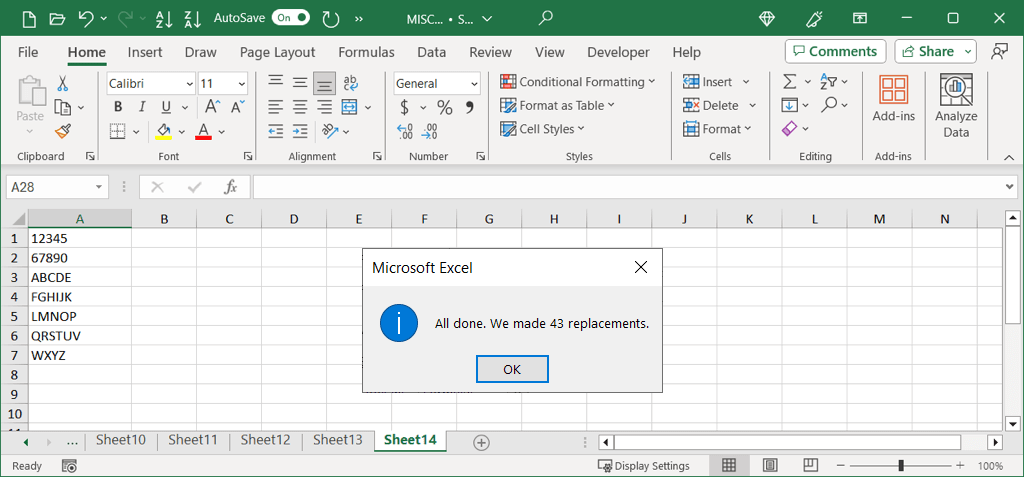
- You’ll see the number of replacements made, can select Close in the Find and Replace box, and should then see your data without the spaces you entered.
Eliminate Spaces Using Power Query
One more way to remove spaces in Excel is with Power Query. This is ideal if you’re already using Power Query to import or transform your data or just want to remove beginning and ending spaces.
Note: Different from the TRIM function mentioned earlier, this Trim feature only removes leading and trailing spaces, not those in the middle.
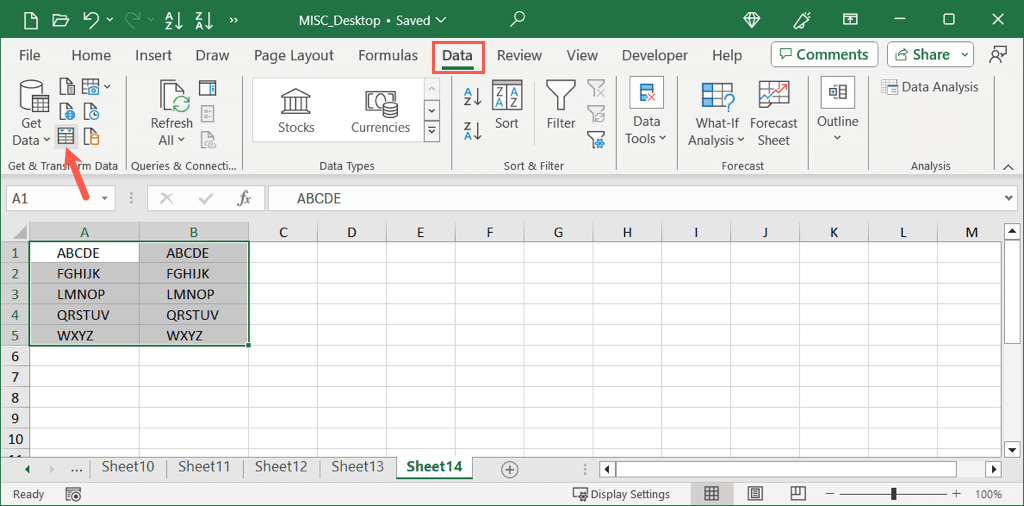
If you don’t have Power Query open yet, select your data and go to the Data tab.
- Choose From Table/Range in the Get & Transform Data group.
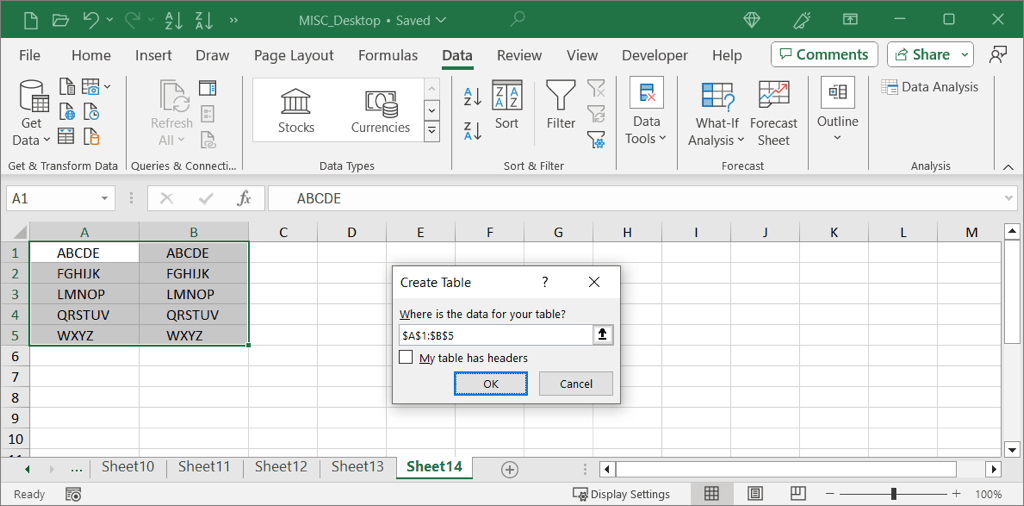
- Confirm your data range for the table in the pop-up box, optionally mark the box if your data has headers, and select OK.
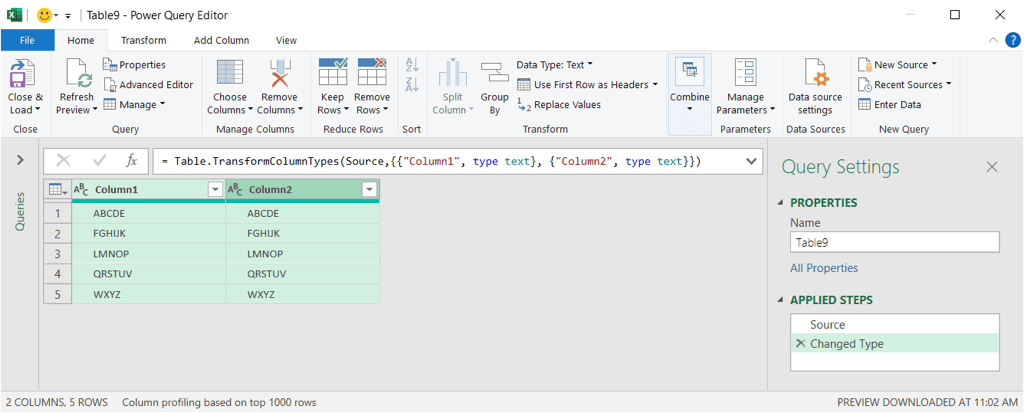
- With your data in Power Query, select the columns to update if you have more than one. You can do this by holding Ctrl as you choose each one.
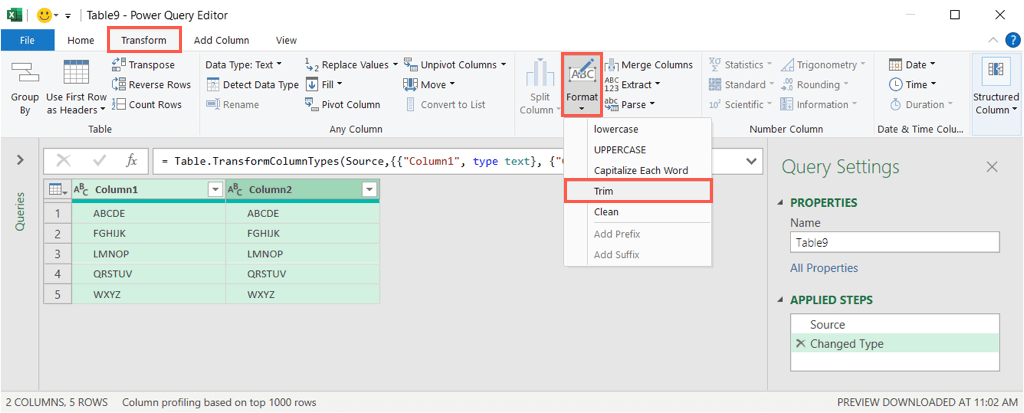
- Go to the Transform tab, open the Format menu in the Text Column group, and pick Trim.
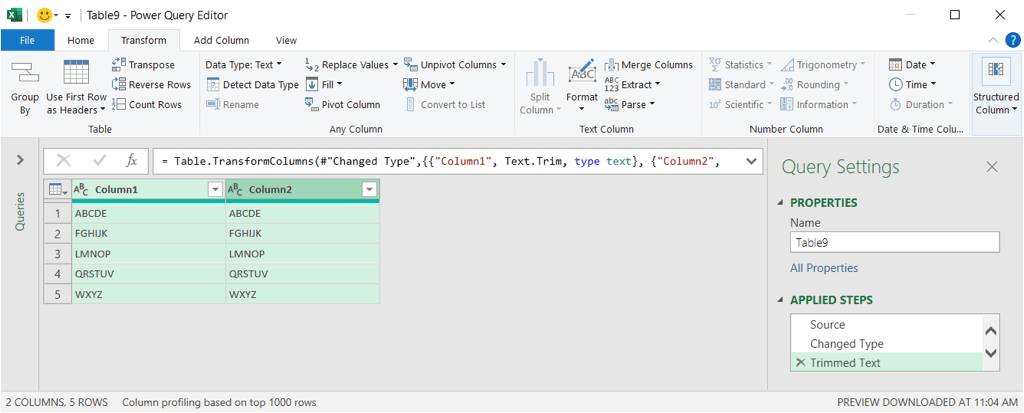
- You’ll see your data update to remove all leading and trailing spaces.
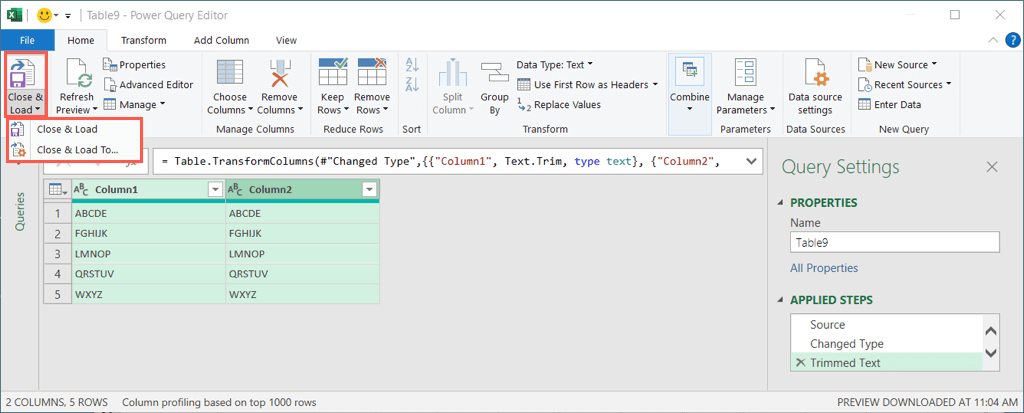
- To use the data immediately, head to the Home tab, open the Close & Load menu, and pick one of the following:
- Close & Load To: Choose the location for the updated data.
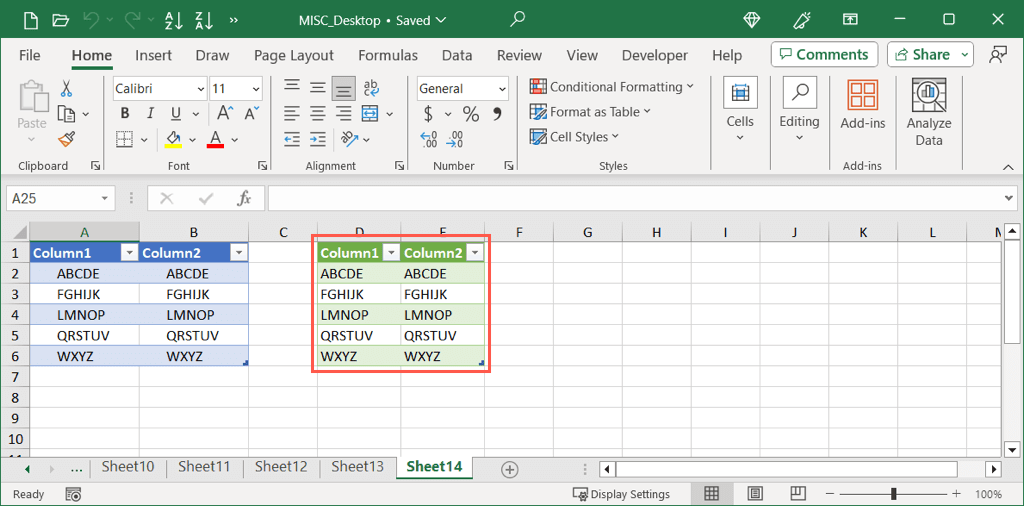
- Close & Load: Place the data in a new tab in your existing sheet.
You can then format, move, and convert the data from a table to a cell range depending on your needs.
With various ways to get rid of spaces that you don’t need in Excel, you can quickly and easily clean up your data regardless of where the spaces are located.
Now that you know how to remove spaces from an Excel cell, look at how to eliminate duplicate rows in Excel too.
