A great way to add some branding and individualism to your WordPress site is to change the fonts in your theme.
Typography and other banding elements create a good first impression, set the mood for your site’s visitors, and establish your brand’s identity. Studies have also found that fonts affect readers’ ability to learn, recall information, and memorize texts.

If you just installed a WordPress theme or have some CSS and coding experience, we’ll show you several options you can use to change fonts in WordPress.
How to Change Fonts in WordPress
There are three main options available for you to change fonts in WordPress:
- Use web fonts like Google Fonts, Fonts.com, or Adobe Edge Web Fonts, which are hosted on a third-party site
- Code web fonts into your theme and enqueue them
- Host fonts on your site and add them to your theme
1. How to Change Fonts in WordPress Using Web Fonts
Using web fonts is an easier and quicker way to change fonts in WordPress than downloading and uploading font files.
With this option, you can access a variety of fonts without updating them each time there’s a change, and it doesn’t hog server space on your hosting. The fonts are served directly from the provider’s servers using a plugin or by adding code to your site.
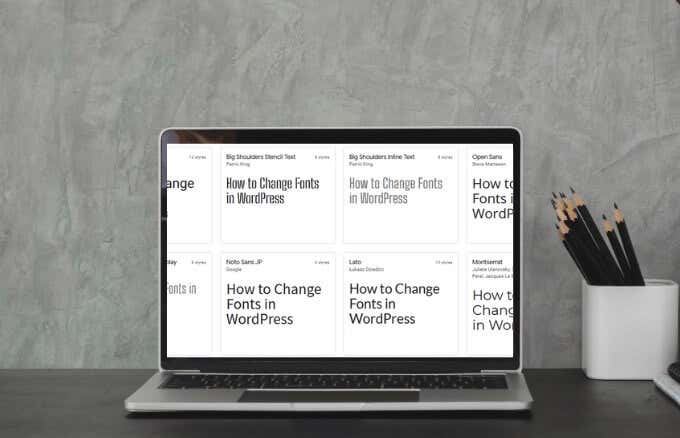
Make sure the web fonts you choose for your site match your brand identity, are easy to read for body text, are familiar to website visitors, and convey the kind of mood and image that you want.
You can add web fonts using a WordPress plugin or manually by adding a few lines of code to your site. Let’s explore both options.
How to Add Web Fonts Using a WordPress Plugin
Depending on the web font you’ve chosen, you can use a WordPress plugin to access the library of fonts and pick out the one you want on your site. For this guide, we chose Google Fonts and used the Google Fonts Typography plugin.
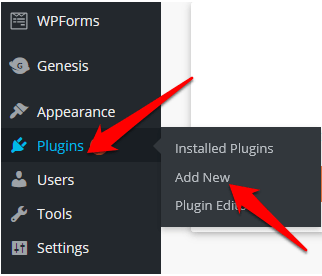
- To get started, log in to your WordPress admin dashboard, and select Plugins > Add New.
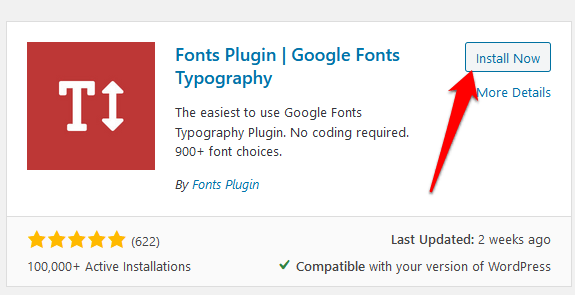
- Type Google Fonts Typography in the search box, and select Install Now.
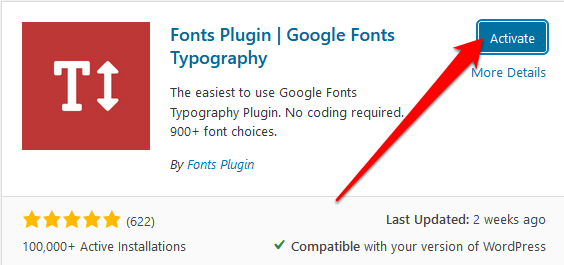
- Select Activate.
- Next, access the Customizer by going to Appearance > Customize.
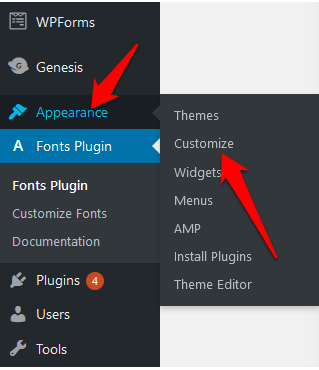
- Select the Google Fonts section.
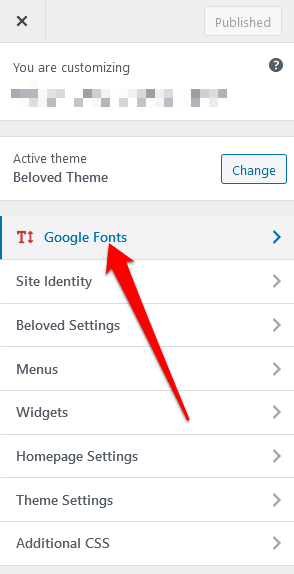
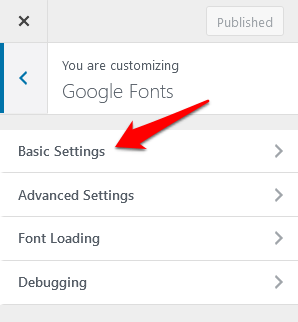
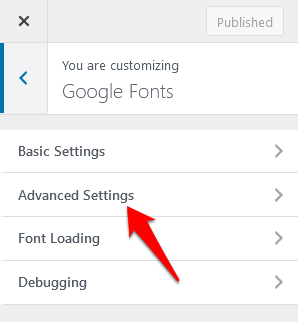
- Next, click on the link to open the fonts’ settings and configure them as follows:
- Under Basic Settings, set the default font for your body text, headings, and buttons.
- Under Advanced Settings, configure your site title and description, menu, headings and content, sidebar, and footer.
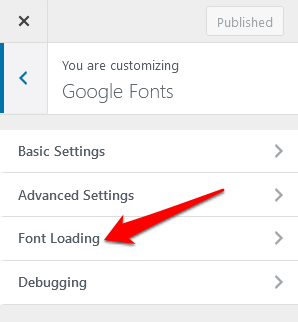
- Uncheck any unwanted font weights in the Font Loading section to avoid slowing down your site.
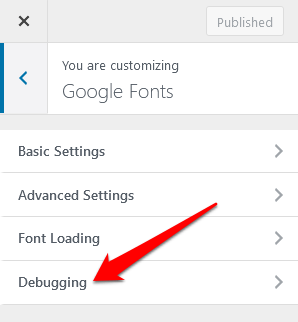
If there are fonts on your site that aren’t displaying or working properly, use the Debugging section to troubleshoot.
- You can test these settings in the Customizer to make sure they’re working the way you want them to, and then select Publish.
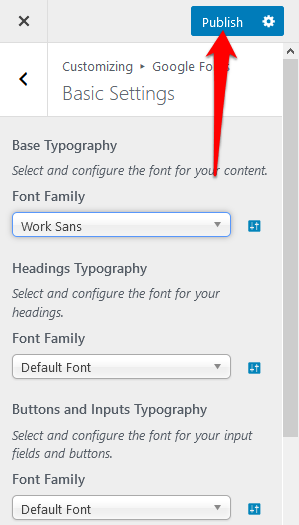
Note: If you forget to select publish in the Customizer, you’ll lose all the changes you’ve made.
How to Add Web Fonts Using Code
You can install and use web fonts if you have access to your theme’s code. This is a manual alternative to adding an extra plugin, but it’s not complicated if you follow the steps carefully.
However, there are different steps to take if you’re using a theme from the WordPress theme directory or a customized theme.
If you bought a theme from the WordPress theme directory, create a child theme and then give it the style.css and functions.php file. It’s easier if you have a customized theme as you can edit the stylesheet and functions file from your theme.
- To get started, select a font from the Google Fonts library, and select the + (plus) icon to add it to your library.
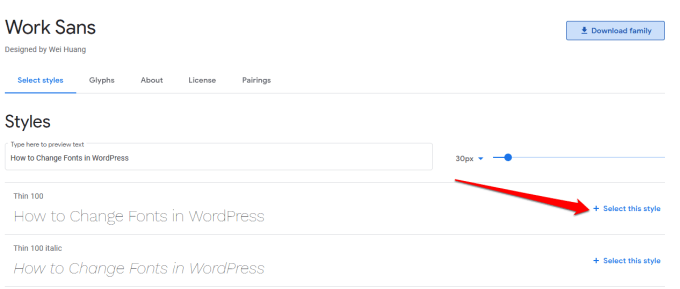
- Next, select the tab at the bottom where you’ll find the code to add to your site. Go to the Embed font section under the Embed tab. You’ll find the code generated by Google Fonts, which looks something like this:
<link href=”https://fonts.googleapis.com/css2?family=Work+Sans:wght@100&display=swap” rel=”stylesheet”>
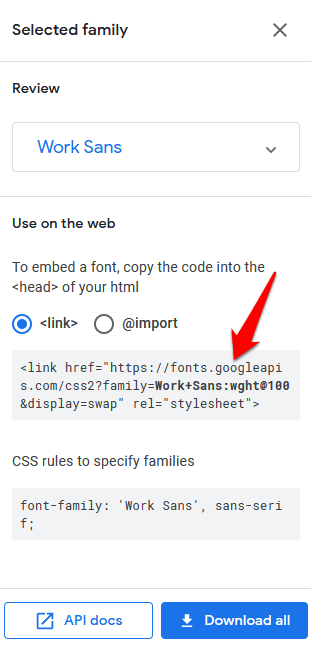
Note: We picked Work Sans for this guide so the font name may be different on yours depending on what you picked.
- Copy this part of the code: https://fonts.googleapis.com/css2?family=Work+Sans
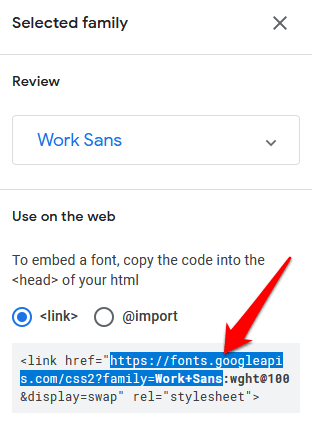
This allows you to enqueue the style from Google Fonts servers to prevent conflict with third-party plugins. It also allows for easier child theme modifications.
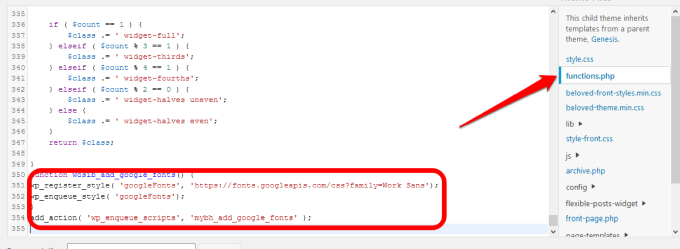
- To enqueue the font, open the functions file and add the following code. (Replace the link with the link you get from Google Fonts):
function wosib_add_google_fonts() {
wp_register_style( ‘googleFonts’, ‘https://fonts.googleapis.com/css?family=Work Sans’);
wp_enqueue_style( ‘googleFonts’);
}
add_action( ‘wp_enqueue_scripts’, ‘mybh_add_google_fonts’ );
- You can add a new line to your function or to the same line if you want to add more fonts in future as follows:
function mybh_add_google_fonts() {
wp_register_style( ‘googleFonts’, ‘https://fonts.googleapis.com/css?family=Cambria|Work Sans’);
wp_enqueue_style( ‘googleFonts’);
}
add_action( ‘wp_enqueue_scripts’, ‘mybh_add_google_fonts’ );
In this case, we’ve enqueued both Cambria and Work Sans fonts.
The next step is to add the fonts to your theme’s stylesheet to make the font work on your site.
- To do this, open your theme’s style.css file and add the code to style individual elements with your web fonts as follows:
body {
font-family: ‘Work Sans’, sans-serif;
}
h1, h2, h3 {
font-family: ‘Cambria’, serif;
}

In this case, the main font will be Work Sans while header elements like h1, h2, and h3 will use Cambria.
Once done, save the stylesheet and check whether your fonts are working as they should. If not, check that the fonts aren’t being overridden in the stylesheet, or clear your browser cache and try again.
- Have a backup font in place to ensure that the fonts can be rendered or accessed easily especially for users with old devices, poor connections, or if the font provider has technical issues. To do this, go to the stylesheet and edit the CSS to read as follows:
body {
font-family: ‘Work Sans’, Arial, sans-serif;
}
h1, h2, h3 {
font-family: ‘Cambria’, Times New Roman, serif;
}
If all is well, your site’s visitors will see your default web fonts, in our case Work Sans and Cambria. If there are issues, they’ll see the backup fonts, for example Arial or Times New Roman in our case.
2. How to Change Fonts in WordPress by Hosting Fonts
Hosting fonts on your own servers helps you optimize the performance of your web fonts, but it’s also a more secure way of doing it instead of pulling in resources from third-party sites.
Google Fonts and other web fonts allow you to download fonts for use as locally hosted fonts, but you can still download other fonts to your computer provided the licenses permit you to do so.
- To get started, download, unzip, upload the font file to your site and then link it in your stylesheet. In this case you don’t have to enqueue the fonts in the functions.php file as you did with the web fonts. Confirm that the files you’re uploading are in the .woff format before using them on your website.
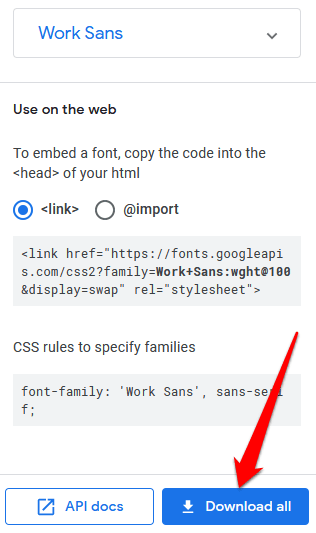
- Next, go to wp-content/themes/themename to upload the font file to your theme.
- Open the stylesheet and add the following code (in this case we’re using Work Sans font but you can replace that with your own fonts):
@font-face {
font-family: ‘Work Sans’;
src: url( “fonts/Work Sans-Medium.ttf”) format(‘woff’); /* medium */
font-weight: normal;
font-style: normal;
}
@font-face {
font-family: ‘Work Sans’;
src: url( “fonts/Work Sans-Bold.ttf”) format(‘woff’); /* medium */
font-weight: bold;
font-style: normal;
}
@font-face {
font-family: ‘Cambria’;
src: url( “fonts/Cambria.ttf”) format(‘woff’); /* medium */
font-weight: normal;
font-style: normal;
}
Note: Using @fontface allows you to use bold, italics and other variations of your font, after which you can specify the weight or style for each font.
- Next, add styling for your elements as follows:
body {
font-family: ‘Work Sans’, Arial, sans-serif;
src: url( “/fonts/Work Sans-Medium.ttf” );
}
h1, h2, h3 {
font-family: ‘Cambria’, Times New Roman, serif;
}
Customize Your WordPress Typography
Changing fonts in WordPress is a great idea to improve the branding and user experience. It’s not a straightforward task, but you’ll have more control over your theme.
Were you able to customize your site’s fonts using the steps using the tips in this guide? Tell us in the comments.