
If you have no restore points on your Windows Vista or 7 computer, then Windows may not be creating the restore points automatically. There are a number of different problems that can cause this.
One cause is a lack of sufficient free space on your hard drive to save the System Restore files. To remedy this problem, make sure you have at least 300 MB of free space on your hard drive (50 MB if your hard drive is smaller than 300 MB and you’re running Windows 7).
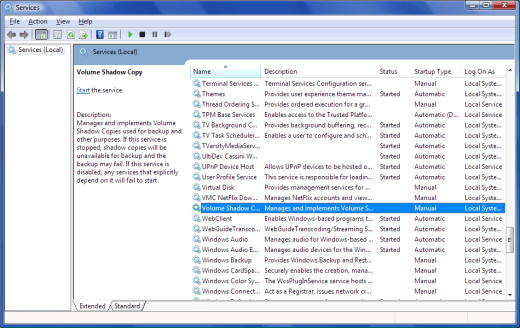
Another cause of missing restore points is a problem with the task scheduler. Before you start troubleshooting this issue, click the Start button, then type Services.msc in the Start Search box. Check to make sure that Volume Shadow Services is running.
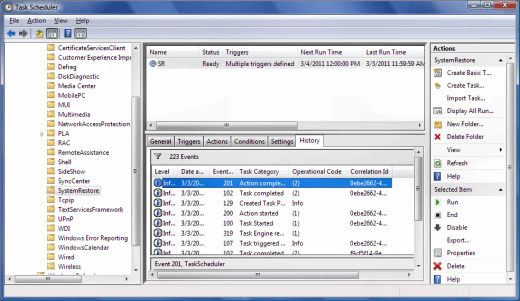
Run Task Scheduler. Click the Start button, then type Task Scheduler and press Enter. Expand the Task Scheduler Library, then select Microsoft, Windows and SystemRestore. In the top pane click the entry named SR. In the bottom pane, click the History tab to see any System Restore tasks, warnings and errors that have been recorded.
Right click the SR file, select Properties and then click the Triggers tab. Click a trigger, then click Edit. Change the trigger so that it creates a restore point automatically when you want it to be created. For example, you could edit the trigger set for 12:00 am daily to another time of day when the computer will be running.

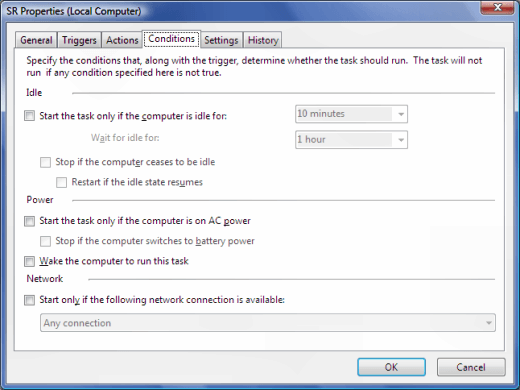
Click the Conditions tab. Uncheck the check box beside Start the task only if the computer is idle for. Also uncheck the box beside Start the task only if the computer is on AC power.
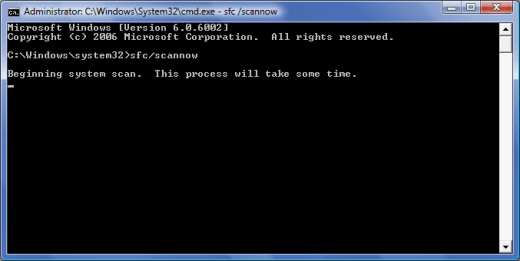
Another way to fix problems with missing System Restore Points is by using the System File Checker. Click the Start button, then type cmd in the start search box. Right-click cmd.exe and click Run as Administrator. Type sfc/scannow at the command prompt. Allow the System File Checker to complete the scan and repair process.
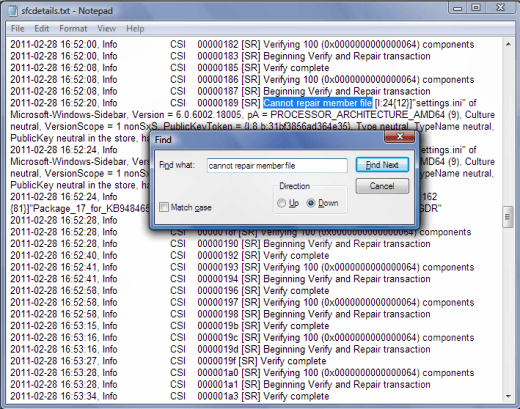
You may receive a message that Windows Resource Protection found corrupt files but was unable to fix some of them. If this occurs, type findstr /c:”[SR]” %windir%logscbscbs.log >sfcdetails.txt at the command prompt and press Enter.
Navigate to your windows/system32 folder and open sfcdetails.txt in Notepad. Click Edit and Find, then type cannot repair member file to see the problems that the System File Checker was unable to repair.
You can also fix this problem by turning System Restore off, then turning it back on again. Learn how to disable and enable System Restore in Windows Vista and in Windows 7. Enjoy!
