Your extra PC is collecting dust, and you’re hoping it can do something useful before you recycle it. Check its hardware and Windows support first, then pick a job that matches its power use, storage, and condition.
Use #1: Set it up as a second household PC
A spare laptop or mini PC works well in a kitchen, workshop, guest room, or shared study area. You’ll have quick access to a browser and documents without moving your primary computer.
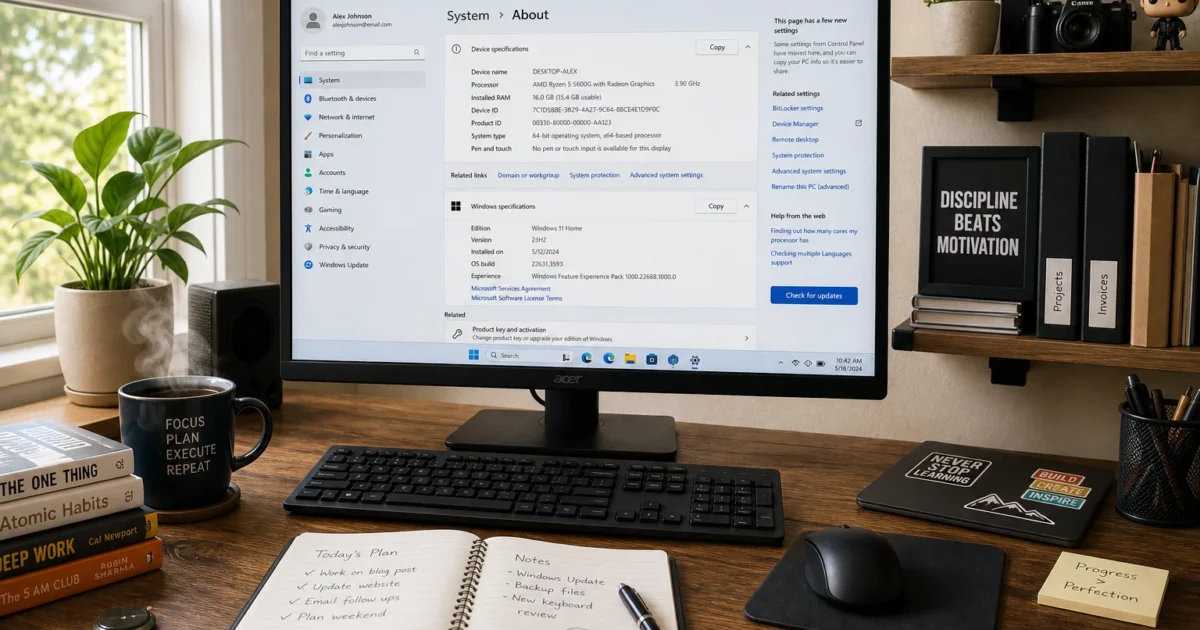
- Open Settings > System > About.
- Confirm the processor, installed RAM, and Windows edition.
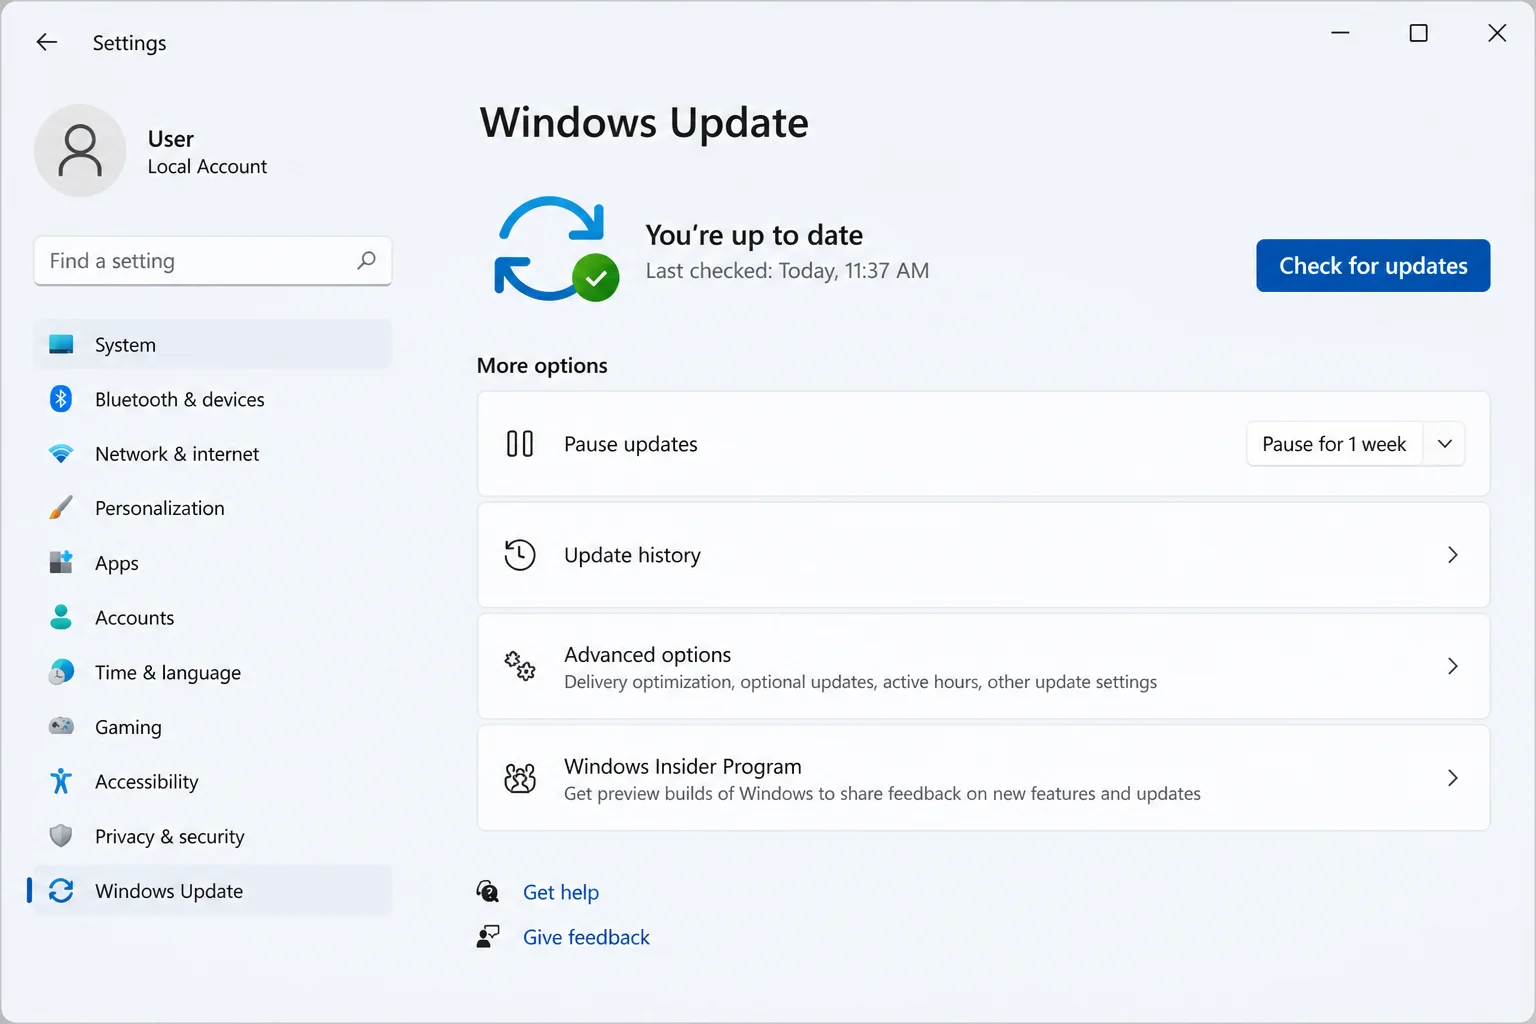
- Open Settings > Windows Update.
- Select Check for updates and install every available security update.
- Open Settings > Accounts > Other users.
- Select Add account and create a separate account for each regular user.
- Remove applications and personal files that the household doesn’t need.
You should end up with a clean secondary PC where each person has separate files and browser data. Keep it somewhere with decent ventilation, particularly if it’s an older desktop.
Use #2: Turn it into a media server
A media server stores movies, music, and photos in one place. Other TVs and computers can then stream that library over your home network.
- Check that the PC has enough storage for your current library and future additions.
- Connect it to your router with Ethernet when possible.
- Install a current media server such as Plex or Kodi.
- Add your media folders inside the server application.
- Install the corresponding client app on your TV or streaming device.
- Play one large video to test the connection and video format.
The video should start without long pauses or constant buffering. If playback struggles, the processor or graphics hardware may lack the required codec support.
I’d skip using a large desktop for this job unless you already own it and don’t mind the electricity cost. A quiet mini PC or NAS often makes more sense for an always-on media library.
Use #3: Build a living-room streaming PC
A living-room PC can run streaming services, local media apps, and PC games on your television. It also handles websites or services that your smart TV doesn’t support.
- Connect the PC to your television through HDMI.
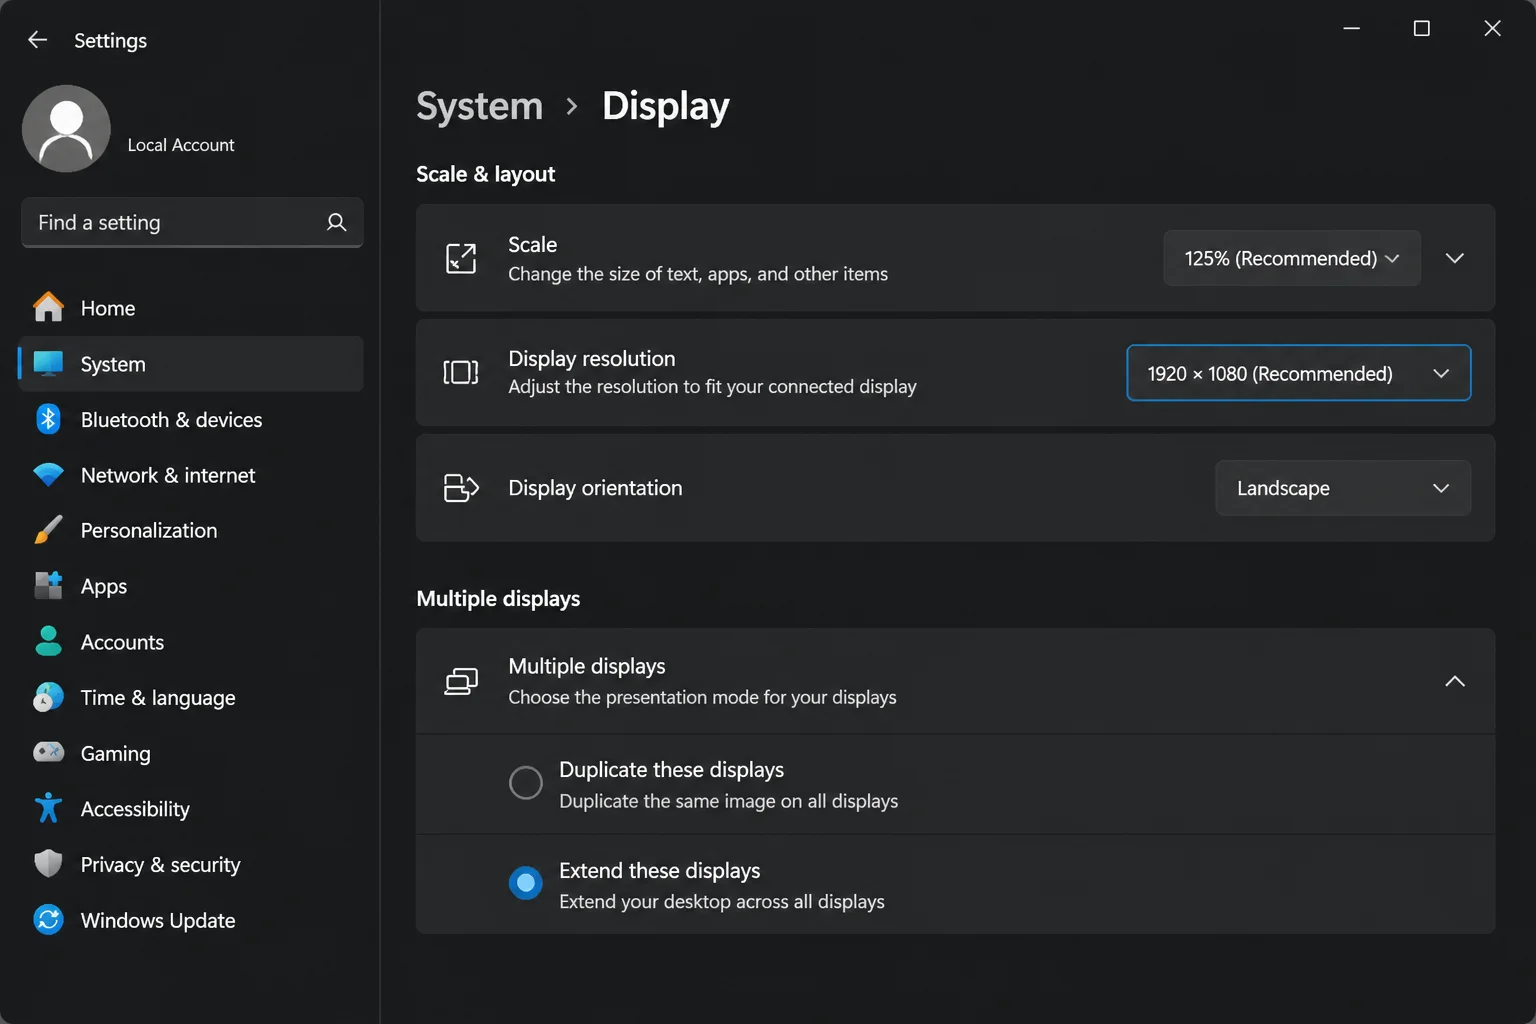
- In Windows, open Settings > System > Display.
- Select the television and choose its recommended resolution.
- Open Settings > System > Sound.
- Select the television or HDMI output under Output.
- Install the streaming and gaming apps you plan to use.
- Pair a wireless keyboard, remote, or game controller.
- Play a video and confirm that sound comes from the television.
Windows Media Center is no longer a current option. Plex, Kodi, and the official apps for each streaming service are better fits for a Windows 11 living-room PC.
Features such as Auto Super Resolution require supported Copilot+ hardware. Don’t expect them to appear on an older repurposed machine.
Use #4: Make it a network backup computer
A second PC can hold backups from every Windows computer in your home. This helps when a laptop’s SSD fails, but the backup PC shouldn’t be your only copy.
- Replace any drive that reports errors or makes unusual clicking sounds.
- Install a large internal or external drive for backup storage.
- Create a dedicated folder for each computer you plan to back up.
- Right-click the main backup folder and select Properties.
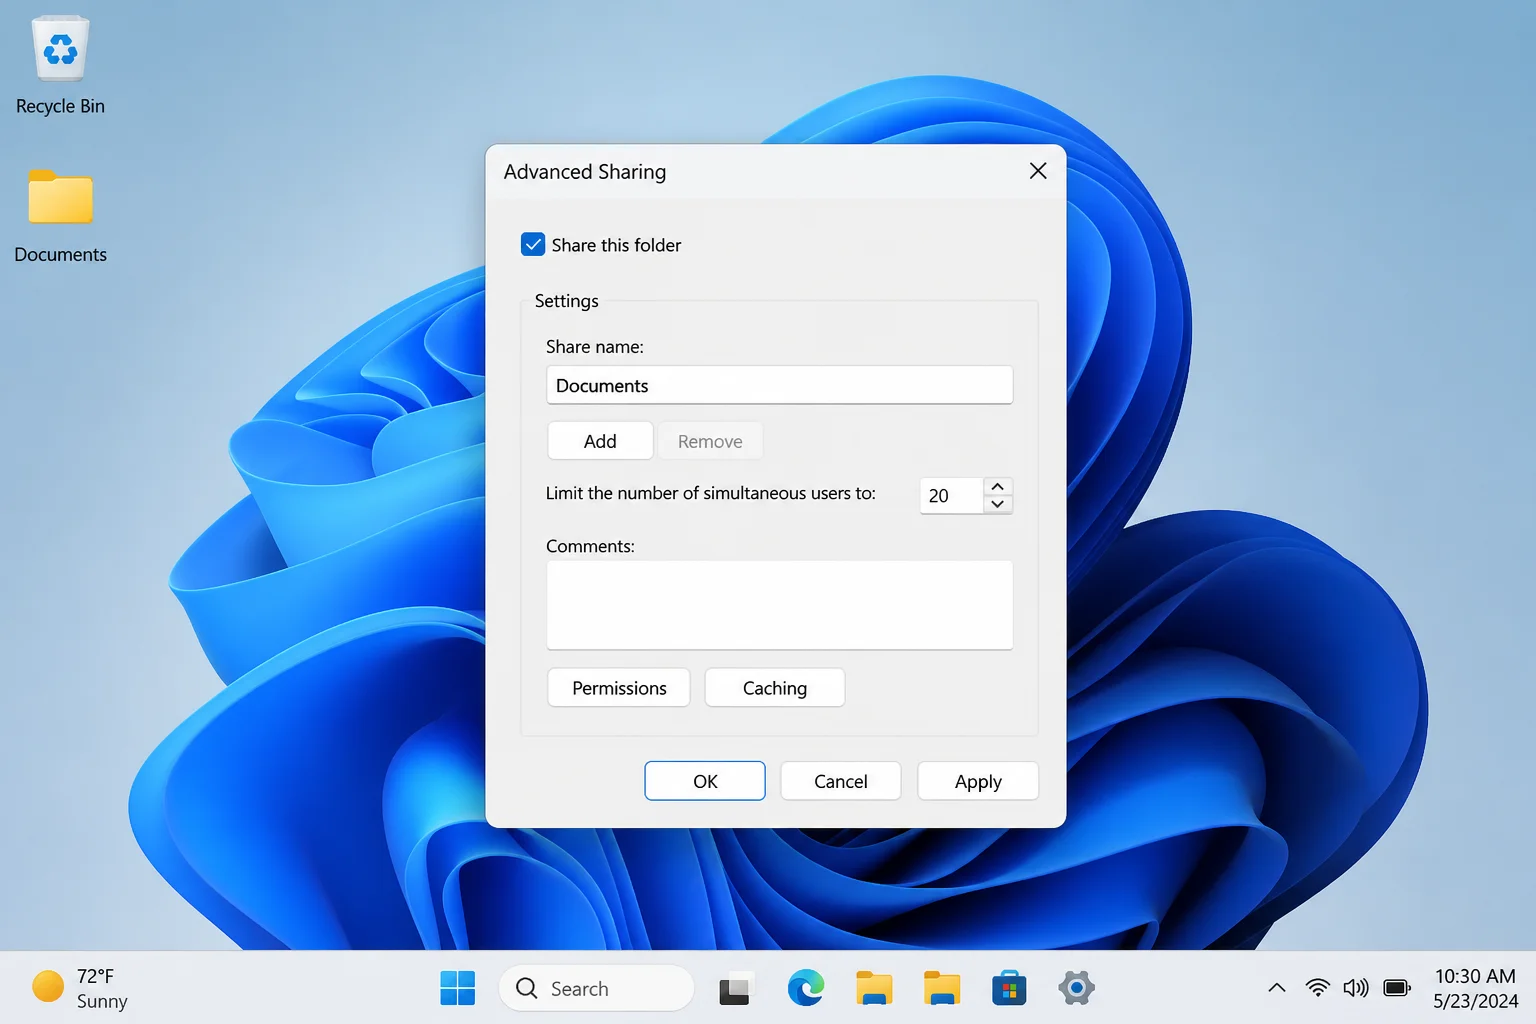
- Open Sharing > Advanced Sharing.
- Select Share this folder, then set access through Permissions.
- On another PC, open File Explorer and enter
\\ComputerNamein the address bar. - Copy a test file into the correct backup folder.
- Open the copied file from the backup computer to verify it.
You should be able to create, open, and delete the test file with the intended account. If Windows requests credentials repeatedly, check the account permissions on the computer hosting the share.
Windows 11 24H2 requires SMB signing by default and doesn’t support NTLMv1. An old router, NAS, or legacy file-sharing configuration may fail until its firmware and authentication settings support current SMB security.
For a server-focused installation, TrueNAS can manage storage and network shares. Read its hardware requirements before replacing Windows, because installation changes the machine’s existing setup.
Mirrored drives improve availability when one disk fails, but they don’t protect against accidental deletion, malware, or theft. Keep another copy on a disconnected drive or a trusted cloud backup service.
Use #5: Create shared network storage
A storage PC gives your household one location for installers, project files, photos, and other large data. It works like a basic NAS, though it usually consumes more power.
- Create folders for each category, such as
Photos,Installers, andShared Documents. - Right-click each folder and select Properties.
- Use the Sharing tab to choose who can access it.
- Give write access only to accounts that need to change files.
- On another Windows PC, open File Explorer.
- Right-click This PC and select Map network drive.
- Choose a drive letter and enter the folder path, such as
\\StoragePC\Photos.
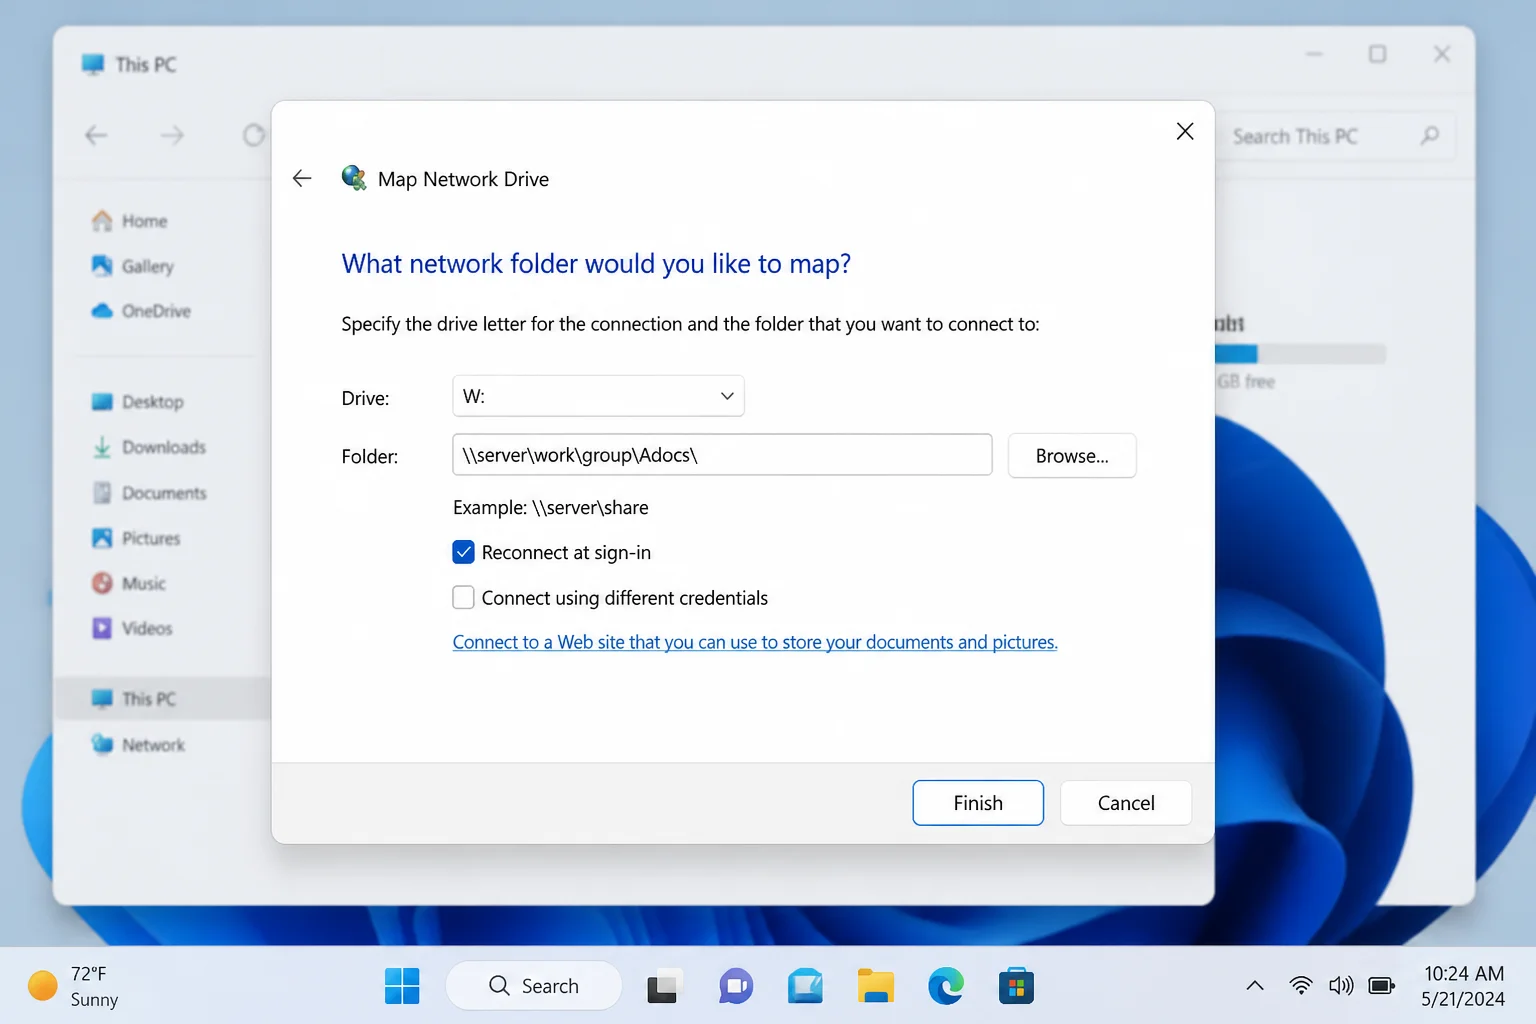
- Select Finish and enter the storage PC’s account credentials if requested.
The shared folder should appear under This PC with its assigned drive letter. Try copying a small file in both directions before moving anything valuable.
This use quickly becomes confusing when permissions aren’t planned. Decide who gets read-only access and who can edit files before copying the full library.
Use #6: Give or donate it safely
A working PC can help a family member, school, library, nonprofit, or refurbishing program. Wipe your data and confirm that the recipient can use the hardware securely.
- Copy every file you want to keep to another verified location.
- Open Settings > System > Recovery.
- Select Reset PC beside Reset this PC.
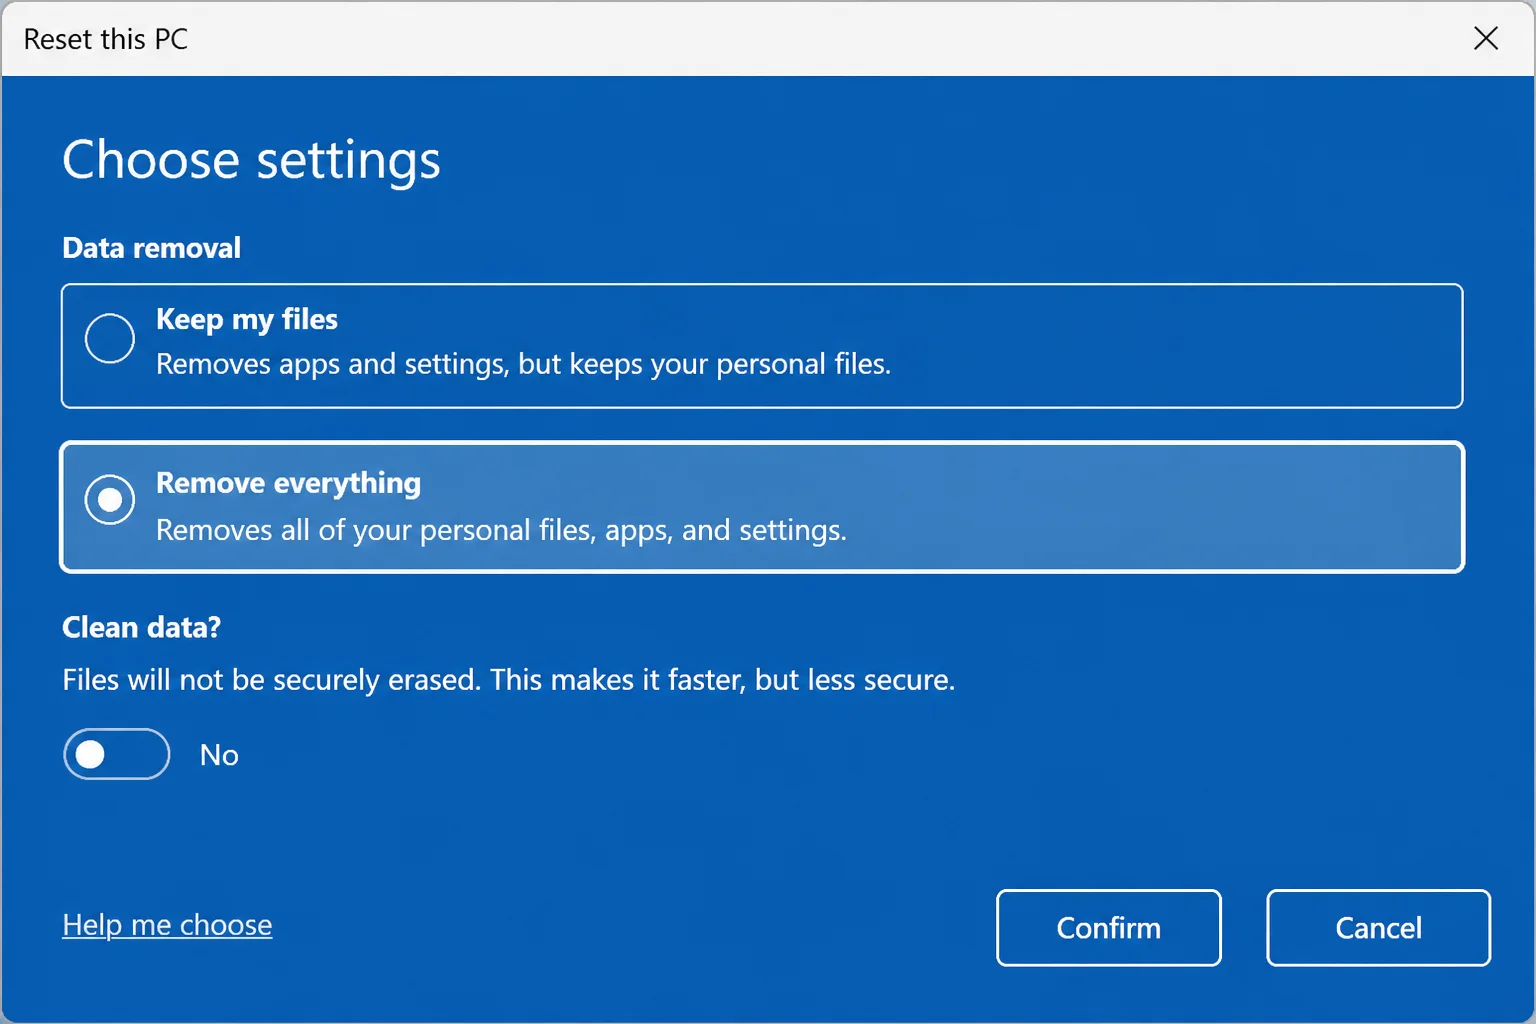
- Choose Remove everything.
- Open Change settings and enable the option to clean data if you’re giving the PC to someone you don’t know.
- Complete the reset and stop when Windows reaches its initial setup screen.
- Include the power adapter, Wi-Fi antenna, and any required proprietary cables.
- Tell the recipient if the battery, drive, ports, or display have known problems.
Windows 11 requires supported hardware. If the machine can’t run a currently supported operating system, contact the organization before donating it. A refurbisher may install a current Linux distribution or recycle the parts instead.
You can also sell the complete computer or its compatible components. State every known fault in the listing and remove the device from your Microsoft account after the handoff.
Use #7: Make a supervised computer for a child
A separate PC gives a child space to learn, play, and complete schoolwork without using your account. Microsoft Family Safety can apply screen-time and content controls to a child account.
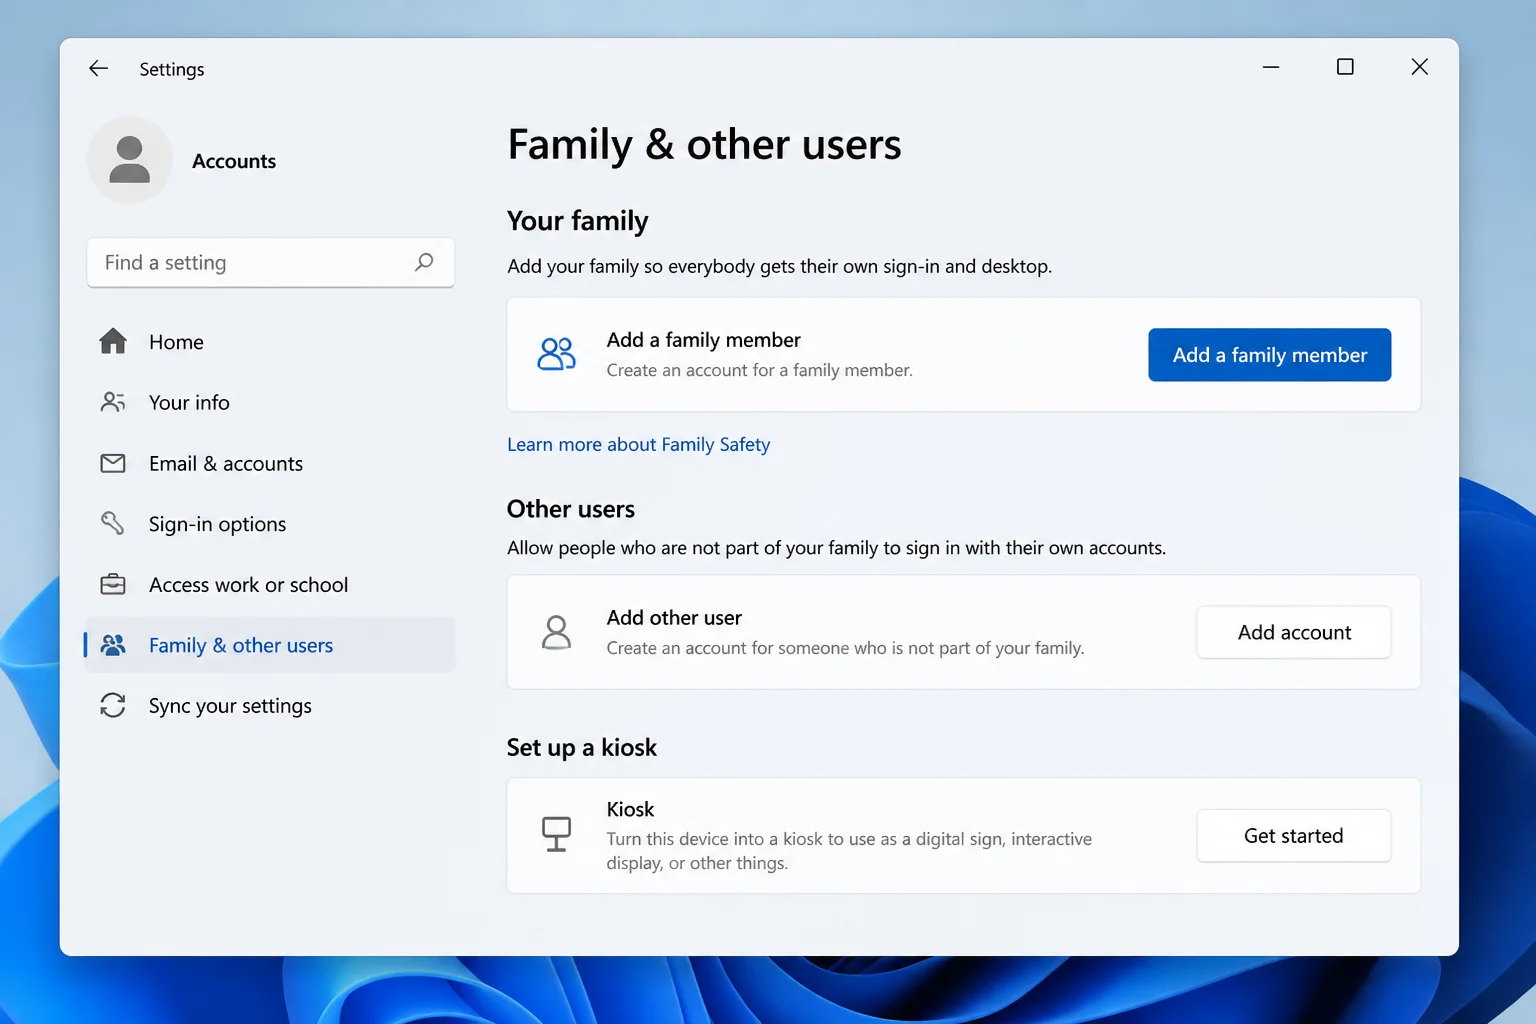
- Open Settings > Accounts > Family.
- Select Add someone.
- Sign in with the child’s Microsoft account or create one.
- Confirm that Windows identifies the account as a family member.
- Open the Microsoft Family Safety website or app.
- Select the child’s profile.
- Configure screen-time, app, game, and web limits that fit your household.
- Sign in to the child’s Windows account and test one restriction.
The restricted app or website should follow the rule you configured. Review the settings after major Windows or browser changes instead of assuming every rule still behaves the same way.
Keep the child’s account as a standard user. Administrator access allows software and system changes that can bypass parts of your setup.
Use #8: Keep it as an emergency replacement or test PC
A spare computer can keep you working when your primary PC fails. It can also test unfamiliar applications, Windows settings, or a different operating system without risking your daily machine.
- Update Windows and the computer manufacturer’s available drivers.
- Install only the applications you would need during an emergency.
- Sign in to essential services and confirm that account recovery works.
- Store a spare charger, keyboard, mouse, and display cable with the computer.
- Shut it down and test it every two or three months.
You should be able to start the PC, connect to Wi-Fi, and open your essential files without a long repair session. That quiet test is what turns a dusty machine into a real Plan B.
Don’t assume old parts will fit your primary computer. RAM generations, storage connectors, laptop components, and power supplies must be electrically and physically compatible.
For software testing, virtual machines on your primary PC may be easier than maintaining separate hardware. The spare PC remains useful when a test needs direct access to a graphics card, USB device, or separate network connection.
Use #9: Build a home lab or private game server
An extra PC is a practical place to learn networking, run virtual machines, test code, or host a private multiplayer server. It keeps experiments away from the computer you depend on.
- Confirm that the PC has enough RAM and free storage for the planned software.
- Enable virtualization in the PC’s firmware if your virtual-machine software requires it.
- Install a current virtualization platform, development environment, or official game-server package.
- Create a separate standard Windows account for routine administration.
- Allow only the required application through Windows Firewall.
- Test the service from another device on your local network.
The service should accept a local connection without requiring you to disable the firewall. If it doesn’t, recheck the application’s port and firewall rule.
Don’t expose Remote Desktop, a game server, or an admin panel directly to the internet unless you understand the security risks. Use authenticated remote-management software or a VPN, keep the server patched, and forward only the ports the application requires.
A full public website or email server on a home connection creates maintenance, security, and reliability problems. Paid hosting is usually the cleaner choice for anything other people depend on.
Use #10: Turn it into a security-camera station
A spare PC can display and record feeds from compatible IP or USB cameras. Storage speed, camera compatibility, and continuous power matter more than raw processor performance.
- Check that each camera supports the monitoring software you intend to use.
- Connect the camera and PC to the same secured network.
- Install the camera manufacturer’s current application or compatible monitoring software.
- Add one camera before configuring the rest.
- Set a recording folder on a drive with enough free space.
- Configure retention so old recordings are removed before the drive fills.
- Trigger motion in front of the camera and open the saved recording.
The recording should show the correct time and play without corruption. Test night footage too, since poor lighting can expose camera-placement problems that aren’t visible during the day.
Use a strong, unique password for every camera and install available firmware updates. Keep remote viewing behind the camera vendor’s secured service or a VPN rather than exposing the monitoring PC directly to the internet.
When an extra PC isn’t the right choice
I almost gave up on one old desktop after its noise, heat, and power use outweighed the job it performed. A mini PC is usually better for lightweight always-on services, while a NAS suits shared storage and backups. Cloud storage handles simple file syncing, and a single-board computer can run small home-automation or network services with less electricity.
Don’t trust an aging drive with your only backup. If the PC can’t run a supported operating system, crashes under load, or shows storage errors, use it for supervised experiments or send it to a certified electronics recycler.
Conclusion
A network backup or home-lab PC usually delivers the most value because it solves a recurring need without demanding powerful hardware. When the machine finally completes that first verified backup or accepts a remote test connection, the effort feels worthwhile. But recurring drive errors, overheating, and unexplained shutdowns mean it’s ready for repair or recycling.