
Leftover Group Policy restrictions from a previous domain environment can block you from installing printers, changing passwords, or even logging in normally, and simply removing the PC from the domain doesn’t clear them. One secedit command resets every local security policy back to Windows defaults.
Before You Start: Back Up First
Resetting local security policy touches password rules, audit settings, user rights, and firewall behavior. Take a full system backup or at minimum export your current policy before running anything.
- Press
Windows + R, typesecpol.msc, and press Enter to open Local Security Policy. - Click Action > Export Policy and save the
.inffile somewhere safe.

Fix #1: Reset Local Security Policy with secedit (Windows 11 and 10)
This single command reads Windows’ built-in default security template (defltbase.inf) and applies it to your system, overwriting any custom or domain-inherited policy settings.
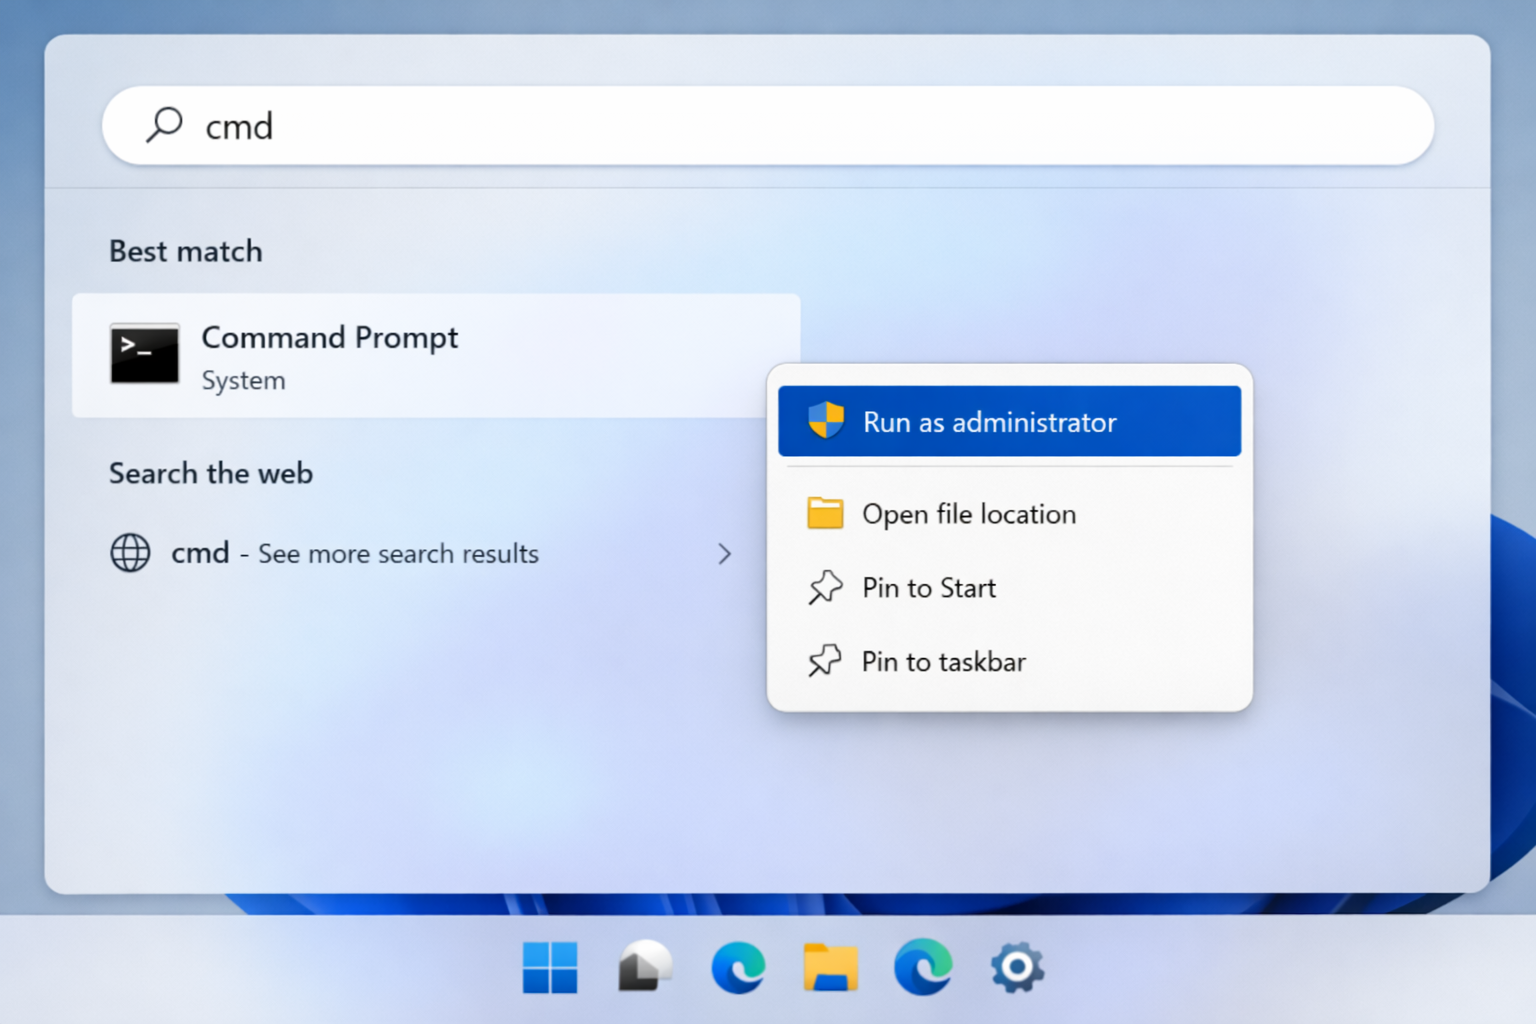
- Click Start, type
cmd, then right-click Command Prompt and select Run as administrator.
- Copy and paste the following command, then press Enter:
secedit /configure /cfg %SystemRoot%\inf\defltbase.inf /db defltbase.sdb /verbose
- Wait for the command to finish — it processes every security setting in the registry and takes a minute or two. You’ll see a stream of status lines as it works.
- Restart your PC to apply the changes.
After rebooting, open secpol.msc and verify the settings look like clean Windows defaults — no unusual password length requirements, no locked-down user rights assignments.
Fix #2: Reset Individual Policies Manually via secpol.msc
If you only need to undo a few specific settings rather than wiping everything, the Local Security Policy console lets you revert individual items without touching the rest.
- Press
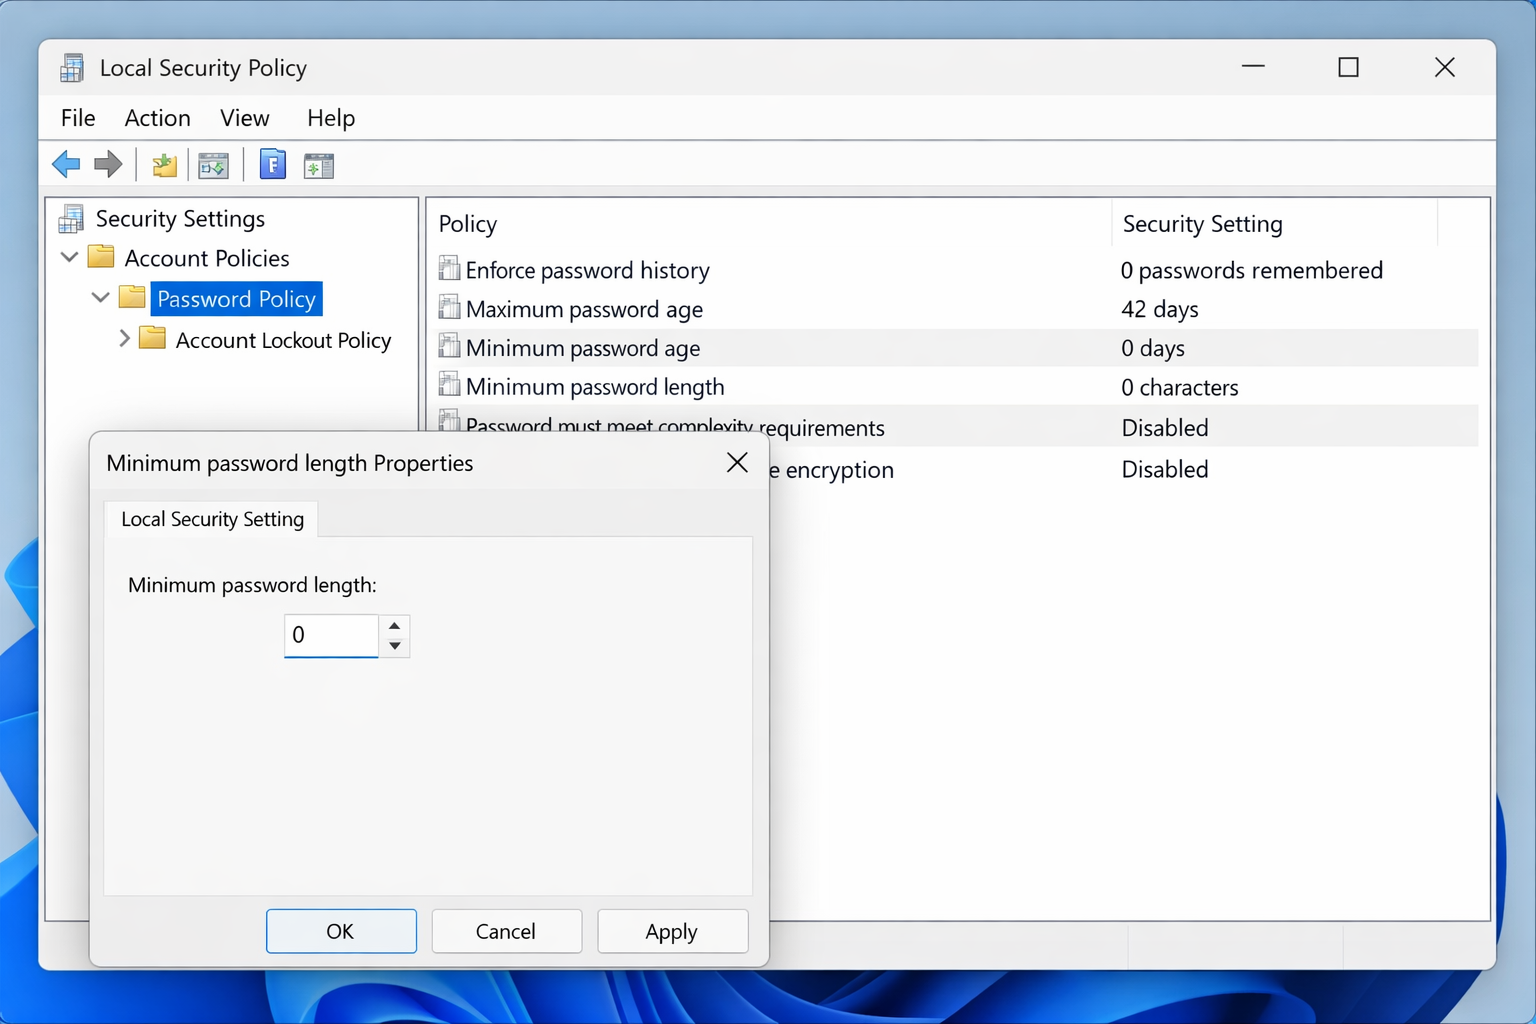
Windows + R, typesecpol.msc, and press Enter. - Navigate to the policy category causing the problem — for example, Account Policies > Password Policy.
- Double-click the specific setting you want to revert.
- Set it back to its documented Windows default value (Microsoft’s Security Baselines documentation lists every default), then click OK.
Fix #3: Enable Local Security Policy on Windows Home Edition
Windows 11 Home and Windows 10 Home don’t include Local Security Policy Manager by default — secpol.msc will throw an error if you try to open it. You can add it back using DISM.
- Click Start, type
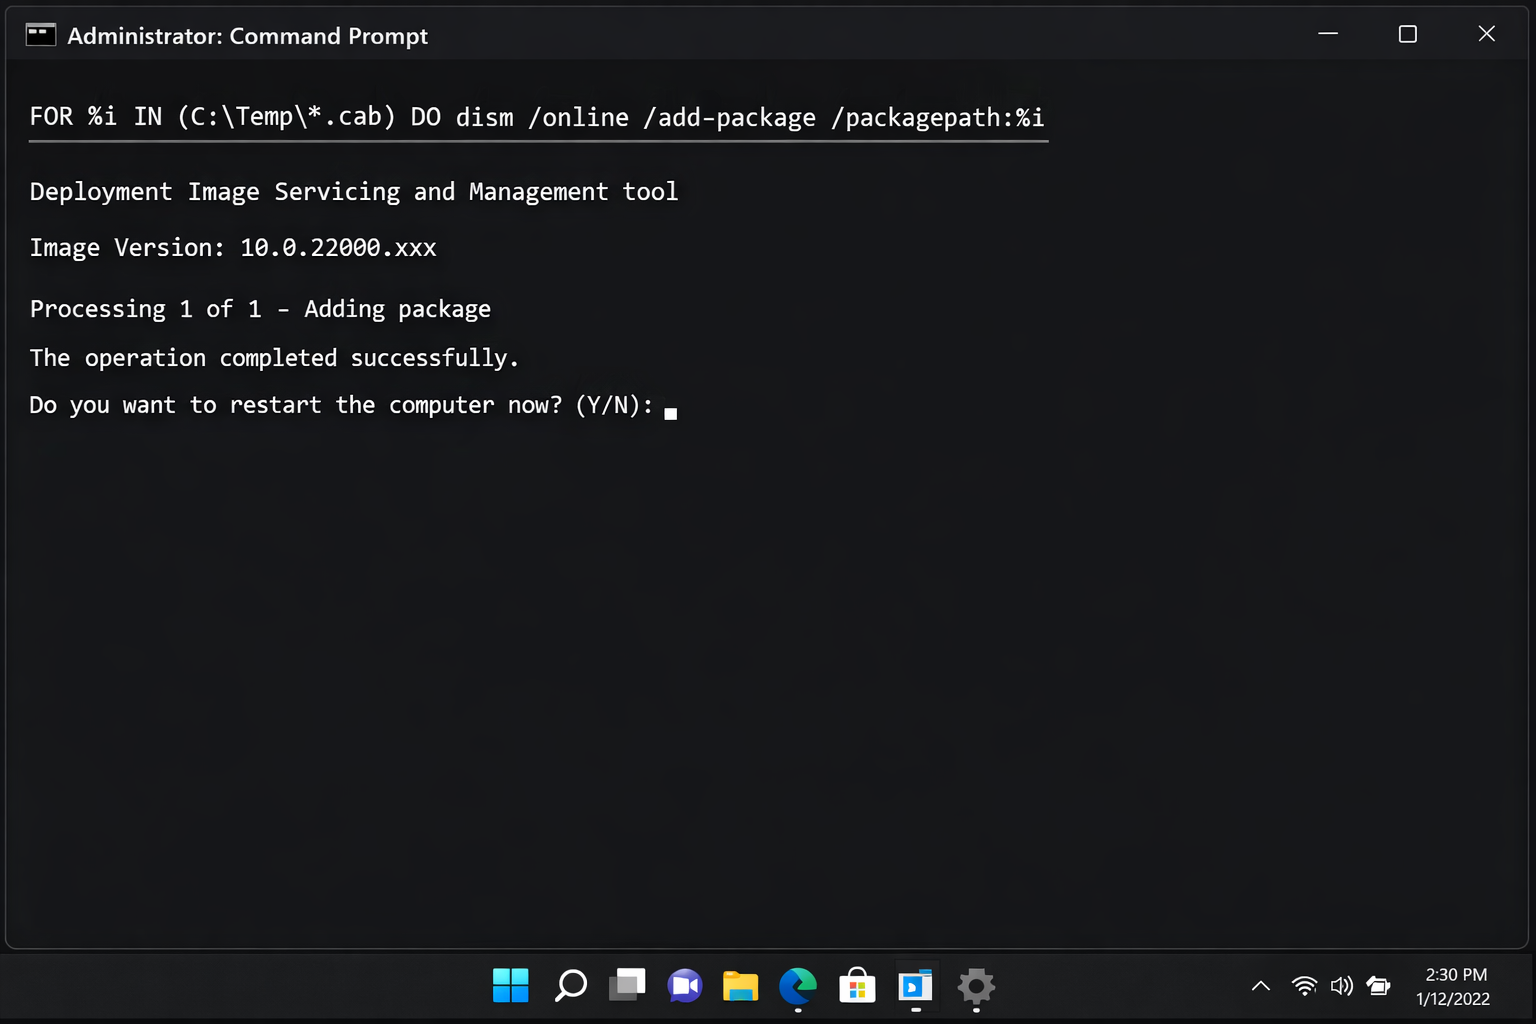
cmd, right-click Command Prompt, and select Run as administrator. - Run this command to install the Group Policy Client Tools package:
FOR %F IN ("%SystemRoot%\servicing\Packages\Microsoft-Windows-GroupPolicy-ClientTools-Package~*.mum") DO (DISM /Online /NoRestart /Add-Package:"%F")- Then run this command to install the Group Policy Client Extensions:
FOR %F IN ("%SystemRoot%\servicing\Packages\Microsoft-Windows-GroupPolicy-ClientExtensions-Package~*.mum") DO (DISM /Online /NoRestart /Add-Package:"%F")- Restart your PC, then try opening
secpol.mscagain. It should load normally now. - Once it’s open, run the
seceditcommand from Fix #1 to reset all policies to default.
Fix #4: Diagnose Policies That Keep Coming Back (GPO Conflicts)
If your security policies reset themselves after every reboot, a domain Group Policy Object (GPO) is overriding your local settings — the secedit reset won’t stick until you find and fix the conflict.
- Click Start, type
cmd, right-click Command Prompt, and select Run as administrator. - Run the Group Policy Results tool to see which GPOs are actively applying:
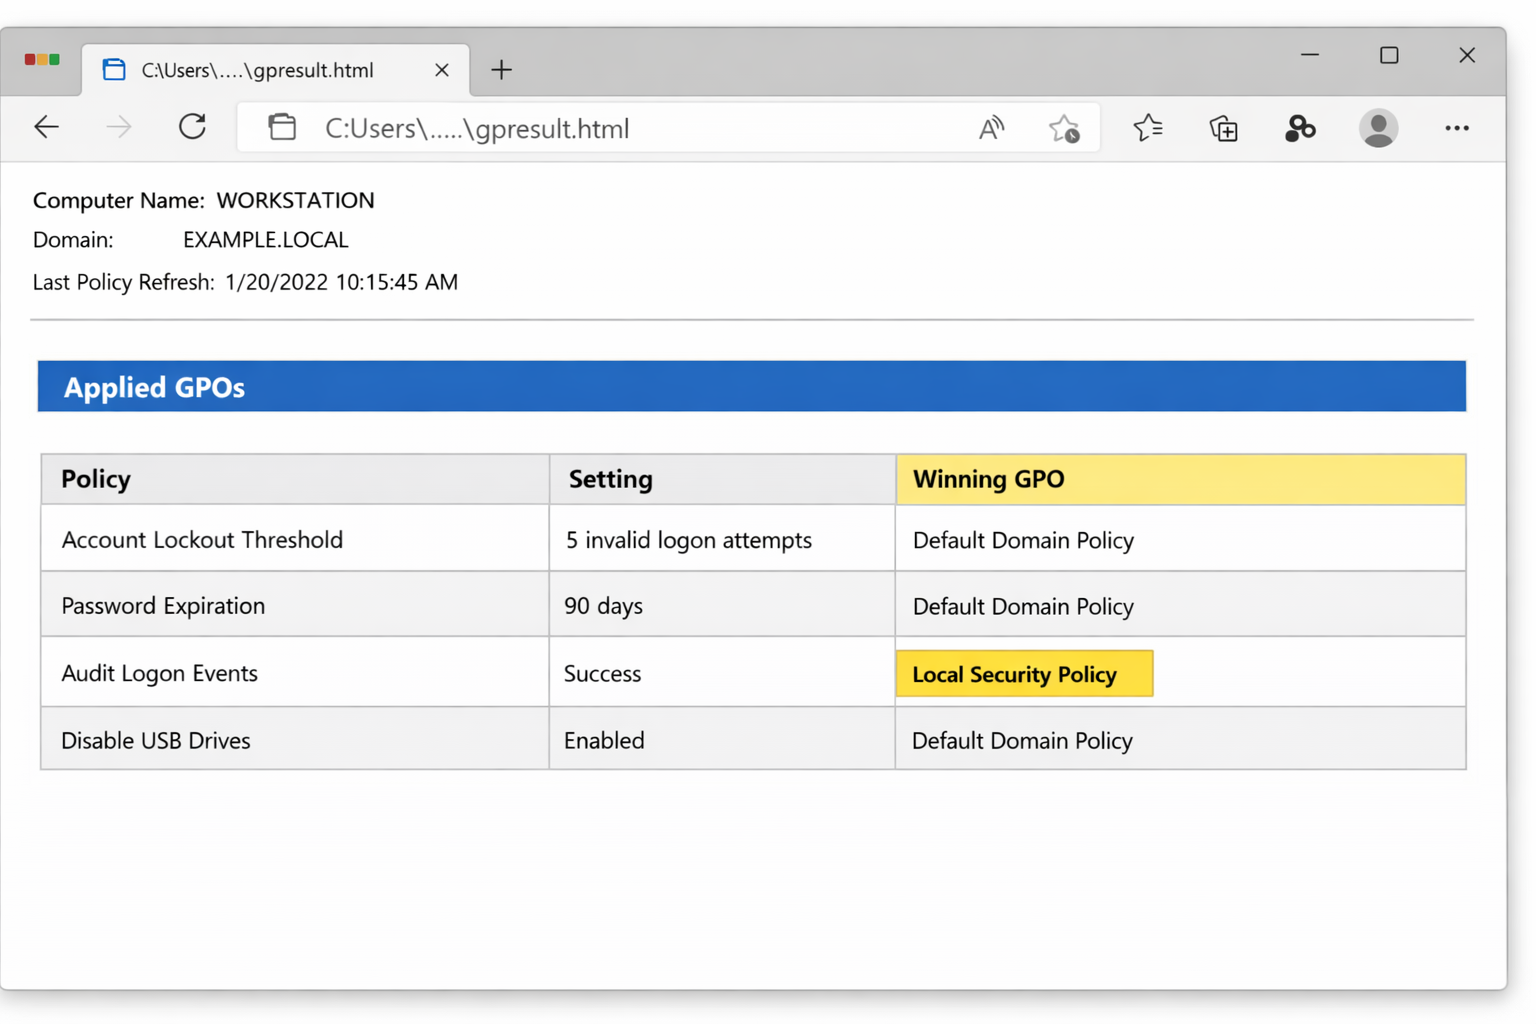
gpresult /h C:\GPReport.html- Open
C:\GPReport.htmlin your browser. - Look for the Winning GPO column next to any policy that shouldn’t be applied — this identifies exactly which GPO is overriding your local settings.
- If the PC is still joined to a domain, contact your domain administrator to correct or remove the conflicting GPO. If it should be off the domain, remove it via Settings > System > About > Rename this PC (advanced) > Change and set it to a workgroup.
When None of These Work
If the secedit command errors out and DISM can’t restore the Group Policy tools, your Windows installation may have underlying corruption. Run sfc /scannow followed by DISM /Online /Cleanup-Image /RestoreHealth in an elevated Command Prompt, then try Fix #1 again. If the corruption is severe, an in-place upgrade repair install of Windows 11 is the cleanest path forward without losing your files.
Conclusion
The secedit command in Fix #1 resolves this for the vast majority of cases — it takes under two minutes and a single reboot. If policies keep reverting after that, you’re dealing with an active GPO conflict (Fix #4) rather than a stale local policy, which is a different problem entirely and worth investigating before assuming something is broken.