
“Windows was unable to find a certificate to log you on to the network” appears when Windows tries to authenticate using 802.1X/EAP (enterprise-style certificate auth) against a router that isn’t configured for it. The fix depends on whether you’re on a home network or a workplace Wi-Fi — both are covered below.
Fix #1: Forget the network and reconnect
Stale network profiles are the most common trigger. Forgetting the network clears the misconfigured authentication settings and lets Windows start fresh.
- Right-click the Wi-Fi icon in your taskbar and select Network and Internet settings.
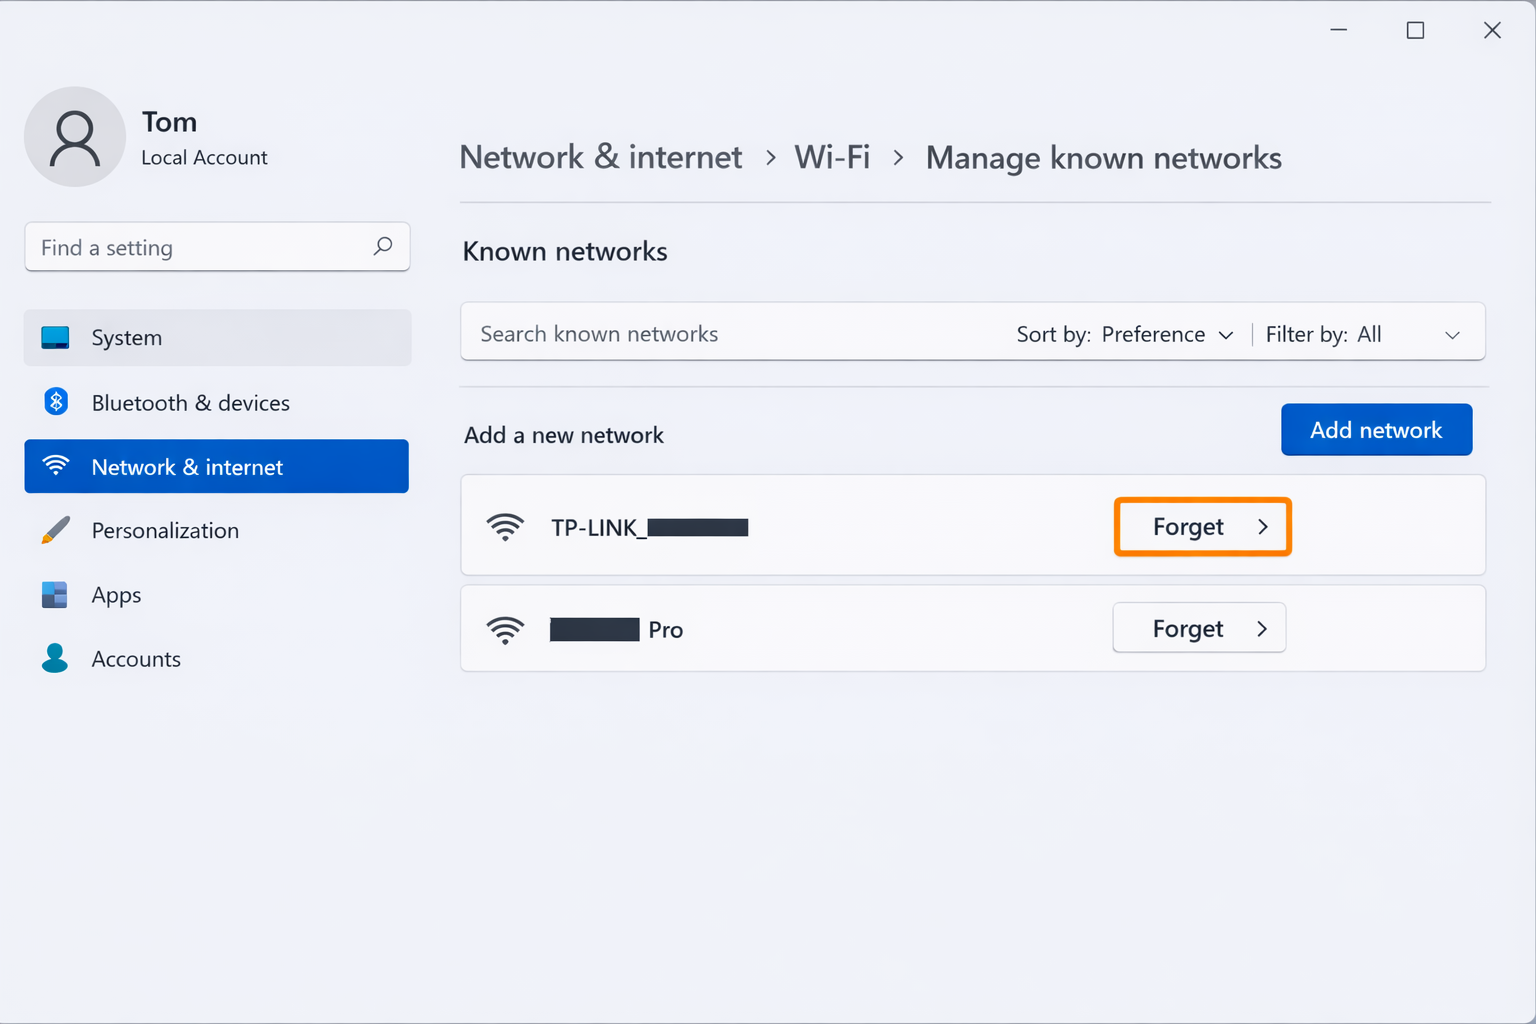
- Click Wi-Fi, then Manage known networks.
- Find the problem network in the list and click Forget.
- Click the Wi-Fi icon in the taskbar again, select the network, and enter your passphrase.
If Windows reconnects without the certificate error, you’re done. If the error comes back, move to Fix #2.
Fix #2: Check your network’s security type
If your router is set to WPA2-Enterprise or WPA3-Enterprise, Windows will demand a certificate. Home routers should always use WPA2-Personal or WPA3-Personal.
- Press
Windows + Ito open Settings. - Go to Network & internet > Wi-Fi > Manage known networks.
- Click your network, then click View more properties (or Properties).
- Check the Security type field. It should read WPA2-Personal or WPA3-Personal — not Enterprise.
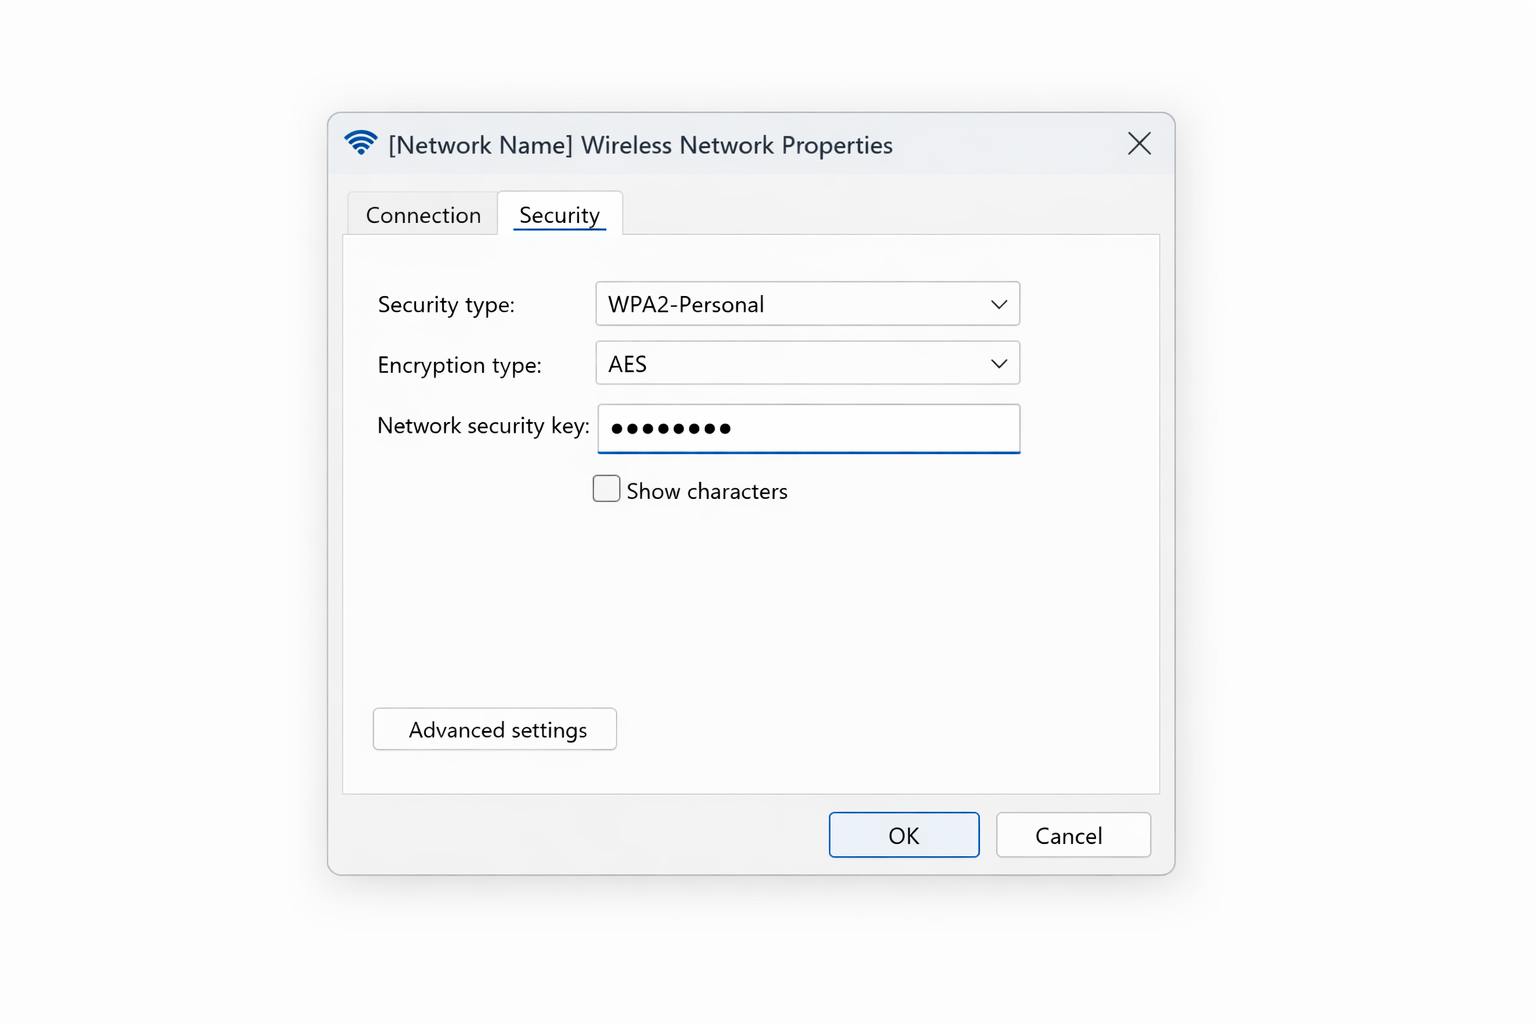
If it shows an Enterprise type, your router’s wireless security mode needs to be changed (see Fix #5 below). If it already shows Personal, continue to Fix #3.
Fix #3: Disable 802.1X authentication on the network adapter
Windows 10 and Windows 11 both expose an 802.1X authentication setting on the network adapter that can be enabled unexpectedly. Turning it off stops Windows from hunting for a certificate that doesn’t exist. Note: if you’re on Windows 10, be aware that consumer editions reached end of support in October 2025, then consider upgrading to Windows 11 or using an LTSC edition to stay protected.
- Press
Windows + R, typencpa.cpl, and press Enter to open Network Connections. - Right-click your Wi-Fi adapter and select Properties.
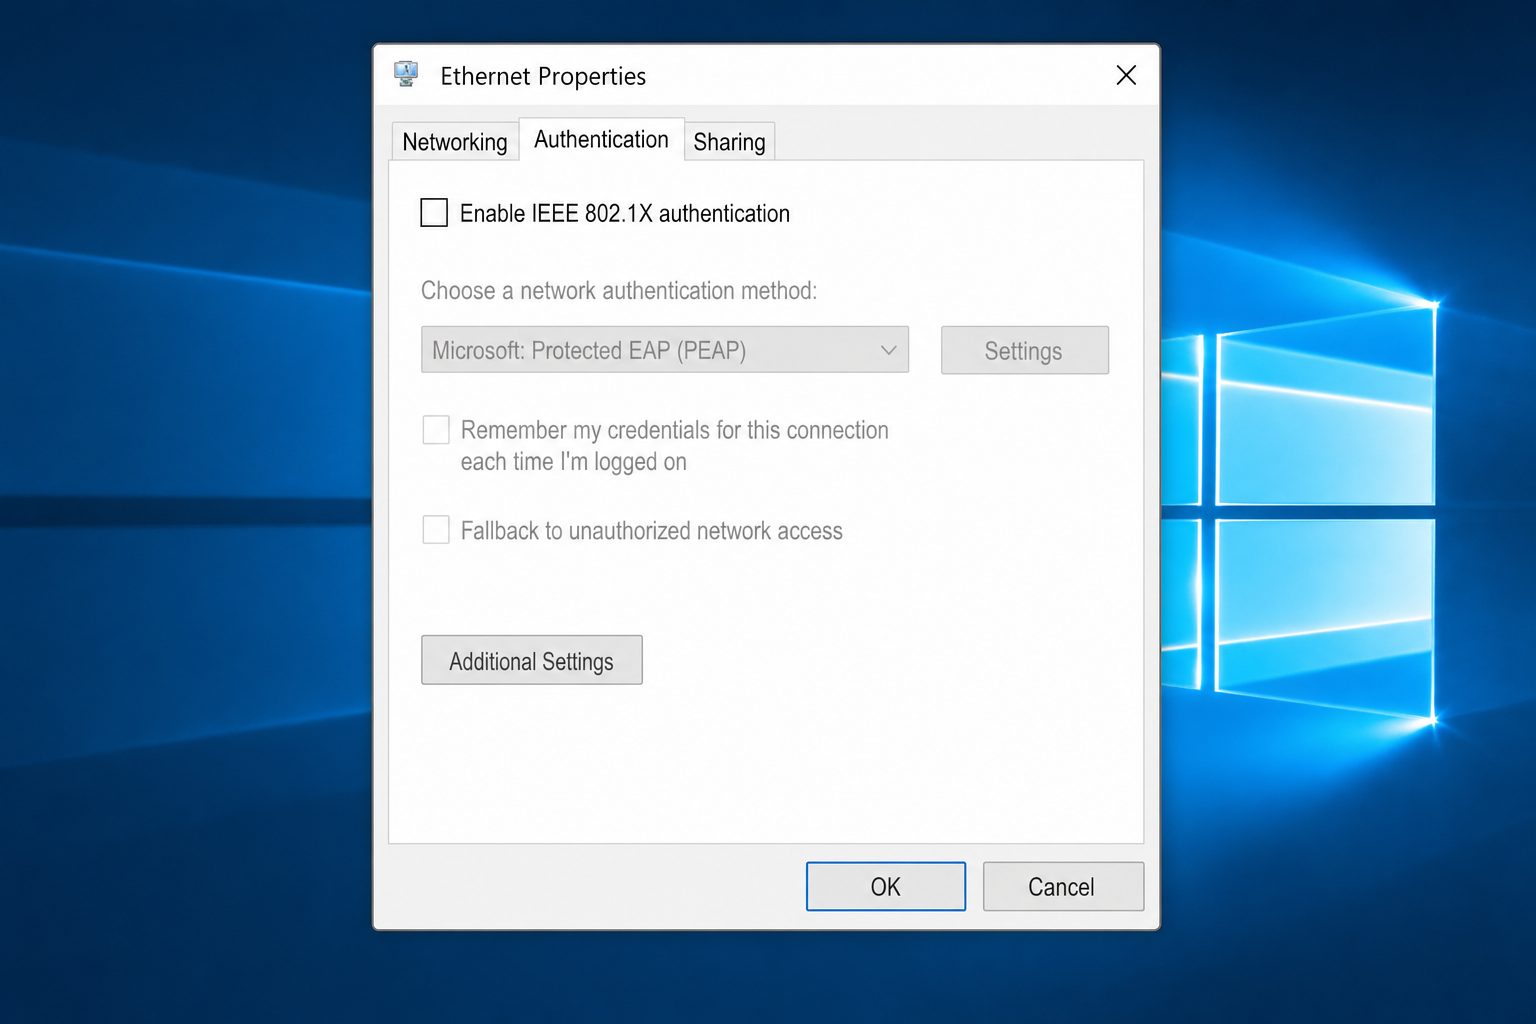
- Click the Authentication tab.
- Uncheck Enable IEEE 802.1X authentication.
- Click OK and try reconnecting.
This is the classic fix for the original error – if the Authentication tab had that box checked on a home network, this is exactly what was causing the certificate error.
Fix #4: Reinstall the Wi-Fi adapter driver
A corrupted or outdated driver can cause Windows to misread the network’s authentication requirements. Reinstalling it from scratch clears that up.
- Press
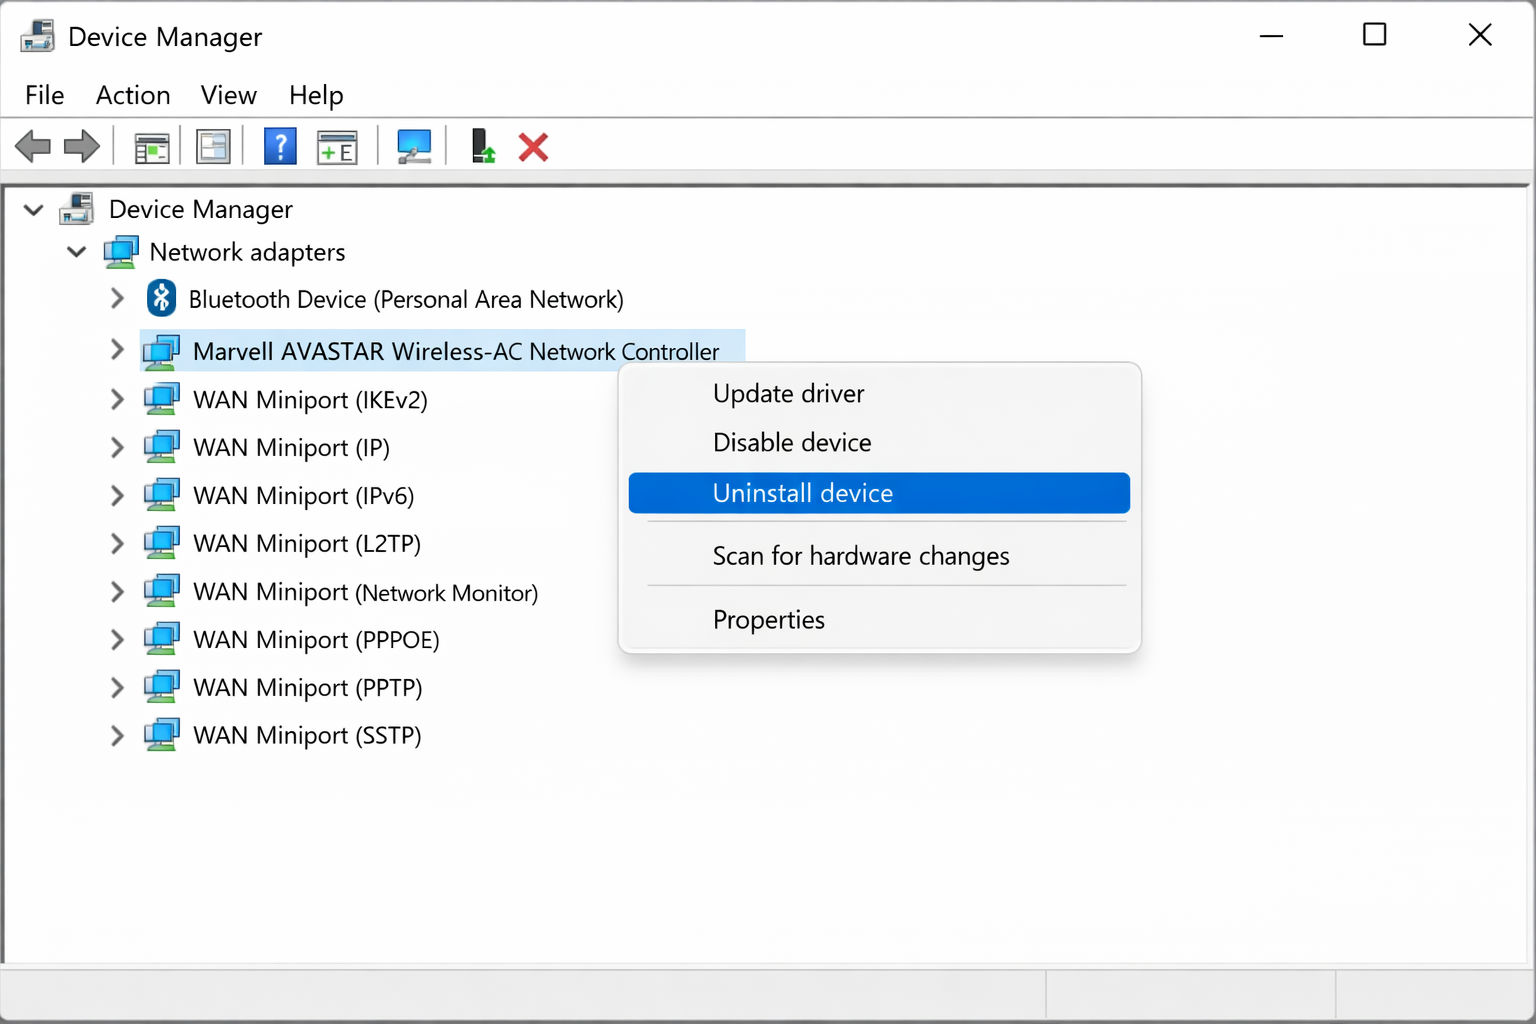
Windows + Xand select Device Manager. - Expand Network adapters and right-click your Wi-Fi adapter.
- Select Uninstall device. Check Attempt to remove the driver for this device if the option appears, then click Uninstall.
- Click Action > Scan for hardware changes. Windows will reinstall the driver automatically.
- Restart your PC, then try reconnecting to the network.
Alternatively, you can delete all saved Wi-Fi profiles at once. Open Command Prompt as administrator and run:
netsh wlan delete profile name="*"This wipes every saved network, so you’ll need to re-enter passphrases for all your Wi-Fi connections afterward.
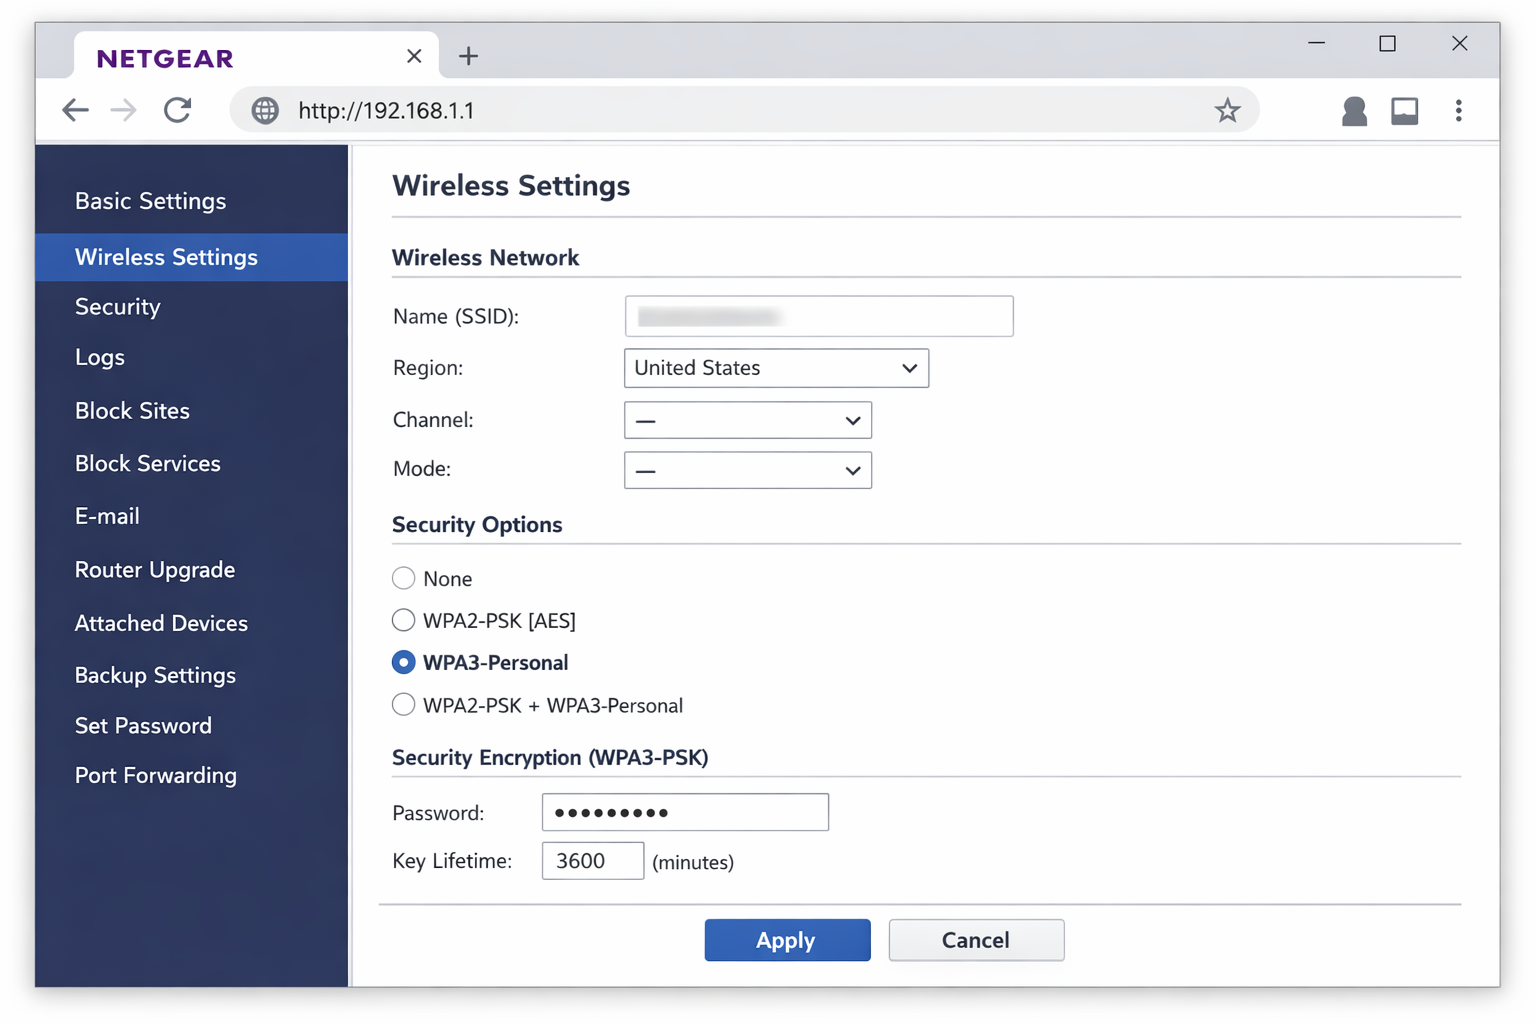
Fix #5: Change your router’s security mode to WPA3-Personal (or WPA2-Personal)
If Fix #2 revealed your router is broadcasting an Enterprise security type, log into the router admin panel and switch it to Personal mode.
- Open a browser and go to your router’s admin page — usually
192.168.1.1or192.168.0.1. Check the label on your router if you’re unsure. - Log in with your admin credentials (often printed on the router label).
- Find the Wireless or Wi-Fi Security settings.
- Set the security mode to WPA3-Personal (preferred) or WPA2-Personal. Avoid WEP — it’s been obsolete for years and is trivially cracked.
- Set a strong passphrase, save the settings, and reconnect your devices.
Many modern routers (including current Linksys models) also have a companion app that makes this change in a few taps without needing to touch the admin panel.
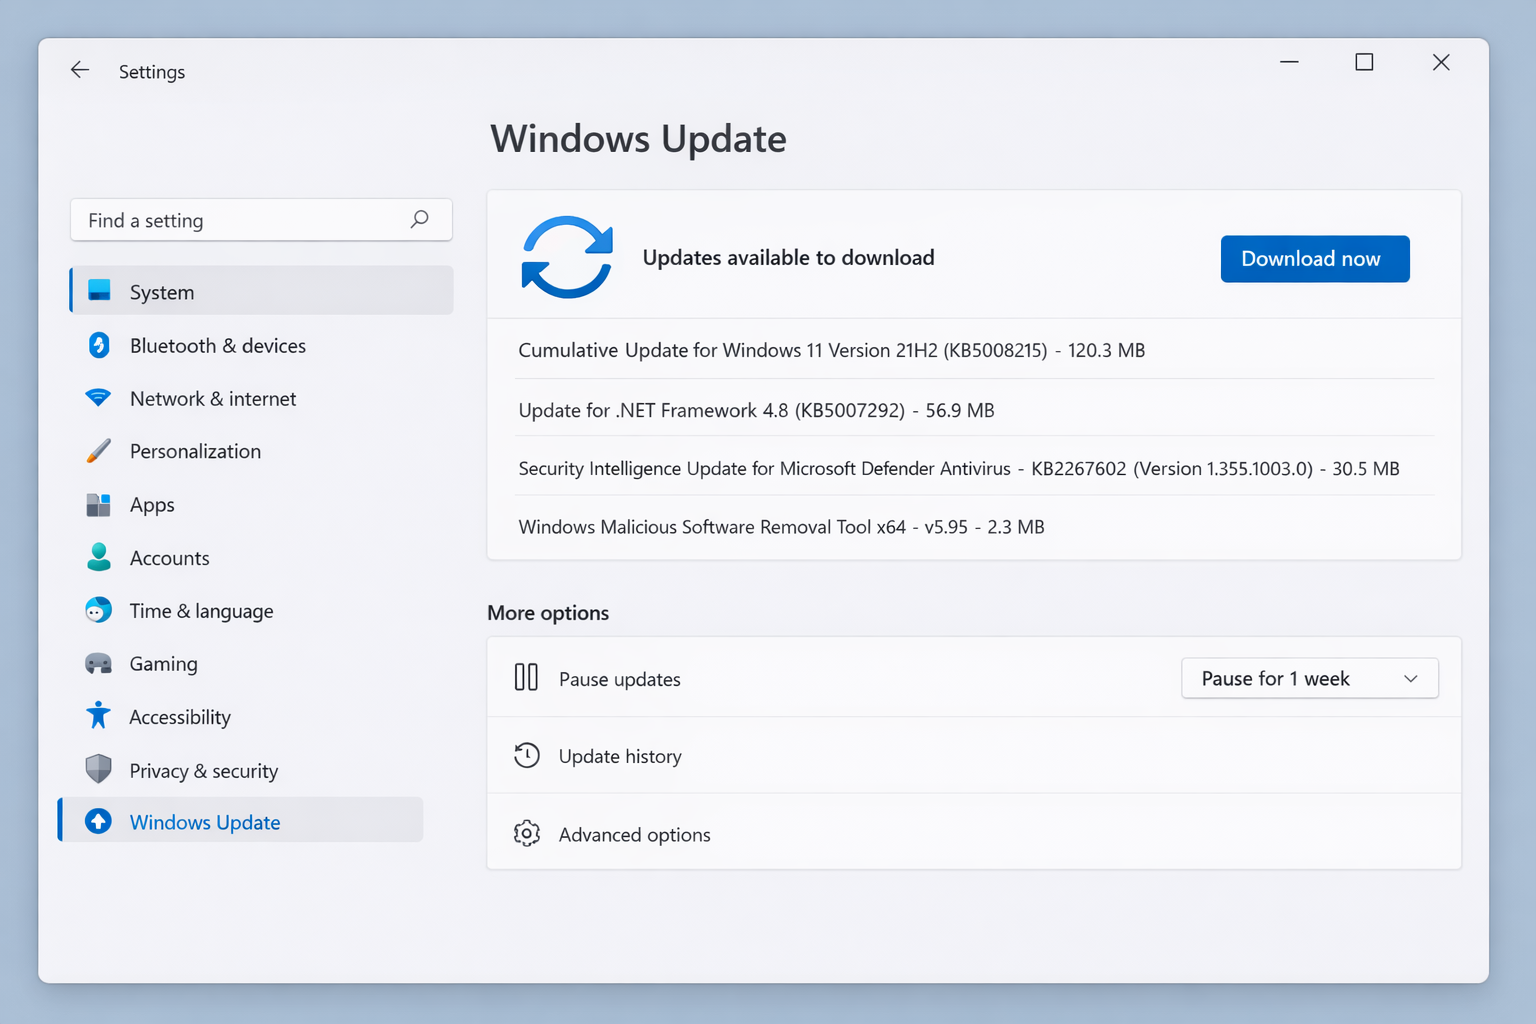
Fix #6: Install pending Windows updates
Some Windows 11 cumulative updates have introduced authentication-related bugs — including failures that look like certificate errors. Installing the latest cumulative update (KB5083769 or later) can resolve these issues.
- Press
Windows + Ito open Settings. - Go to Windows Update and click Check for updates.
- Install any pending updates and restart your PC.
- Try reconnecting to the Wi-Fi network.
When the fixes don’t work
If you’re on a workplace or school network and none of the above fixes help, the certificate your organization requires may have expired or been revoked. Contact your IT department and they’ll need to re-enroll your device or push a new certificate via Intune or Group Policy. Don’t try to manually import certificates from an unknown source.
Conclusion
For home networks, Fix #3 (disabling 802.1X authentication on the adapter) or Fix #1 (forgetting and rejoining) resolves this for most people. If you’re on Windows 11 and the error appeared after a recent update, Fix #6 is the one to try first as cumulative update bugs can cause exactly this kind of authentication failure out of nowhere.