
So here’s an interesting situation I ran into when using Windows 7 connected to both my Ethernet network and my wireless network at home: whenever I would transfer data between my NAS and my machine, Windows 7 would tend to use the wireless network instead of the Ethernet connection! This was annoying because the speed of the transfers was much slower over the wireless connection for obvious reasons.
I was kind of surprised because I figured Windows would automatically figure out that the Ethernet connection was faster for this type of transfer and therefore switch over. However, that was not the case. So then I couldn’t help but try to figure out a way to force Windows to use the wired connection over the wireless one.
In this article, I’ll show you two methods that you can use to accomplish this. Note that it may be best to combine both methods to really make sure the proper connection is being used. One method involves changing the network adapter bindings and the other method involves changing the metric on each network connection. By default, Windows uses the connection with the lowest metric value. For whatever reason though, the Ethernet connection may not end up with a lower metric value, so you can manually change it.
Method 1 – Change Network Adapter Bindings
To change the adapter bindings and order, first click on Start and then type in network connections. From the list, click on View network connections.

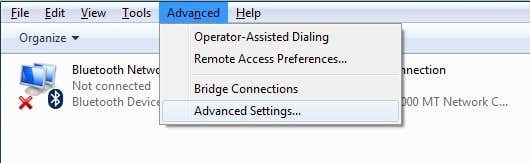
In the Network Connections dialog, you will need to press the ALT key on your keyboard to get the menu bar to appear. Then click on Advanced and click on Advanced Settings.
Now you will see the list of network connections listed in the connections box.
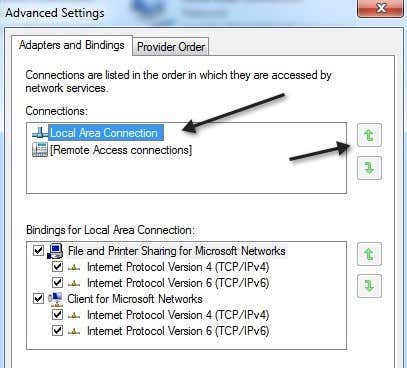
In my case, you don’t see the wireless network because this is running in a virtual machine, however, normally you would see Local Area Connection and Wireless Network Connection. You want to move Local Area Connection to the top using the green arrows. This will move the wired connection higher up in the order so that Windows 7 will access the network using Ethernet first, then Wireless. That’s step one. The second method is also recommended to ensure Windows 7 is forcefully using the LAN connection.
Method 2 – Change Network Metric Value
You can read a little bit about how metric values work when accessing network resources here:
http://support.microsoft.com/?id=299540
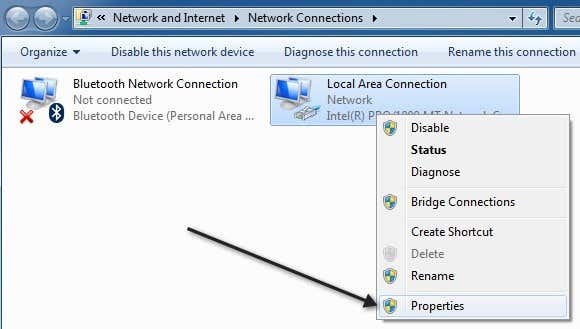
In order to change the values, you need to go to Network Connections again, but this time right-click on the network you want to change the metric value for and choose Properties.
Now click on Internet Protocol Version 4 (TCP/IPv4) and click on Properties.
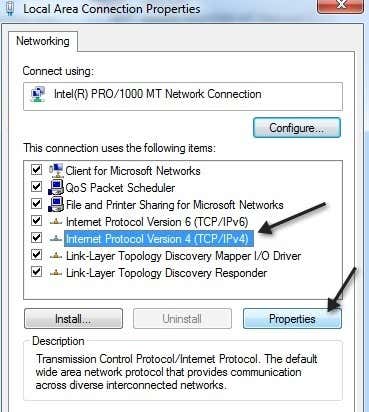
Then click on the Advanced button at the bottom right:

Lastly, on the IP Settings dialog, go ahead and uncheck the Automatic metric box and then type in a value yourself.
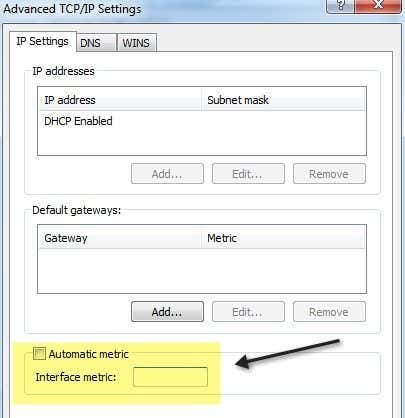
For the wired connection, you want a lower value and it’s best to start with 10. At least that’s the standard Microsoft uses. For the wireless connection, you can type in a higher value like 25 or 100. This will ensure that in the routing table, the “faster” network route is now the wired connection instead of the wireless connection.
Like I said before, it’s best to use both of these methods to fully ensure you are forcing Windows to use one connection over another. If you have any questions, feel free to post a comment. Enjoy!