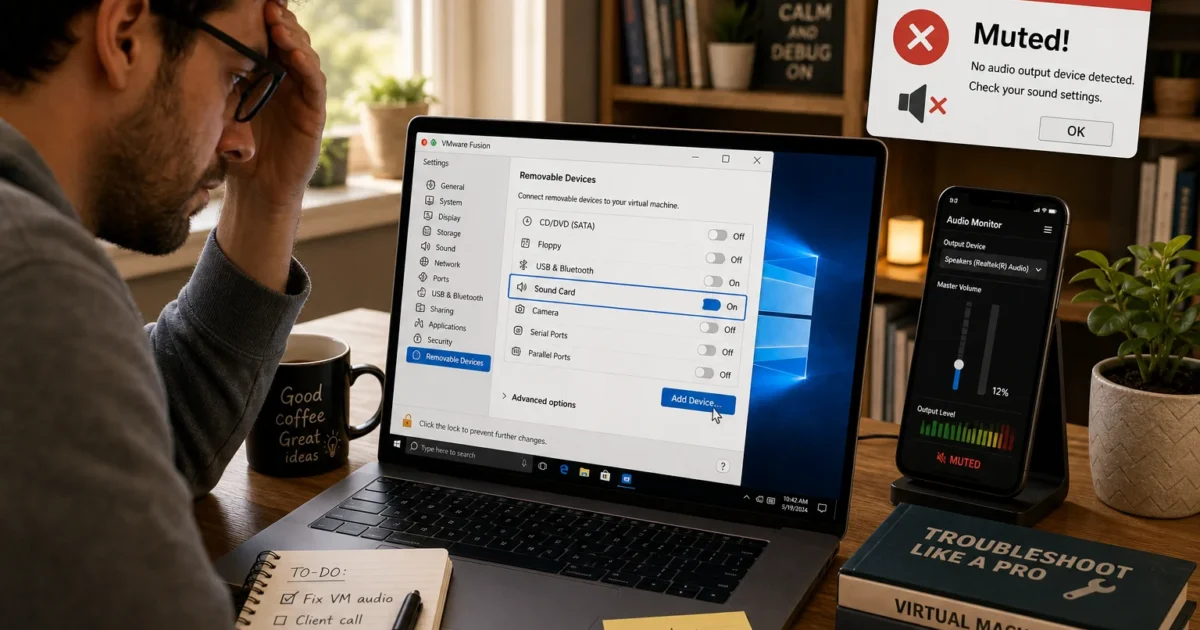
Your Windows VM in VMware Fusion is silent, or the audio is crackling, lagging, or distorted, and nothing in the obvious places looks wrong. The problem usually traces back to a missing virtual sound card, a misconfigured .vmx file, or an audio driver issue inside Windows.
Fix #1: Enable the sound card in Fusion settings
Fusion won’t route audio to a VM that has no virtual sound card attached, or has it disabled. This takes about 30 seconds to check.
- Shut down the Windows VM completely. Don’t just suspend it; power it off.
- In VMware Fusion, select the VM in the Virtual Machine Library.
- From the macOS menu bar, choose Virtual Machine > Settings.
- Look for Sound Card under Removable Devices or Hardware.
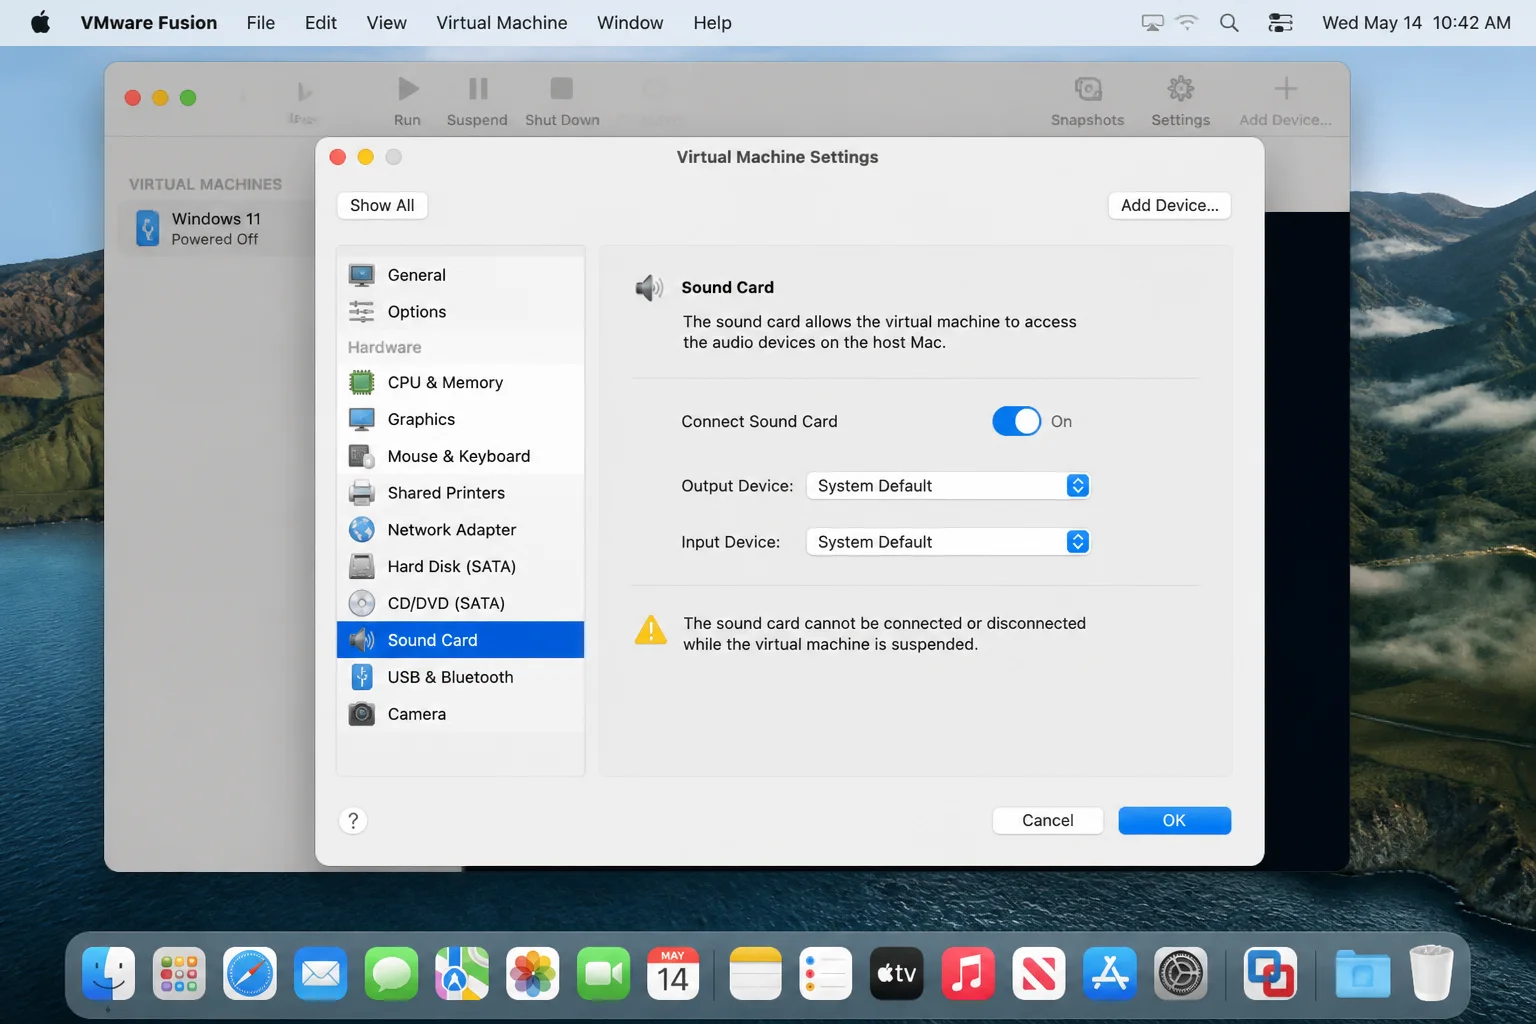
- If Sound Card is listed, confirm the toggle is set to On.
- If there’s no Sound Card entry at all, click Add Device (or the + button), choose Sound Card, and add it.
Power the VM back on and test audio. Still silent? Keep going.
Fix #2: Check macOS audio output and reset PRAM (Intel Macs)
Fusion passes audio through the Mac host. If macOS is muted or pointed at the wrong output device, the VM gets silence too.
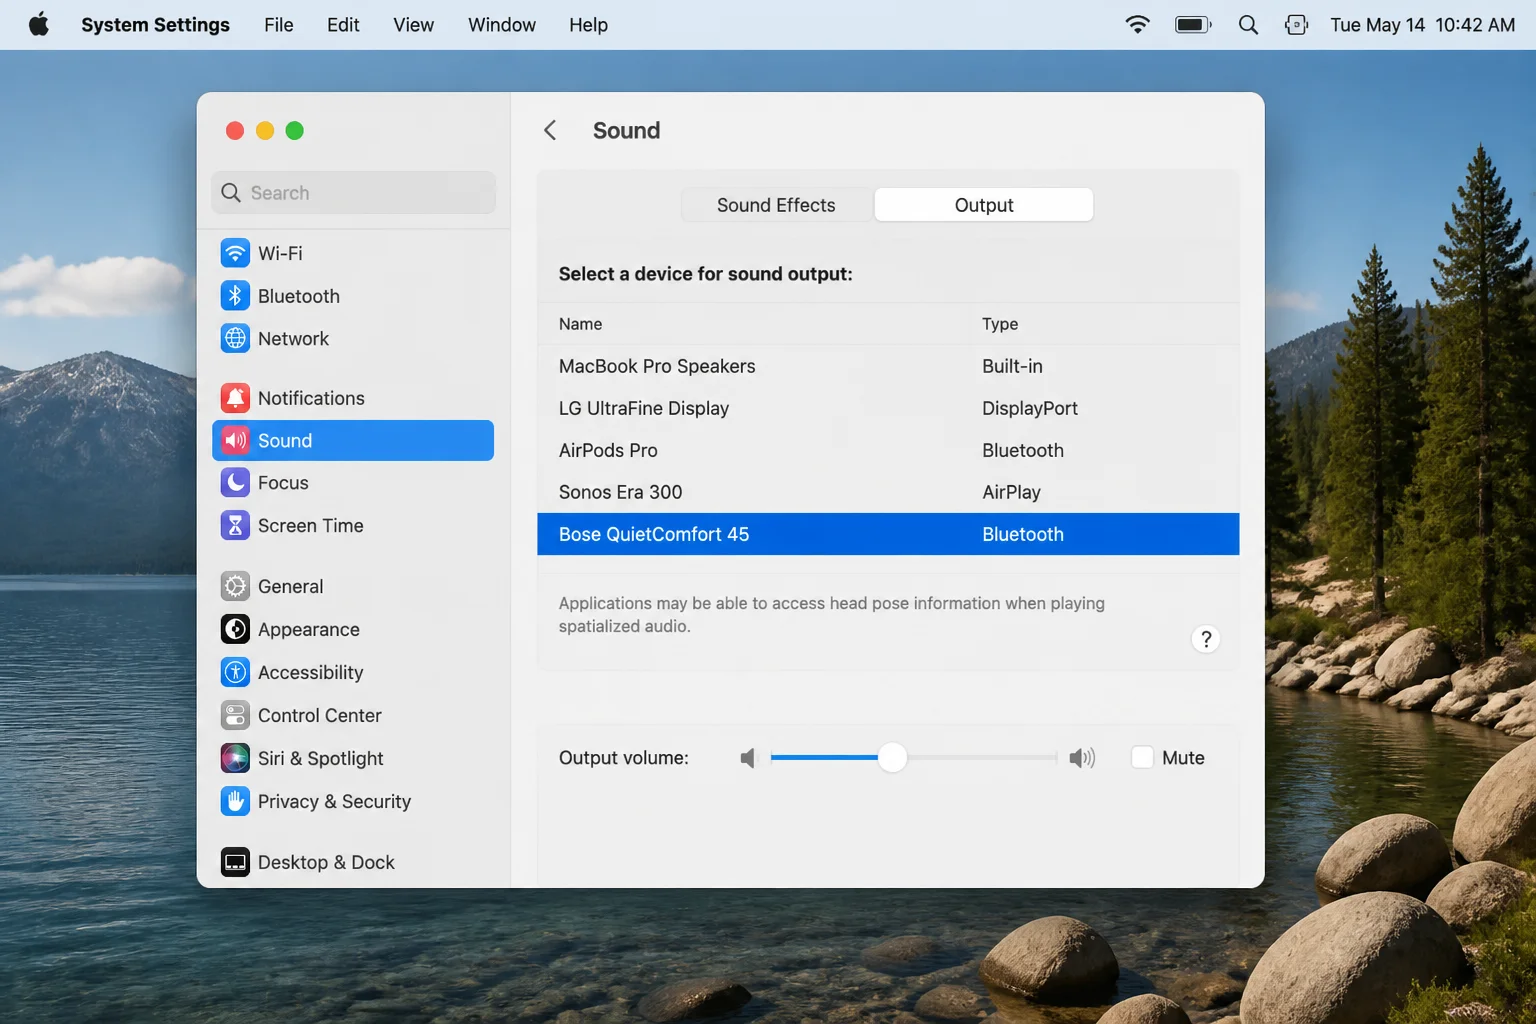
- Open System Settings on your Mac and go to Sound.
- Under Output, confirm the correct device is selected: built-in speakers, headphones, USB DAC, or whatever you’re using.
- Make sure the output volume is up and not muted.
If macOS audio looks fine but Fusion previously showed a “Sound will be disconnected” warning, reset your Mac’s low-level audio state. On Intel Macs:
- Quit Fusion completely.
- Restart your Mac and immediately hold Command + Option + P + R until the Apple logo appears twice.
- Let macOS boot normally, relaunch Fusion, and test the VM.
On Apple-silicon (M-series) Macs, this kind of reset works through Recovery Mode rather than a startup key combination.
Fix #3: Check the Windows playback device and update audio drivers
Windows might see the virtual sound card but route audio to the wrong output, or the driver itself is corrupted.
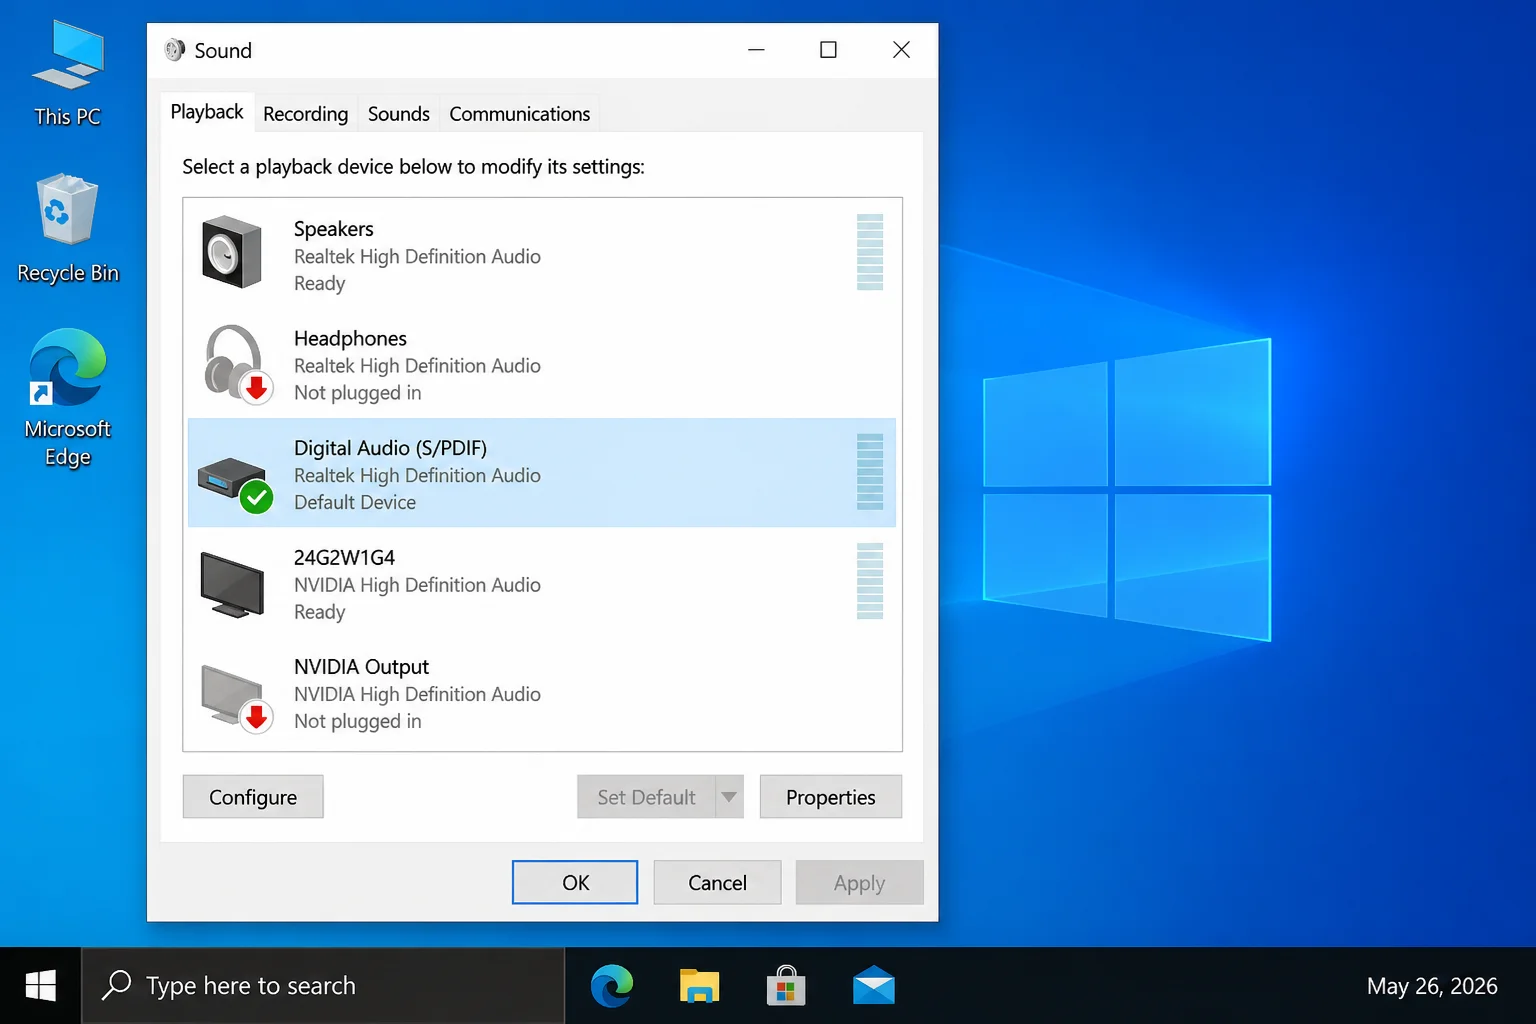
- Inside the Windows VM, open Settings > System > Sound (Windows 10/11) or Control Panel > Sound (Windows 7).
- Make sure a device such as Speakers or High Definition Audio Device is present and set as the Default device.
- Check the volume mixer and confirm the app you’re testing isn’t individually muted.
If the playback device looks right but there’s still no audio, update the driver:
- Right-click This PC (or Computer on Windows 7) and choose Manage, then open Device Manager.
- Expand Sound, video and game controllers. Depending on your guest OS:
– Windows XP: right-click Creative AudioPCI (ES1371, ES1373) (WDM) and choose Update driver – Windows 7 and later: right-click High Definition Audio Device and choose Update driver
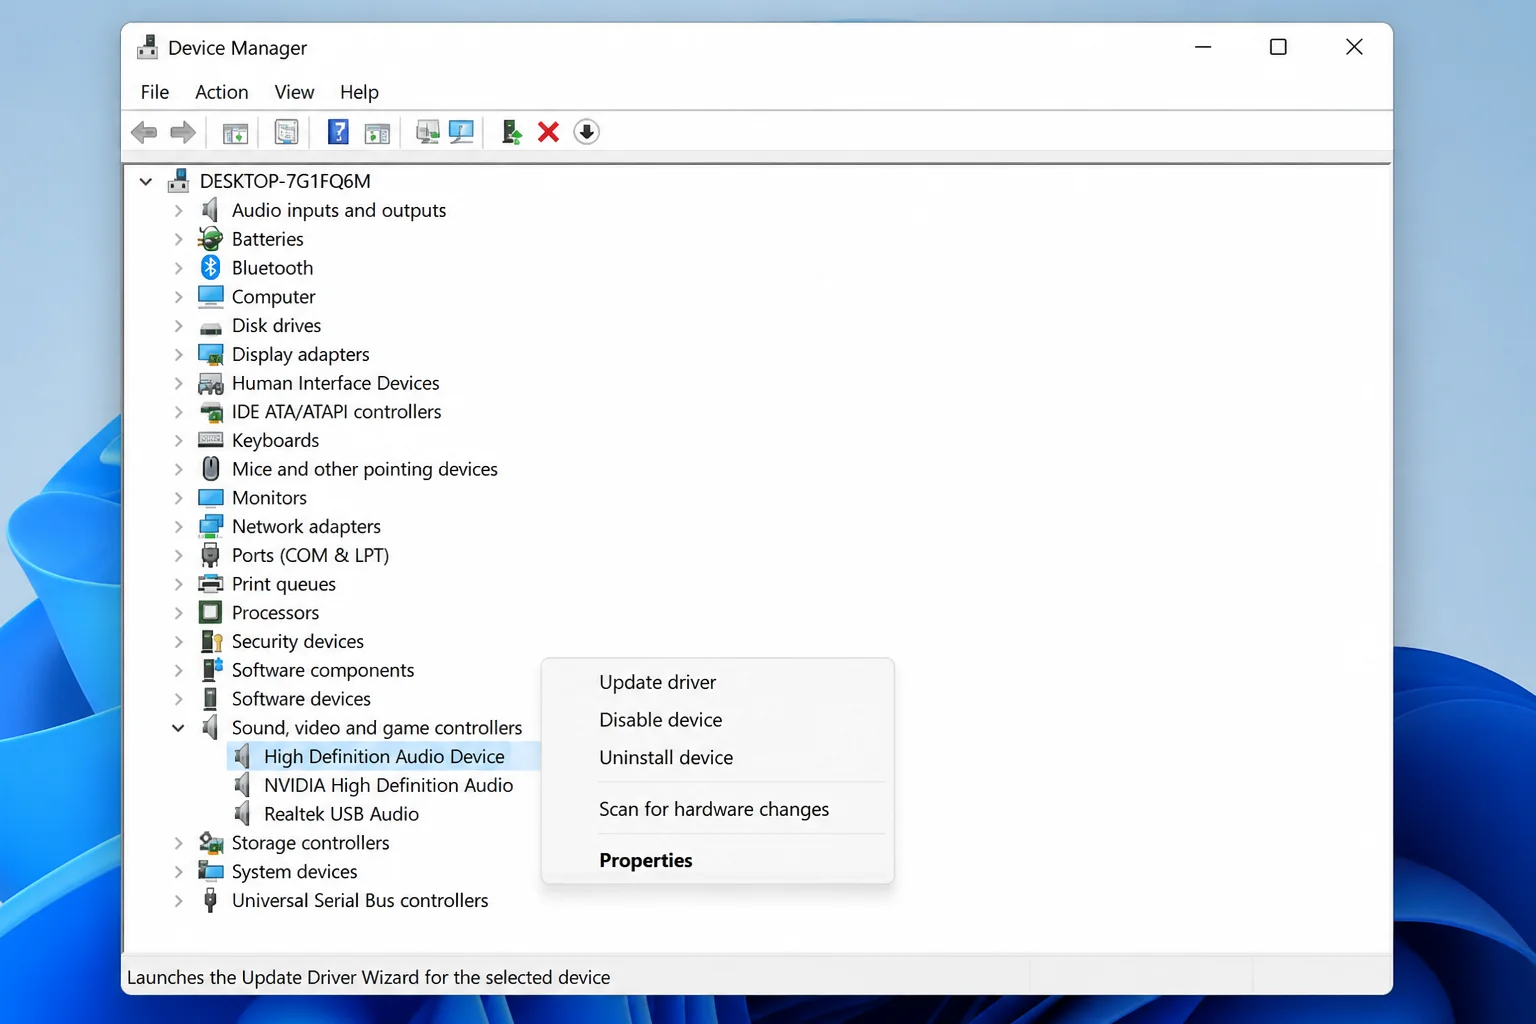
- Select Search automatically for updated driver software.
- If the driver has a yellow warning icon, choose Uninstall device instead, reboot the VM, and let Windows reinstall it automatically.
Fix #4: Remove and re-add the sound card, then reinstall VMware Tools
A virtual sound card stuck in a bad state won’t respond to toggling it on and off. Removing and re-adding the device gives Fusion a clean start.
- Shut down the Windows VM.
- Open Virtual Machine > Settings.
- Select Sound Card and click the minus (–) button or Remove to delete it.
- Click Add Device, choose Sound Card, and add it back.
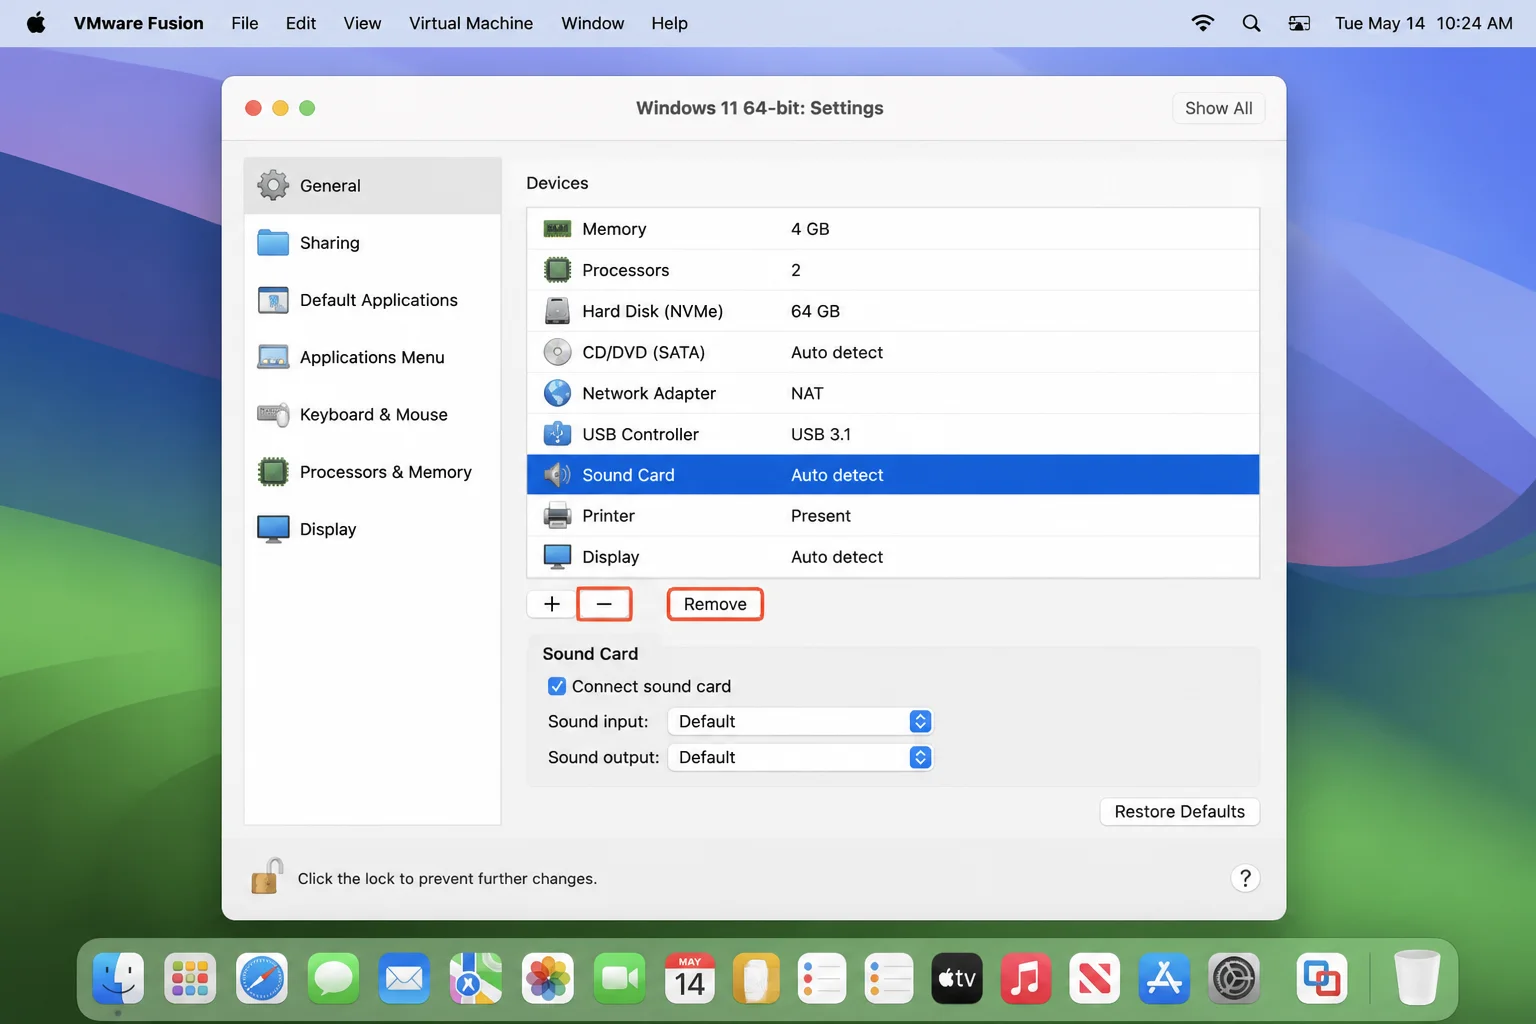
- Start the VM.
- From Fusion’s menu, choose Virtual Machine > Reinstall VMware Tools.
- Follow the installer inside Windows and reboot when it finishes.
VMware Tools includes the audio bridge between Fusion and Windows. A fresh install often resolves cases where Device Manager reports the sound device as “working correctly” but nothing comes out.
Fix #5: Edit the .vmx configuration file
If Fusion’s UI shows a sound card but audio still fails, the .vmx file may have conflicting entries overriding what the settings dialog shows.
- Power off the VM.
- In the Virtual Machine Library, hold Option, right-click the VM, and choose Open Config File in Editor.
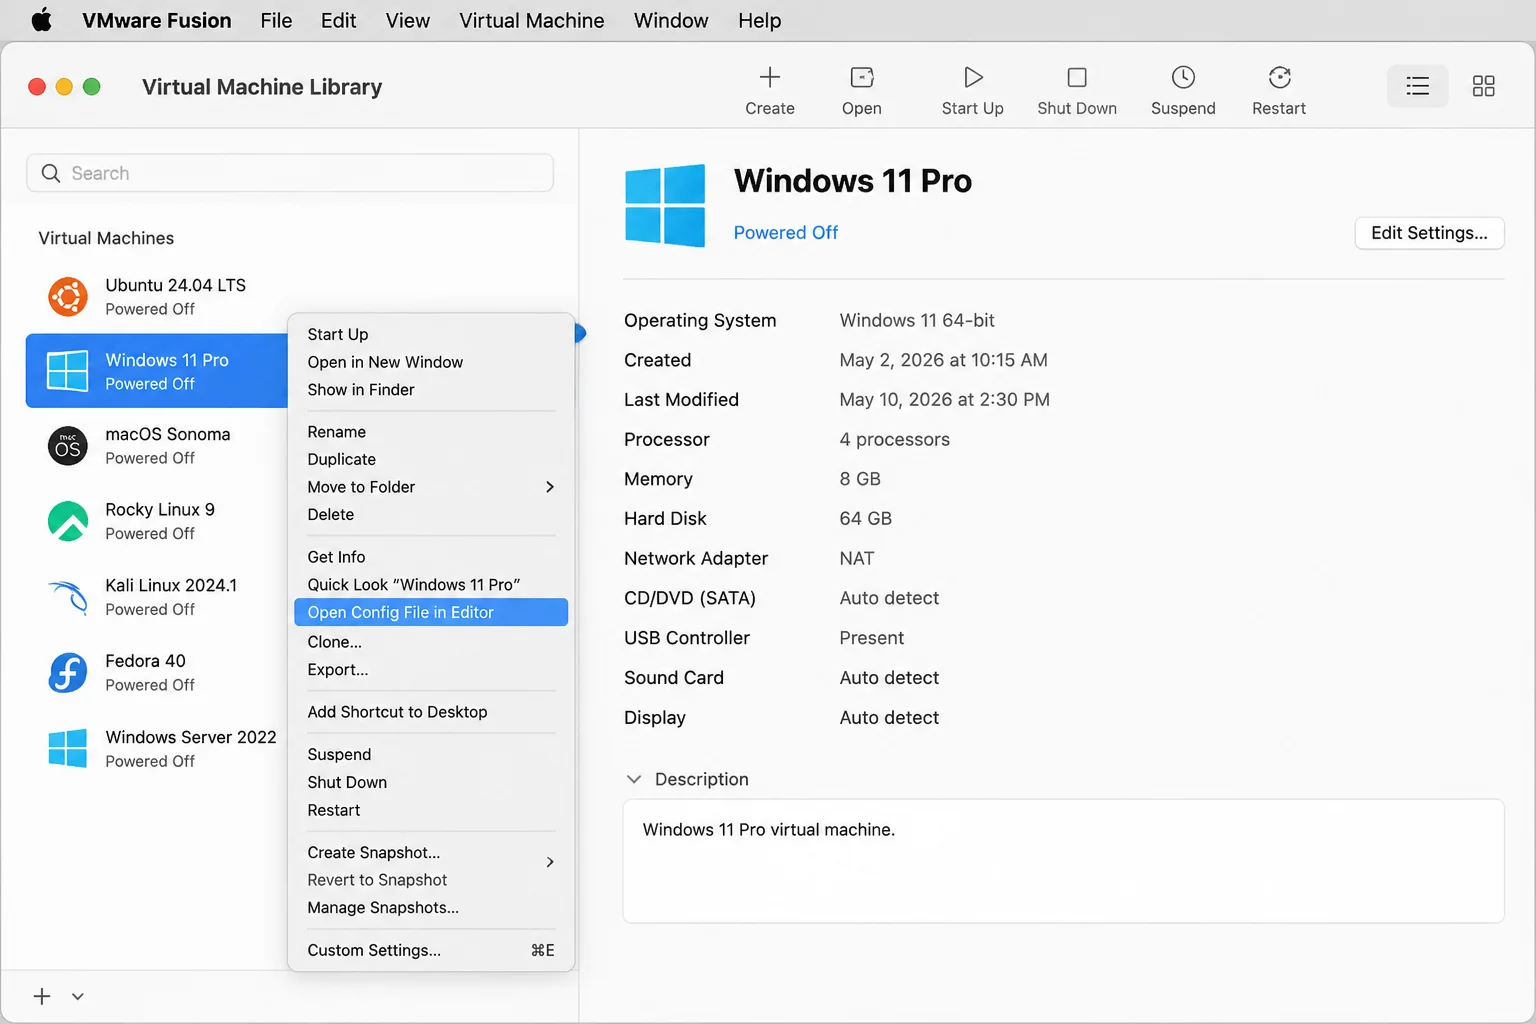
- Confirm these three entries exist with exactly these values:
sound.present = "TRUE"
sound.fileName = "-1"
sound.autodetect = "TRUE"- If any are missing, add them.
- Delete any
sound.virtualdevlines you find, such as:
sound.virtualdev = "sb16"
sound.virtualdev = "es1371"
sound.virtualdev = "hdaudio"
Forcing a specific virtual device type conflicts with Fusion’s automatic detection and silences audio on modern macOS and Fusion versions.
- Save the file and restart the VM.
Fix #6: Fix crackling, distorted, or lagging audio
Crackling and lag point to a different root cause than silence, usually a timing issue or a Windows security feature interfering with the virtual audio stack.
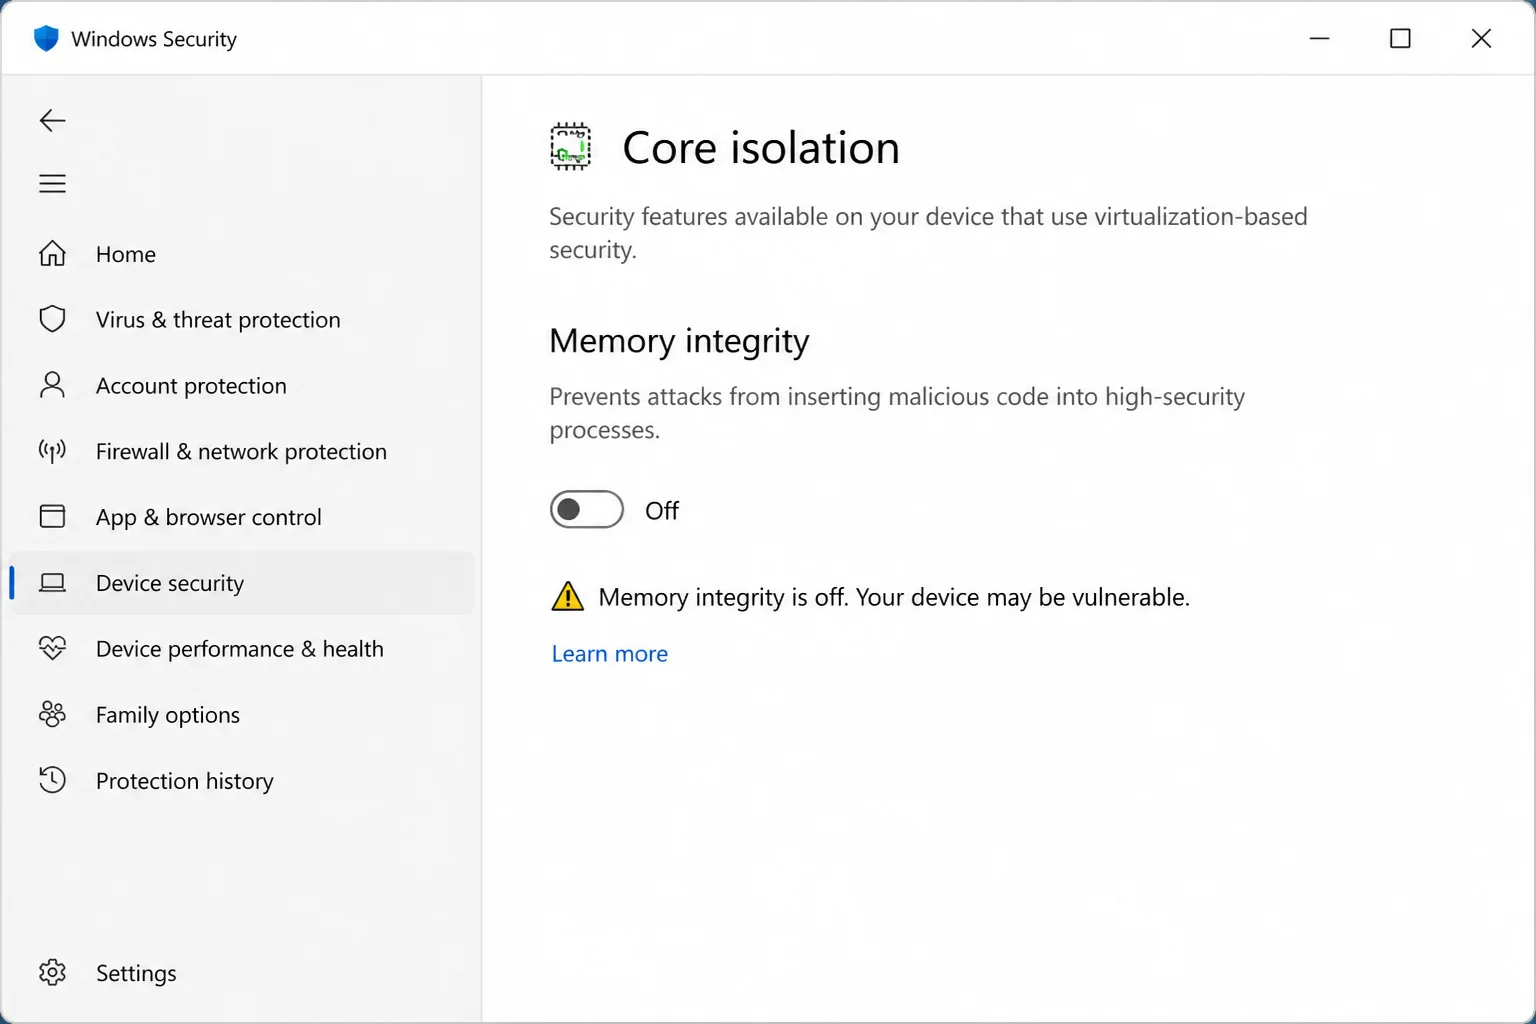
Windows 10/11 guests: disable Virtualization-Based Security (VBS)
VBS can disrupt audio timing inside VMs and cause severe crackling. Turning it off often resolves distortion without any other changes.
- Inside the Windows VM, open Windows Security > Device Security > Core isolation details.
- Turn off Memory integrity.
- Reboot the VM and test audio.
You can find more information about disabling Hyper-V and its relation to virtualization-based security features. Additionally, ensuring your Windows is up-to-date and secure is crucial; you can learn more about setting up Windows 11 privacy and security settings.
Windows XP and legacy guests: use VMAudioBackHost
Crackling in XP VMs almost always comes from timer issues at the host level. The community tool VMAudioBackHost runs on the Mac host and smooths audio playback for XP and older Windows builds. VMware Tools must be installed in the guest for it to work correctly.
General latency and stuttering tips
- Keep VMware Fusion updated; audio handling improves across releases.
- Don’t over-allocate CPU and RAM to the VM; high host interrupt rates cause audio glitches even on fast hardware.
- If latency appeared after a VMware Tools update, reinstalling Tools (Fix #4 above) often clears it.
- For more on optimizing your system, consider optimizing your Windows 11 PC for gaming, which can also help with general performance and latency issues.
Conclusion
Fix #1, enabling the virtual sound card in Fusion settings, resolves the problem in most “no audio” cases, especially after a fresh VM setup. If the sound card was already on, the .vmx edit in Fix #5 handles most of what’s left. Persistent crackling in a Windows XP VM is almost always a timer issue; VMAudioBackHost is the most reliable path forward there. For Windows 10/11 guests, disabling VBS in Fix #6 takes care of distortion that survives everything else. You might also want to upgrade to Windows 11 if you’re on an older version, as newer versions often have better support and fewer issues with virtualization. For troubleshooting common audio issues in Windows, you can refer to this guide. Additionally, learning how to record a PowerPoint presentation with narration can be useful for creating tutorials or presentations, and ensuring your audio settings are correct is key.
For external resources, you can check this article on sound not working in Windows virtual machines, or visit Microsoft’s support page for more information on Windows VMs and audio issues.