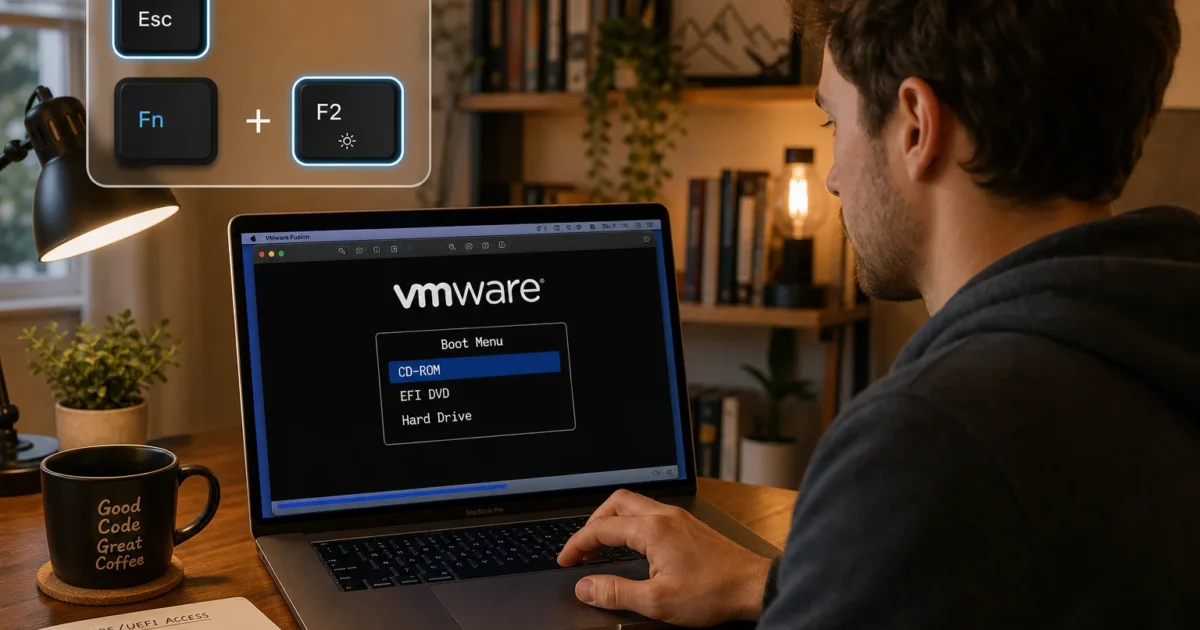
The VMware Fusion BIOS or UEFI screen flashes past in under a second. Pressing F2 before it disappears is nearly impossible. On a Mac keyboard, F2 controls screen brightness by default, so the key never reaches the VM anyway.
Fix #1: Press Esc at the splash screen for a boot menu
No file editing required. Esc opens a boot device picker in most VMware firmware configurations, enough if you just need to change what the VM boots from this once.
- Shut down the VM completely. Suspending it won’t work here.
- Start the VM from VMware Fusion.
- The instant the VMware splash screen appears, click inside the VM window to give it keyboard focus.
- Press Esc.
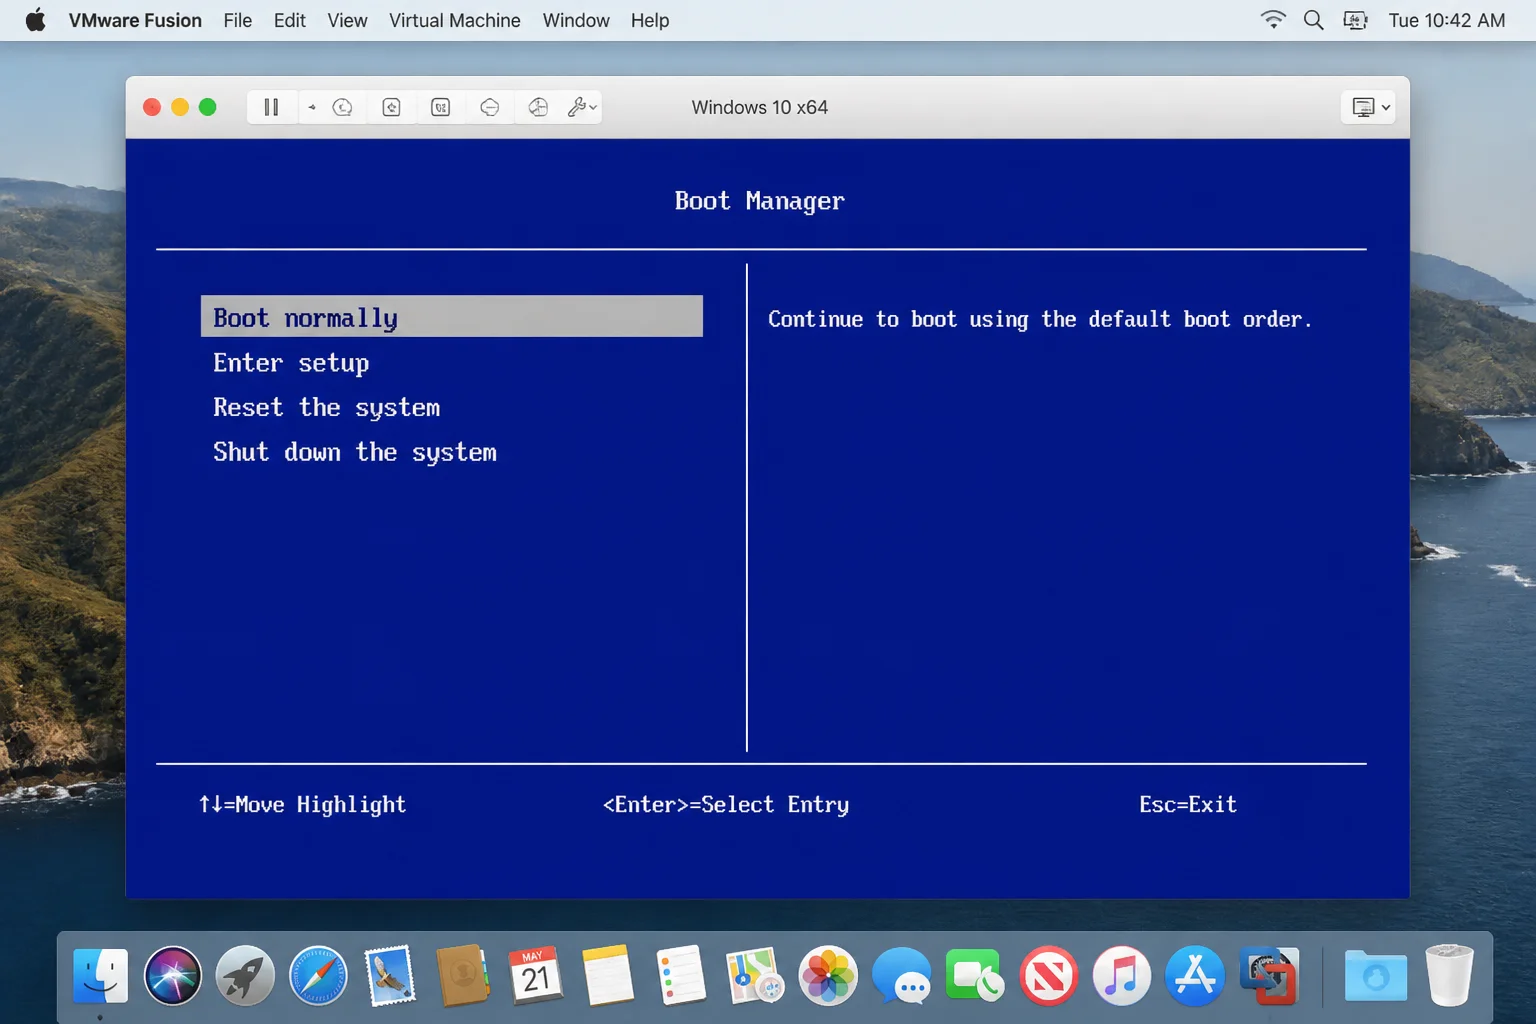
A boot device menu appears. Pick CD-ROM, EFI DVD, Hard Drive, or whichever device you need. This isn’t the full BIOS or UEFI settings panel, just the boot picker. If the splash still vanishes before you can react, use Fix #2 instead.
Mac keyboard note: F2 on Apple keyboards raises screen brightness rather than sending the keypress to the VM. Hold Fn + F2 to send the raw F2 key to VMware while the VM window has focus. To flip this permanently, go to System Settings > Keyboard and enable “Use F1, F2, etc. as standard function keys”. F-keys then route to the active app by default, and media controls require Fn.
Fix #2: Force firmware setup on the next boot
One line in the .vmx file sends the VM straight into BIOS or UEFI setup on the next start. No key timing, no Fn combos, no racing the splash screen.
- Shut down the VM.
- Open Finder and navigate to
~/Documents/Virtual Machines/, the typical default location. If you chose a custom location when creating the VM, open that folder instead. - Open your VM’s folder and right-click the
.vmxfile inside. - Open it with TextEdit.
- Add this line at the bottom of the file:
bios.forceSetupOnce = "TRUE"- Save and close TextEdit.
- Start the VM.
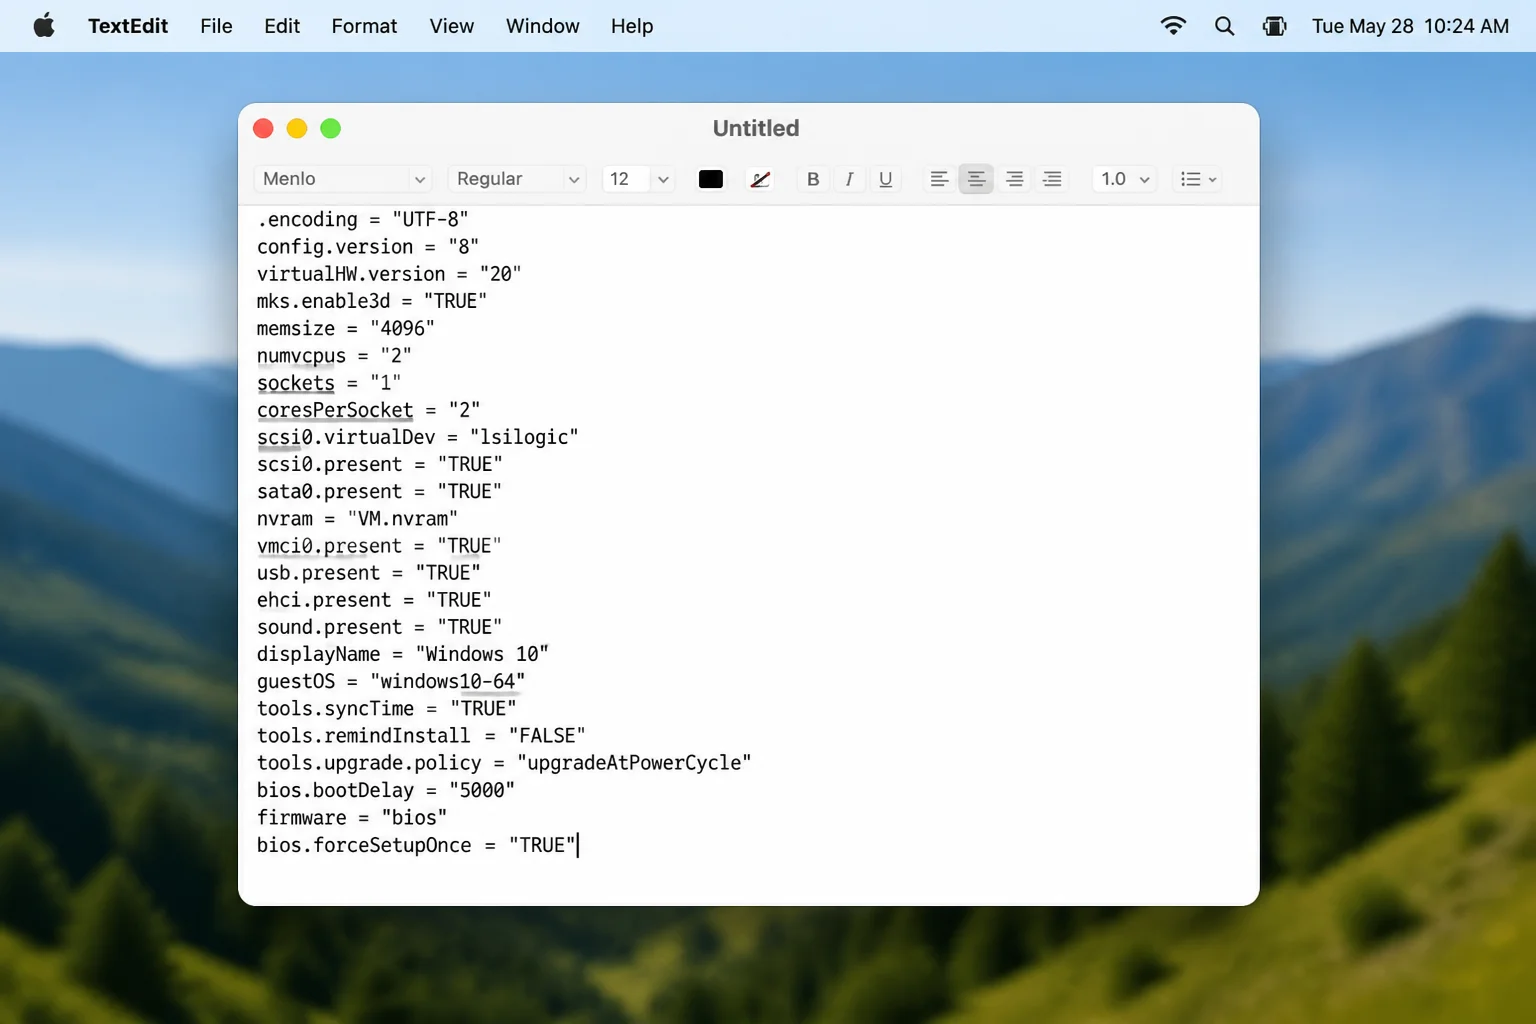
The VM boots directly into firmware setup. Once you exit and restart, VMware resets that value to "FALSE" automatically. It won’t trigger again unless you add it back.
Fix #3: Add a permanent boot delay to the .vmx file
If you need regular access to firmware settings, a boot delay gives you a proper window to press the entry key each time. No need to re-edit the .vmx file before every session.
- Shut down the VM.
- Open the VM’s
.vmxfile in TextEdit (same steps as Fix #2). - Add this line at the bottom:
bios.bootDelay = "3000"- Save the file and start the VM.
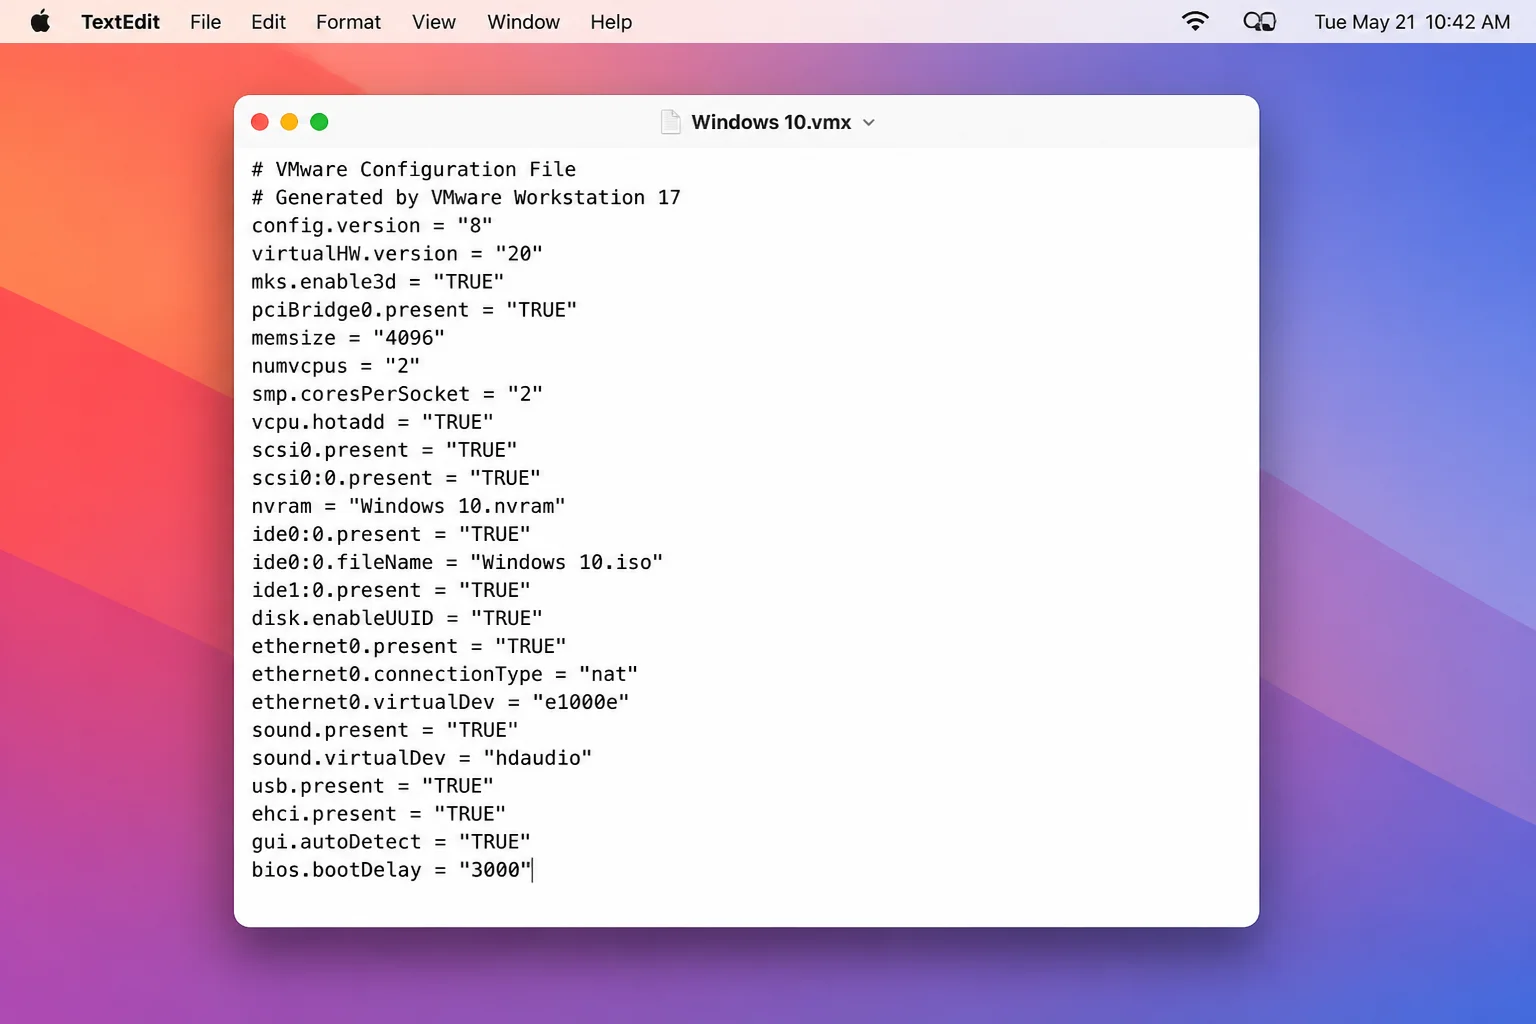
The splash screen now pauses for 3 full seconds. Click inside the VM window, then press F2 (or Fn + F2 on a Mac) or Esc during that window. Raise 3000 to 5000 or 7000 if 3 seconds isn’t enough. Unlike bios.forceSetupOnce, this delay runs on every boot. Remove the line once you no longer need it.
Fix #4: Boot from an ISO via Fusion’s settings instead
If the goal is to boot from a Windows installer, recovery environment, or live disc, and you don’t need to change any other firmware settings, you can sidestep BIOS and UEFI entirely.
- Shut down the VM.
- In Fusion, open Virtual Machine > Settings > CD/DVD.
- Check Connect CD/DVD drive.
- Select your ISO file. Don’t use “Auto-detect.”
- Start the VM.
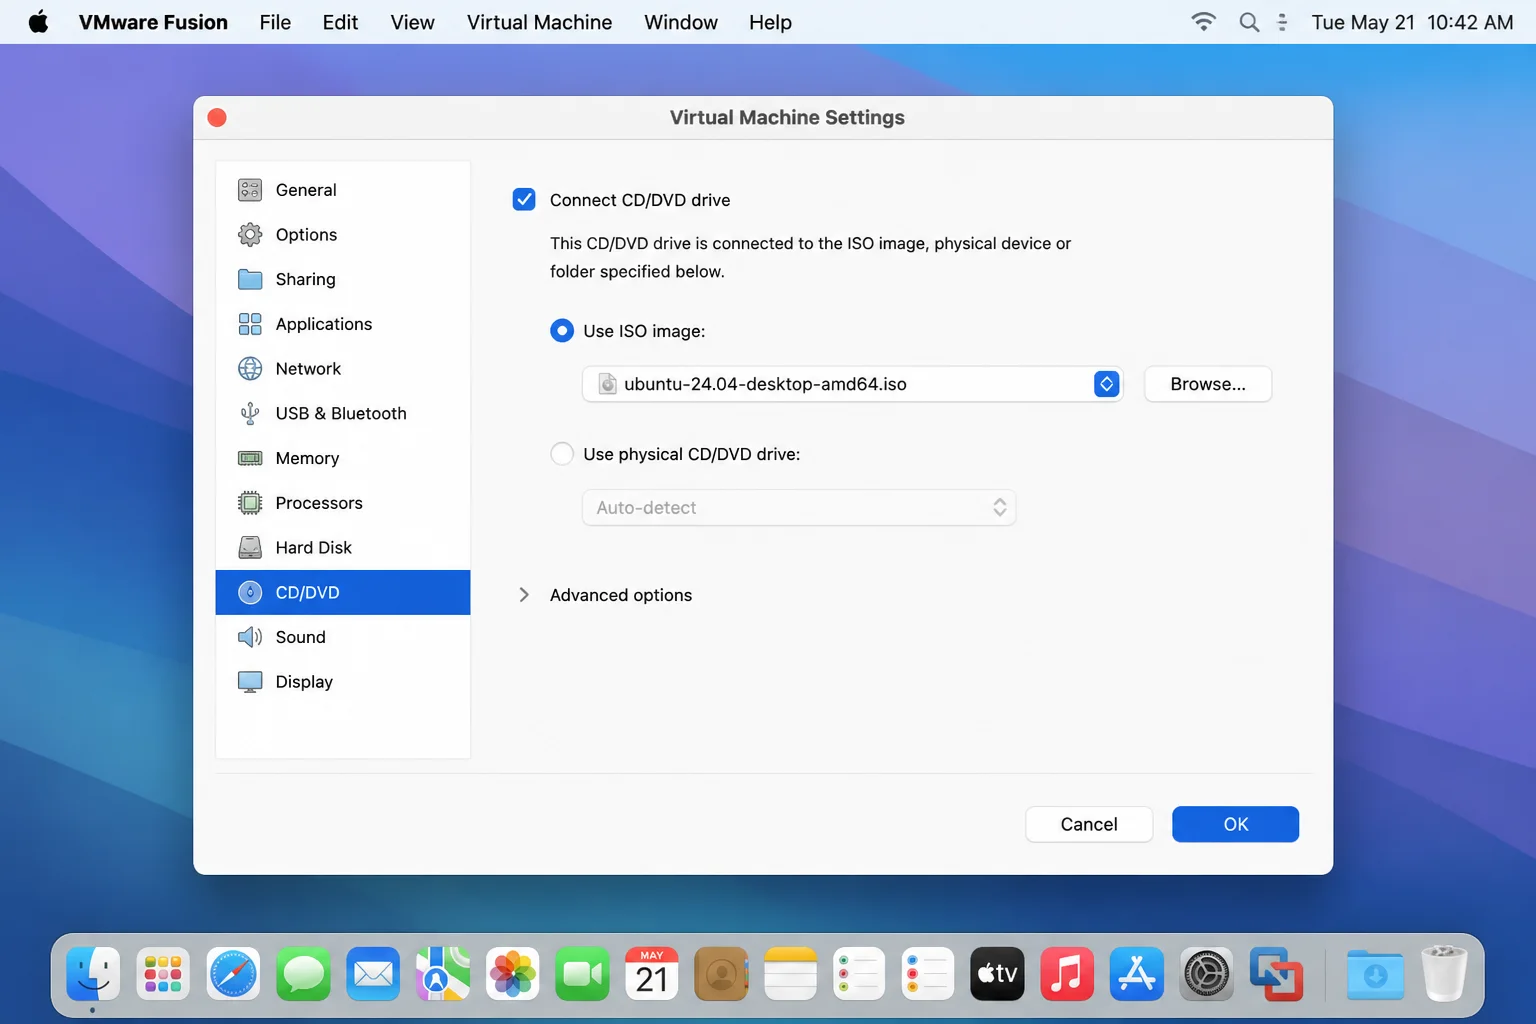
The VM boots from the ISO on the next start, no firmware interaction needed. When you’re done, go back to CD/DVD settings and uncheck Connect CD/DVD drive so the VM returns to its normal boot device.
If the Boot Order Is Greyed Out Inside Firmware
If you get into BIOS or UEFI but can’t edit the boot order because the options are locked, there’s likely a bios.bootOrder line in the .vmx file overriding the firmware UI.
- Shut down the VM.
- Open the
.vmxfile in TextEdit. - Find and delete this line if it’s there:
bios.bootOrder = "CDROM"- Save the file and restart into BIOS.
The boot device list should be fully editable after that.
Conclusion
Fix #2 (bios.forceSetupOnce = "TRUE") is the right call for a one-time firmware visit. One edit, one boot, done. For regular access, Fix #3 (bios.bootDelay = "3000") is cleaner long-term. Windows 10 and 11 guests in VMware Fusion default to UEFI rather than legacy BIOS, but all three .vmx fixes work the same either way. For more information on VMware Fusion firmware, visit the Broadcom community forum.