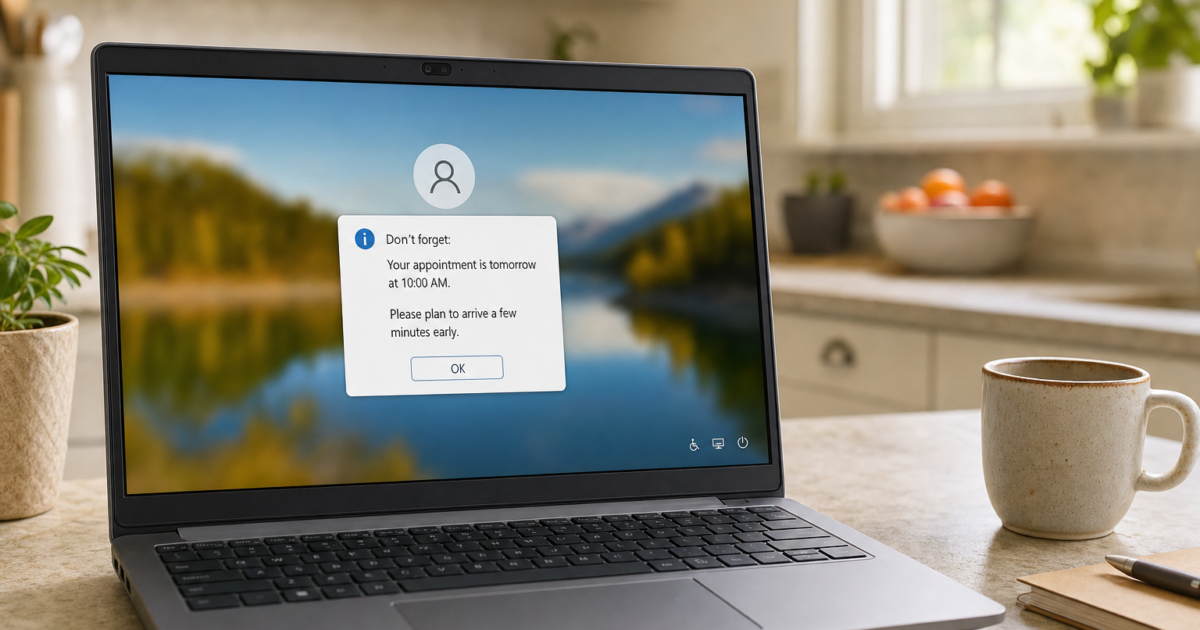
Windows lets you display a custom message on the logon screen that every user must dismiss before signing in, handy for acceptable-use notices, household reminders, or basic legal banners. You can set it up in under two minutes using Local Security Policy (Pro and higher) or Registry Editor (all editions, including Home).
Note: This message is purely informational. Clicking OK dismisses it, it doesn’t add any access control. For real security, pair it with strong passwords, MFA, and BitLocker.
Which Method Should You Use?
| Method | Works on | Difficulty |
|---|---|---|
| Local Security Policy | Windows 10/11 Pro, Enterprise, Education | Easy |
| Group Policy (gpedit.msc) | Domain-joined PCs; Pro/Enterprise/Education | Medium |
| Registry Editor | All editions including Home | Easy |
Windows 10/11 Home users: secpol.msc and gpedit.msc are not available on Home editions. Skip straight to Method 2: Registry Editor.
Method 1: Local Security Policy (Pro and Higher)
This is the cleanest way to set the message on Pro, Enterprise, or Education editions. The setting names haven’t changed from Windows 7 through Windows 11.
Step 1: Open Local Security Policy
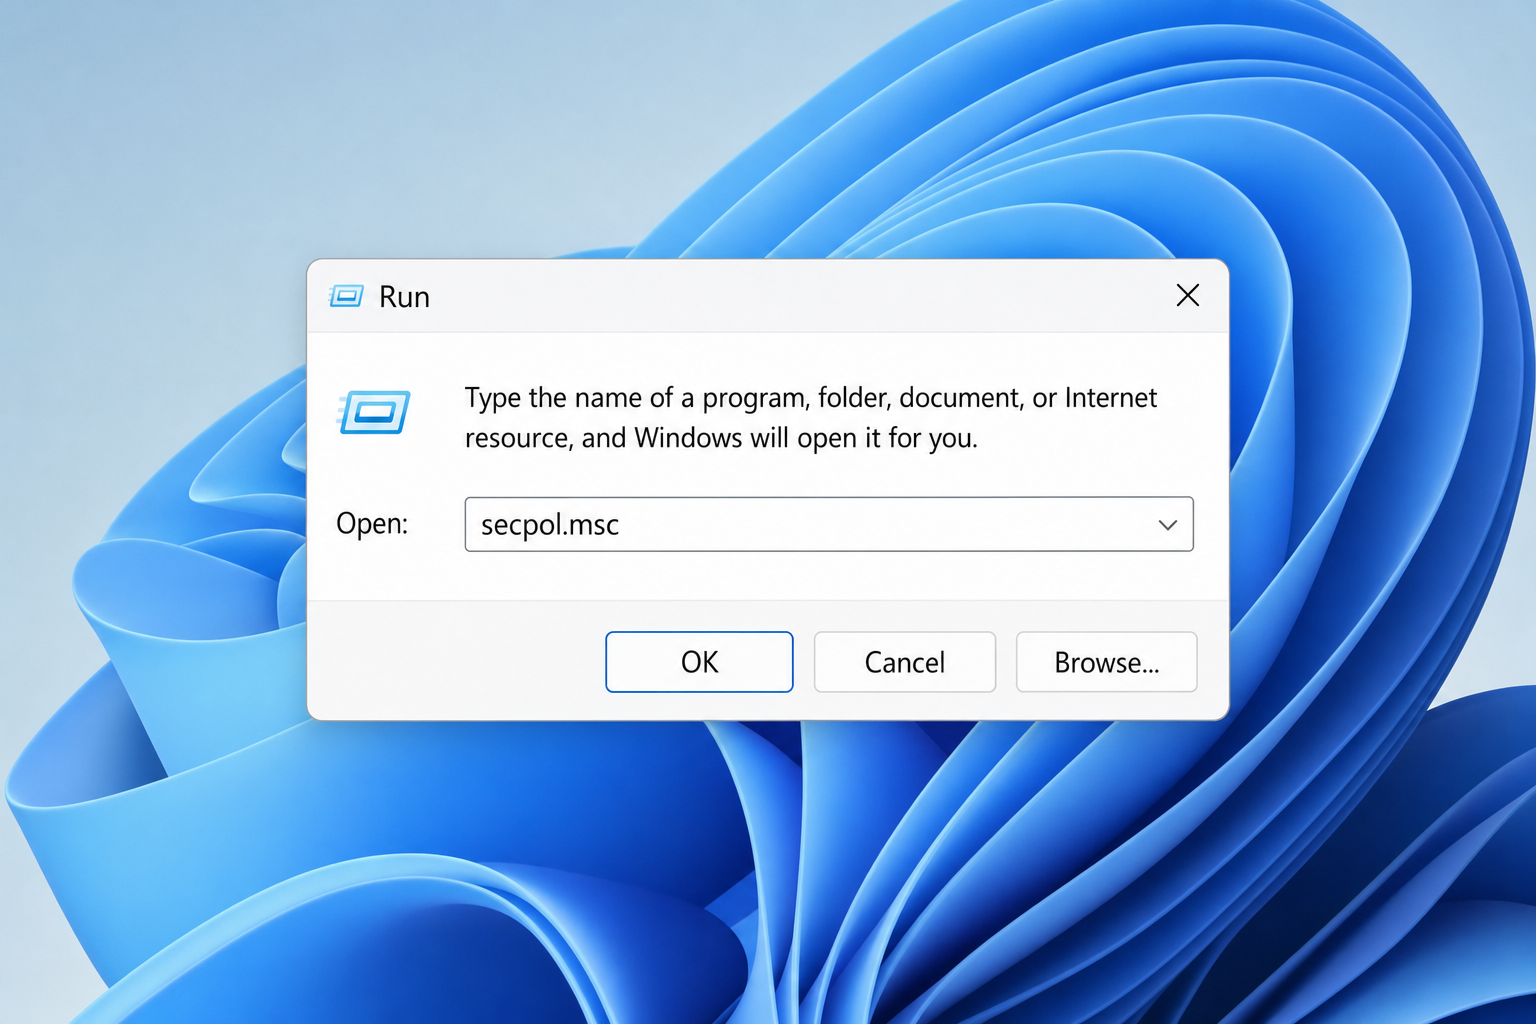
- Press
Windows + Rto open the Run dialog. - Type
secpol.mscand press Enter.
Step 2: Navigate to Security Options
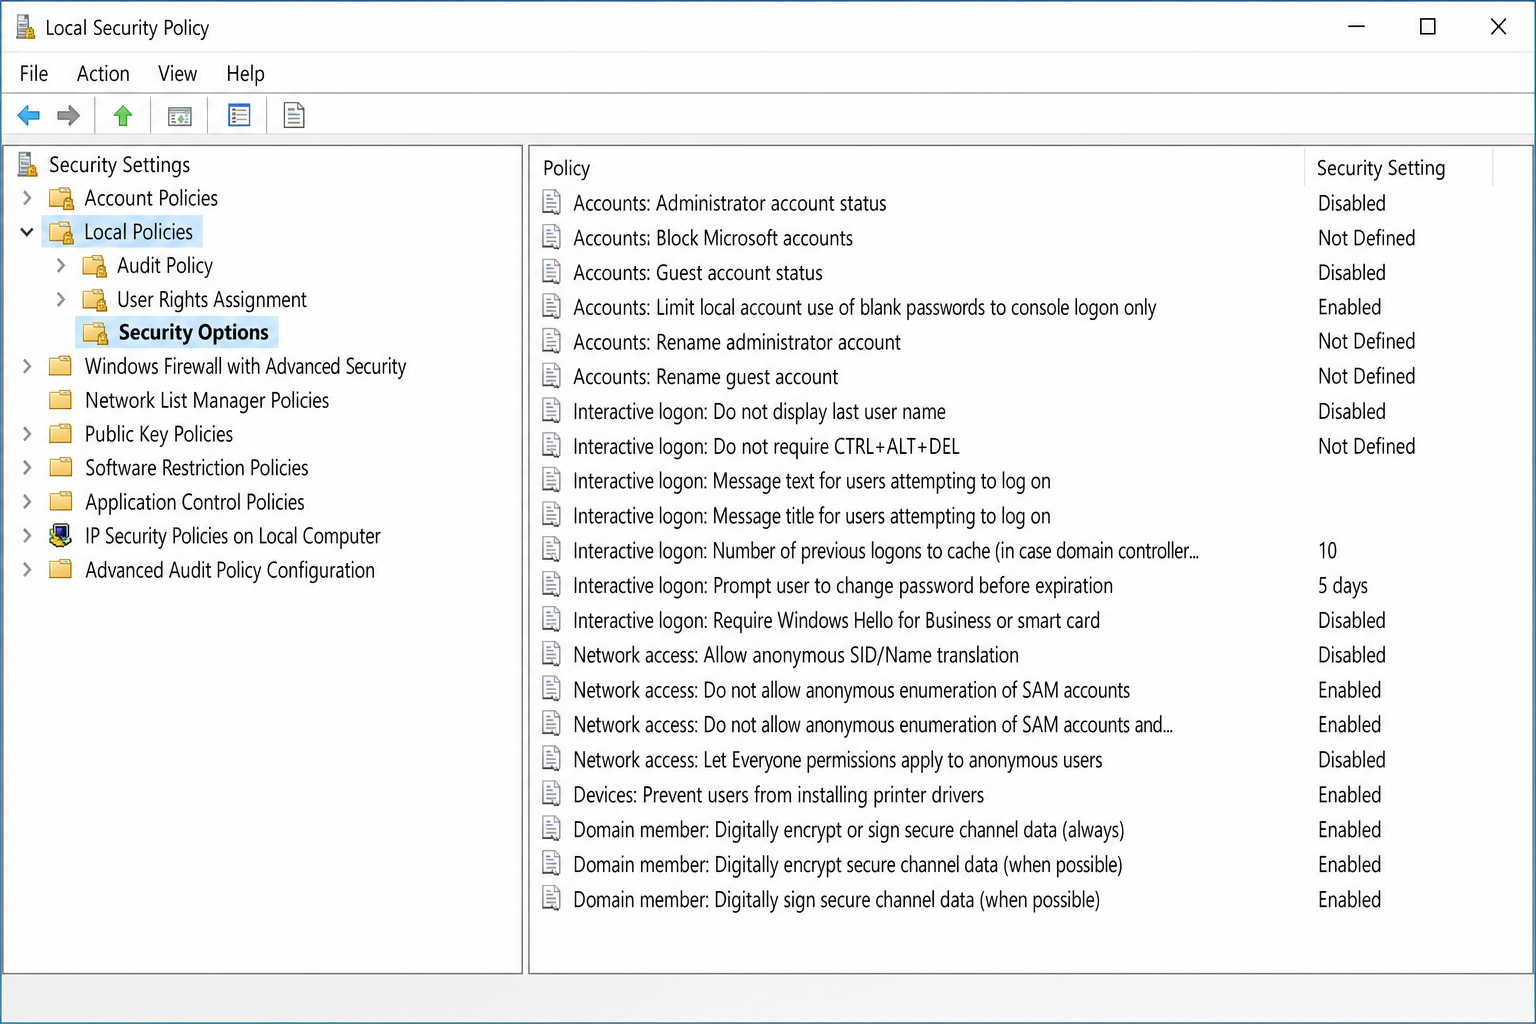
- In the left pane, expand Security Settings → Local Policies.
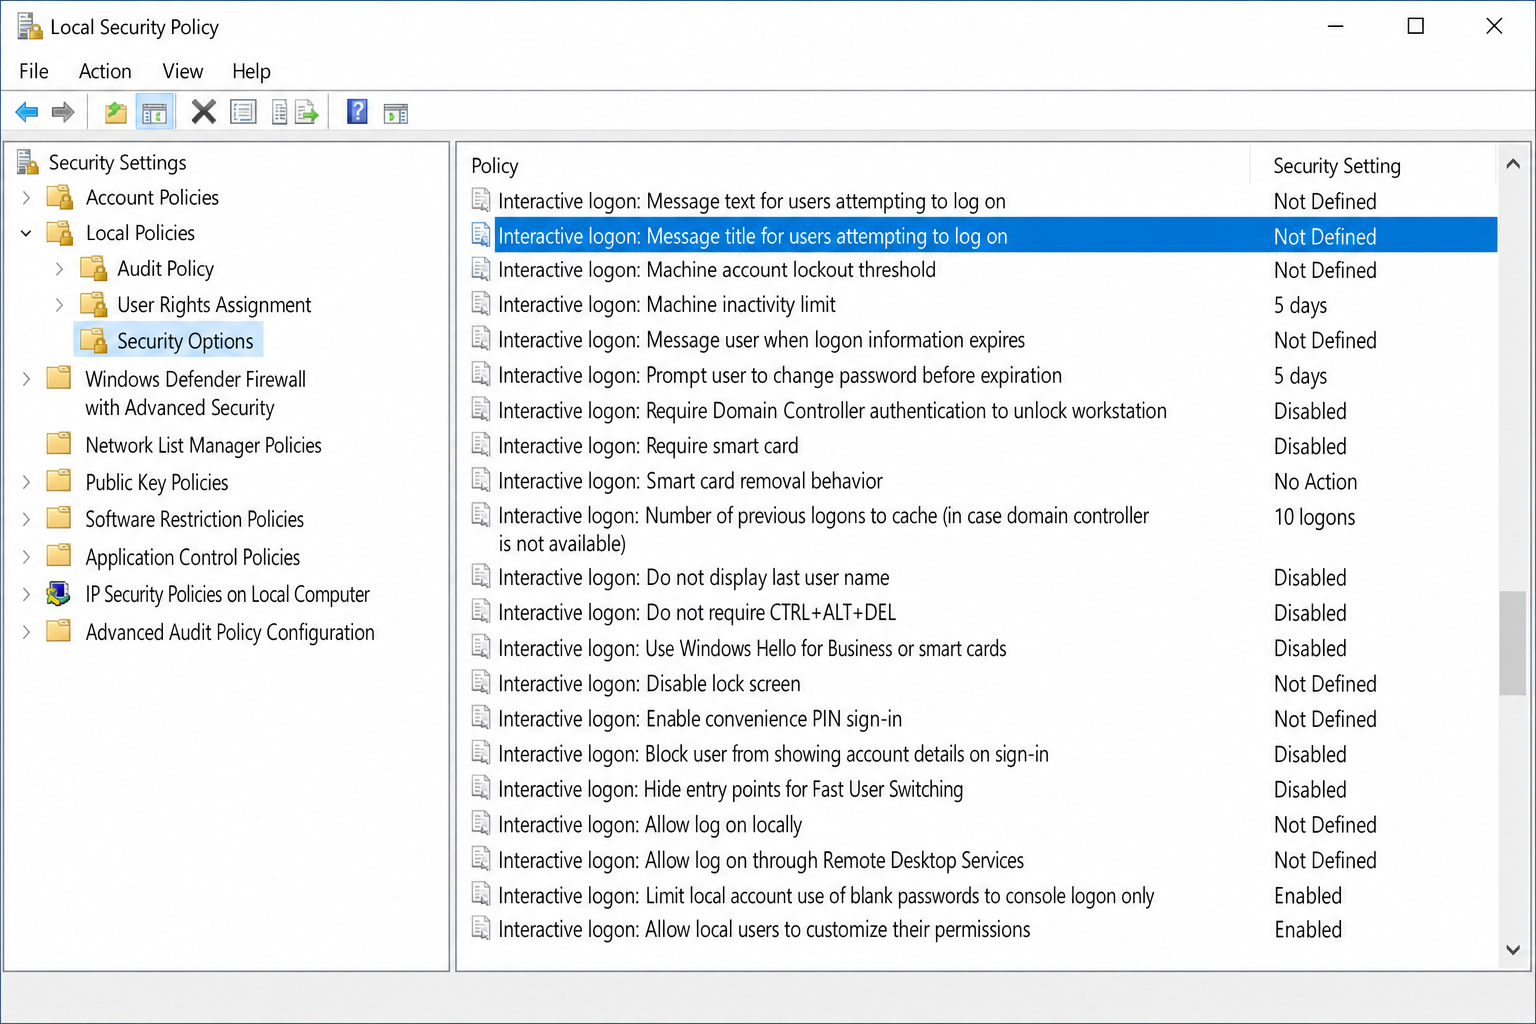
- Click Security Options.
Step 3: Set the message text
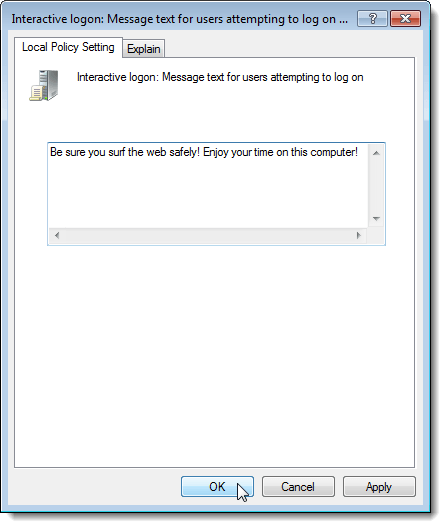
- In the right pane, scroll down and double-click Interactive logon: Message text for users attempting to log on.
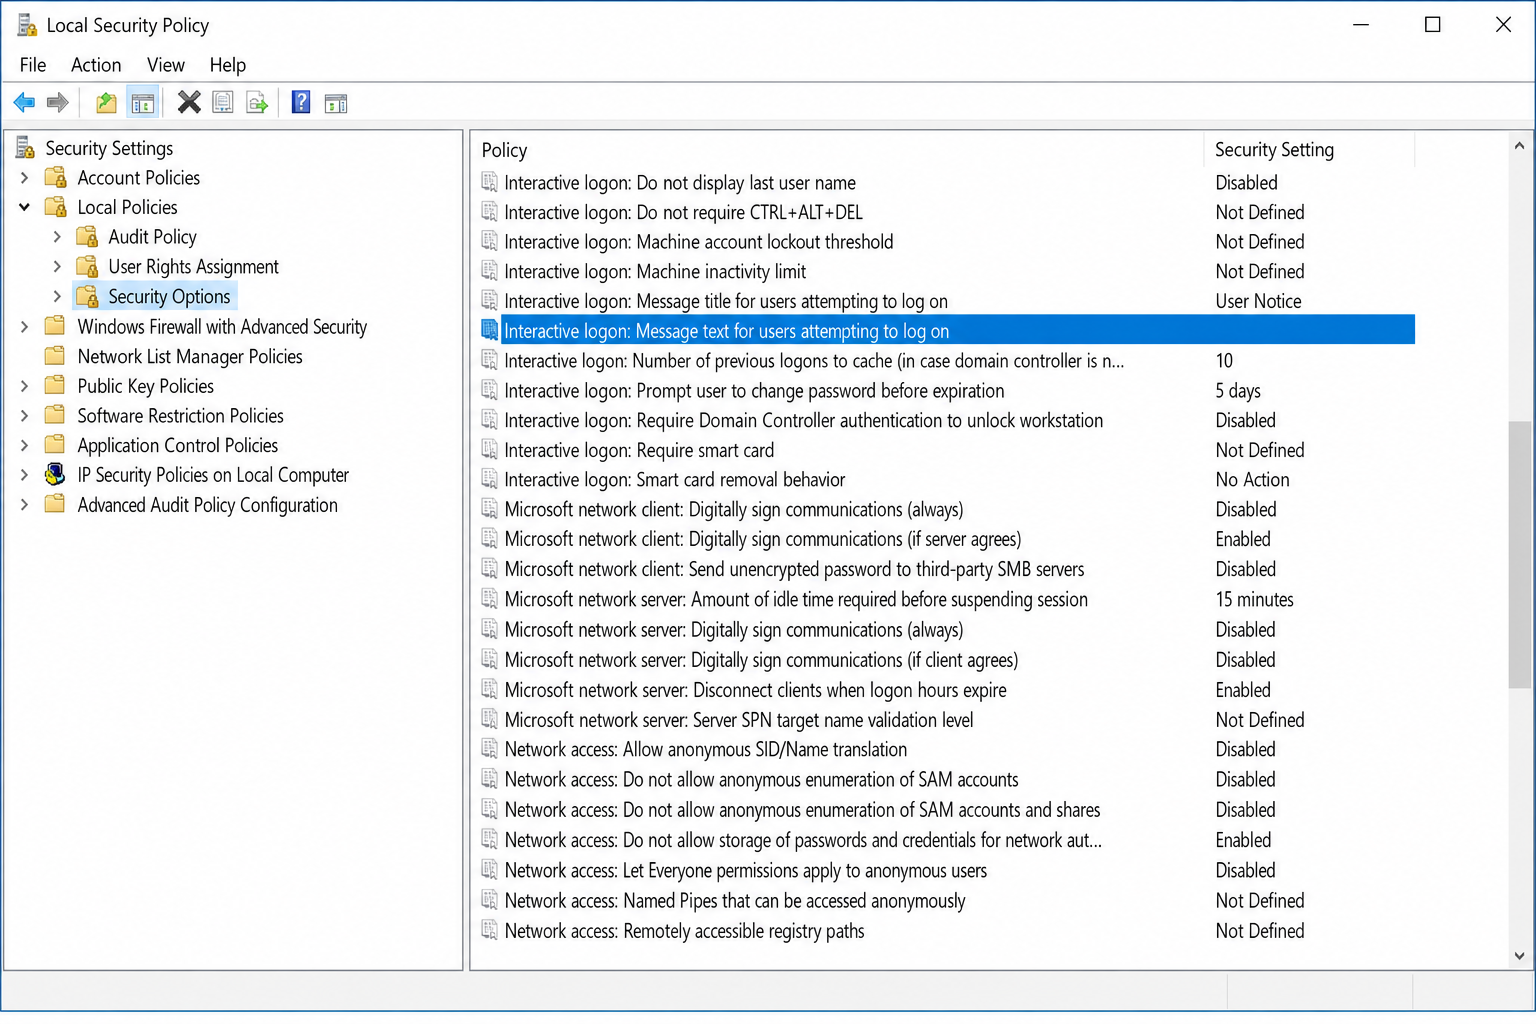
- On the Local Security Setting tab, type your message in the text box.
- Click OK.
Step 4: Set the message title
Important: Setting only the message text is not enough. On most systems the message won’t appear unless you also set a title. Always configure both.
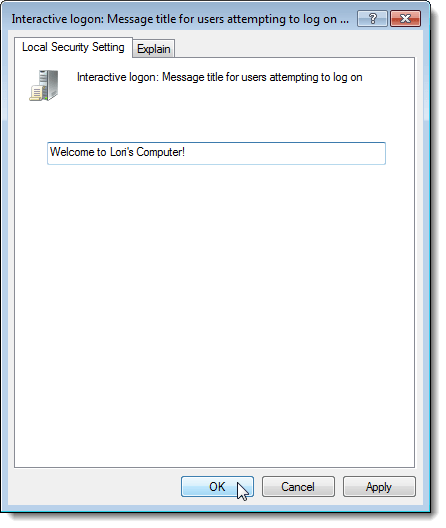
- Back in the Security Options list, double-click Interactive logon: Message title for users attempting to log on.
- Type a short title (for example, Authorized Use Only or Notice).
- Click OK.
Step 5: Test it
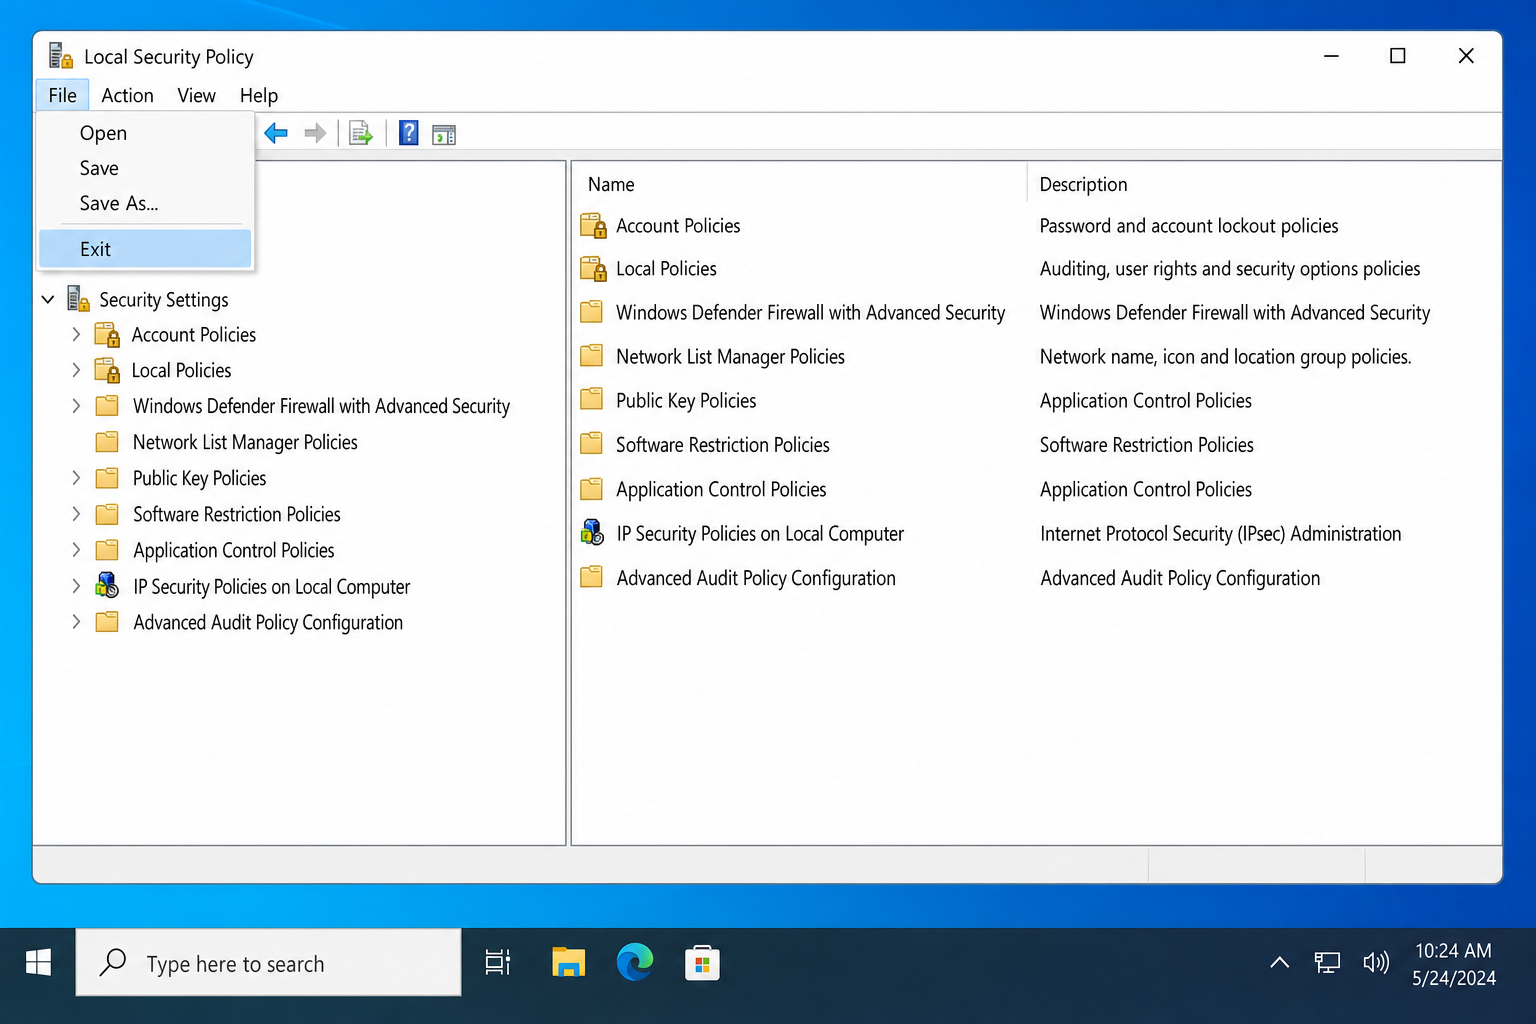
- Close Local Security Policy.
- Press
Windows + Lto lock your PC, or sign out completely. - Your title and message should appear before the credential prompt. Click OK to dismiss it and sign in normally.
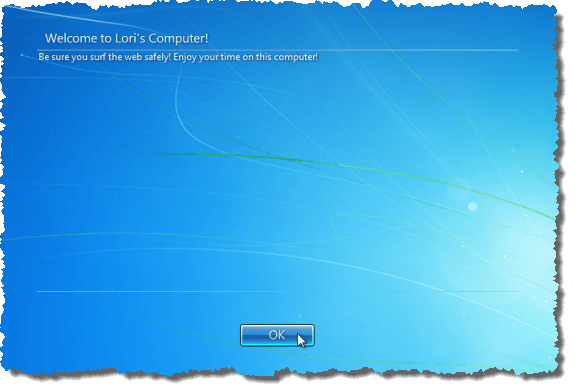
To remove the message
- Reopen
secpol.mscand navigate back to Security Options. - Double-click each setting and clear the text field, then click OK.
- Sign out or restart to confirm the message no longer appears.
Method 2: Registry Editor (All Editions, Including Home)
The Registry method sets the exact same values that Local Security Policy writes, but it works on every Windows edition, including Home.
Warning: Editing the Registry incorrectly can cause serious problems. Create a restore point before you start: press
Windows + R, typesysdm.cpl, go to System Protection, and click Create.
Step 1: Open Registry Editor
- Press
Windows + R, typeregedit, and press Enter. - Click Yes at the UAC prompt.
Step 2: Navigate to the Policies\System key
- In the address bar at the top of Registry Editor, paste the following path and press Enter:
HKEY_LOCAL_MACHINE\SOFTWARE\Microsoft\Windows\CurrentVersion\Policies\System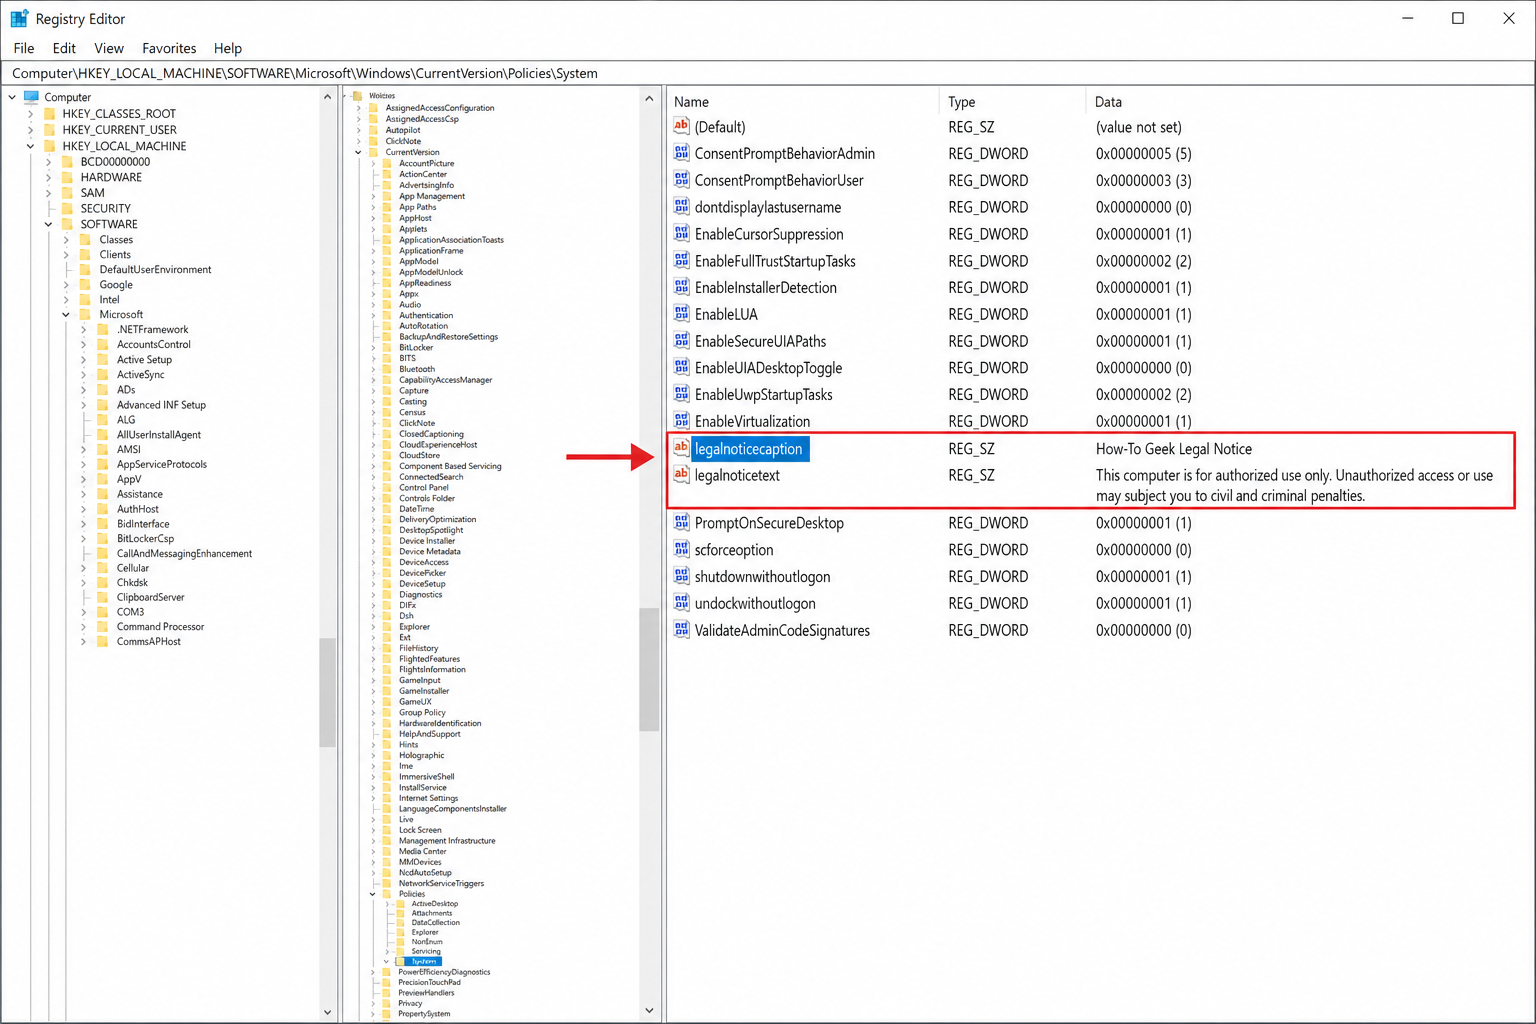
Step 3: Set the title value
- In the right pane, look for
legalnoticecaption. If it exists, double-click it. If it doesn’t, right-click an empty area in the right pane → New → String Value, name itlegalnoticecaption, then double-click it. - In the Value data field, type your title (e.g., Authorized Use Only).
- Click OK.
Step 4: Set the message text value
- Find
legalnoticetextin the right pane. If it exists, double-click it. If it doesn’t, create it the same way: right-click → New → String Value, name itlegalnoticetext. - Type your full message in the Value data field. You can press Enter for line breaks.
- Click OK.
Step 5: Test it
- Close Registry Editor.
- Restart your PC or press
Windows + Lto lock it. - Your message should appear before the sign-in screen. Click OK to dismiss it.
To remove the message
- Navigate back to the same registry key.
- Double-click
legalnoticecaptionand clear the Value data field, then click OK. Repeat forlegalnoticetext. - Alternatively, right-click each value and select Delete.
- Restart to confirm it’s gone.
Method 3: Group Policy (Domain-Joined PCs)
If you’re managing multiple machines on a domain, configure the logon message through Group Policy instead of touching each PC individually.
- On the domain controller or management workstation, open Group Policy Management Console (GPMC) and edit the appropriate GPO, or press
Windows + R, typegpedit.msc, and press Enter for local Group Policy. - Navigate to: Computer Configuration → Windows Settings → Security Settings → Local Policies → Security Options.
- Configure Interactive logon: Message title for users attempting to log on and Interactive logon: Message text for users attempting to log on as described in Method 1.
- Run
gpupdate /forcein an elevated Command Prompt on the target machines, then sign out or reboot to test.
Troubleshooting: Message Not Showing Up?
- Only set the text, not the title? Set both values. Many systems won’t display the message if the title is blank.
- Didn’t restart or sign out? The message only appears at sign-in. Lock your PC with
Windows + Lor restart to test. - Using Windows Hello or a PIN? The legal notice still appears before any authentication method. It’s independent of how you sign in.
- Seeing a full-screen Microsoft upgrade or end-of-support warning? That’s a separate Microsoft-controlled alert, not your custom message. It can’t be dismissed via these settings.
Frequently Asked Questions
Can I show the message only once, or only for specific users?
No, the built-in legal notice is system-wide and appears every time anyone signs in. For a one-time or per-user message, you’d need a logon script or scheduled task that checks a registry flag to track whether the user has already seen it.
Is there a character limit?
There’s no hard limit that you’ll realistically hit, but very long messages may require scrolling on smaller displays. Keep it concise enough to read without scrolling. A few sentences is ideal for most use cases.
Can I add images or formatting?
No. The built-in logon message is plain text only, with no images, colors, bold, or HTML. Line breaks are supported. If you need a branded or formatted message, you’d need a custom application that launches at logon.
Does this actually improve security?
Not technically. Anyone with valid credentials can click OK and sign in regardless. Its real value is satisfying compliance or policy requirements that mandate an acceptable-use notice at logon. It’s not a substitute for MFA, BitLocker, or keeping Windows updated.
Conclusion
The Registry method works on every Windows edition, including Home, and is the one to bookmark if you only need to do this once. The Local Security Policy method is slightly cleaner for Pro users who want a GUI. Either way, remember to set both the title and the message text, or the notice likely won’t show up at all.