
When Windows is first installed, Microsoft asks you a series of questions about the owner of the computer upon which the operating system is being loaded. Once you choose the name of the owner, Microsoft uses this information as the person to whom Windows is licensed.
If you bought your computer with Windows pre-installed, the manufacturer may have included this information for you. If you bought your computer second hand, the operating system will show the original owner as the person to whom the operating system is licensed. Either way, using a quick registry edit, you can change the name of the registered owner to anyone you want.
Windows 7/8/10 License
To see the name of the person to whom your copy of Windows is licensed, click on Start and type
winver
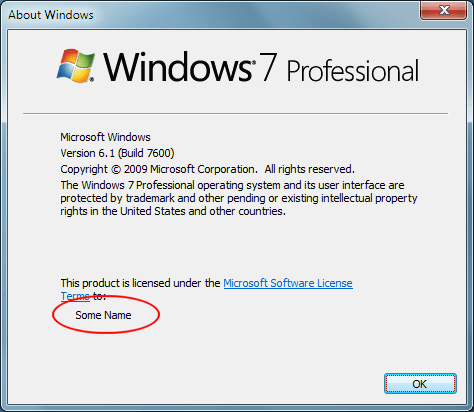
into the search box. Press the Enter key and Windows brings up the About Windows window. Here you will find all kinds of information including the edition of Windows you are using, the current version of the operating system, and the person who holds the license to use Windows.

Notice that this particular owner simply identified him/herself as “user” for the licensing information. Using a quite registry edit, you can change this name to anything you want.
However, be advised that changes to the registry can cause your computer to become unstable if you make an incorrect entry or delete a particularly important registry key. It is advised that you always make a backup of your registry before you make any changes.
Change the Name of the Registered Owner
To change the name of the registered owner of the Windows license, begin by click on Start and typing
regedit
into the search box. This will bring up the Windows registry. Depending on your settings, you may have to verify that you want to run the registry editor.
Locate the registry key located at:
HKEY_LOCAL_MACHINESOFTWAREMicrosoftWindows NTCurrentVersionRegisteredOwner

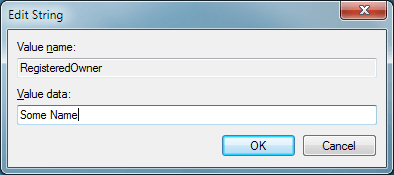
Double click on RegisteredOwner and change the key’s string value to whatever name you want.
Now when you check the name of the owner by clicking on Start and typing winver into the Search Programs And Files box, your new name should appear instead of the old one.
Keep in mind that this trick is cosmetic only; it does not change the actual owner of the Windows license in the legal sense. It also does not change the licensing relationship you or anyone else has with Microsoft.
It is, however, a way that you can take ownership of a computer purchased second hand or change the name of the owner to something other than what the original manufacturer entered when Windows was first loaded onto the computer.
This trick is particularly useful when a name changes because of a marriage. A woman who changes her name after marriage can update the owner of the machine to reflect her new name. Enjoy!