A homegroup in Windows makes it easier to share files and printers on a home network. You can share pictures, music, videos, documents, and printers with other people in your homegroup. As a security measure, other people can’t change the files that you share, unless you give them permission to do so.
When you set up a computer with Windows, a homegroup is created automatically if one doesn’t already exist on your home network. I assume that you already have an existing homegroup on one of your Windows computers. If a homegroup already exists, you can join it and actually, that’ll be your only option.
The only problem is if the original computer is now gone and you no longer have the password to join the homegroup. If you have another computer that is already joined to that homegroup, you can view the password by following the directions down below. If not, I’ll mention how to create a new homegroup to replace an old homegroup.
Manage Existing HomeGroup
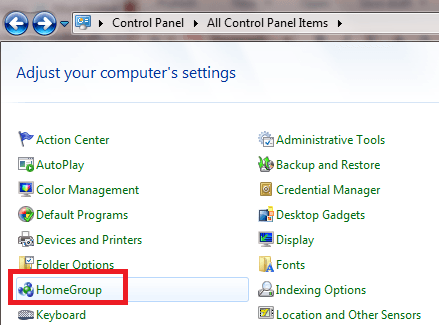
To connect a second or third computer to the homegroup, go to the first computer’s control panel, then click HomeGroup:
You can prevent specific files or folders from being shared, and you can share additional libraries later. You can also make your computer act like a DNLA server by checking the Stream my pictures, music, and videos to all devices on my home network option. You can help protect your homegroup with a password, which you can change at any time.
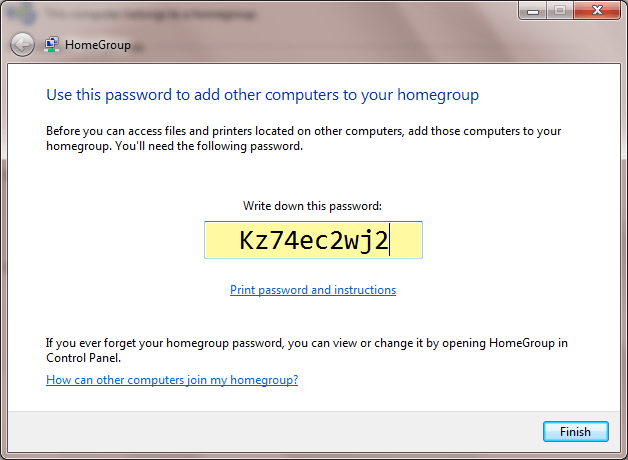
Click the View or print the homegroup password to view the password:

The password will appear. You may opt to print it and distribute to other people connected to your homegroup.
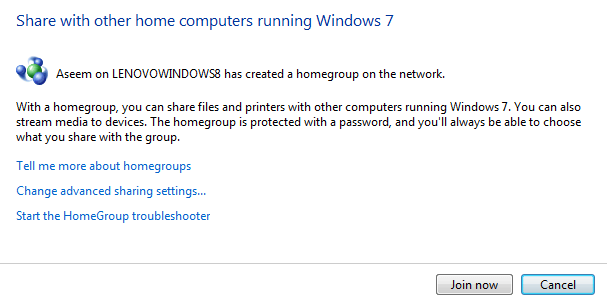
One your other Windows computers, go to Control Panel > HomeGroup and then click Join Now.

Create New HomeGroup
If you can’t access the password for the original homegroup that was created on your network, you will need to create a new homegroup. Note that this is possible on Windows 7. If you are using Windows 8 or Windows 10, there is literally no easy way to create a new homegroup.
So, if you’re stuck in this situation where you don’t know the homegroup password and all your computers are running Windows 8 or 10, then you’ll have to get a Windows 7 machine onto your network somehow in order to create the new homegroup. Once it has been created and another computer has joined, you can remove the Windows 7 computer and the homegroup will continue working fine.
The only other possible solution I have read about is leaving the homegroup from all of your computers and shutting all of them down, except for one. Then restart that last computer and open the homegroup dialog and if you’re lucky, you might see the Create a homegroup option in Windows 10. Again, make sure all other computers on the network are turned off.

To create a new homegroup in Windows 7, go to Control Panel, then Network and Sharing Center.

Under View your active networks, click on Home network under the network name. You’ll get a popup dialog where you can select from a couple of options. You want to change the network location to Public.

Now click on Public network and change it back to Home network. The second you do this, it should bring up the Create homegroup dialog.

You’ll want to be pretty fast here because if you wait more than a few seconds, Windows will detect the original homegroup and tell you that it cannot create a new homegroup because one already exists. If you click Next quickly, you’ll be able to create a new homegroup, which will override the existing homegroup.
Now to see the computers and shared files, just go to Explorer and you’ll see an option called Homegroup listed.

The concept of homegroup simplifies the file sharing on small scale home networks. In older versions of Windows like 2000 and XP, users had to supply a login and password for another machine or map a network drive to access shared content or devices.
If you’re having any kind of issues with your homegroup, read my ultimate troubleshooting guide for Windows homegroups. If you’re still running Windows XP, you can read my post on how to connect an XP machine to a Windows homegroup. Also, if you created the homegroup using Windows 7, you can still connect a Windows 8 or Windows 10 machine to that Windows 7 homegroup. If you simply need to share files between computers, read my article on the myriad of ways that probably are better than using homegroups. Enjoy!