In Windows 7 and Windows 8/10, there is a new folder under C:\Windows called WinSxS, which basically stores dll and component files. It also stores older versions of all dll and component files and can grow to be quite large. In addition to that, a lot of space is taken up by the backup folder, which gets really big after you install a Service Pack, like SP 1 for Windows 7.
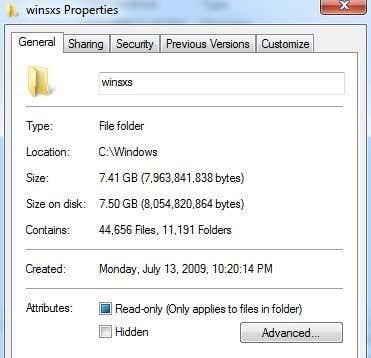
Here’s the size of my WinSxS folder on Windows 7:
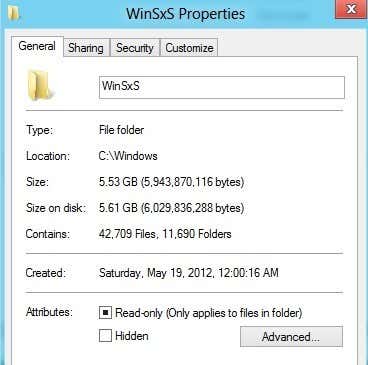
And here’s the size of the WinSxS folder on Windows 8/10:
That’s a lot of space, especially for fresh installs of both operating systems! Once you install more Windows updates or any service pack, it’ll shoot up a few more GBs. Unfortunately, this is a super core set of files for Windows, so you never want to try to delete anything yourself. You can, however, save a little space.
The first thing you can do is reduce the size of the backup folder by running the following command (Start, type CMD):
dism /online /cleanup-image /spsuperseded /hidesp
If any service pack backup files were found, it will automatically clean them up. In my case, I didn’t install SP1, so there was nothing to remove and hence I didn’t save any space. You can do that on Windows 7 with SP1 and on Windows Vista SP1, you can do the same thing using a different tool. Basically, it removes all the older files, but makes the service pack unremovable.
The file is called VSP1CLN.EXE for Windows Vista SP1 and it’s called COMPCLN.EXE for Windows Vista SP2. You can run these by clicking on Start and then typing in Run. When the Run dialog appears, just type in the commands.
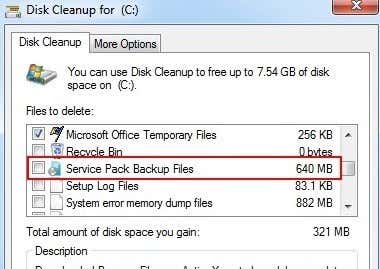
There is also another way to remove the backup files for SP1 in Windows 7 and make it permanent. Simply open up the Disk Cleanup utility, click on Clean Up System Files and then check the Service Pack Backup Files box. Also, be sure to check Windows Update Cleanup and Previous Windows installations if those options are present. The latter one will reduce the size of the entire Windows folder significantly.
So again to reiterate, in Vista you have to use VSP1CLN and COMPCLN and for Windows 7 you use the DISM command. Using any of these will make the service pack permanent. Other people have mentioned compressing the backup folder inside the WinSxS folder, but that’s probably not a good idea. Doing anything else will reduce the reliability of your system.
You can also run two other commands that will clear out older or out-dated components. Basically, once you run these commands, you won’t be able to uninstall any installed updates or service packs, so keep that in mind.
DISM.exe /online /Cleanup-Image /StartComponentCleanup

DISM.exe /online /Cleanup-Image /StartComponentCleanup /ResetBase
Remove Windows Features
In Windows 8/10, there are some nice new features added to the DISM command. You can now remove packages that you no longer want need or want. You can use the commands like below or you can simply use the Add and remove Windows features option, which gives you a nice GUI. This is the command:
DISM.exe /Online /Disable-Feature /Featurename:<name> /Remove
So how do you know what features you can disable? Well, you can run the following command to see all the available features:
DISM.exe /Online /English /Get-Features /Format:Table
Now that you have the list, you can disable a feature like SimpleTCP shown below:
DISM.exe /Online /Disable-Feature /Featurename:SimpleTCP /Remove
Pretty neat eh!? So that can save you a lot of space in Windows 8/10 if you plan on not using a lot of advanced features that are built-in by default. Enjoy!


