In Windows 10 there is a new feature called Hyper-V that is basically the same thing as XP Mode in Windows 7. It allows you to run as many guest operating systems on your Windows 10 host machine. However, Windows XP mode was based on Windows Virtual PC, which was the consumer version of their virtualization product.
Now you get the more enhanced server version. Also, there is no XP Mode in Windows 10 with Hyper-V. XP Mode was a free copy of Windows XP SP3 that allowed you to run older apps seamlessly with Windows 7. That is no longer available in Windows 10 with Hyper-V.
Up till now, Hyper-V was only available in Windows Server editions. Also, it is the exact same version that is included in the Windows Server edition, so you are getting a server virtualization product for free in Windows 10. It’s perfect for IT people and especially help desk techs who work from their laptops.
In this article, I’ll walk you through the steps to install Hyper-V and set it up. Of course, any guest OS that you install using Hyper-V has to have it’s own license/product key. To get started, you need to open the Control Panel in Windows 10.
Install Hyper-V in Windows 10
Next, click on Programs and Features.

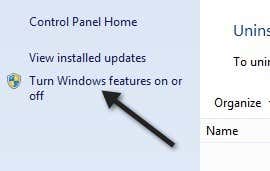
Next, click on Turn Windows features on and off in the left-hand pane.
Go ahead and click on the check box next to Hyper-V, which will install the Hyper-V management tools.
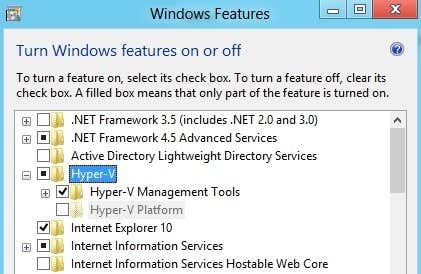
If you are running Windows 10 in a virtual machine like VMWare, you might see that Hyper-V Platform is greyed out. When you hover over it, it says
Hyper-V cannot be installed: A hypervisor is already running.
In this case, you need to add a line to the configuration file for your VMWare virtual machine:
hypervisor.cpuid.v0 = "FALSE"
That’s it. You have to make sure you turn off the virtual machine and then add the line and then turn it back on. After that, you will be able to install Hyper-V Platform. Well, that is if your CPU supports Hyper-V. I got a different message saying:
Hyper-V cannot be installed: The processor does not have the required virtualization capabilities.

The CPU requirements for Hyper-V are as follows:
1. x64-based processor – You need to be running a 64-bit version of Windows.
2. Hardware-assisted virtualization – You need an Intel processor with Intel Virtualization Technology (Intel VT) or AMD processor with AMD Virtualization technology. Read my post on how to enable virtualization in the BIOS.
3. Hardware DEP Enabled – Must enable Intel XD bit (execute disable bit) or AMD NX bit (no execute bit).
As long as you have met those requirements, you should have Hyper-V up and running on your Windows 10 machine. Once you have it installed, read my post on how to virtualize your current PC and run it in Hyper-V. Enjoy!