There’s no doubt that having a second monitor can make using your PC much more convenient. For both work and play, there’s nothing better than being able to keep social media or Reddit up on your second screen – or even to watch Netflix while you work.
But what if you don’t have a second monitor lying around? If you have a spare HDTV lying around with an HDMI input, you can hook it right into your computer and use it like you would a monitor.
If you’ve done this, you may have run into a frustrating problem with this process, however, and rest assured you’re not alone. Even with the TV set to the correct resolution, you might end up with a picture that is cut off on your TV screen.
The Notorious “Overscan”
There’s one major culprit for this problem, and it’s a feature built into many TVs known as “overscan.” If you’re noticing that part of your screen is cut off and you can’t access your taskbar or the edges of your screen, there’s a pretty dated technology to blame.
If we go back in time for a moment to talk about TVs that were around long before the advent of LCD or Plasma screens, there was one main problem that content creators were running into: the lack of standardized equipment that made it near-impossible to design shows and movies that would look great on all screens. Overscan was the solution, and would cut off the edges and only really show the parts of the screen that were considered important.
Overscan is a relic of a bygone time that isn’t really needed anymore, but is annoyingly still part of many HDTVs. This can create resolution issues when setting up the screen to be used as a secondary display, so let’s discuss how to fix the issue and make your TV into the best monitor it can be.
Fixing TV Resolution: Television Settings
It’s difficult to give a specific guide for how to disable overscan on your TV, since it will vary pretty significantly by brand and model. In most cases, you’ll be looking for an option in the “Picture” menu that allows you to adjust aspect ratios or even just disable overscan outright.
In most cases, your aspect ratio will be set to something along the lines of a 16:9 resolution. You’ll want to change this to an option that says “Screen Fit,” “Just Scan,” or something like that. If you don’t see those options, you may want to refer to your TV manual (or just try some good old trial and error). You can also just Google your TV brand and model and the words “overscan setting“.
In some cases, despite your best efforts, you might have no luck getting the picture to show up correctly. Fortunately, there are some steps you can take in your Windows and Mac settings that might be able to fix the problem for you.
Fixing TV Resolution: Mac Settings
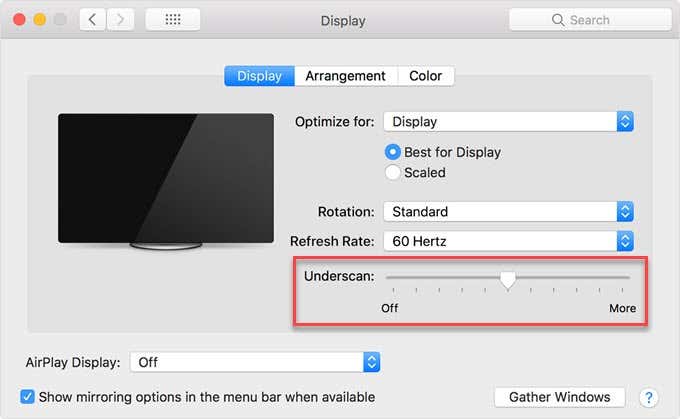
If you’re on a Mac and/or are using a device like an Apple TV, you can check out this article from Apple support that goes through all the details for adjusting overscan or underscan is OS X and tvOS.
Fixing TV Resolution: Windows Settings
Fixing TV resolution through Windows settings is a little bit more complicated, but shouldn’t be too difficult using the steps below. Keep in mind that this tutorial focuses on the Nvidia Control Panel, but those running Intel CPUs shouldn’t have too much difficulty following along either.
Those with AMD equipment may be a little disappointed, however, as there isn’t really an easy fix for overscan within their settings.
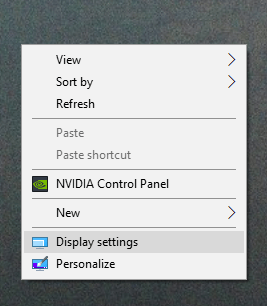
So, first off, right click on your desktop and click on Nvidia Control Panel.
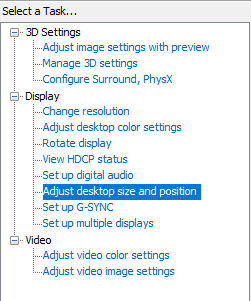
A window should pop up with a menu on the left that looks similar to the one below. Select Adjust Desktop Size and Position.
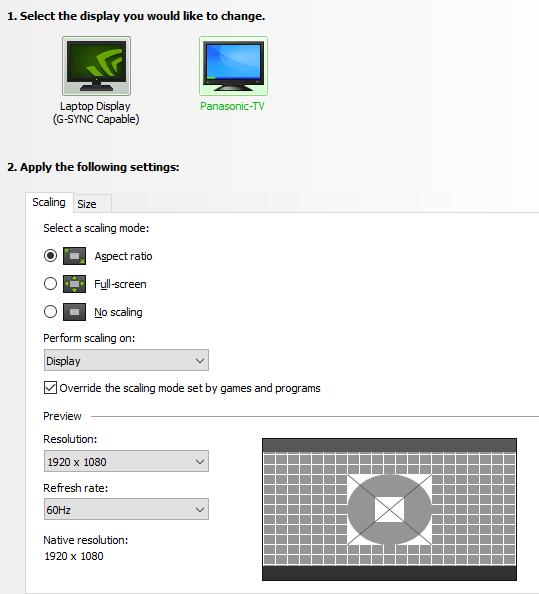
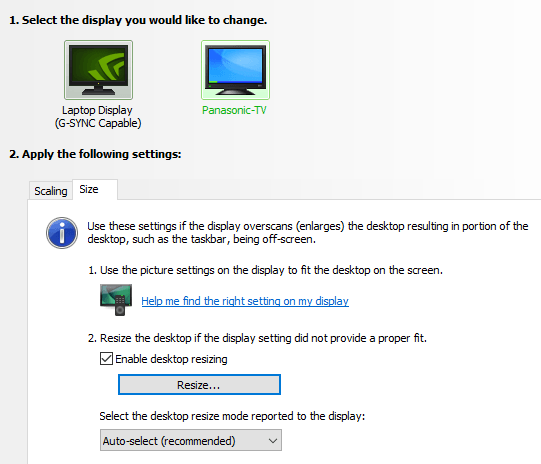
On the right side of the menu, you’ll see a bunch of settings. Click on the second monitor (your TV) and make sure the settings look similar to what we have set. Just keep in mind that your resolution and refresh rate may be different depending on the make of your TV.
Click on the Size tab, set your settings similar to the ones within the image, and click on Resize….
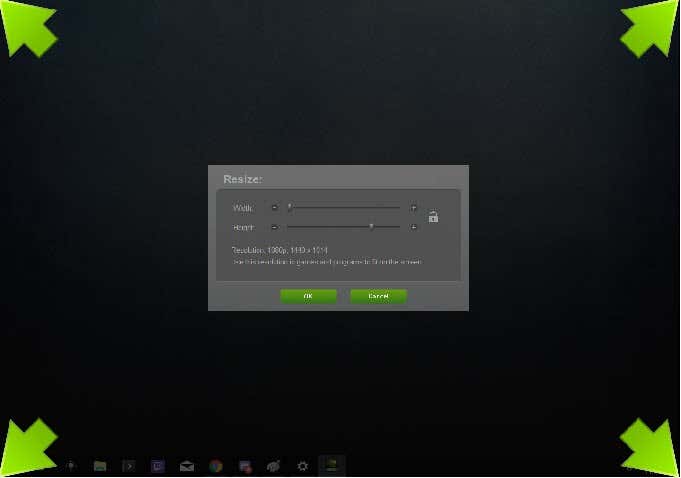
At this point, a screen should pop up like the one below. You’ll simply drag the sliders untilt the corner indicators are placed correctly. This will adjust the resolution of your monitor (potentially away from its native resolution), but it’s an excellent fallback if you’re not able to disable overscan through your TV.
We hope this process has given you all the tools you need to get your HDTV up and running as a secondary monitor. Enjoy streamlining your workflow, or even goof off with YouTube while you’re working or gaming now that you’ve managed to fix resolution when using your TV.
Related Posts
Freelance blogger, journalist, and copywriter specializing in reviews, guides, and the latest in technology news. Read Zachary’s Full Bio
