In this guide, we will be taking a look at how you can stop your autofill passwords from showing in Chrome.
We will offer tips on how to remove passwords completely, or just get rid of them from one computer, whilst still having them available across other devices when using your Google account.
Hopefully, the guide below should be easy for you to follow along with and you should have the problem solved within minutes.

How to Remove Autofill Passwords, but Only From One Device
If you would like to turn off or remove your autofill passwords from one device, you must turn off sync and then delete your cache so that your passwords aren’t saved on that device anymore.
With sync turned off, your browser will no longer check online for any saved passwords tied to your Google account. Alternatively, you can just sign out of your Google account too, but you’ll lose any saved websites, browsing history, or other data.
Either way, you must delete your cache after. We will explain both methods below, and then after that we’ll explain how you can delete your cache.
To Remove Autofill Passwords, but Remain Logged In
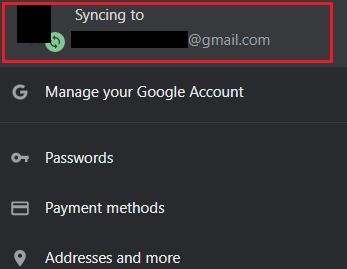
- On Chrome, click your profile icon in the top right
- Click on your profile icon again once the dropdown menu appears
You now have two options. You can turn off syncing for everything, or just turn off password syncing.

For the first option, simply click turn off next to the syncing to …@email.com at the top of the page.
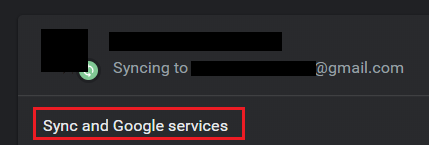
Alternatively, you can turn off syncing for passwords, but keep other synced data on. To do this, instead click Sync and Google services just below the turn off option.
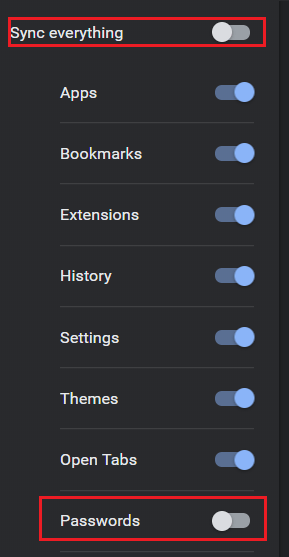
On the following page, you can click Manage Sync – this will take you to a page where you can pick and choose which features to turn off syncing for. First, click the Sync everything switch to move it into the off position. This will then unlock the other options. After that, click the Passwords switch to turn password syncing off.
To Remove Autofill Passwords by Signing Out
This option won’t remove your autofill passwords, but it will log you out from your Google account, which means you have the freedom to clear your cache and that will remove the passwords only from the device you are using.
It’s a simpler option if you are using a shared computer, but you may prefer the option above if you want to keep your browsing history and other data synced.
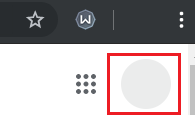
To sign out of Chrome, open a new tab. On the new tab, click the profile icon in the top right. The one inside the actual page, not on the browser navigation bar. Next, click sign out on the dropdown box that appears.
How to Remove Cache to Get Rid of Autofill Passwords
Whether you have signed out of your Google account or just removed password sync, you must now clear your cache to get rid of the autofill data that has saved locally to your Chrome browser.

To remove your cache on Chrome, click the three stacked vertical dots in the top right. On the dropdown menu that appears, click Settings.
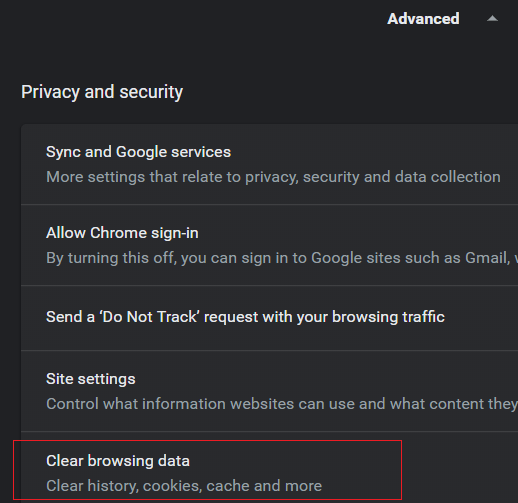
In settings, scroll down and click Advanced. Scroll down further and click Clear browsing data.
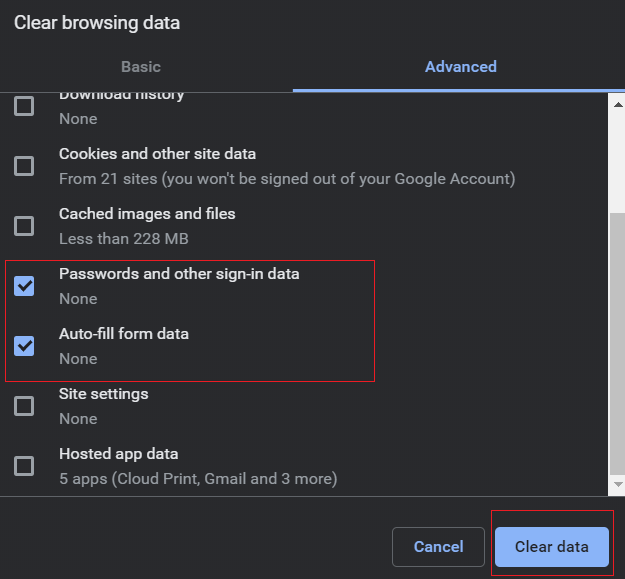
On the new window that appears, click Advanced and then click the tick boxes next to Passwords and other sign in data and Auto-fill form data. Finally, click Clear data. The autofill details will now be removed from your current device, but not your Google account.
How to Remove Autofill Passwords Across All Devices
If you want to remove your autofill passwords across all devices at once, follow the steps listed below. The process is far easier than the options above because you simply need to access settings on your Google account.
First, visit myaccount.google.com. You should be signed in already. If not, make sure to sign in and select the right account.
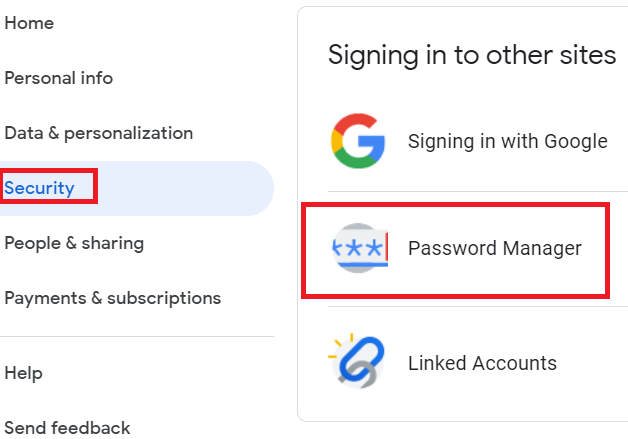
On the left side of the screen, click Security. Next, scroll to the bottom and look for Password Manager. Once you have found it, click on it.

On this page, you can now delete any saved passwords. Before you leave, you should click the Settings cog in the top right. You will then be given options to turn off password saving. Click to turn off Offer to save passwords and Auto sign-in.
If, after deleting your passwords, they still appear during sign in, you may need to clear your cache too. This may be different for each device, and it will depend on if you signed in and used autofill on that device prior to signing in to your Google account.
Either way, clearing your cache can be done through the same method listed above. Below is a quick reminder.
- Click the three stacked dots in the top right
- Click Settings
- Scroll down and click Advanced
- Scroll down again and click Clear browsing history
- On the new page, click Advanced
- Click Passwords and other sign-in data and Auto-fill form data
- Click Clear data
Summary
There we have it – two different methods for stopping your autofill passwords from showing on Chrome. These two methods are great for different reasons. The first method is useful for removing your details from a single device, whilst the second is better for removing it across all of your devices.
If you have any questions about this guide or need any help, please get in touch and I’ll try to help as soon as I can.
Related Posts
Ollie stumbled upon writing online whilst participating in a mobile network forum back in 2011. Since then, he has developed an incredible passion for writing about all sorts of tech from smartphones, PC hardware, software, and everything in between. Read Ollie’s Full Bio
