If your document is in PDF format, it’s likely to be in its final format—ready to wow your audience. This is where your highest quality graphics are used and where the final version of your text is presented, ready to print or share with others to read or distribute. This can mean large file sizes, especially if it’s an image-heavy document.
While you can edit a PDF, you’ll have to reduce the quality to reduce the overall file size. If you want to know how to compress a PDF, you can get around this issue by compressing the file instead using built-in or third-party software on Windows and Mac or by using an online compression service.
How To Compress A PDF On Windows Using PDF Compressor
There are no built-in methods to compress a PDF on Windows 10, unless you want to add it to a zip file first. This means you’ll need to use a third-party compression tool to compress the PDF file.
While several tools do exist, one of the best options is Free PDF Compressor. This free app has existed for several years, but it’s still one of the easiest and quickest ways to compress a PDF on Windows.
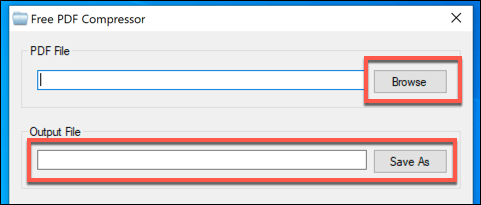
- Download, install, and run the Free PDF Compressor software to begin. In the Free PDF Compressor window, click the Browse button next to the PDF File option to select your file. Provide a location and file name for the compressed file in the Output File box.
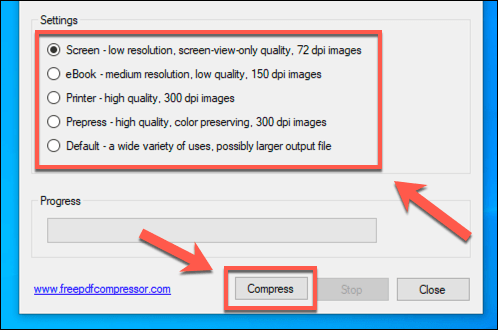
- Under the Settings section, you can set the preferred quality of your PDF file. Screen is the lowest quality, while Printer and Prepress are higher quality options. Select the quality level you wish to use, then press Compress to begin the PDF compression.
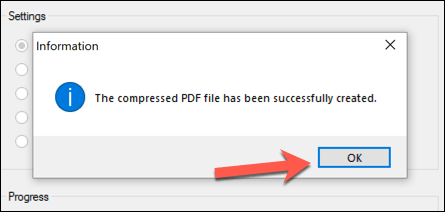
- Free PDF Compressor will alert you when the file compression is complete. Press OK to close.
As the Free PDF Compressor saves the compressed file as a separate file to the original, you can repeat the process with a higher quality if you’re unhappy with how the file turns out.
How To Compress A PDF On Mac Using Preview
Unlike Windows, macOS includes a built-in PDF compression feature as part of the Preview app for image and document viewing. This app is included on all Macs, and you can find it in your Launchpad app list.
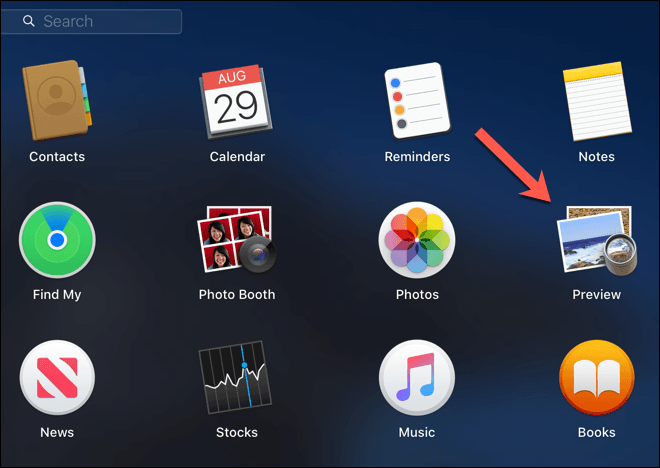
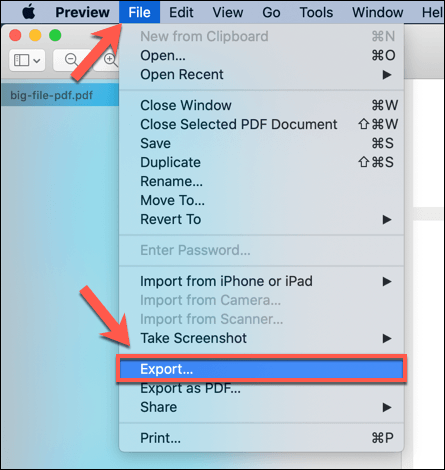
- To compress a PDF file on a Mac, open the Preview app and select a PDF file to open. Once opened, press File > Export from the menu bar.
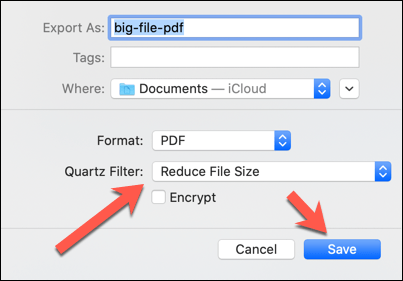
- In the Export option menu, select a new file name (or leave the existing file name to overwrite the existing file) and the location to save the file. From the Quartz Filter drop-down menu, select the Reduce File Size option. Press Save once you’re ready to begin the compression process.
Preview will immediately save an updated, compressed version of your PDF document. You’ll need to open this in Preview afterwards to preview what (if any) noticeable changes in the quality have been made by the app.
Using Online PDF Compression Services
If you don’t want to download additional software to compress your PDF file, you can use various online PDF compression services instead. If you want to use an online service like this, however, you should only do so with non-sensitive documents.
Using these services involves uploading the file to a remote server, where the file could remain in place for a period of time. This poses a serious security risk for any documents that may contain personal data, and you should only use online compression sites for files that you would be happy to share publicly.
Various services exist to compress PDF files online, such as I Love PDF. Most services work in a similar way, however, by allowing you to upload the file, select the quality, and download the compressed file afterwards.
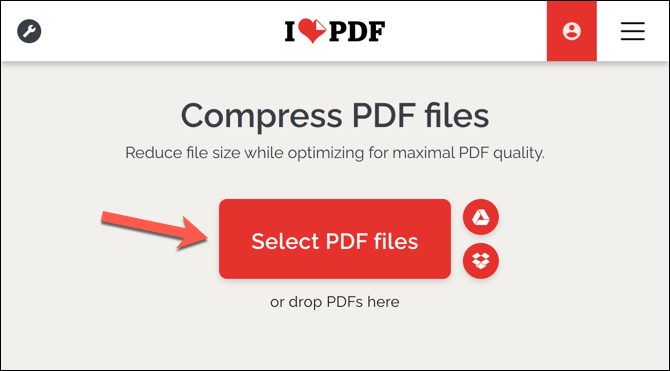
- To use I Love PDF, press the Select PDF Files button to select the PDF files you wish to compress. You can also drag and drop the files directly into the website window to upload them automatically.
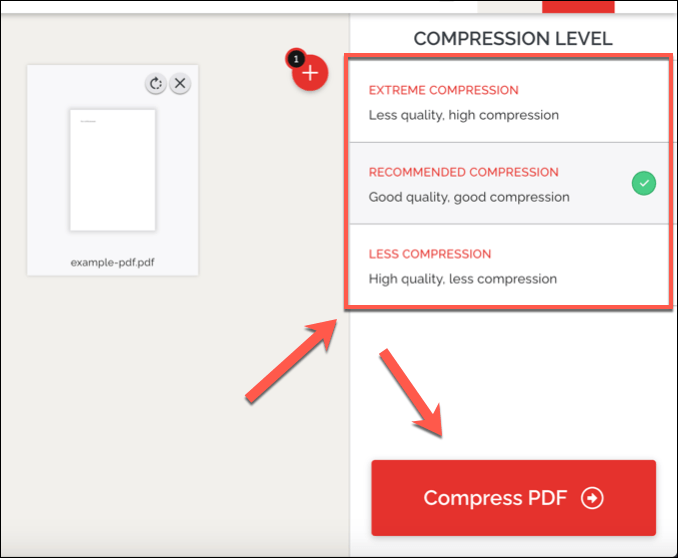
- Once the files are uploaded, you can select the compression level from the right-hand menu. The higher the compression, the lower the quality of your output file (and vice versa). Select Extreme Compression for the maximum possible compression, Recommended Compression for medium compression but with reasonable quality, or Less Compression for the lowest compression but for much higher quality. Press the Compress PDF button to begin the compression once you’re ready.
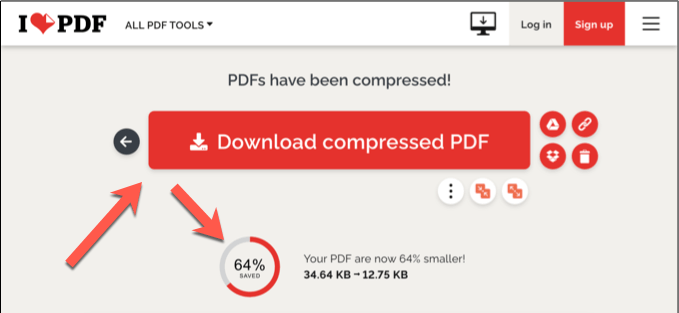
- The PDF compression process will complete on the remote server. Press the Download Compressed PDF button to download the compressed file once it’s done. The compression amount (with the amount of file space saved) will be shown underneath.
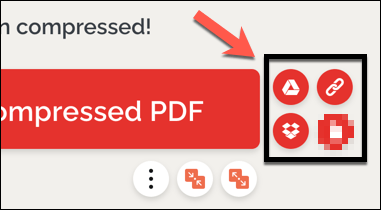
- If you want to save the file to cloud storage, or distribute it to others using the I Love PDF service, you can use the sharing icons to the right of the download button. These include options to share to Google Drive or Dropbox, as well as to create a QR code or sharing link to distribute to others.
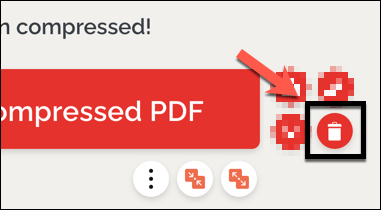
- I Love PDF also provides a deletion option, allowing you to remove the file from its servers. To delete the file, however, press the Delete icon. While this will disable the deletion link on the I Love PDF website, this does not guarantee that the file will be completely deleted from the site’s servers using this method.
As previously mentioned, you should not use services like I Love PDF for sensitive documents. For any kind of sensitive document containing personal data, you should use a software option to compress the file instead, such as the Preview or Free PDF Compressor apps demonstrated above.
Sharing And Viewing Compressed PDF Files
Compressing a PDF allows you to reduce the file size without lowering the quality too much (unless you want to). This makes it easier to share online, over email or other file sharing services. You can even password protect your PDF files to keep the contents of sensitive documents safe from snoopers.
If you’re struggling to open a PDF, you’ll need to install a good PDF reader like Adobe Acrobat or Foxit Reader. If you want an online option, you could convert PDFs to Google Docs, letting you view, edit, and share the files from your web browser without needing to install a third-party app first.
Related Posts
Ben Stockton is a freelance technology writer based in the United Kingdom. In a past life, Ben was a college lecturer in the UK, training teens and adults. Since leaving the classroom, Ben has taken his teaching experience and applied it to writing tech how-to guides and tutorials, specialising in Linux, Windows, and Android. He has a degree in History and a postgraduate qualification in Computing. Read Ben’s Full Bio
