At its core, the Photoshop brush tool is there for drawing lines and shapes on your designs using strokes. With the help of Photoshop brushes, you can create anything from various patterns and textures, and even change the lighting of your images.
Photoshop comes with a built-in set of brushes that you can use to add special effects to your photos. However, it’s a scarce selection with just a few general styles. If you want to have more options, you can add more brushes to Photoshop, as well as download them from third-party sites. Here’s how you can add and install brushes and use them in Photoshop.

How to Add Brushes to Photoshop
To see your installed brushes, select the Brush tool from the Tools Panel on the left. Right-click anywhere inside your document to open the Brush Options window. Then select the gear icon to open a full list of brushes.
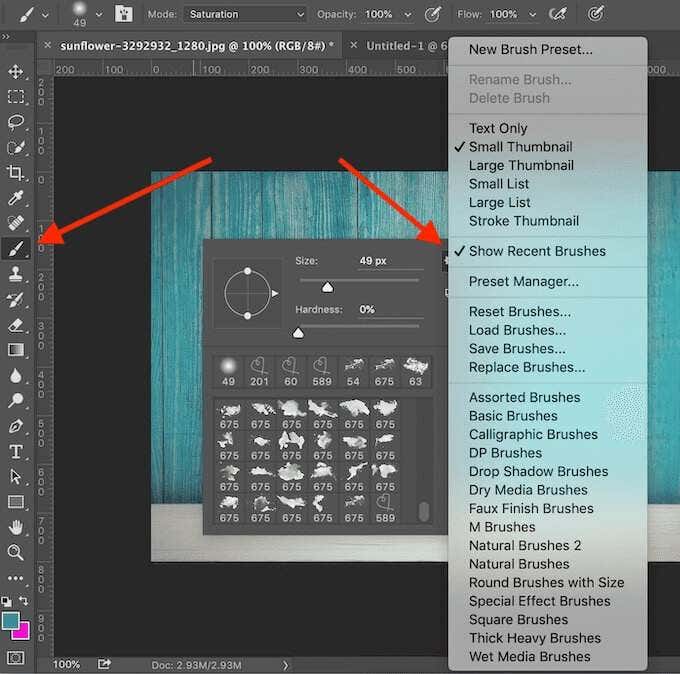
If preset brushes aren’t enough for you, you can always download and install your own. Adobe Photoshop allows you to add new brushes to add shapes, patterns, various structures and more.
Where to Find Brushes for Photoshop
Many sites offer free Photoshop brushes you can download and install. However, be careful and only download them from trustworthy sources to prevent malware in the presets.
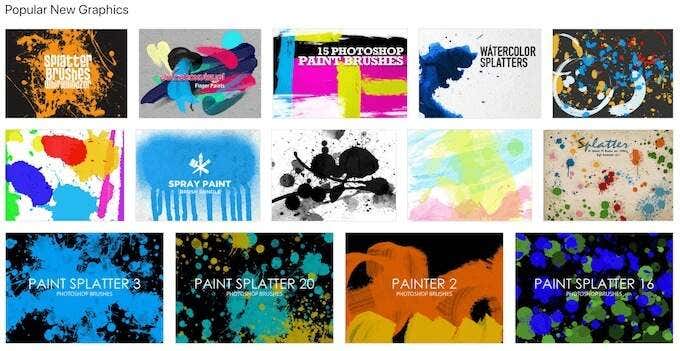
Some popular sources for getting brushes for Photoshop include Brusheezy, My Photoshop Brushes, and DeviantArt. If you don’t mind spending a few bucks, you can find a great selection of brushes on Creative Market.
How to Install Brushes to Photoshop
Once you’ve chosen the file with brushes, download it to your computer. If it’s a zip file, unpack the contents of the file. You’ll find a new folder containing several files, and one of them will have an .ABR extension.
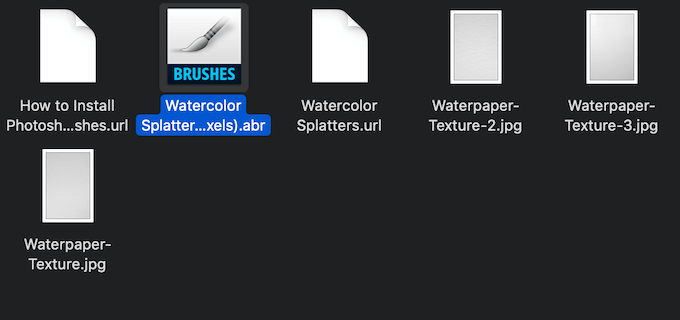
- Open Adobe Photoshop.
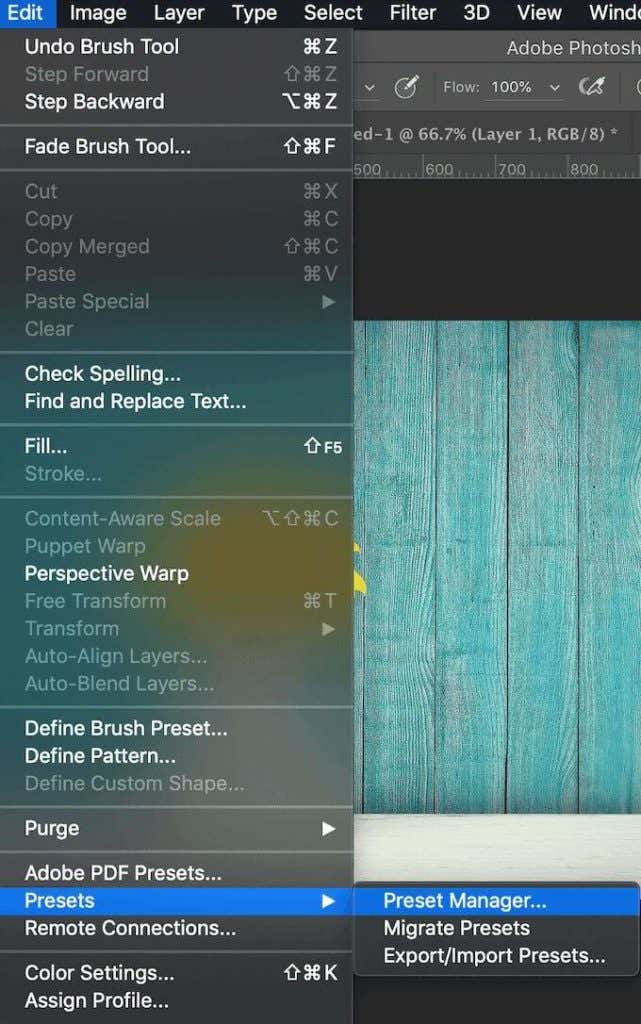
- You can either drag the .ABR brush file directly into your Photoshop working window, or follow the path Edit > Presets > Preset Manager.
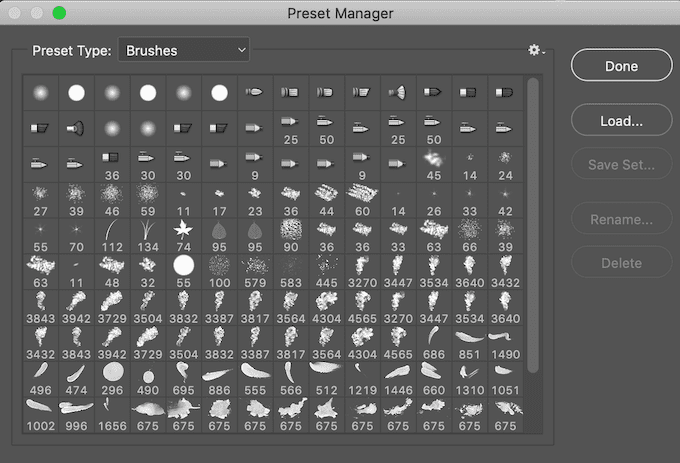
- Select Load and manually select the .ABR file on your computer to add your brushes.
In Photoshop 2020, the steps will differ. To install your brushes on Photoshop 2020, open the Brushes window and follow the path Settings > Import Brushes > Load. Then select the .ABR file to add your brushes.
You can add as many brushes to Photoshop as you like. Once added, you can access them in the Brush Options window under the drop-down arrow in the Options bar Control panel on top of the screen.
How to Use Brushes in Photoshop
The brush tool allows you to create unique images and projects in Photoshop. If you’re a beginner, here are some tips on how to make the most out of the brush tool.
1. Use the Brush Options Pop-up Window
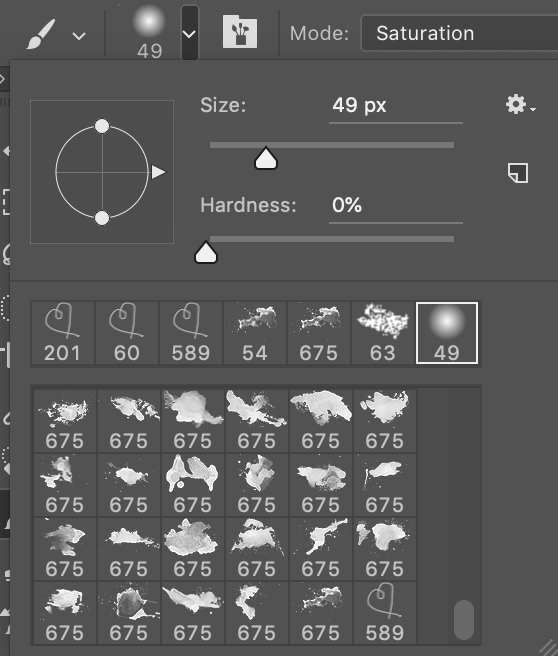
To get started working with your brushes in Photoshop, select the Brush Tool from the toolbar on the left. Once you’ve selected the tool, you can customize it using the Brush Options window, in which you can access the full list of your downloaded brushes, as well as shape and size options.
To bring up the Brush Options, right-click anywhere inside your document or select the drop-down arrow in the upper-left corner of the top toolbar. To change the size of your brush strokes, use the Size slider on top of the Options window.
Some brushes also allow you to change the Hardness parameter making the edges of the brush strokes harder or softer. Slide the mark all the way to the right for a more defined look of your brush, or keep it on the left side of the slider to create a soft airbrush effect.
2. Use the Brush Panel
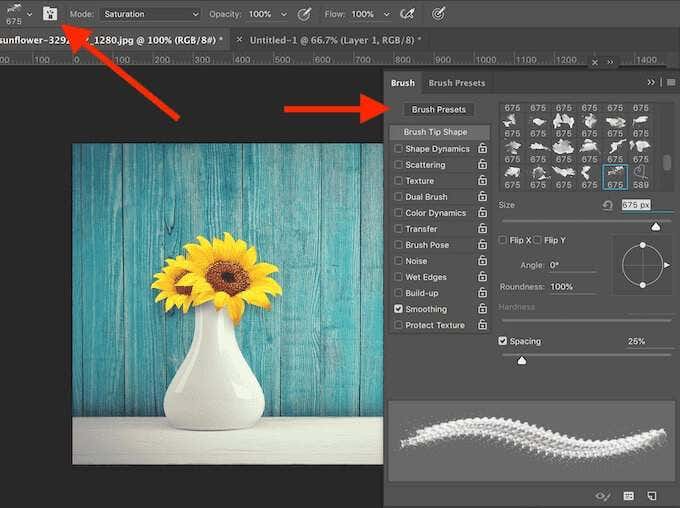
To access more advanced settings, open the brush panel by selecting an icon in the top toolbar on the right side from the Brush Options drop-down arrow. When you tweak these individual settings, you’ll see how each of them affects the final look of your brush strokes.
3. Use Brush Mode & Opacity & Flow

Other settings that you can change when using brushes are Mode, Opacity, and Flow. They’re also located in the same toolbar on top.
Opacity and Flow work in conjunction and help you control the thickness of your brush strokes.
Mode is exactly the same as Layer blending modes in Photoshop, except the changes will only affect your individual brushstrokes rather than a whole layer of your image.
4. Create Your Own Custom Brush
While there are plenty of options and sites to download brushes from, if it’s something specific that you’re after, it might be easier and quicker to create your own brush. To create a brush in Photoshop, follow the steps below.
- Open a new Photoshop window.
- Select the Brush tool and draw the tip shape that you have in mind.
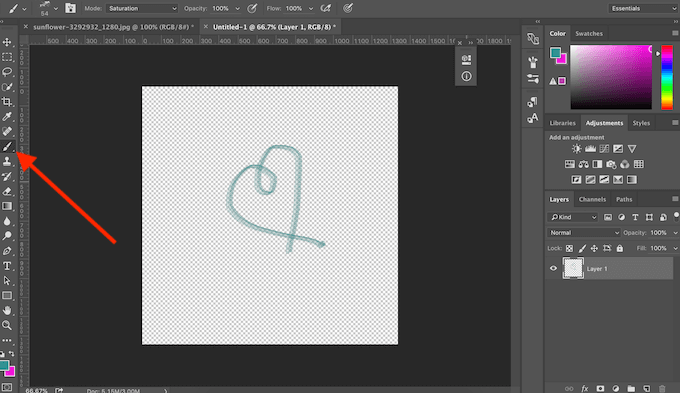
- Select Edit > Define Brush Preset from Photoshop’s menu.
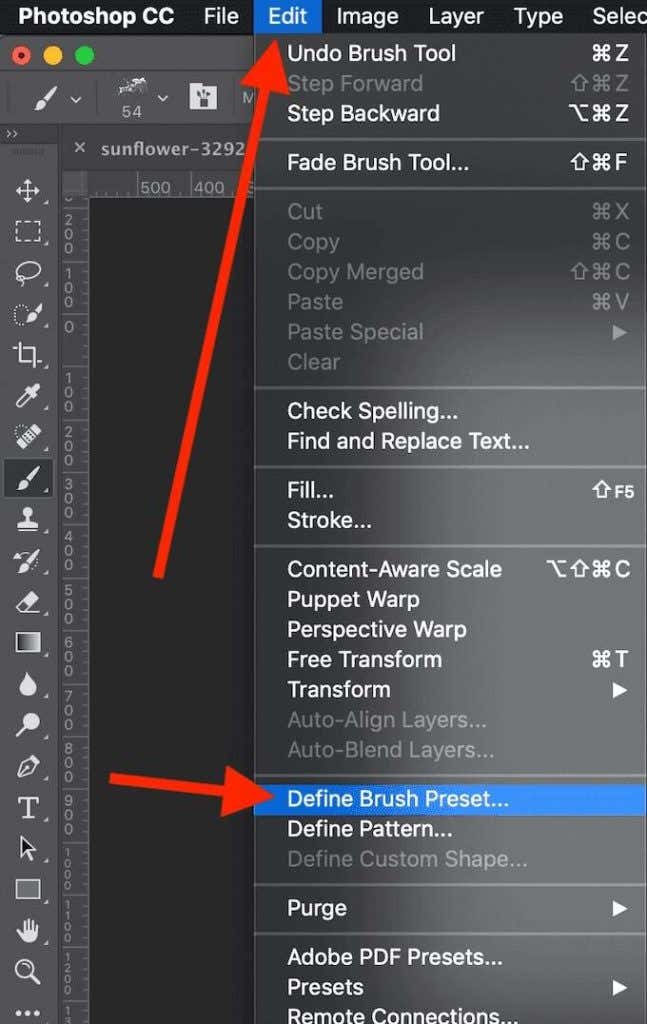
- Add a name for custom your and select Ok to save it.
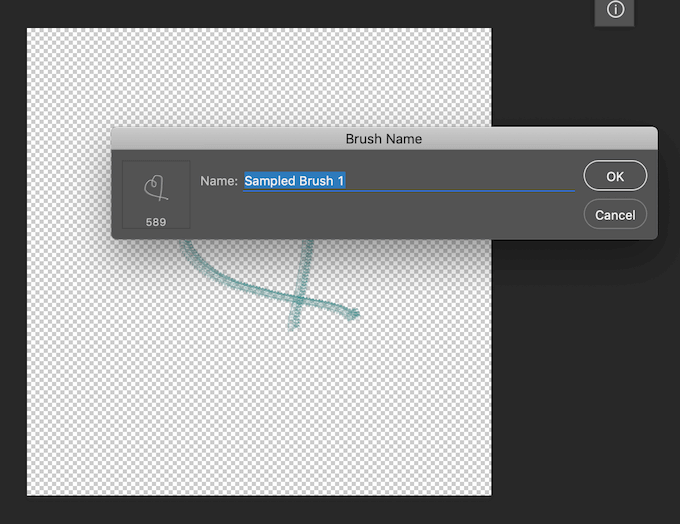
Your custom brush is now added to your list of brushes and is ready to use.
Time to Master Brushes in Photoshop
The Brush tool is great for anyone looking to create their own designs in Photoshop or just do some creative editing of their images. Just like Photoshop filters or presets, brushes are easy to use even if you’re a complete beginner. However, you can really transform your works in Photoshop if you dig deeper and learn how to use Brushes on a professional level.
Do you use brushes in Photoshop? What’s your favorite source of getting new brushes online? Share your Photoshop experience with us in the comments section below.
Related Posts
Anya is a freelance technology writer. Originally from Russia, she is currently a full-time Remote Worker and Digital Nomad. With a background in Journalism, Language Studies, and Technical Translation, Anya couldn’t imagine her life and work without using modern technology on a daily basis. Always looking out for new ways to make her life and location-independent lifestyle easier, she hopes to share her experiences as a tech- and internet-addict through her writing. Read Anya’s Full Bio
