Sometimes, when you run the Windows’ built-in network troubleshooter to fix any internet issues, you might see an error that says “The remote device or resource won’t accept the connection”. There are various reasons this error occurs, many of which are related to your network settings.
Since the error message doesn’t tell you what needs fixing, you’ll have to rely on multiple standard fixes to get around the issue.
Disable Proxy Server
One of the possible reasons for the “The remote device won’t accept the connection” error is your PC’s proxy server. When proxy is enabled, your network data gets transmitted differently than it would when proxy is disabled.
Therefore, turn the proxy server off on your PC and see if that helps you get rid of your problem. You can always turn the proxy server on with a few clicks.
Here’s how to disable proxy:
- Open the Run box by pressing Windows + R keys at the same time.
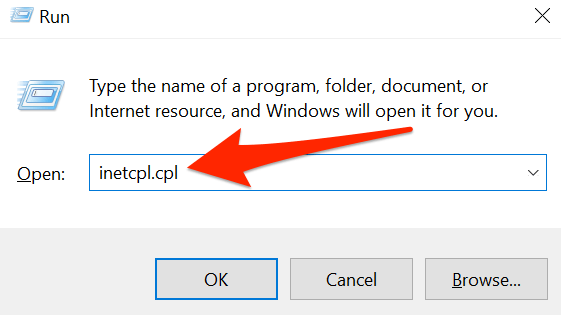
- Type inetcpl.cpl in the Run box and press Enter.
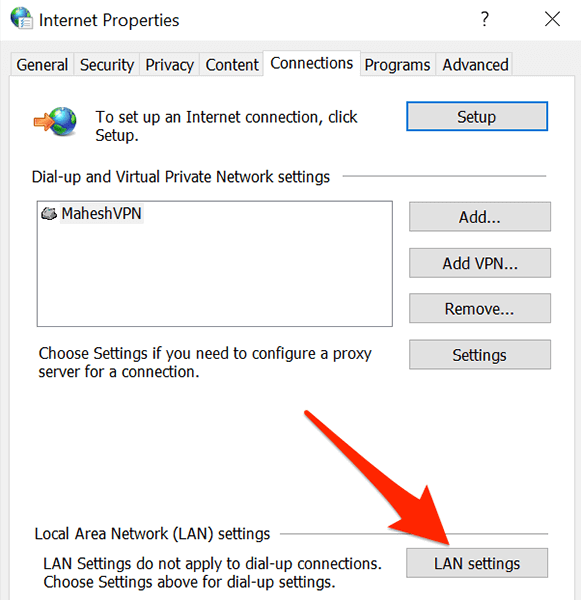
- In the Internet Properties window that opens, select the Connections tab.
- In the Connections tab, at the bottom, select the LAN settings button.
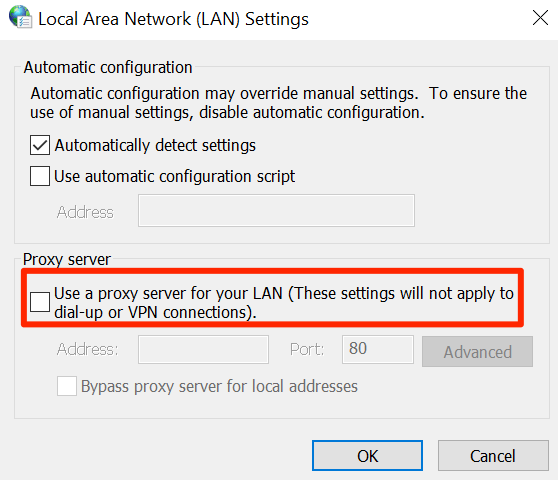
- On the Local Area Network (LAN) Settings window, disable the Use a proxy server for your LAN option. Then, select OK.
- Select Apply and then OK on the Internet Properties window.
Reset Web Browser
If you have trouble accessing websites in your web browser, there might be an issue with your browser. In this case, you can reset the settings for your browser and see if that helps resolve the “The remote device won’t accept the connection” problem.
From the sections below, use the one that’s for your browser to reset your browser.
Reset Internet Explorer
- Open Internet Explorer on your PC.
- Select the settings icon at the top-right corner and choose Internet options.
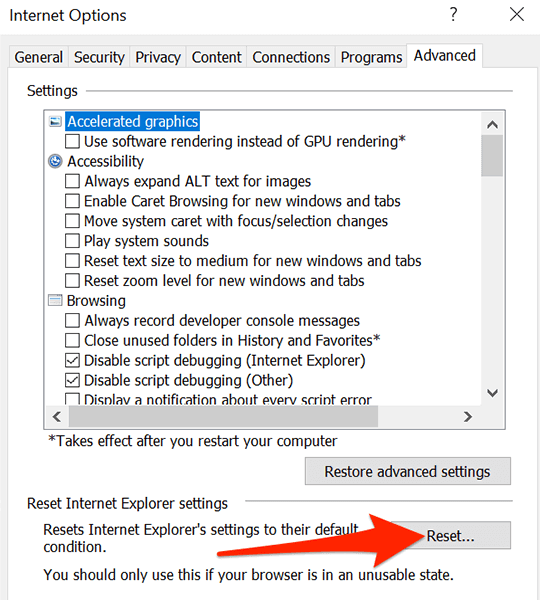
- Select the Advanced tab and then select Reset at the bottom.
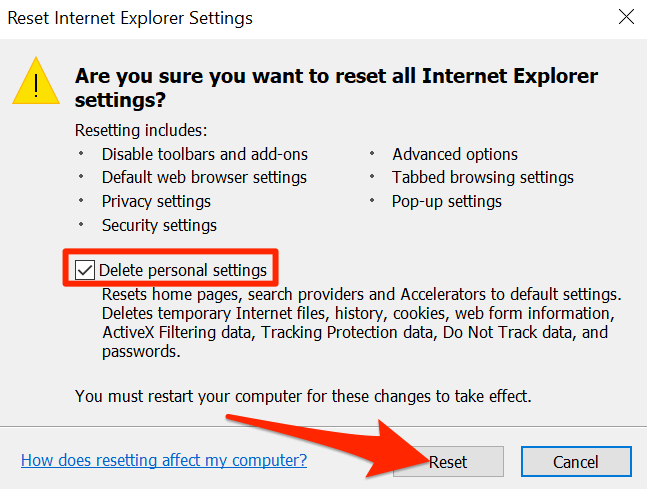
- Enable the Delete personal settings option and select Reset.
Reset Microsoft Edge
- Launch Microsoft Edge.
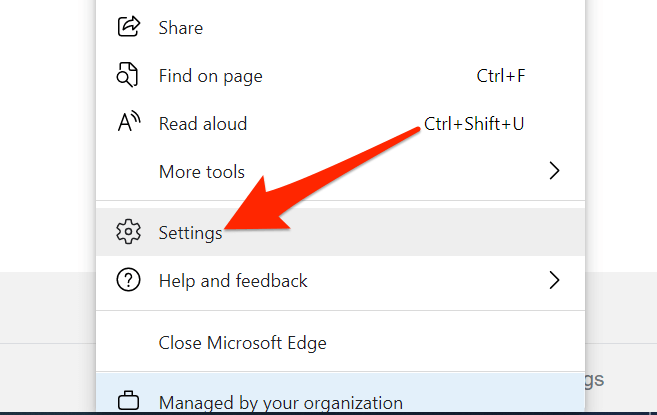
- Select the three-dots menu at the top-right corner and choose Settings.
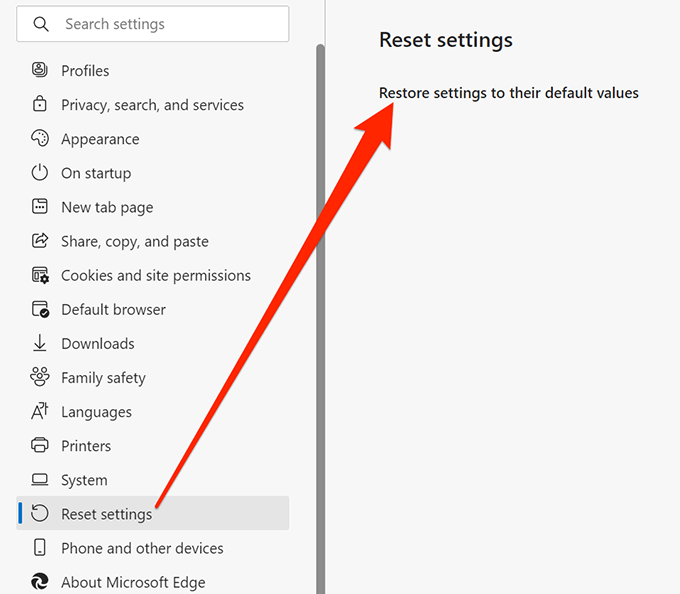
- From the sidebar on the left, choose Reset settings.
- Select Restore settings to their default values on the right.
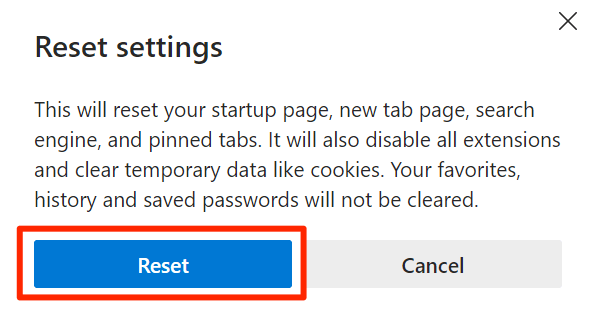
- Select Reset in the prompt.
Reset Google Chrome
- Launch Chrome on your PC.
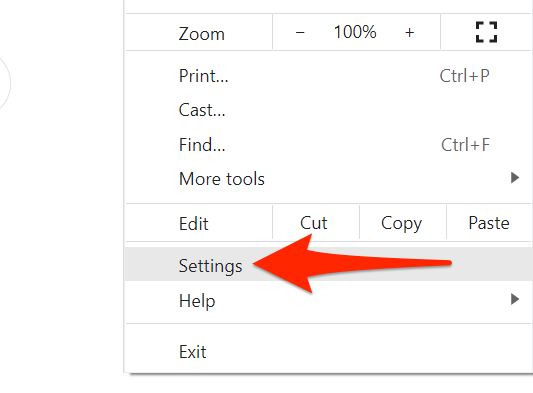
- Select the three-dots menu at the top-right corner and choose Settings.
- From the sidebar on the left, select Advanced.
- Choose System from the Advanced menu.
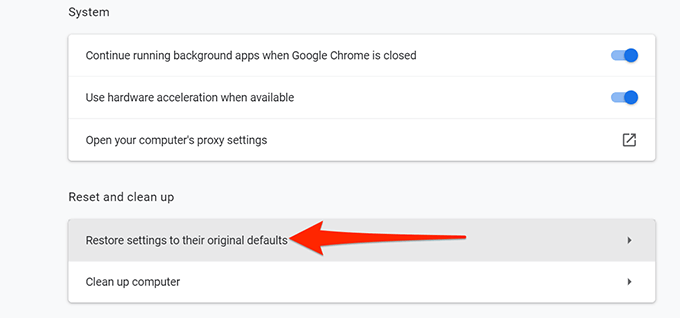
- Select Restore settings to their original defaults on the right.
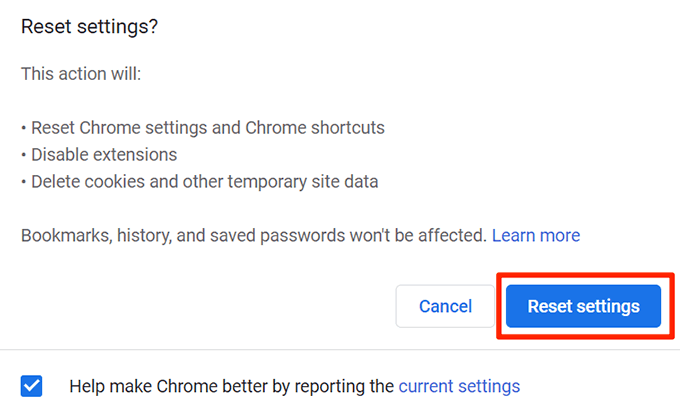
- Choose Reset settings in the prompt.
Disable Windows Firewall
Windows’ firewall defines how your incoming and outgoing network connections should work. If there’s a rule in the firewall that blocks certain connections, that can cause your PC to display the “The remote device won’t accept the connection” error.
In this case, turn the firewall off temporarily and see if that resolves the problem. You can turn the firewall back on whenever you want.
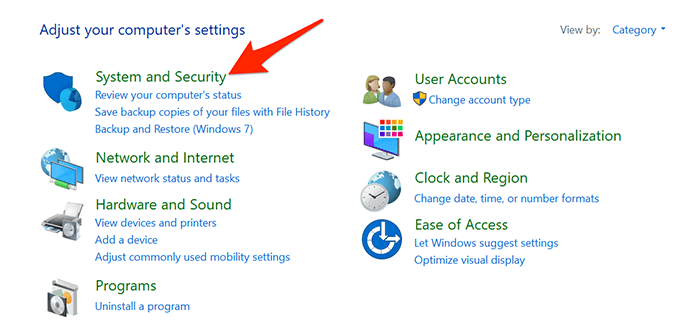
- Open Control Panel on your PC. An easy way to do this is to open the Start menu, search for Control Panel, and select Control Panel in the search results.
- Select System and Security in Control Panel.
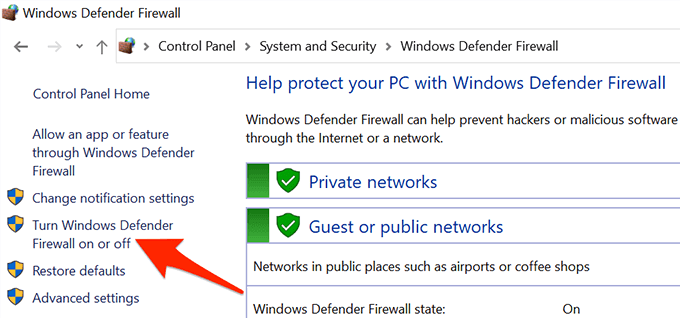
- Choose Windows Defender Firewall on the following screen.
- From the sidebar on the left, select Turn Windows Defender Firewall on or off.
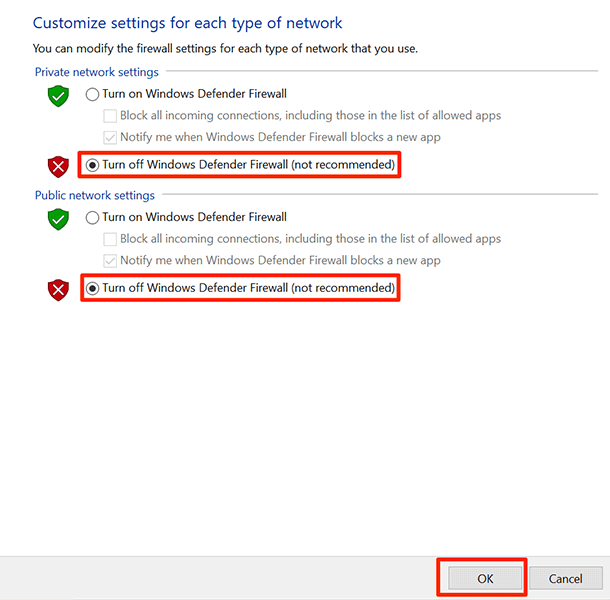
- In the pane on the right, activate the Turn off Windows Defender Firewall option in both Private network settings and Public network settings sections.
- Select OK at the bottom.
Turn Off Antivirus
When you experience network-related issues on your PC, you can’t rule out the possibility of your antivirus interfering with your connections. It’s possible your antivirus is blocking certain connections and causing the network troubleshooter to display a “The remote device or resource won’t accept the connection” message.
If this is the case, fixing the issue is easy. All you basically need to do is turn your antivirus off and see if the error persists. How you turn off your antivirus program depends on what program you’re using.
Generally, you can find the option to turn protection off on the main screen of the antivirus program.
If this doesn’t fix the issue for you, continue with the methods below.
Update Group Policies
If your network administrator has made changes to group policies, you’ll have to wait until those policies go into effect. This usually takes about 90 minutes, but you can expedite this process using a command on your PC.
By running a command from Command Prompt, you can bring any group policy changes into effect right away. This might be helpful in fixing your network issue.
To do that:
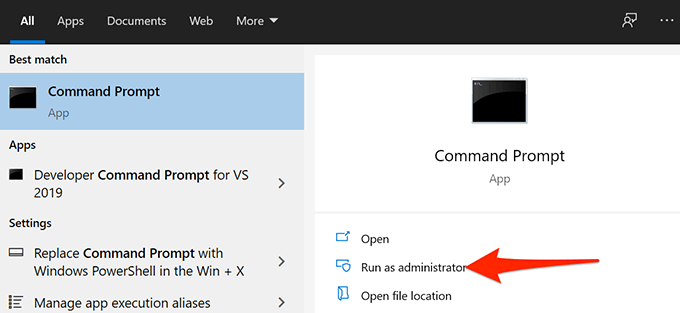
- Open the Start menu, search for Command Prompt, and select Run as administrator.
- Select Yes in the User Account Control prompt.
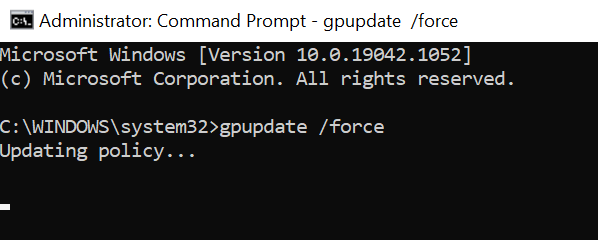
- In the Command Prompt window that opens, type the following command and press Enter:
gpupdate /force
- Wait for your PC to update the group policies.
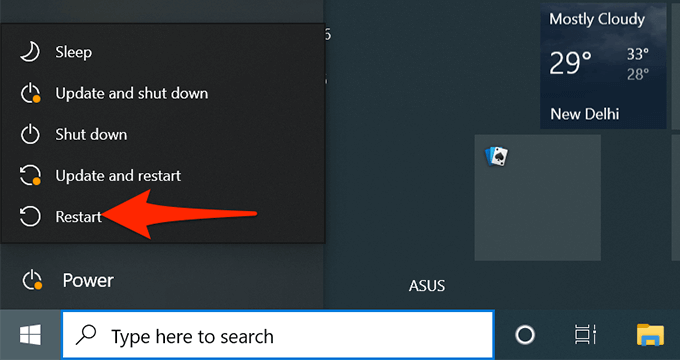
- When the policies are updated, restart your PC. To do this, open the Start menu, select the power icon, and choose Restart.
Release and Renew IP Address
When you encounter network issues like “The remote device or resource won’t accept the connection”, it’s worth releasing and renewing your PC’s IP address to possibly fix the issue.
Releasing and renewing allows your PC to release its current IP address and ask your router’s DHCP server for a fresh new IP address. You, as a user, just have to run a couple of commands from Command Prompt, and this utility will take care of the rest for you.
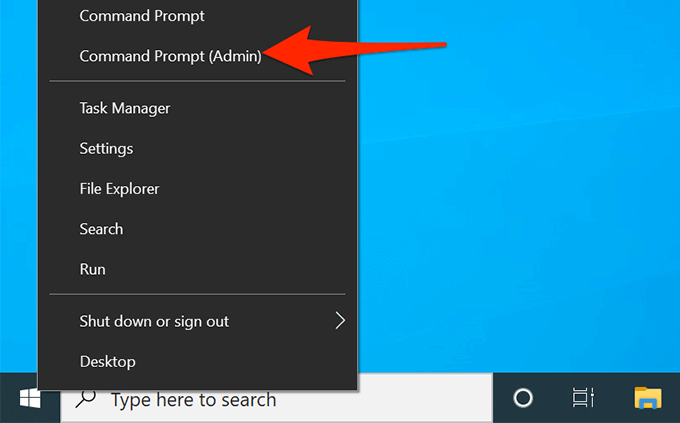
- Right-click the Start menu icon and choose Command Prompt (Admin) from the menu that opens.
- Select Yes in the User Account Control prompt.
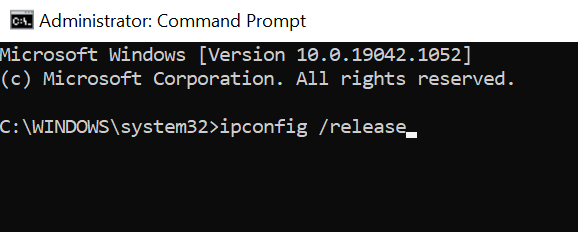
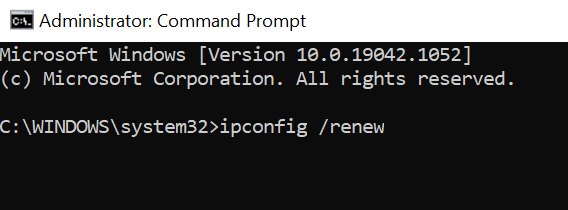
- On the Command Prompt window, type the following command and press Enter:
ipconfig /release
- When the above command is executed, type the following command and press Enter:
ipconfig /renew
- Close the Command Prompt window.
Hopefully, using one of the methods outlined above, you should be able to fix the “The remote device or resource won’t accept the connection” error on your PC and resume your network activities.
Related Posts
- Preparing for Windows 10 End of Support: Upgrading to Windows 11
- How to Fix a “This file does not have an app associated with it” Error on Windows
- How to Fix an Update Error 0x800705b4 on Windows
- How to Resolve “A JavaScript error occured in the main process” Error on Windows
- How to Fix the Network Discovery Is Turned Off Error on Windows
Mahesh has been obsessed with technology since he got his first gadget a decade or so ago. Over the last few years, he’s written a number of tech articles on various online publications including but not limited to MakeTechEasier and Android AppStorm. Read Mahesh’s Full Bio
