If you’re stuck on how to add a splash of color to your document, tables are a great way to break up text and draw attention to key points in Microsoft Word. Not only do they look aesthetically pleasing, but color can help structure the visual hierarchy of your work as well.
Microsoft Word makes it easy to change the background color of your table. You can color already existing tables, or create new ones from scratch. It doesn’t matter if the data is already written in the table. Changing the background color of a cell, row, column, or entire table, won’t affect its content. So In this blog post, we’ll give you all the tips and tricks for sprucing up your table designs with vibrant colors that will make them stand out from the page.
Add a Color With Shading
To add a background color with Shading, you just need to select the parts of the table you want to color. You can use this method to add more than one color to the table. Here is how:
- Insert a table, or choose the already existing one.
- If you want to select the whole table, mouse over it and click on the four-fork arrow icon at the top.
You can also select only a single cell simply double-click on it. If you want to select an entire row or a column, click on the last or first cell and drag the cursor to where you want to end the selection.
If you want to select multiple non-continuous table cells, press Ctrl and then select the cells you want to color by double-clicking.
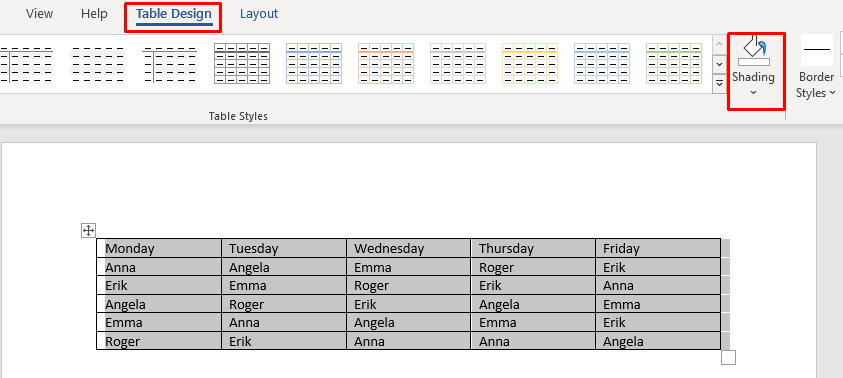
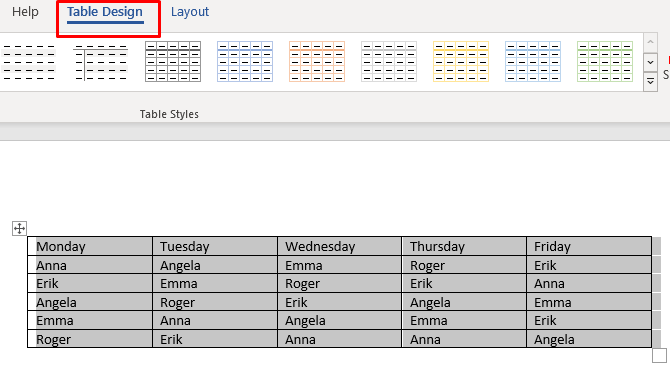
- When the table is selected you’ll notice two new features appearing on the ribbon: Table Design and Layout.
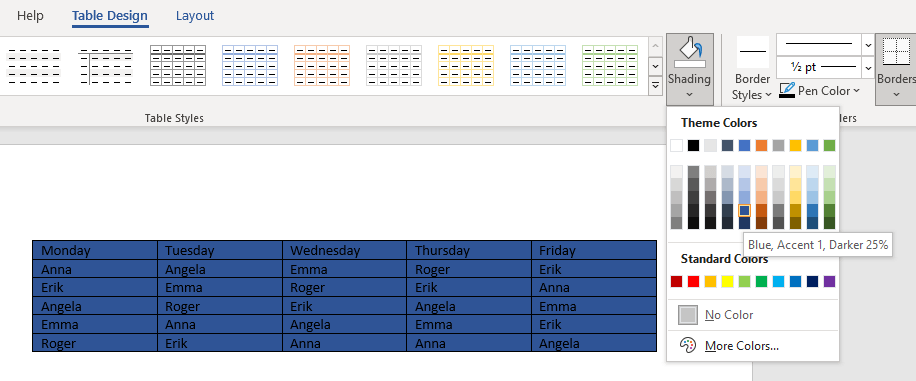
- Go to Table Design and select the drop-down arrow under Shading.
- A drop-down menu will appear with a color pallet. Choose the color you want to add to the table.
Now you can customize the color of your table by taking the following steps:
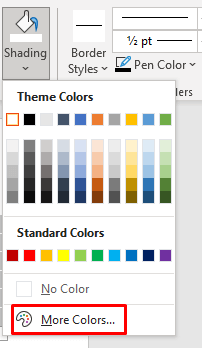
- Go to the Shading drop-down arrow again, and select More Colors at the end of the drop-down menu.
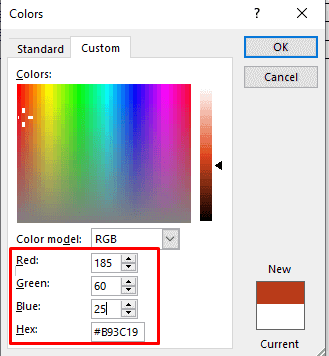
- When the new window pops up, go to the Custom tab.
- Click anywhere on the color panel to select a custom color, or enter your custom RGB color code in the appropriate fields.
- When you’re done selecting the custom color, press OK to return to the table.
This is one way to color the background of your Word table and it’s pretty straightforward. However, there is more than one way of accessing the Shading button:
- Simply click on the table selection button and a new menu will appear. Locate the Shading button there by looking for its icon.
- You can also find the Shading button in the Home tab on the ribbon.
Use Table Styles
You can use Table Styles to change the color of a table. Mind you, these styles are something like presets, theme colors, or templates. You’ll choose a template for a whole table, but you can later edit it, add more colors, or change the existing colors. This method works only on an entire table, but you can change the color of its cells or rows later, using the method described above.
- Select the table you want to add color to and go to Table Design.
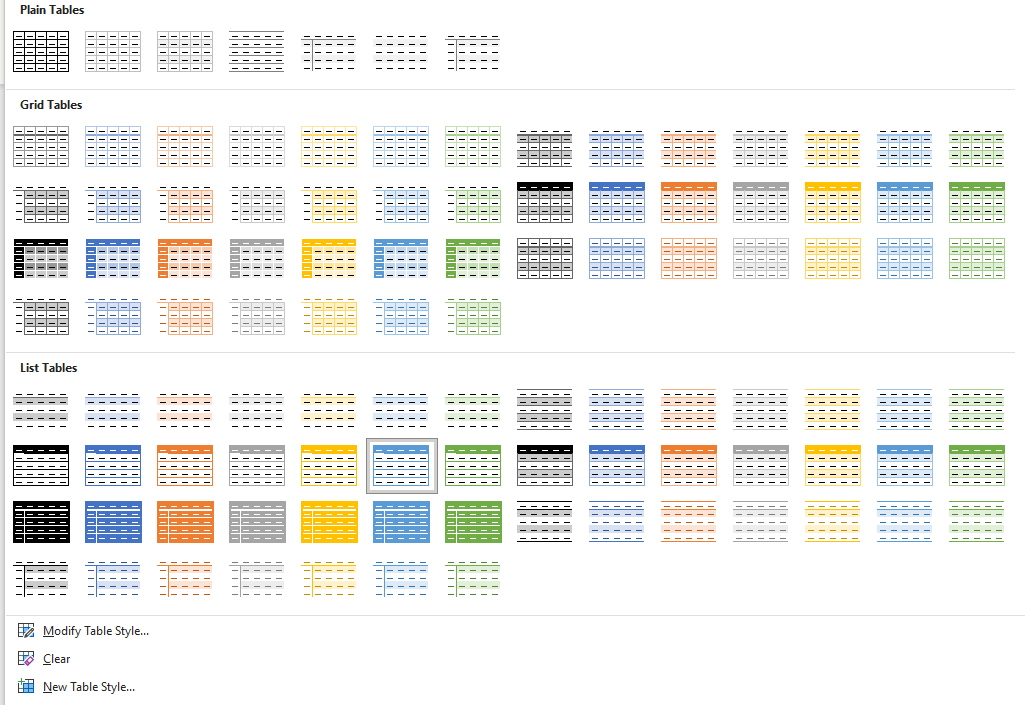
- Click the arrow at the bottom right corner of the Table Styles ribbon.
- A new window with different table style presets will appear. Select your favorite one.
- You can now use the Table Style Option section to modify the table.
Table styles can be beneficial if you don’t have time to design your tables. You can simply choose the preset and it will change not only the background color but the entire look of your table, including borders, cells, and headers.
Add Color With Borders and Shading
Adding background color to the Microsoft Word table with Borders and Shading is best used on already existing tables.
- Select a whole table or only the parts you want to tint.
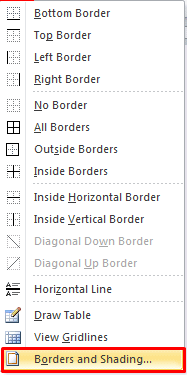
- Right-click on one of the selected table cells and choose Borders and Shading.
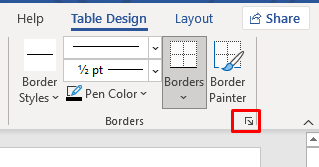
- If you’re using the latest version of Microsoft Office, to find this option go to Table Design, and then click on the arrow pointing down in the bottom right corner of the Borders section.
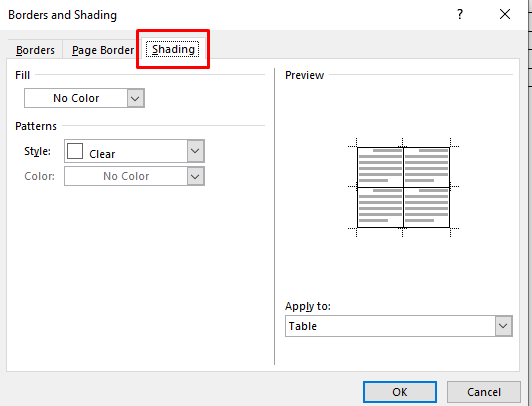
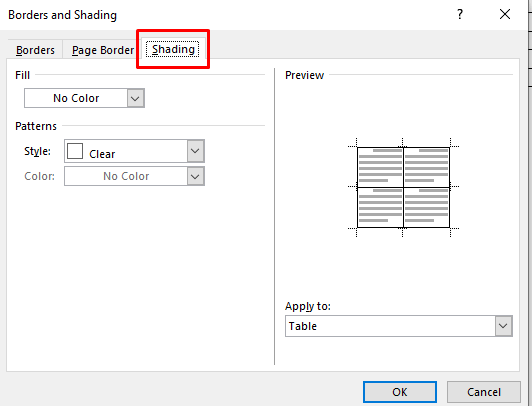
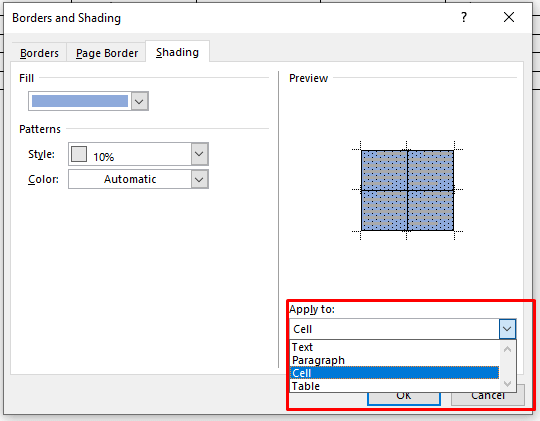
- A new dialog box will open. Go to the Shading tab.
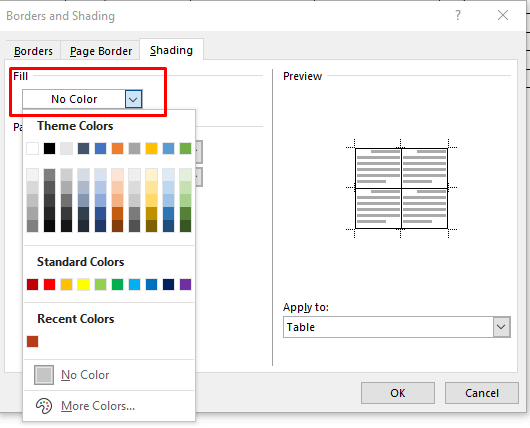
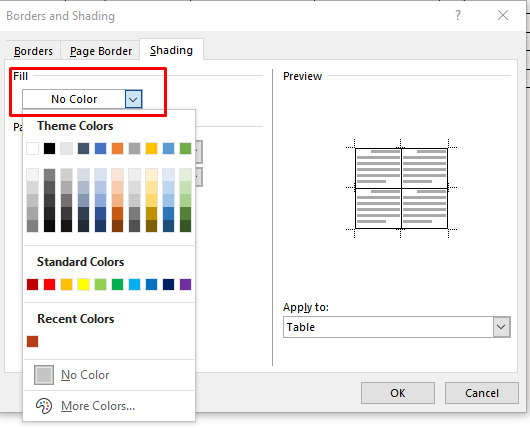
- Select the Fill drop-down arrow and the color chart will open. Simply choose the color you want.
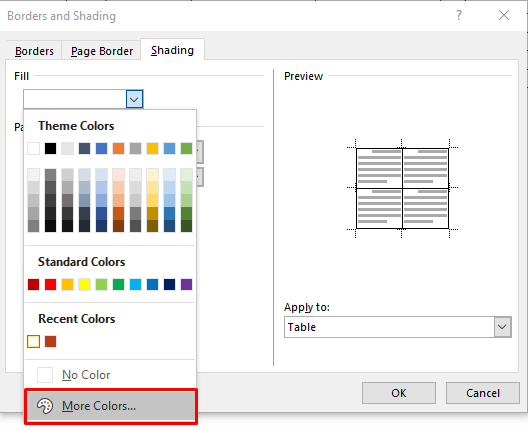
6. To customize the background color, go to More Colors and select a color from the pallet, or import the custom RBG code.
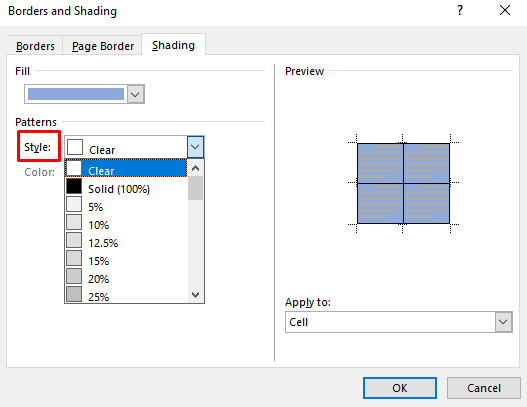
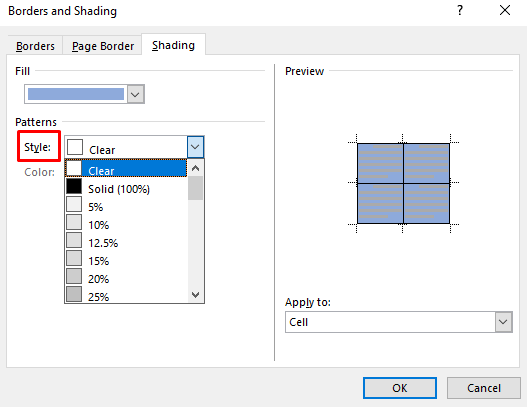
7. Now you can choose the tint percentage of the chosen color by selecting the Style drop-down arrow.
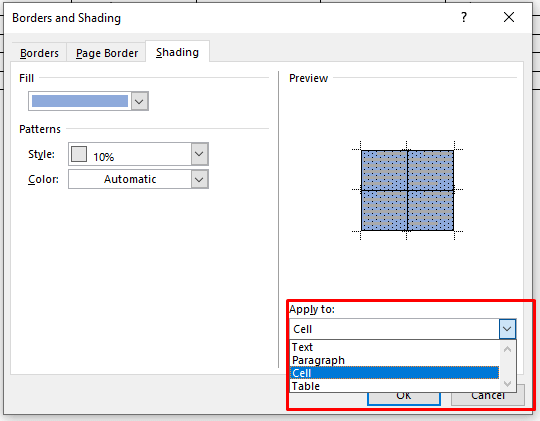
8. You can also go to the Apply to drop-down menu and choose Cell to apply the coloring only to the table selection. If you choose Table, the color will be added to the entire table.
Once you’re done selecting the color and parameters, click OK to return to the table. The changes will automatically be applied.
Add Background Color With Page Borders Design Tab
The last method of adding a background color to the table might feel redundant. However, it is an option and some people might feel it more natural to add color to their tables this way. Although very similar to the previously described method, you’ll find the Page Borders Design tab more conveniently placed on the ribbon.
- Select the table or part of the table you want to add color.
- On the ribbon find the Design tab.
- Select Page Borders on the right side of Word’s ribbon.
This will open the Borders and Shading window. From here you can set the color and parameters by using the steps described in the previous method. Let’s repeat them just in case:
- Choose the Shading tab.
- In the Fill section click on the drop-down arrow and choose the color.
- Select the tint percentage in the Style section.
- Go to Apply to the dropdown arrow and select whether to apply the color on the entire table or just selected cells.
And that’s it!
Now you know four different ways to add a background color to your Microsoft Word tables. Adding a background color to tables in Word is a great way to visually organize content. With the simple steps provided above, you can apply backgrounds and borders to tables with ease. Now, your documents will be easier to read for everyone.
Related Posts
Nicolae is a Jack of all trades technology writer with a focus on hardware, programming languages, and AI image-processing software. Over the last five years, he has ghostwritten numerous tech how-to guides and books on a variety of topics ranging from Linux to C# programming and game development. Nicolae loves everything that has to do with technology and his goal is to share his knowledge and experience with others. Read Nicolae’s Full Bio

