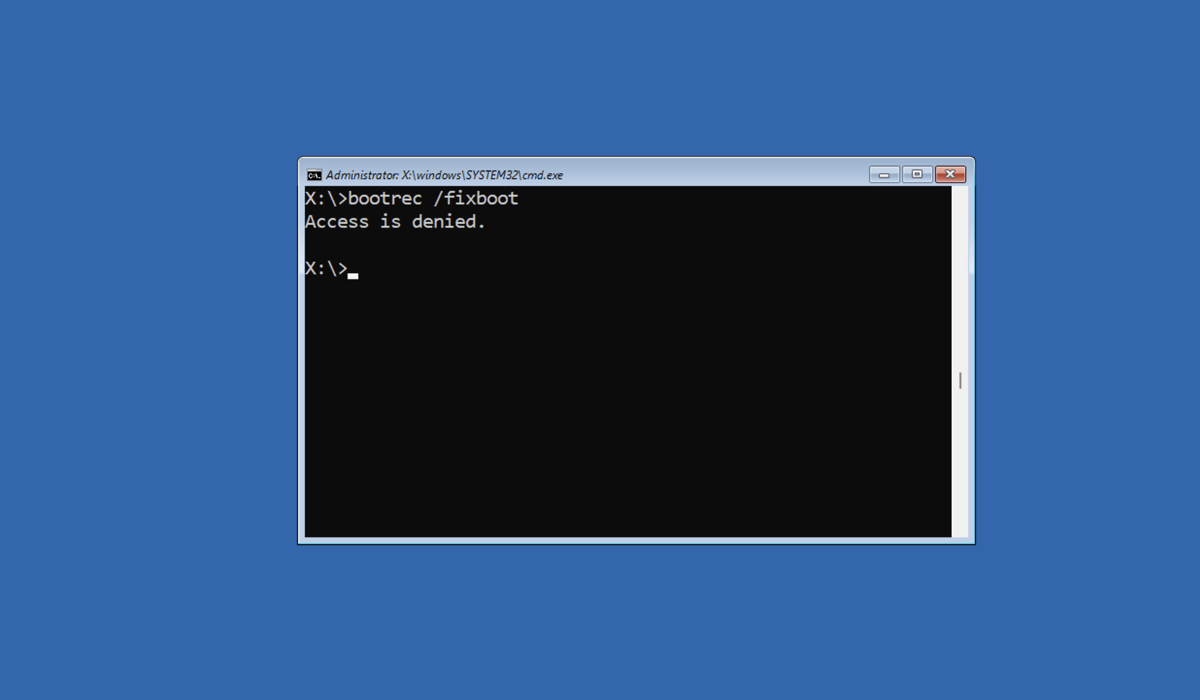
The bootrec /fixboot access is denied error in Windows is a frustrating error that occurs when you’re trying to resolve problems with your boot configuration data. If you’re at this stage, then your PC is probably already refusing to boot—that’s a problem that you’ll need to resolve.
To fix the bootrec /fixboot access is denied error, follow the steps below.
What Causes the Bootrec /Fixboot Access Is Denied Error?
The bootrec /fixboot access is denied error has a few different causes.
In most cases, there’s a simple reason for it—you’re probably using the wrong command. On Windows 10 and Windows 11, the typical boot loader in use is an EFI (or Extensible Firmware Interface) boot loader. This doesn’t support the use of bootrec /fixboot to fix boot problems.
If you’re using an older, legacy Master Boot Record, however, it does. Unfortunately, data about this is often confusing online, so it’s important to figure this out before you proceed with trying to repair your boot data, which can (and likely will) stop your PC from working.
If you’re searching for this problem, however, then it’s possible that you already have damaged or corrupted boot configuration data (or BCD). If your BCD data gets compromised, it can directly affect the boot process and generate an error.
It’s important to note that hardware issues can also cause problems—in particular, a failing hard drive. If the drive containing your Windows installation is failing, for example, this can cause data corruption and prevent your PC from booting up. You’ll need to check your hard drive health before you proceed.
Use Startup Repair on Windows
If you’re searching for information on the bootrec /fixboot “access is denied” error in Windows, we’ll assume that you’re having trouble booting up your PC.
If that’s the case, you can use the built-in Startup Repair tool (also known as the Automatic Repair tool) to resolve it. This tool can fix problems that prevent Windows from loading properly.
- To get started, restart your computer and press the appropriate key to enter your BIOS or UEFI settings (typically F2, F12, or the Delete key).
- In the BIOS or UEFI settings, configure your boot settings so that your USB or DVD drive containing your Windows installation files boots first.
- Save the changes, insert the Windows installation media (USB or DVD), and then restart your PC.
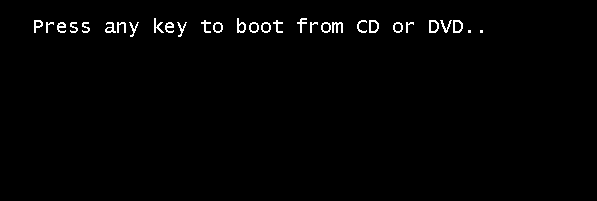
- Next, press any key to boot from the installation media when prompted.
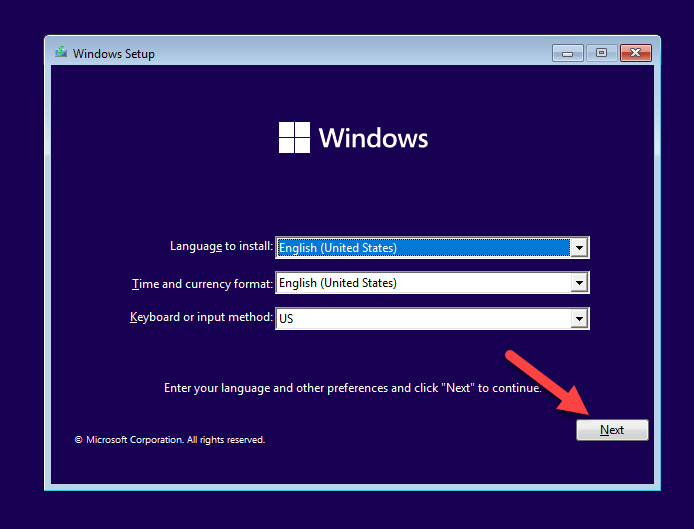
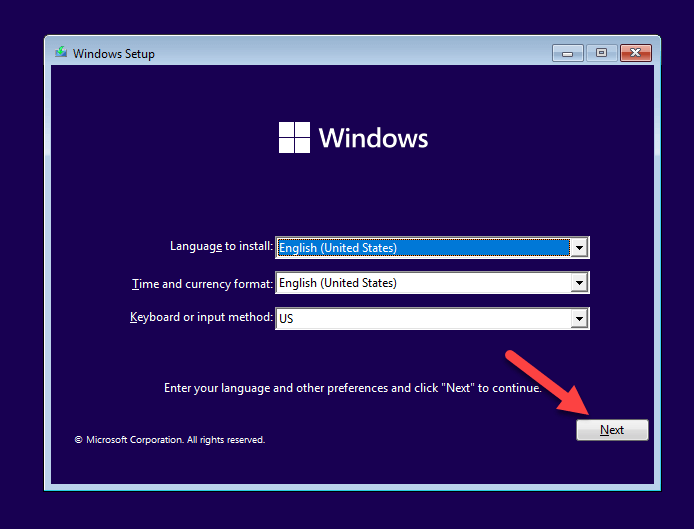
- Choose your language, time and currency format, and input method, then click Next to proceed.
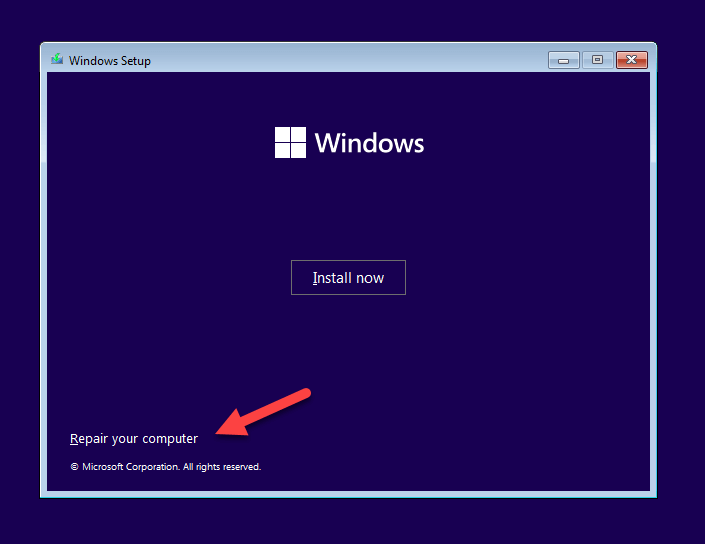
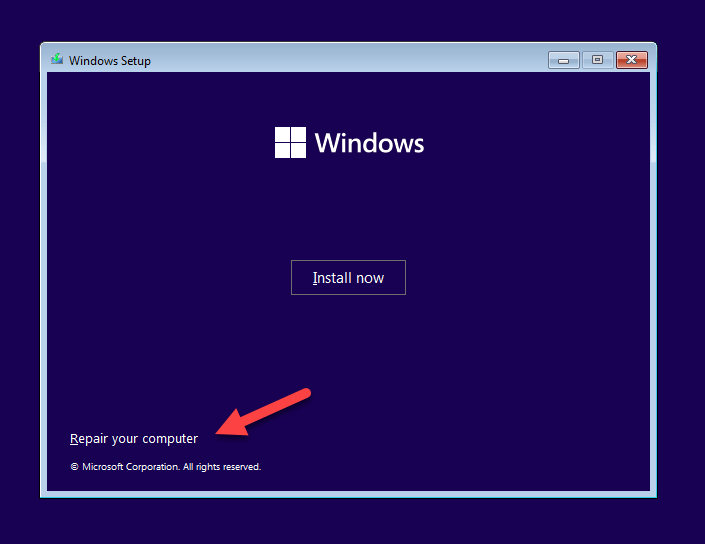
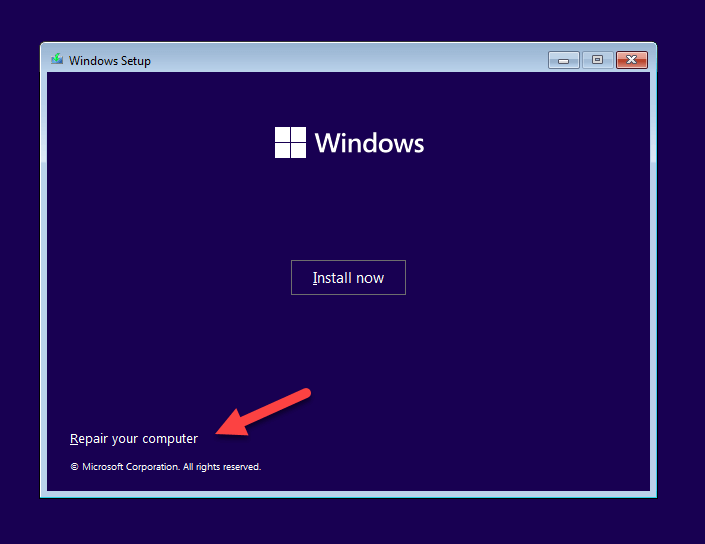
- Press Repair your computer in the bottom-left corner of the screen.
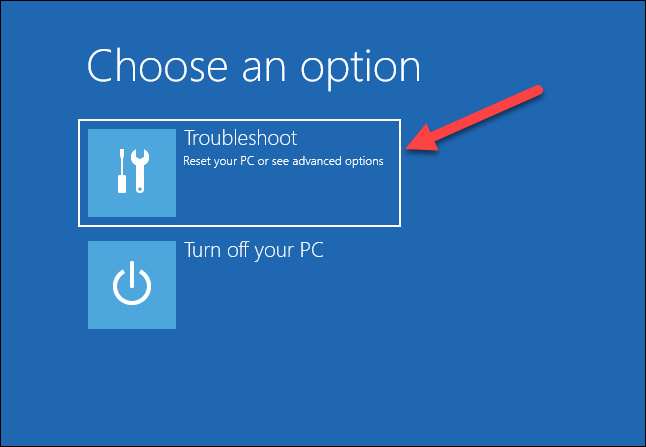
- Select Troubleshoot from the Choose an option menu.
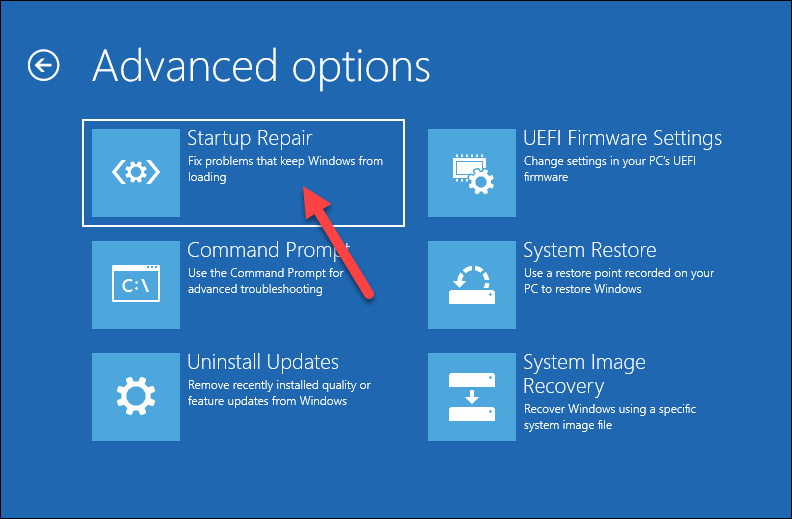
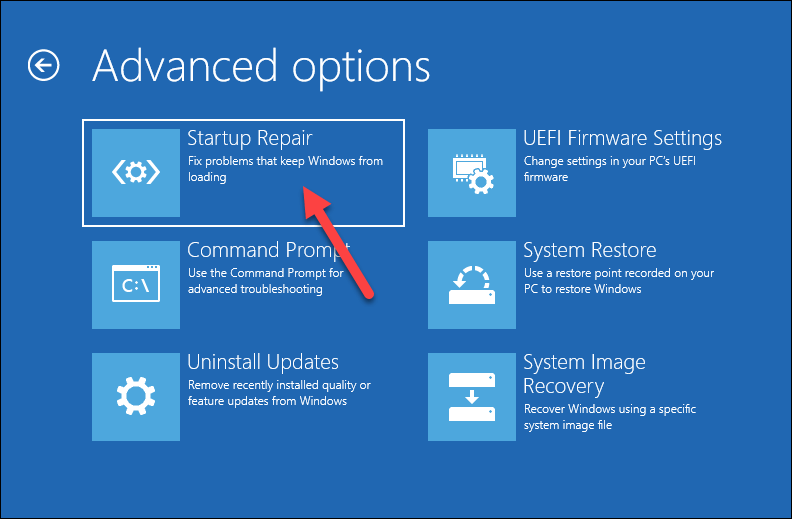
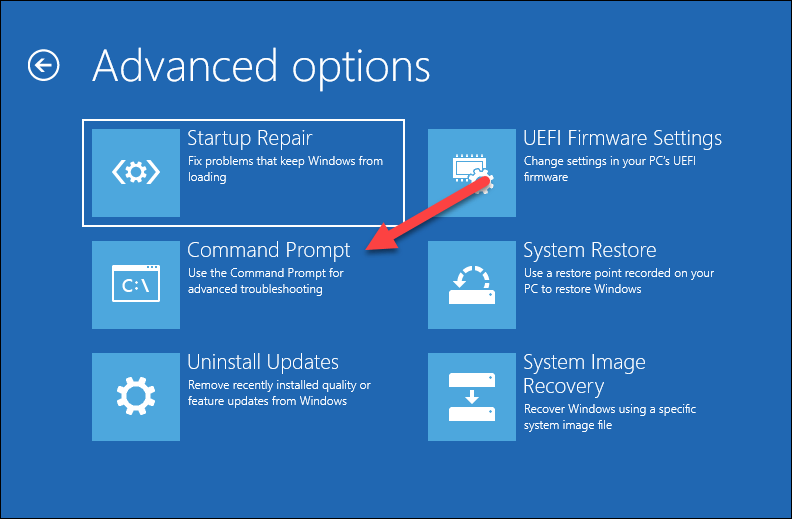
- Next, press Advanced Options > Automatic Repair or Startup Repair (depending on your version of Windows).
- Follow the on-screen instructions and let the Startup Repair process complete.
Once completed, restart your computer and check if it boots up correctly. If the issue persists, you’ll need to try a different method.
Use Diskpart
Diskpart is a command-line utility in Windows that helps you manage disks, partitions, and volumes. It’s a good idea to use diskpart to check that all of your drives and volumes are accessible (including your boot drives) as this may prevent your PC from booting.
You can also use diskpart to delete the existing EFI partition and format it—this should allow you to run the necessary commands to restore your boot configuration files afterward. However, formatting this partition will prevent your PC from booting (if it isn’t already), so we’d advise caution before you proceed.
Make sure that you have backed up your data as working with diskpart can potentially lead to data loss if it isn’t used carefully. You’ll also need a USB drive or DVD with the Windows installation media to proceed.
- To begin, boot into your Windows installation media and press Repair your computer in the installation menu.
- Next, press Troubleshoot > Advanced options > Command Prompt to open a Command Prompt window.
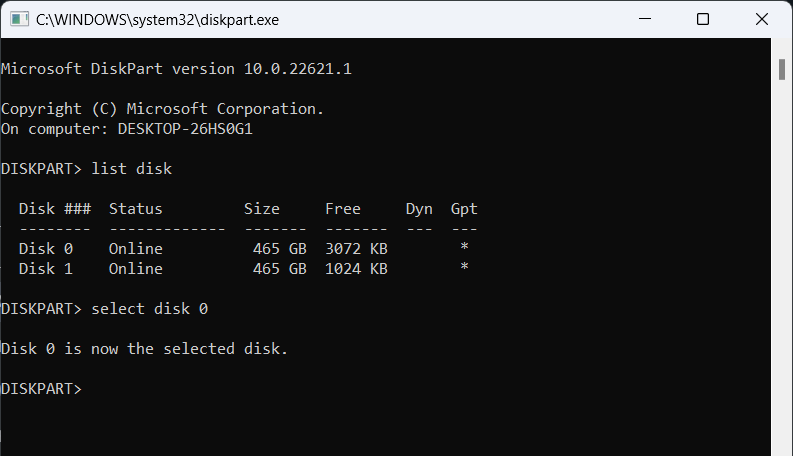
- In the cmd window, type diskpart and press Enter.
- Enter list disk to display a list of all available disks connected to your computer.
- Determine the disk where Windows is installed, and enter select disk #, replacing # with the appropriate disk number.
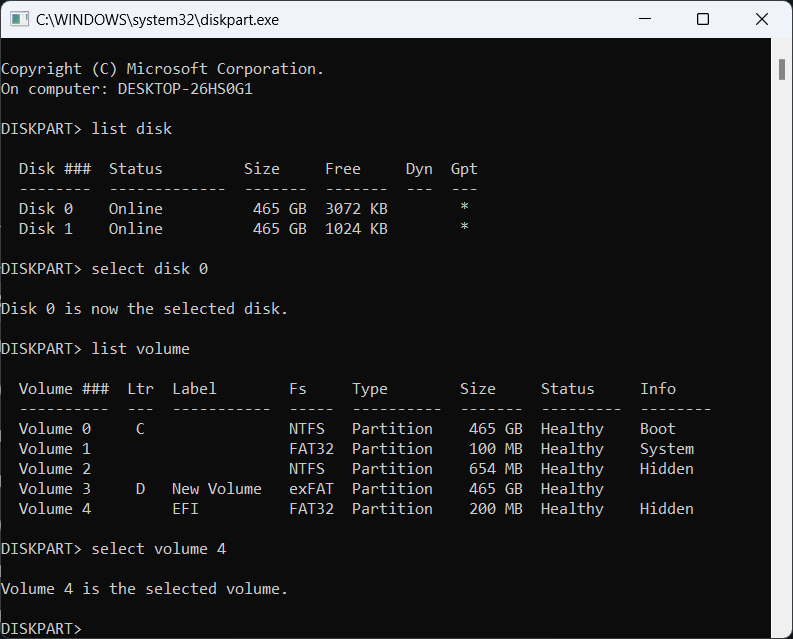
- Now type list volume and press Enter to display a list of all volumes on the selected disk.
- Identify the volume number of the EFI (Extensible Firmware Interface) partition, which is typically formatted as FAT32 and may have an EFI label.
- Enter select volume #, replacing # with the volume number of the EFI partition. To be clear, this assumes that you’re using a newer EFI bootloader for Windows (which is most likely for Windows 10 and Windows 11 installations).
- If the EFI partition does not have a drive letter assigned, assign one by typing assign letter=V: replacing V with your desired drive letter.
- To format the EFI partition as FAT32, type format V: /FS:FAT32 and press Enter, replacing V with the actual assigned letter.
- After the EFI partition is formatted, exit diskpart by typing exit and pressing Enter.
Rebuild BCD Using Bootrec and Bcdboot
If you’ve formatted your EFI partition, you should be able to run the bootrec command and restore your boot configuration data (BCD) to it. However, there are three things to note before you begin.
These steps assume that you’re using an EFI bootloader rather than the Master Boot Record (MBR), which has different steps to follow if you need to restore it. This is the default configuration for Windows 10 and 11 PCs.
You’ll also need to know the correct drive letters for your main system partition (containing your Windows installation) and your EFI partition. You can follow the steps above using the diskpart command to help you determine this.
Finally, these instructions will only work for users running Windows 11 (all versions) and Windows 10 version 1709 and later.
- First, insert your Windows installation media (whether it’s on a DVD or USB drive) and restart your computer.
- As your PC starts up, press the appropriate key to access the boot menu (such as F2, F12, or Delete). Once you’re in the boot menu, select your installation media (either a USB drive or DVD drive) as the option to boot into.
- When the Windows setup screen appears, choose your language settings and click Next, then press Repair your computer in the bottom-left. This will boot you into the Windows Recovery menu.
- Next, select Troubleshoot > Command Prompt.
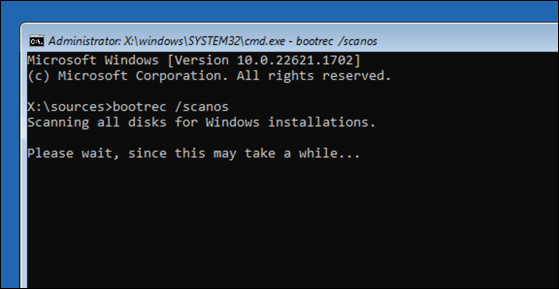
- Once the Command Prompt window opens, you’re ready to enter a series of commands to rebuild your BCD—start by typing bootrec /scanos and press Enter. This command scans all disks for installations compatible with Windows and displays the results.
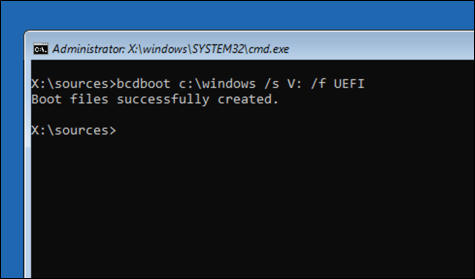
- Next, copy your BCD data from your Windows system partition to your EFI partition by typing bcdboot c:\windows /s V: /f UEFI and pressing Enter, where V: is the correct drive letter for your EFI partition (as explained above).
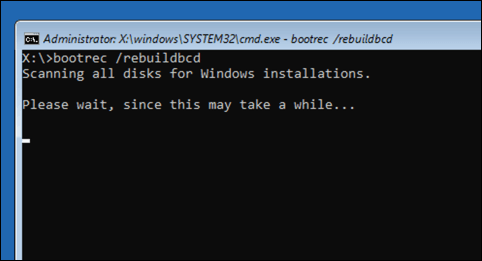
- Next, type bootrec /rebuildbcd and press Enter. This command rebuilds your BCD data by scanning for installed operating systems. With the data moved to your EFI partition, this will allow your PC to boot again.
- Once you’ve entered all the commands, close the Command Prompt window and restart your computer.
Reinstall Windows
If all else fails, and you’re sure that your drive is working properly, you’ll need to consider a more drastic option—reinstalling Windows entirely. This means reinstalling Windows over your existing partition data using Windows installation media.
If you decide to reinstall Windows, you’ll see a fresh configuration (including boot loader) applied to your drive. This should resolve any boot issues, including the bootrec /fixboot access is denied error (which you shouldn’t need to run afterward).
Before you start, remember to create a backup of your important files and data, as repairing or reinstalling Windows may potentially lead to data loss.
To reinstall Windows:
- Insert the Windows installation media (DVD or USB flash drive) into your computer and restart your computer, making sure to press the appropriate key to boot from the installation media. If it doesn’t, make sure to check your UEFI or BIOS settings to ensure that your installation media boots first.
- When the installation screen appears, confirm your language, time, and keyboard settings, and then press Next.
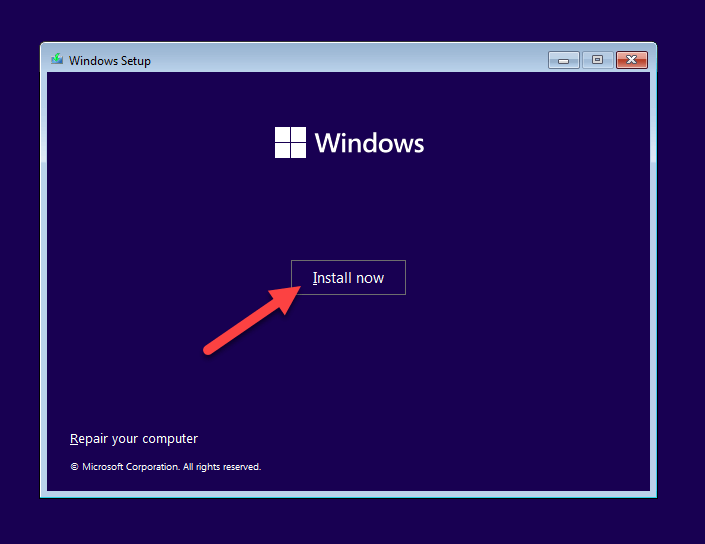
- Wait a few moments, then press Install Now at the next screen.
- Provide your product key, select your Windows version, and accept the user agreement.
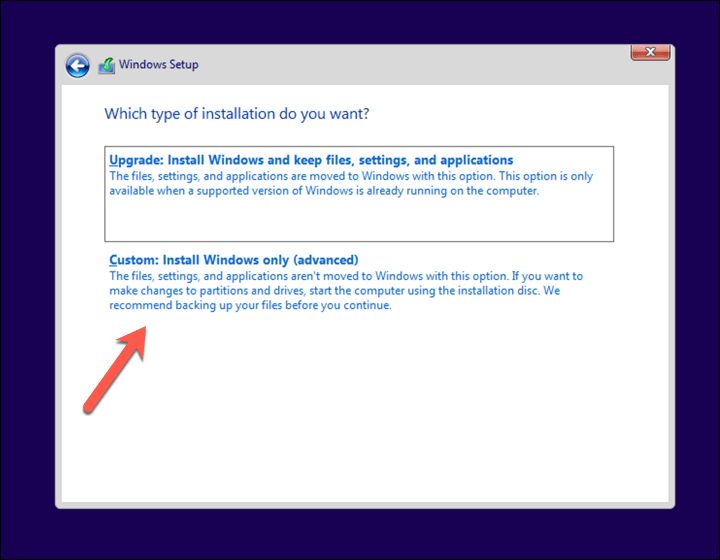
- When prompted, choose the Custom option as your preferred installation type.
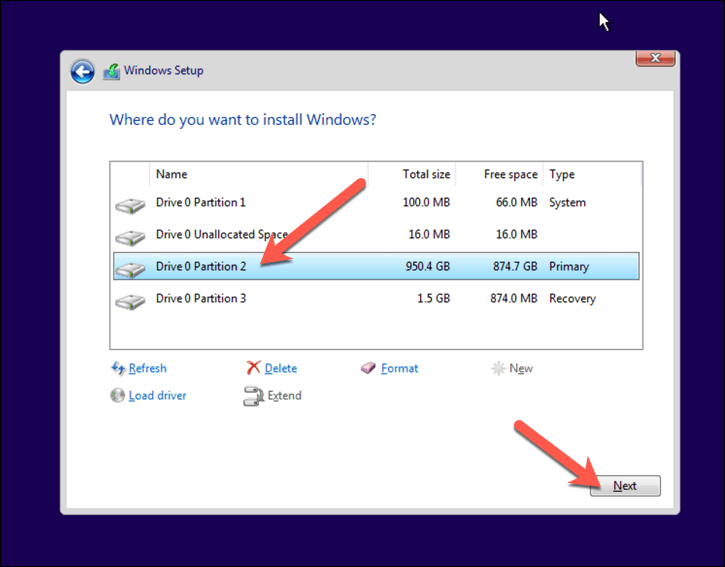
- Select the partition to install your Windows installation, then press Next. If you already have a Windows installation, make sure to select this partition. If this fails, you may need to press Delete to remove the partition and then New to re-create it, but you will lose any files already on the partition.
- Follow any additional on-screen instructions to begin and complete the installation.
Once the installation is complete, Windows should boot up normally, resolving any boot issues you had previously.
Maintaining Windows 11
For most users with a recent Windows PC, you’ll need to bypass the bootrec /fixboot access is denied error and consider a better option for repairing your bootloader. However, if you’re using an older MBR, or you still can’t recover your PC, you’ll need to consider reinstalling Windows entirely instead.
Run into other problems? You don’t need a fresh installation—you can always try repairing Windows 11 with a bunch of built-in tools and troubleshooters instead.
Related Posts
- Preparing for Windows 10 End of Support: Upgrading to Windows 11
- How to Fix a “This file does not have an app associated with it” Error on Windows
- How to Fix an Update Error 0x800705b4 on Windows
- How to Resolve “A JavaScript error occured in the main process” Error on Windows
- How to Fix the Network Discovery Is Turned Off Error on Windows
Ben Stockton is a freelance technology writer based in the United Kingdom. In a past life, Ben was a college lecturer in the UK, training teens and adults. Since leaving the classroom, Ben has taken his teaching experience and applied it to writing tech how-to guides and tutorials, specialising in Linux, Windows, and Android. He has a degree in History and a postgraduate qualification in Computing. Read Ben’s Full Bio
