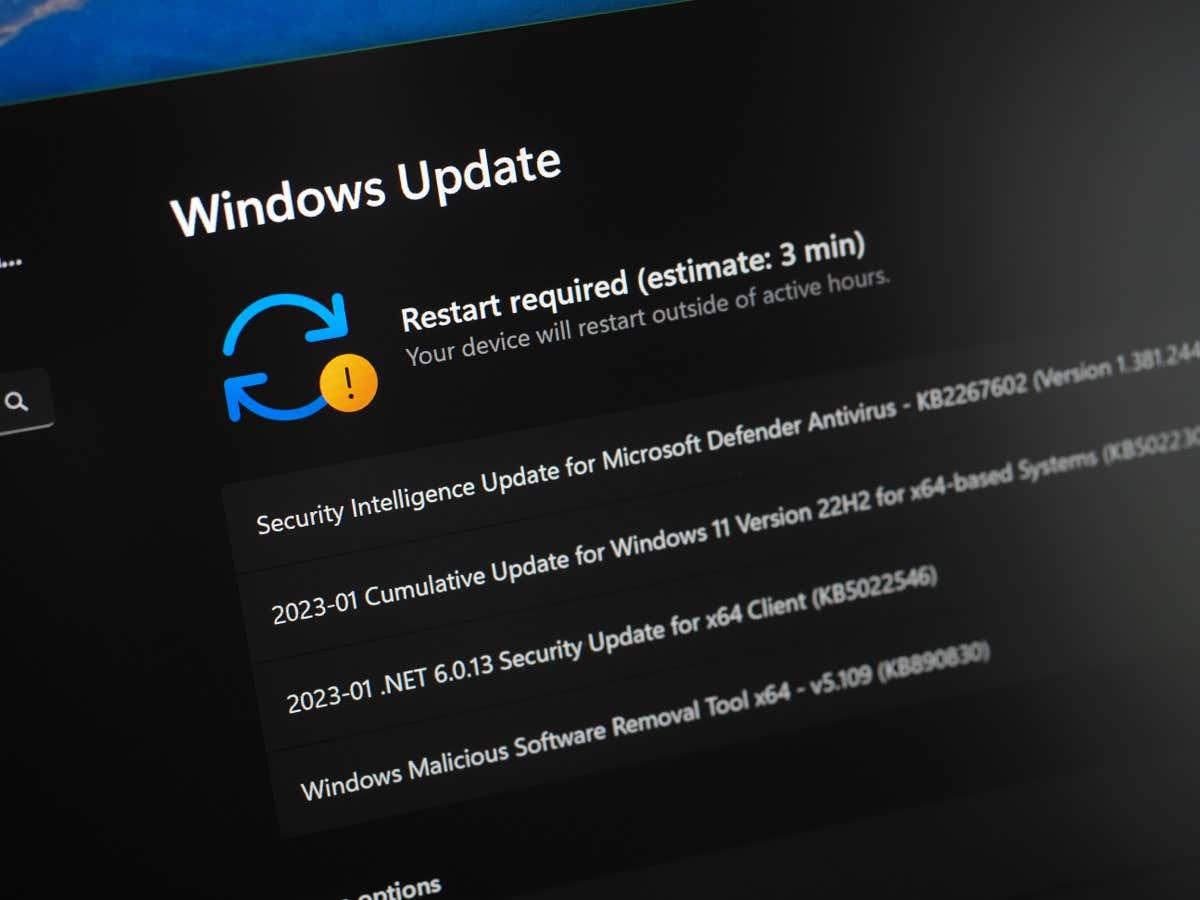
Do you get a “Realtek Semiconductor Corp Extension Install Error” while trying to install an update on your Windows PC? Your Windows Update feature may be faulty, or your operating system may have another issue. Many items can cause your update to fail to install. We have a few solutions that you can use to get rid of this error.
A couple of other reasons you can’t install your Realtek driver update are that your Windows Update cache is corrupted or your current drivers are problematic. You can fix these items to potentially resolve your problem.
Use Windows Update Troubleshooter on Your PC
Whenever you face an issue updating your Windows system or device drivers with Windows Update, use your PC’s built-in Windows Update troubleshooter to detect and resolve your update problems. This tool’s sole purpose is to find and fix all your update issues.
The tool is available in both Windows 11 and Windows 10 systems.
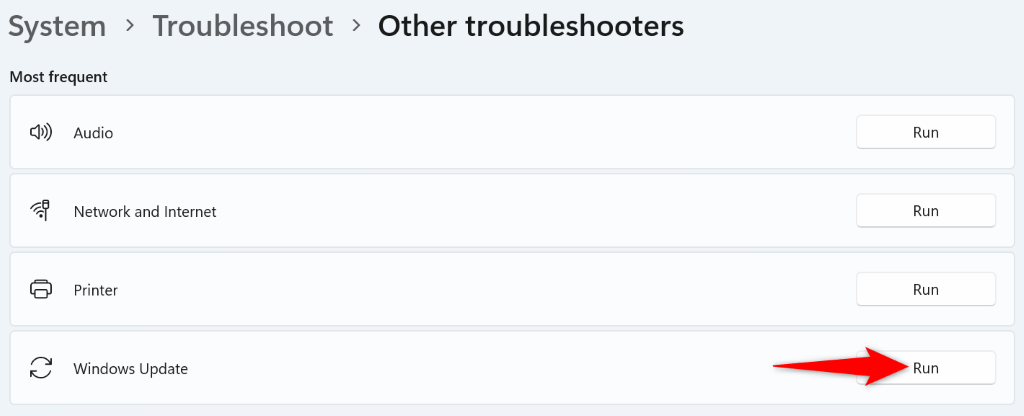
On Windows 11
- Open the Settings app by pressing Windows + I.
- Select System in the left sidebar.
- Choose Troubleshoot on the right pane.
- Select Other troubleshooters to view all troubleshooting tools.
- Choose Run next to Windows Update to run your troubleshooter.
- Allow the tool to find and resolve your update problems.
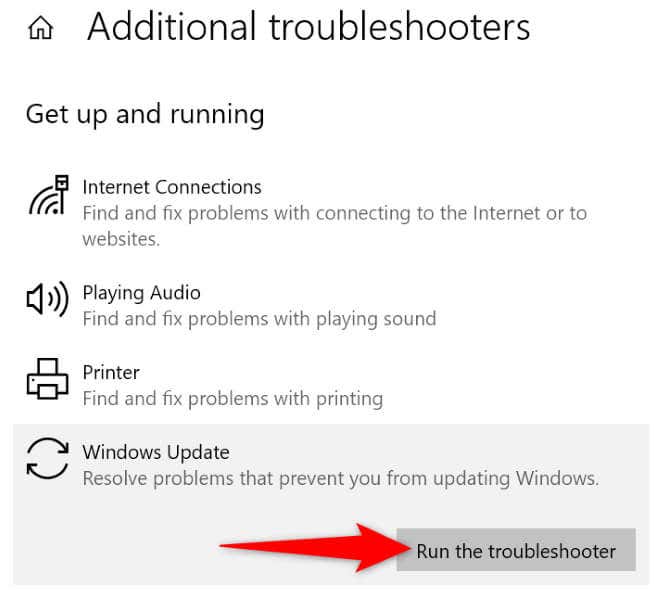
On Windows 10
- Launch Settings using the Windows + I key combination.
- Choose Update & Security in Settings.
- Select Troubleshoot in the left sidebar.
- Choose Additional troubleshooters on the right pane.
- Select Windows Update and choose Run the troubleshooter.
- Wait for the troubleshooter to find and resolve your update issues.
Clear Your Windows Update Cache
One reason your Realtek driver update fails to install is that your Windows Update cache is corrupted. These cache files help your system install the available updates. When the cache becomes corrupted, your updates fail to install.
In this case, you can resolve your problem by clearing your Windows Update cache. You don’t lose any personal files when you do this, and Windows will re-download the required update files.
You’ll follow the same steps on both Windows 11 and Windows 10 systems.
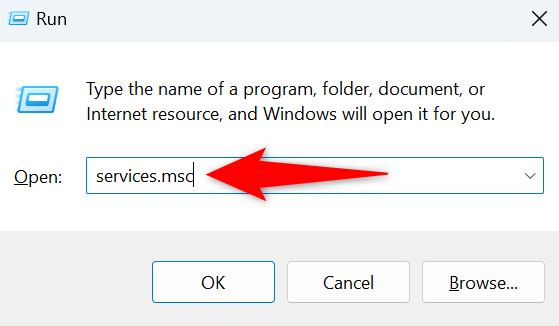
- Open the Run dialog box using Windows + R.
- Type the following in the box and press Enter:
services.msc
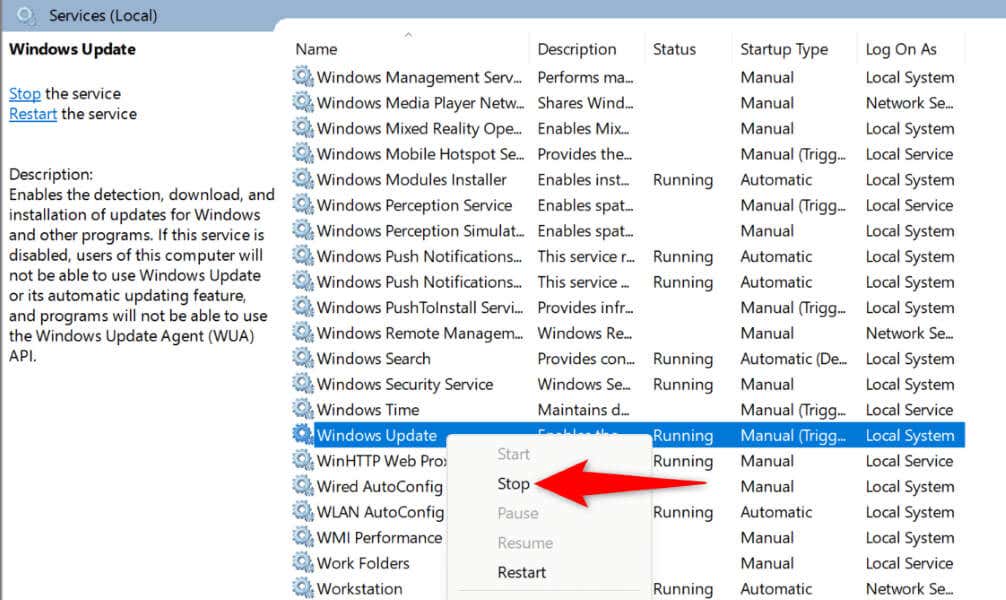
- Find the Windows Update service on the list, right-click the service, and choose Stop. You’re disabling the Windows Update service before clearing the update cache. Keep this window open as you’ll return here shortly.
- Launch Run again using the same keyboard combination, type the following, and press Enter:
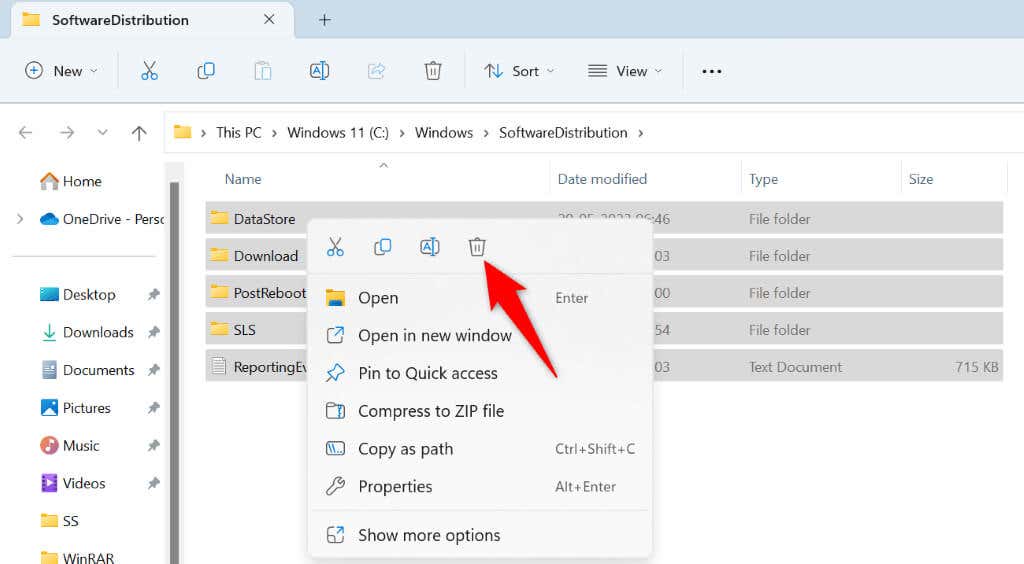
C:\Windows\SoftwareDistribution - Your Windows Update cache folder is now open. Select all files in this folder by pressing Ctrl + A.
- Right-click a selected file and choose Delete in the context menu.
- Get back to your Services window, right-click Windows Update, and choose Start.
- Try installing your Windows updates.
Roll Back Your Realtek Driver Update
One reason you get a “Realtek Semiconductor Corp Extension Install Error” message is that your recent Realtek driver update was faulty. This corrupted update is now preventing your PC from installing further updates, causing your issue.
In this case, you can roll back your driver update to potentially fix your issue. You can then use Windows Update to get the latest driver update.
- Open the Start menu, find Device Manager, and launch the utility.
- Expand Sound, video and game controllers, right-click your Realtek device, and choose Properties.
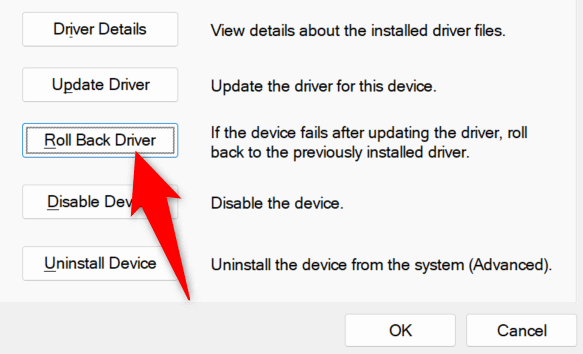
- Access the Drivers tab and select Roll Back Driver.
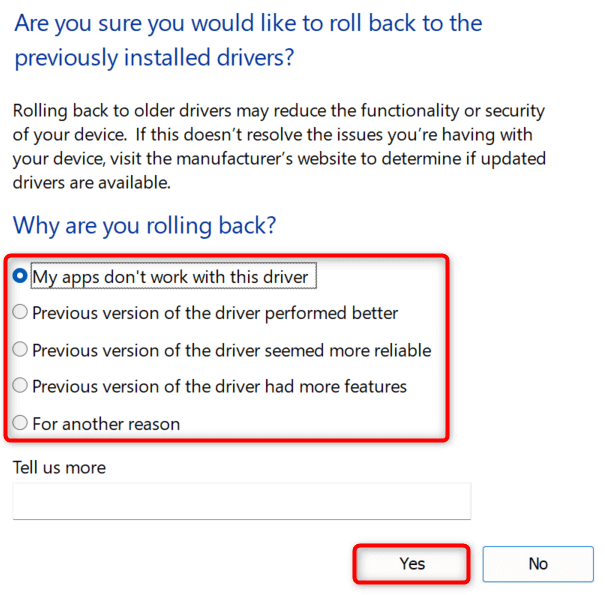
- Select the reason you’re rolling back the driver update and choose Yes.
- Wait for Device Manager to roll back the update. Then, install your available Windows updates.
Manually Download and Install Your Realtek Drivers
If your Realtek driver update via Windows Update continues to fail to install, use an alternate method to get your driver update. One option is to manually download the required drivers from the Realtek website and install those drivers on your PC.
That gets you the same updates that you’d obtain from Windows Update.
You can do that by launching a web browser on your PC, accessing the Realtek website, finding your device’s drivers, downloading those drivers, and running the downloaded file to install the drivers. Then, reboot your PC, and your Windows Update error should be gone.
Hide the Faulty Realtek Update in Windows Update
If your “Realtek Semiconductor Corp Extension Install Error” message continues to appear despite manually installing the driver updates, you can use a Microsoft-developed utility to hide the faulty update in Windows Update.
This way, you don’t encounter that faulty update when updating other PC components.
- Download the Show or hide updates utility from the Microsoft website.
- Run the downloaded file on your computer.
- Select Next on the utility’s first screen.
- Allow the utility to find problematic updates on your system.
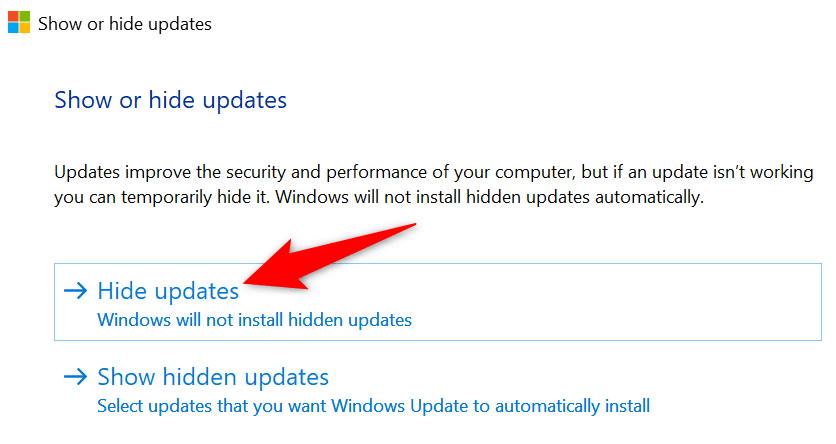
- Select Hide updates on the screen that opens.
- Choose the faulty Realtek update on the list and select Next.
- The tool will hide your selected update.
Resolving a Realtek Semiconductor Update Install Error in Windows
Windows’ “Realtek Semiconductor Corp Extension Install Error” indicates that your Realtek driver update has failed to install. There are various reasons this update didn’t install successfully. Luckily, you have multiple ways to get around this problem on your computer and install your update without problems.
We hope our guide above helps you out.
Related Posts
- Preparing for Windows 10 End of Support: Upgrading to Windows 11
- How to Fix a “This file does not have an app associated with it” Error on Windows
- How to Fix an Update Error 0x800705b4 on Windows
- How to Resolve “A JavaScript error occured in the main process” Error on Windows
- How to Fix the Network Discovery Is Turned Off Error on Windows
Mahesh has been obsessed with technology since he got his first gadget a decade or so ago. Over the last few years, he’s written a number of tech articles on various online publications including but not limited to MakeTechEasier and Android AppStorm. Read Mahesh’s Full Bio
