The Recycle Bin stores the files you’ve deleted in case you ever want to restore them. Occasionally, the Recycle Bin on C:/ becomes corrupted and stops working — and it’s not clear what you can do to fix it. This guide explains how to troubleshoot the problem.
What Causes the “Recycle Bin Is Corrupted” Error
When the recycle bin becomes corrupted, you can no longer clear the bin or restore any of the files that you previously deleted. Essentially, any files in the recycle bin become stuck there, and you have to permanently delete files to get rid of them.
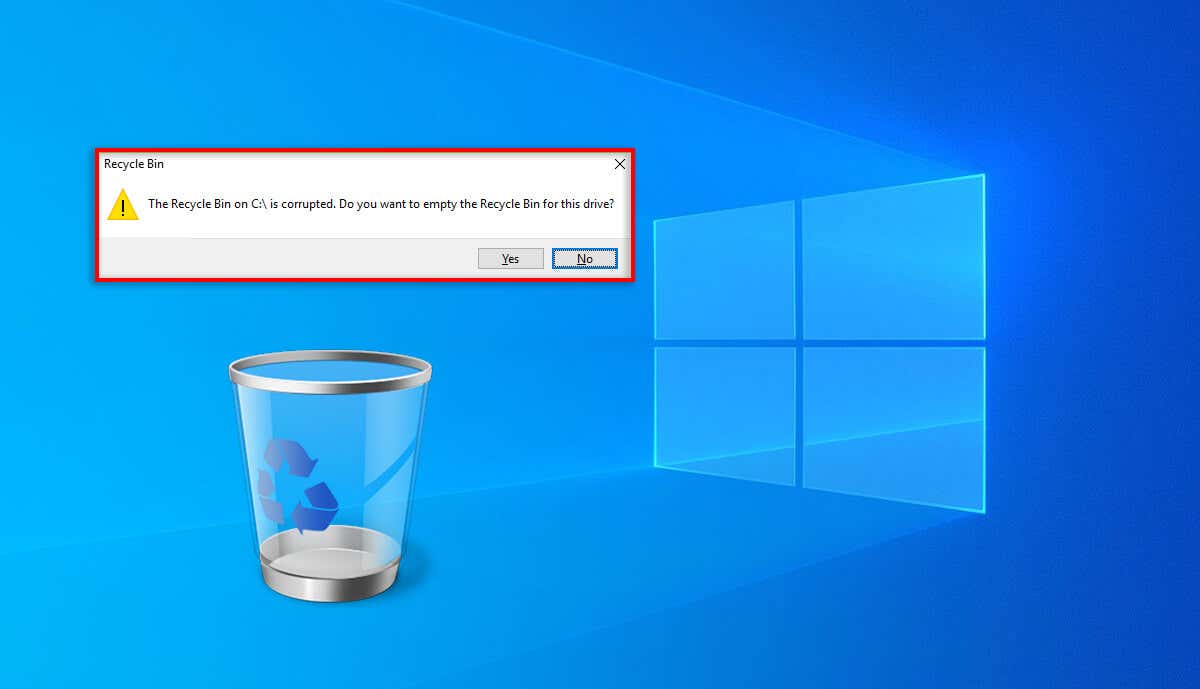
When the recycle bin becomes corrupted users receive the message, “The Recycle Bin on C:\ is corrupted. Do you want to empty the Recycle Bin for this drive?” If you press Yes, the files are deleted and the empty recycle bin will work properly until you reboot the computer.
There are a couple of potential causes for this glitch, including:
- Corrupted DLL files. The Dynamic Link Library (DLL) file type is used by the Windows operating system to streamline how programs use system resources. Without these files, apps can’t work correctly — including the recycle bin. A DLL file can become corrupt for several reasons, including a sudden PC shutdown, random bugs, and malware.
- A problem with the $Recycle.bin folder. The $Recycle.bin folder is where your deleted files are stored. If something happens to this folder, files will no longer be stored correctly.
- File system errors. You may have corrupted Windows files within the C:/ drive that are preventing the recycle bin from working correctly.
Note: The recycle bin can become corrupted on any version of the Windows operating system, but we’ll focus on Windows 10 and Windows 11 as these are the two versions most used and most likely to be affected.
How to Fix Corrupted Recycle Bin Error
Below, we’ll explain how to fix the recycle bin is corrupted error. We’ll start with the easiest solutions and work into the more technical fixes, so start at the top and work your way down.
1. Quick Fixes to Try First
Before we get into specific fixes, here are a couple of things to try that might solve the error quickly:
- Step 1: Restart your computer. Often, a simple reboot is all it takes to fix system errors.
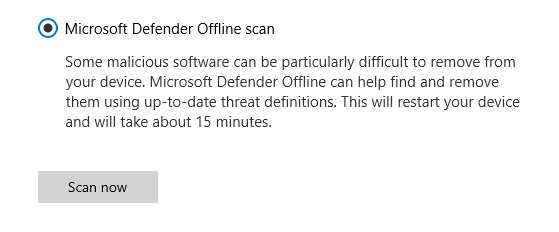
- Step 2: Scan your computer for viruses and malware. Open Windows Defender and select Microsoft Defender Offline Scan. If it finds and removes malware, restart your computer and check if the recycle bin works.
- Step 3: Install Windows Updates. Occasionally, a simple Windows update will fix the recycle bin issue. Press Win + I to open Settings, then select Update & Security. Choose Windows Update and press Check for update.
2. Reset Recycle Bin via Command Prompt
You can use the Command Prompt (CMD) to reset the recycle bin and resolve any problems. To do so:
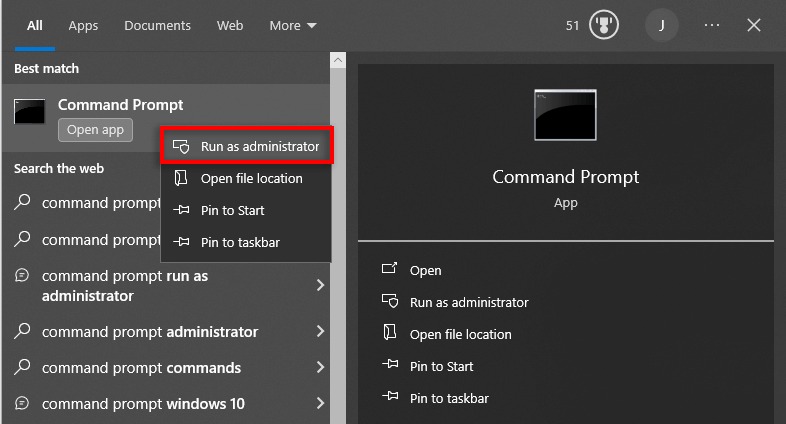
- Open the Start Menu and search for “Command Prompt.”
- Right-click Command Prompt and select Run as administrator.
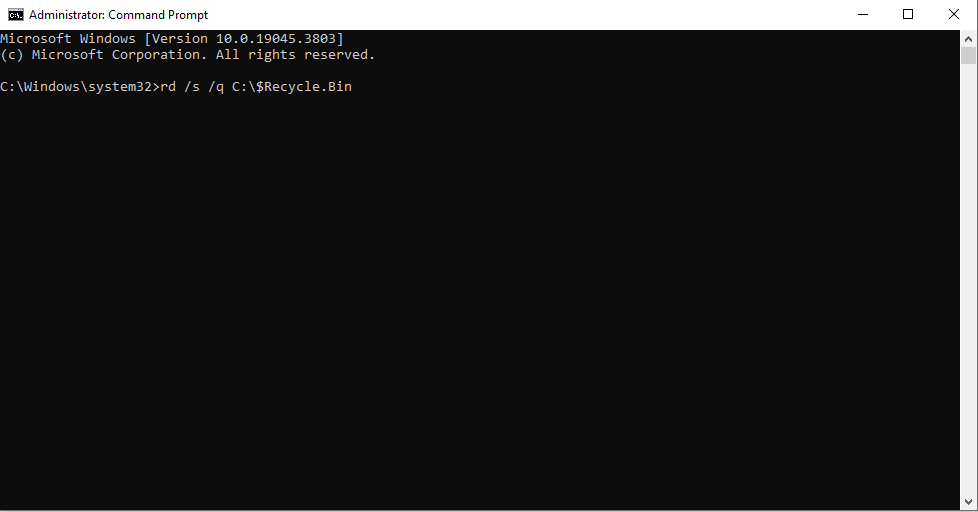
- In the Command Prompt window, type the following command and press Enter:
rd /s /q C:\$Recycle.Bin
- Reboot your PC and check whether the recycle bin is now working correctly.
Note: Make sure you enter the correct hard drive when typing the command into Command Prompt. You may also need to execute the command for each drive if it’s corrupted on more than one of them.
3. Use the System File Checker (SFC)
The system file checker is a Windows utility that scans and repairs corrupted files in the OS. Here’s how to use it to fix the recycle bin:
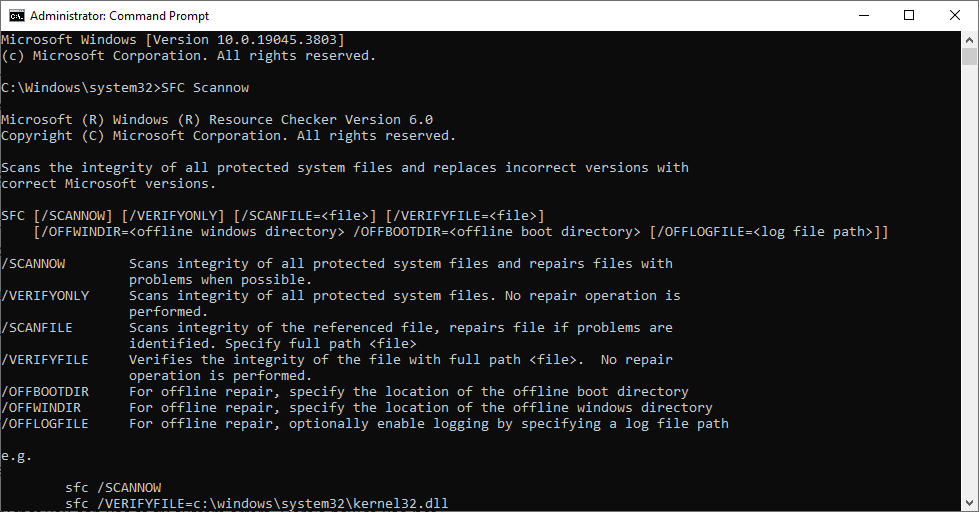
- Open Command Prompt and administrator.
- Enter the following command:
SFC /scannow
- Wait for the scan to complete and restart your Windows PC.
4. Use the CHKDSK Utility to Repair the Recycle Bin
CHKDSK is another Windows utility that you can use to fix system errors and repair damaged hard drives. Here’s how to use it to fix the recycle bin error:
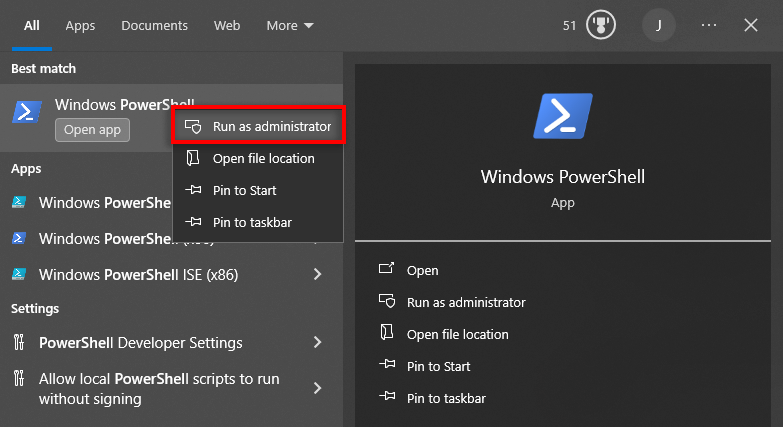
- Press the Windows key + X and select the Windows PowerShell (Admin).
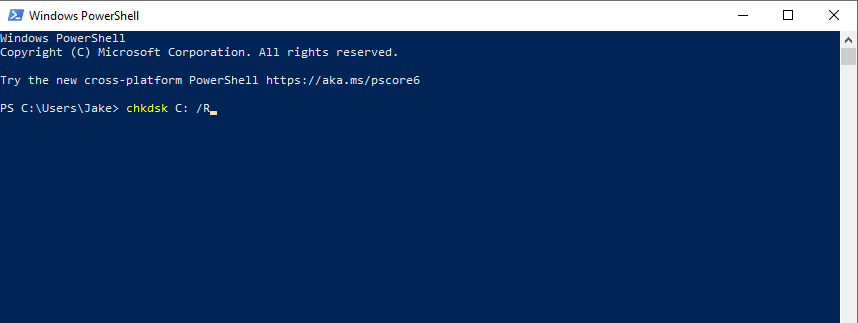
- Enter the following command and hit Enter:
chkdsk C: /R
- Wait for the process to complete, then restart your PC.
Note: Again, make sure you enter the correct drive letter for your storage device.
5. Delete the $Recycle.bin Folder
According to some users, deleting the $Recycle.bin folder is a quick way to resolve the recycle bin error. However, it will permanently delete whatever files you have in the recycle bin — so only use this method if you’re willing to lose those files forever.
- Open File Explorer.
- In the search bar, type C:\$Recycle.Bin and press Enter.
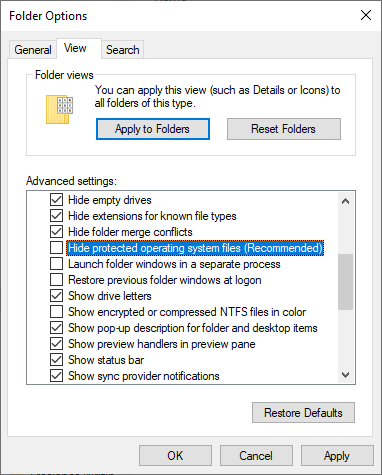
- In the View tab, press Options.
- Select Change folder and search options.
- Select the View tab, then scroll down and uncheck the option that says, “Hide protected operating system files (recommended).” This will uncover the hidden files that contain the recycle bin data.
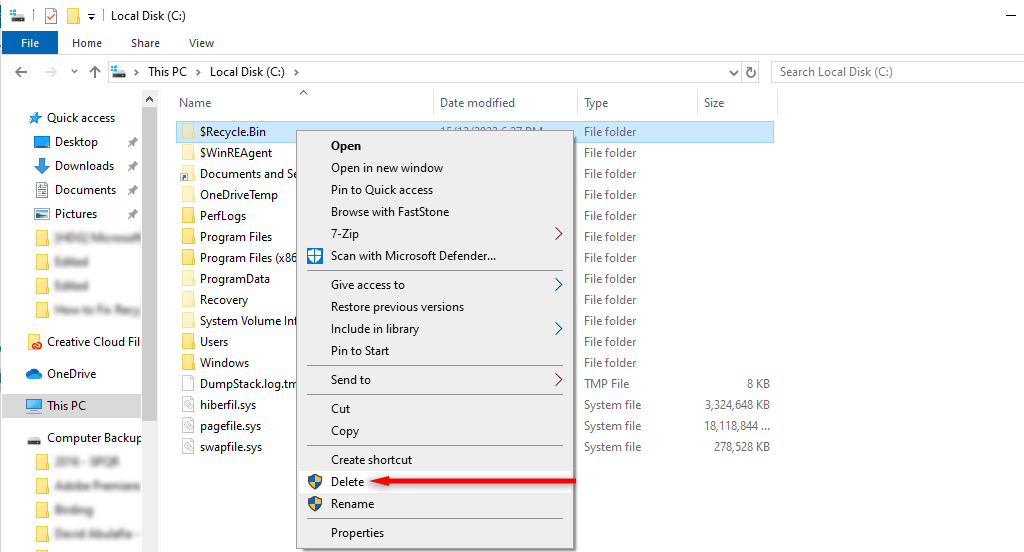
- Go back to File Explorer and delete the $Recycle.Bin folder.
- Next, restart your computer and check if the recycle bin is now working correctly.
If the recycle bin icon doesn’t reappear on your desktop, you’ll have to reinstall it. To do so:
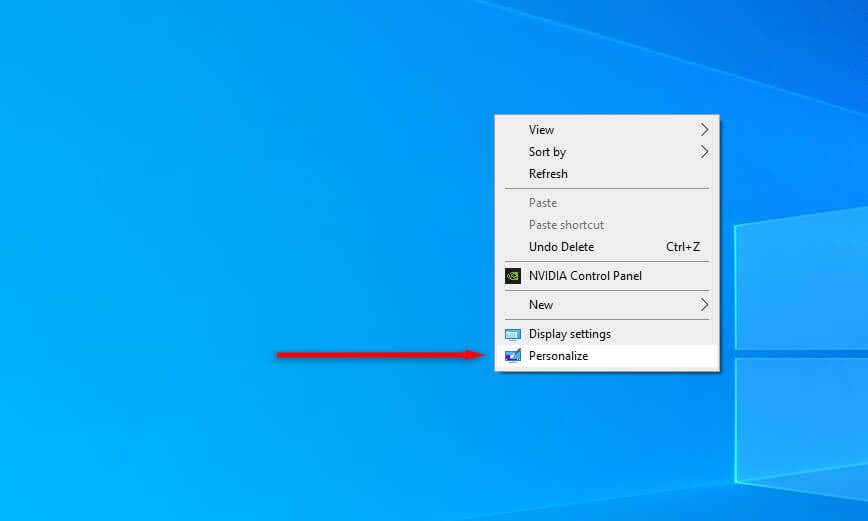
- Right-click on your desktop and select Personalize.
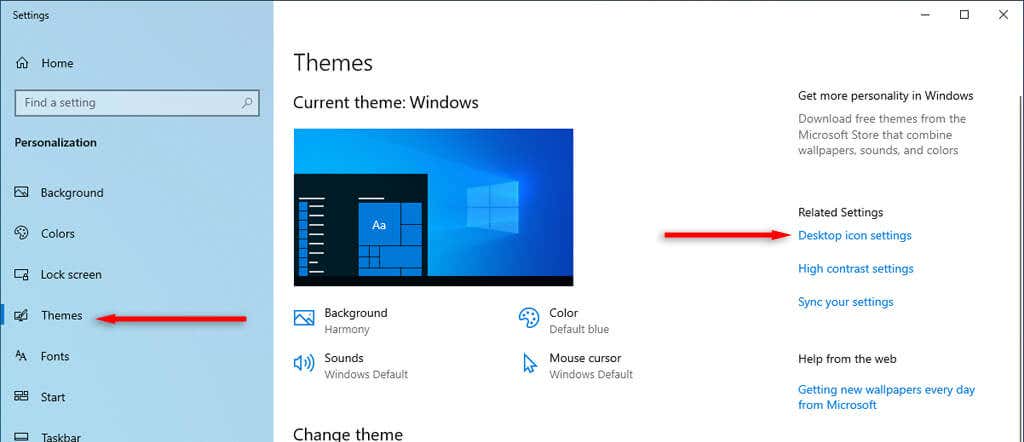
- Select Themes.
- Choose Desktop icon settings.
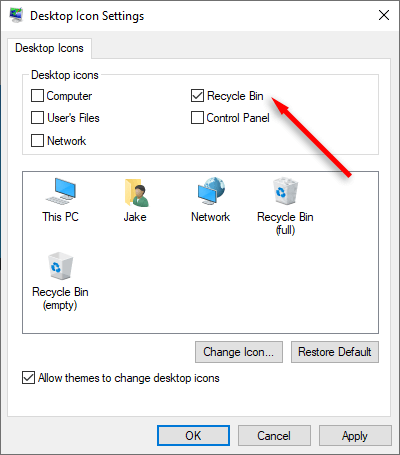
- Choose the recycle bin, then press OK.
How to Recover Deleted Files
If your recycle bin is working properly, you can simply right-click the lost file you want to recover and select Restore. However, if the recycle bin remains corrupted (or you need to delete the files inside it in order to fix it), you might have to try data recovery software.
However, keep in mind that file recovery software is often unreliable and there’s no guarantee that it will be able to recover files after experiencing recycle bin data loss on your HDD or SSD.
Delete What You Want, When You Want
Hopefully, this article has helped you get your recycle bin working the way it should, and you can easily delete files once again. Unfortunately, if you’re still experiencing a corrupt recycle bin, your last resort is to use a system restore point or reinstall Windows entirely.
