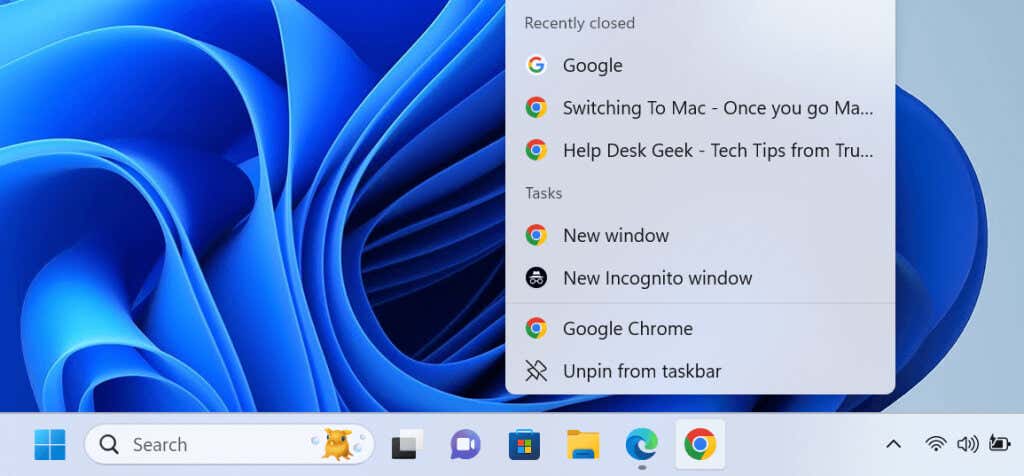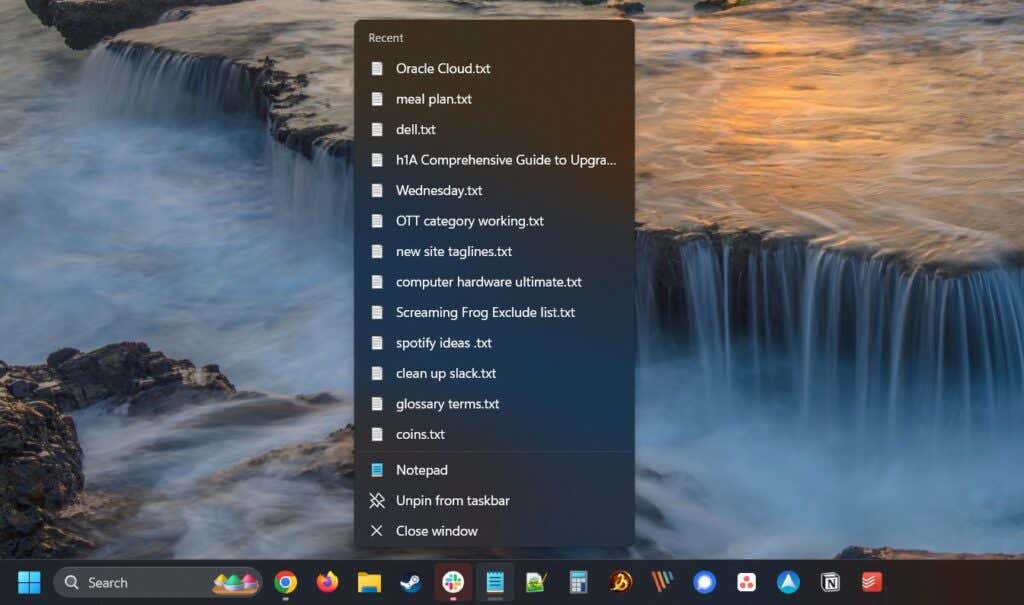
Jump lists make accessing your recently and frequently accessed items faster and easier in your favorite apps. If you’d like to customize Windows 11 jump lists, we have a few methods to help you out. You can use the Settings app or a registry editor tweak to control what and how many items appear in these lists. Here’s how to do that.
What Is a Jump List in Windows 11?
When you right-click an app on Windows’s taskbar or in the All apps menu of Start, you see your recently and frequently accessed items for that app. This list of items is called a jump list of that specific app.
You can select any item on a jump list to open that item in that app. This saves you time as you don’t have to locate the file on your computer and then open it, or launch the app and then use the “Open” option.
Jump lists support pinned items, so an item doesn’t necessarily have to remain recently or frequently accessed for it to appear on a jump list. You can manually pin items to these lists, giving yourself quick access to them.
Enable Jump Lists on Windows 11 Using the Settings App
Jump lists are enabled for all apps by default in Windows 11. If you right-click an app and don’t see the list, turn on the feature using Settings as follows.
- Launch the Settings app by pressing Windows + I or right-clicking Start and choosing Settings.
- Select Personalization in the left sidebar.
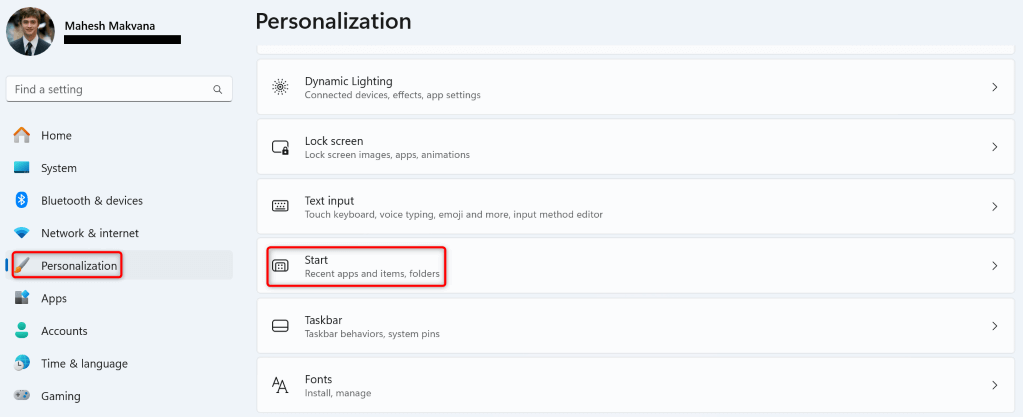
- Choose Start on the right pane.
- Turn on the Show recently opened items in Start, Jump Lists, and File Explorer option.
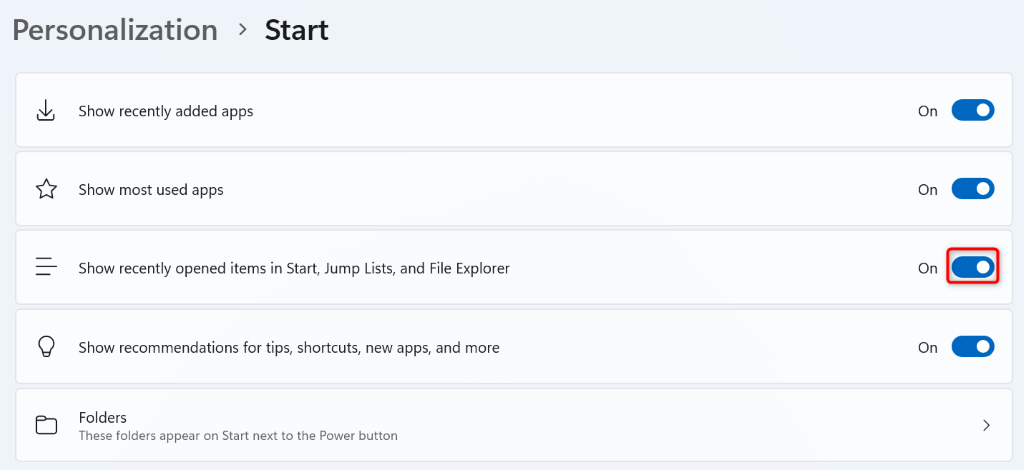
- Close Settings.
Note that you won’t see the files you’ve accessed before enabling the feature in your apps’ jump lists. The lists will only show the files that you access after you’ve enabled the feature. Disabling and re-enabling the option erases the contents of the jump list.
Pin and Unpin Items in Jump Lists on the Taskbar and the Start Menu
To stick specific items on jump lists, simply pin them to these lists. This way, even if you don’t access those items frequently, the jump lists will still display them. If you’ve already pinned items to your app’s jump list, it’s possible to unpin those items if you want.
Pin and Unpin Jump List Items on the Taskbar
- Find the app whose jump list you want to edit on your taskbar.
- Right-click the app to view the jump list.
- To pin an item to the list, right-click that item and choose Pin to this list.
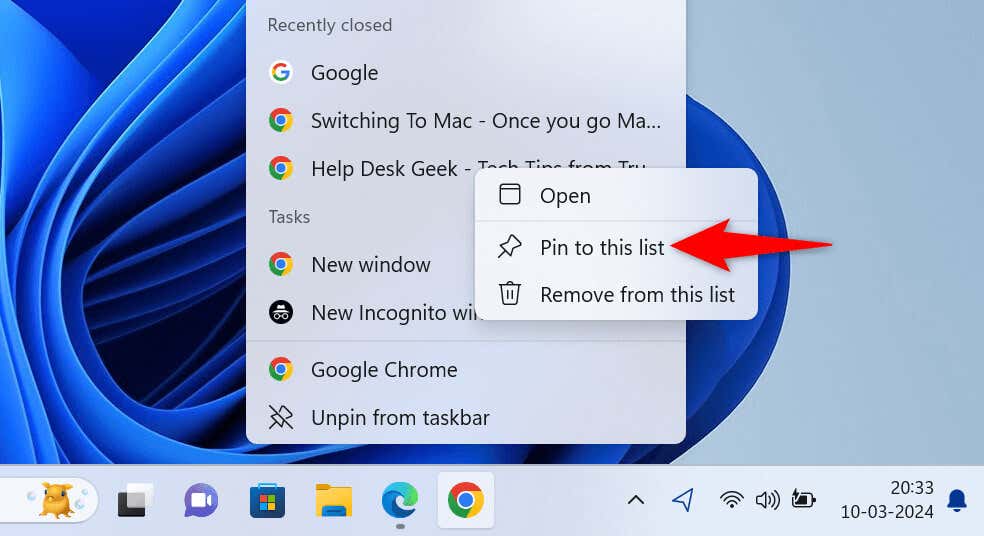
- To unpin a pinned item, right-click that item and select Unpin from this list.
If you end up mistakenly unpinning an item, use the pinning step above to re-pin that item.
Pin and Unpin Jump List Items in the Start Menu
Jump lists for your apps appear in the All apps section of the Start menu. These lists don’t appear when you search for an app or on the main Start menu interface.
When you pin and unpin jump list items on the Start menu, these changes apply to the taskbar jump lists. This is because Windows syncs your taskbar and Start menu jump lists to ensure both lists are consistent.
- Open the Start menu.
- Select All apps to view all your apps.
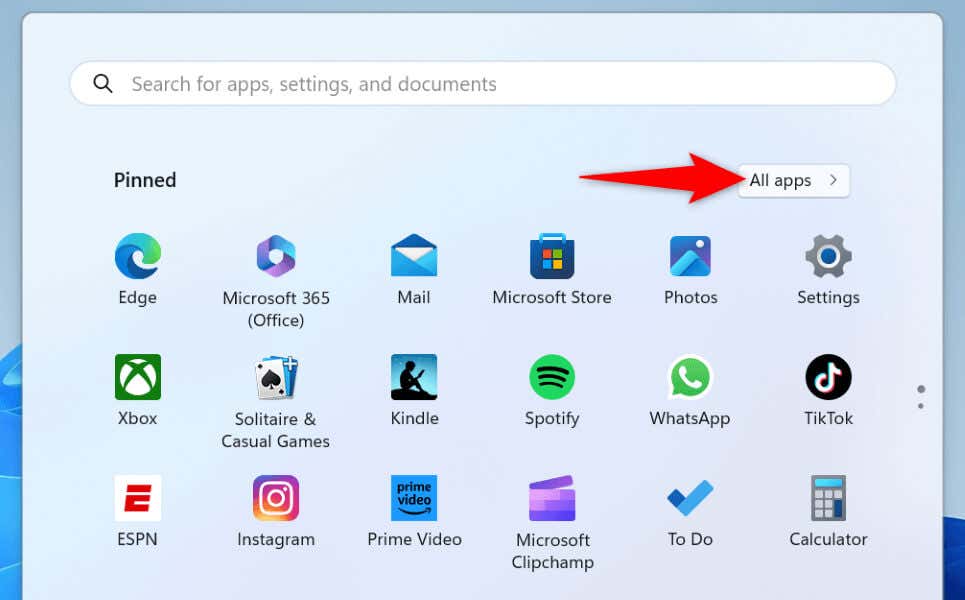
- Find and right-click the app whose jump list you want to edit.
- To pin an item to the list, right-click that item and select Pin to this list.
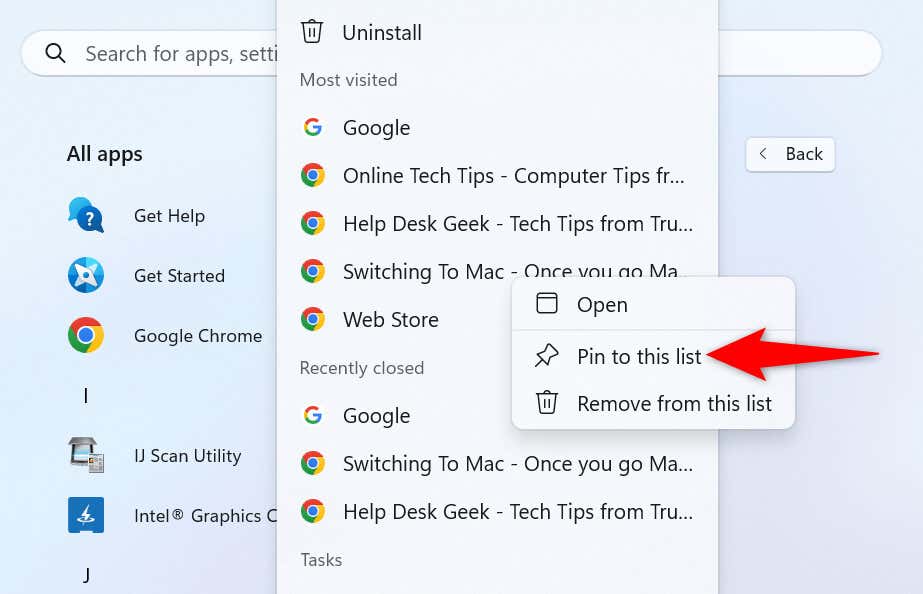
- To unpin an item, right-click that item and choose Unpin from this list.
Show More Items in a Jump List Using a Registry Editor Tweak
If you’ve noticed, Windows 11 only displays 13 items at most in your app’s jump lists. Many screens support displaying more items than that. In this case, you can tweak Windows’ registry to make the system display more than 13 items in your apps’ jump lists.
Note that editing the Windows registry incorrectly can cause your system to be unstable. Follow the instructions to the letter, and you should have no issues.
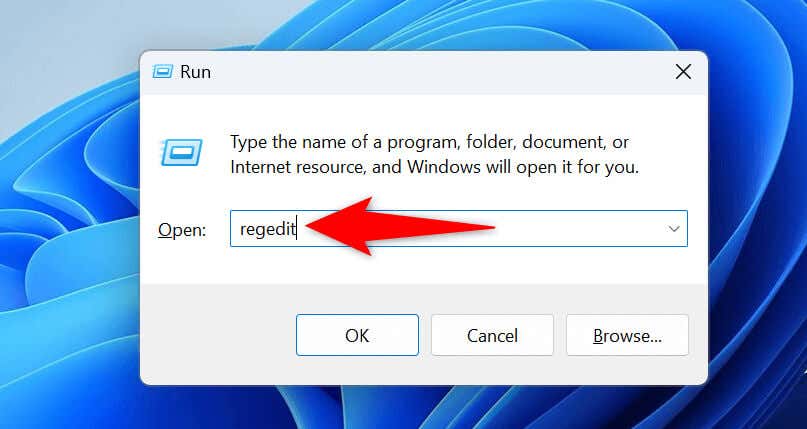
- Open the Run dialog box by pressing Windows + R, type the following in the box, and press Enter:
regedit
- Select Yes in the User Account Control prompt.
- Navigate to the following path in Registry Editor:
ComputerHKEY_CURRENT_USERSoftwareMicrosoftWindowsCurrentVersionExplorerAdvanced - Right-click anywhere blank on the right pane and choose New > DWORD (32-bit) Value.
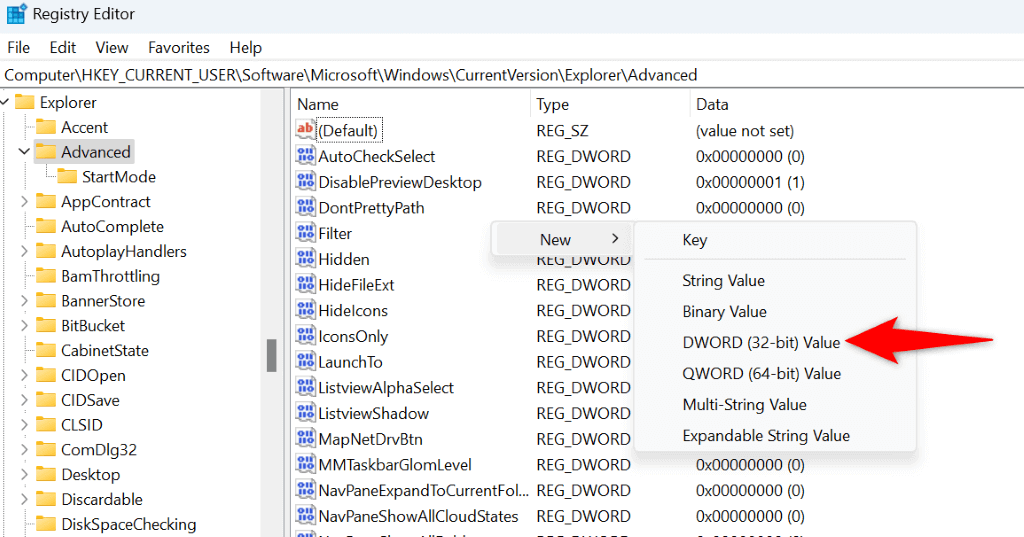
- Type JumpListItems_Maximum as the entry name and press Enter.
- Double-click the newly-created entry, type the number of items jump lists can have, and select OK.
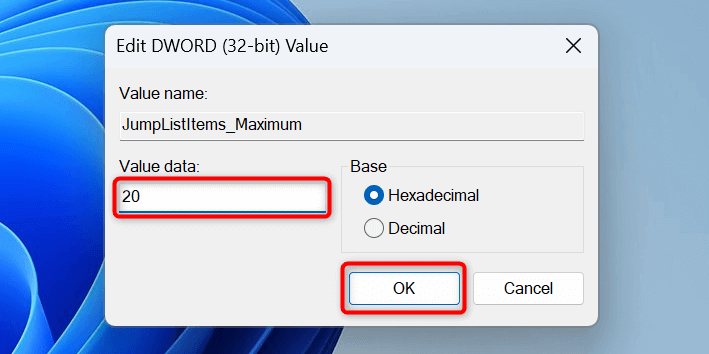
- Close Registry Editor and restart your PC.
In the future, you can restore jump lists to their default values by right-clicking the JumpListItems_Maximum entry, choosing Delete, and rebooting your PC.
Make Windows 11’s Jump Lists Work the Way You Want
Windows 11’s jump lists are an excellent way to quickly get back to your favorite files in your favorite apps. This feature makes your workflows more efficient and convenient. Our guide above shows you how to enable this feature and add (or remove) sticky items to your jump lists. We hope you get the most out of this built-in feature on your PC. Enjoy!
Related Posts
Mahesh has been obsessed with technology since he got his first gadget a decade or so ago. Over the last few years, he’s written a number of tech articles on various online publications including but not limited to MakeTechEasier and Android AppStorm. Read Mahesh’s Full Bio
