If you’re looking to save time, especially if you struggle with not getting things done, you may want to look at some time-saving shortcuts you could use. This is especially true if you’re forever filling out your details online, in online forms or shopping carts.
For Google Chrome users, there’s one easy, time-saving shortcut you can use to save time online—Google Chrome autofill. You can use it to fill out passwords and other form data you’ve securely saved, such as addresses or credit card details. If you’re new to Chrome, here’s everything you need to know about Google Chrome autofill.

What Is Google Chrome Autofill?
Google Chrome autofill is designed as a time-saving measure. It has one purpose: to fill out details you commonly use on websites. It’ll fill out your name, address and payment details in shopping carts, while also allowing you to quickly sign into your favorite websites by filling in your username and password automatically.
There are advantages and disadvantages to having this feature enabled in your browser. The advantages are clear—it will save you time and make your browser experience more secure, allowing you to save and use more complex passwords for your most-used sites, as well as keeping your other personal details safe.
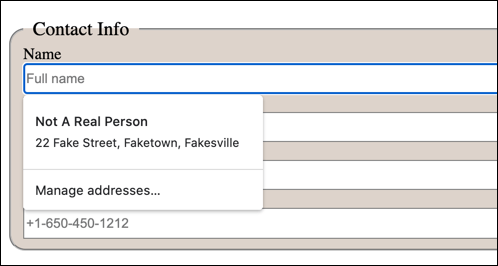
Unfortunately, this could also prove to be a disadvantage. If you’re saving payment details (such as your credit card information) to Chrome, you’re placing your data at risk if your PC is ever compromised, although Chrome does encrypt your personal data.
Of course, you may prefer to use Google Chrome autofill for less sensitive data without this proving to be much of a problem. If you do find yourself saving sensitive data, you can always remove it later or disable Chrome autofill entirely.
How To Set Up Google Chrome Autofill
To use Chrome’s autofill feature, you’ll first need to make sure that it’s set up to save the right kind of data. Autofill can be used to save passwords, payment details, addresses, and other forms of contact details.
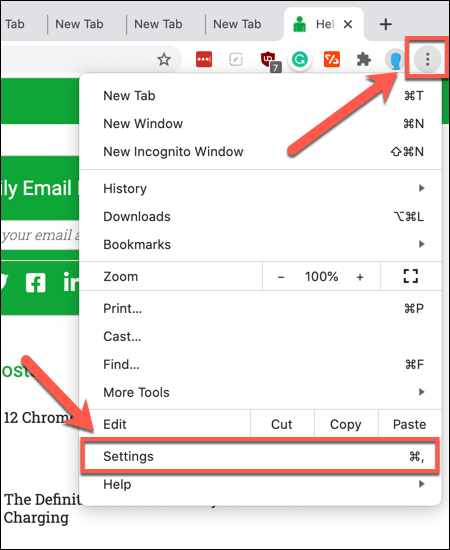
- You can access these settings by clicking the three-dot menu icon in the top-right corner of the Chrome window. From the drop-down menu, click the Settings option.
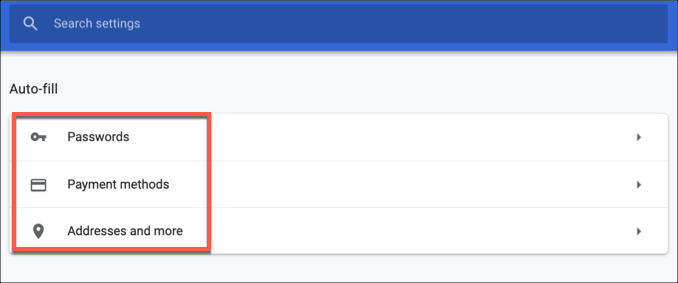
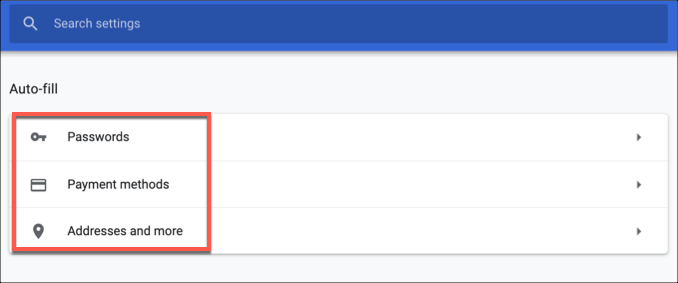
- In the Chrome Settings menu, you can access the different settings for autofill under the Auto-fill category. Click Passwords, Payment methods or Addresses and more to access the particular autofill settings for those categories, as well as to add or delete saved data.
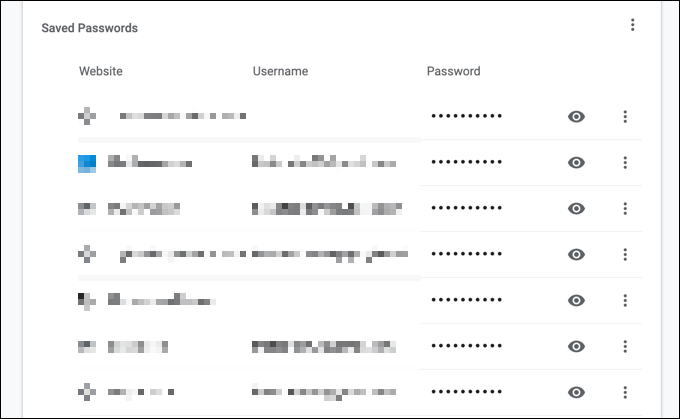
- In the Passwords section, you’ll be able to enable and change Chrome’s built-in password manager. Passwords you’ve previously saved will be listed under the Saved Passwords section.
- If you want this feature to work automatically, inviting you to autofill forms on different websites, make sure that the Offer to save passwords slider is enabled. You can also enable automatic sign-in to saved websites by making sure that the Auto sign-in slider is enabled.

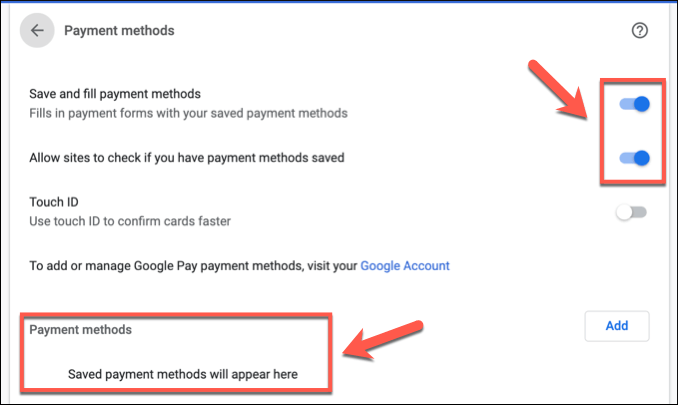
- Under the Payment methods menu, you can access your saved payment options. These will be listed under the Payment methods category. If you want to enable this feature (and allow sites to check if you have this feature enabled), make sure that the Save and fill payment methods and Allow sites to check if you have payment methods saved sliders are enabled.
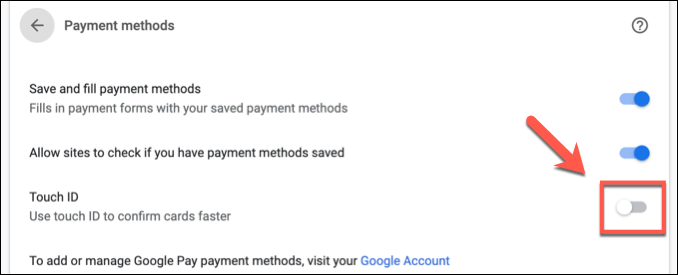
- If your device has a fingerprint scanner (for instance, a Macbook Pro), you can enable Touch ID as an authentication method by enabling the Touch ID slider.
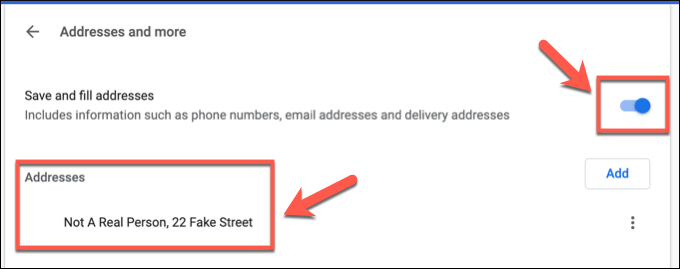
- For addresses, phone numbers, and other types of contact details, you’ll need to access the Addresses and more menu from the Chrome Settings menu. From here, a list of your saved information will be visible under the categories listed. If you want to enable this setting, make sure that Save and fill addresses slider is enabled.
Deleting Existing Chrome Autofill Data
There are several ways you can erase your autofill data in Google Chrome. For instance, you may want to remove a specific piece of saved data like a saved password or address, which you can do from the Chrome settings menu. You can also remove all saved autofill data from your Chrome profile.
- To remove individual pieces of Chrome autofill data, you’ll need to access your autofill settings by clicking the three-dot menu icon > Settings and clicking one of the options from the Auto-fill category.
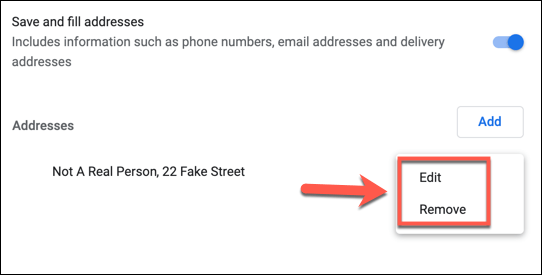
- In each of the autofill category menus, you’ll see another three-dot menu icon next to each saved bit of data. Click this, then click Remove to remove the data from your saved autofill database. You could click Edit to make changes to this data if you don’t want to remove it from autofill entirely.
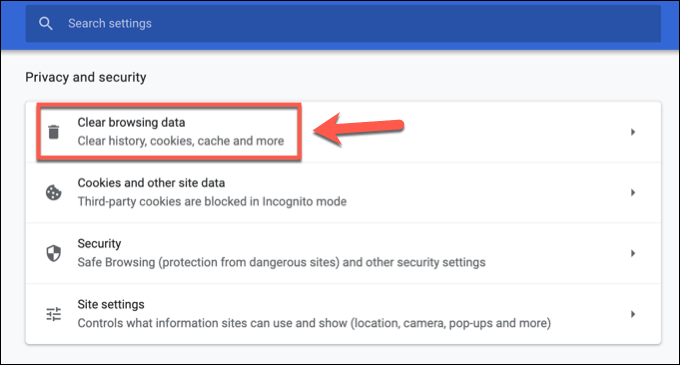
- If you want to remove all autofill data from your Chrome profile, you’ll need to wipe your browser data. To do this, click the three-dot menu icon > Settings. From the Chrome Settings menu, click the Clear browsing data option.
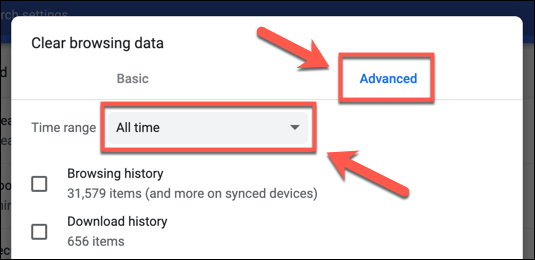
- In the Clear browsing data window, click the Advanced tab. You’ll need to set the time range you want to remove. To remove all autofill data, make sure to select All time from the Time range drop-down menu.
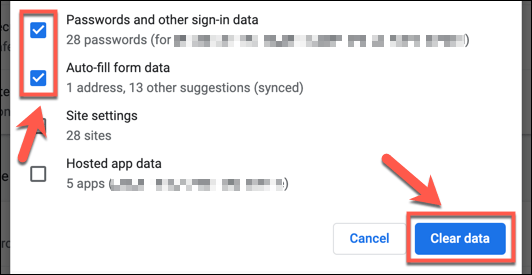
- You’ll need to make sure that the Auto-fill form data and Passwords and other sign-in data checkboxes are selected. You can also wipe other Chrome browsing data at the same time.
If you want to only wipe your autofill data, make sure to disable all other checkboxes. Once you’re ready to delete your Chrome autofill data, click the Clear data button. If you’re wiping all of your browser data, this may take a little bit of time to complete.
Once you’ve wiped your autofill data, you’ll need to make sure that each of the autofill categories are disabled in the Auto-fill category menus from the Chrome settings menu to ensure that further data isn’t saved automatically.
Using Google Chrome Autofill Effectively
Chrome autofill is a great time-saving feature for casual and power users alike. It’s especially useful if you’re worried about your password security, especially as it becomes a built-in password manager for your Google account. You can use a similar autofill feature on Android devices, too.
Similar features are available for other browsers. If you’re using Firefox, you can make Firefox safer by adding a master password to store your common site logins and form data. Of course, if you’re worried about your data security, you can always wipe your browser data to keep your important information hidden from snoopers.