Does Steam download or install updates each time you launch it? If so, your app may be experiencing a technical issue. App updates are necessary as they iron out bugs and possibly add new features, but your app shouldn’t be updating each time you open it. There are a few ways to fix this weird Steam behavior on your Windows computer, and we’ll show you what those ways are.
Some reasons Steam keeps updating on your PC are that the app may not have permission to make permanent changes to your system, your firewall may have blocked the app’s access to the internet, your installed Steam games may be updating, and more.
1. Launch Steam as an Administrator
One reason Steam shows an update dialog box each time you launch the app is that the app is unable to make permanent changes to your system. Your app updates may want to make certain changes to your system, and the lack of required permissions prevents that from happening.
In this case, you can run Steam as an admin to resolve your issue. Launching the app as an administrator grants it all the rights it needs, fixing all the permission-related issues.
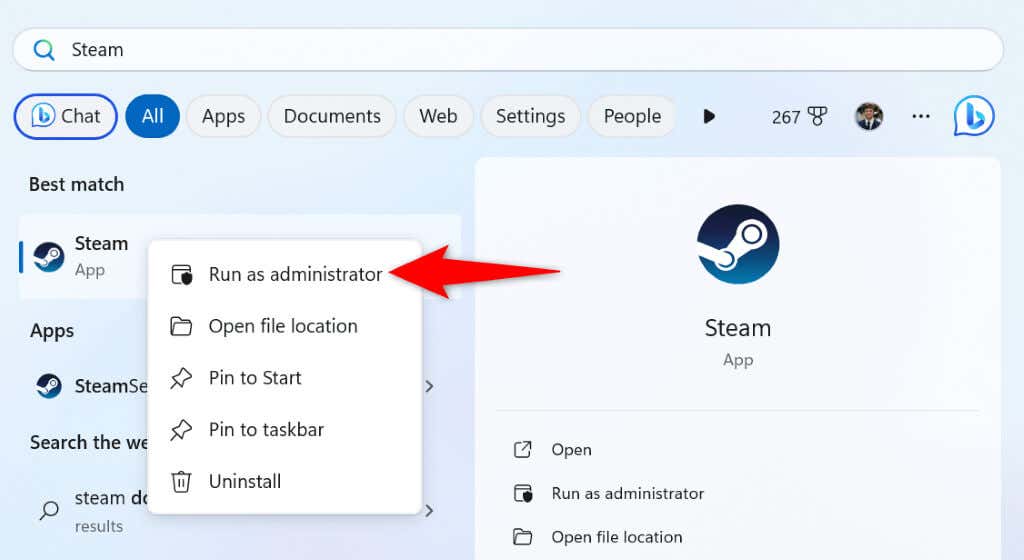
- Find Steam in your Start menu or on your desktop.
- Right-click the app and select Run as administrator.
- Choose Yes in the User Account Control prompt.
If this method fixes your issue, make Windows always launch your Steam client with admin rights using the following steps:
- Right-click the Steam shortcut on your desktop and select Properties.
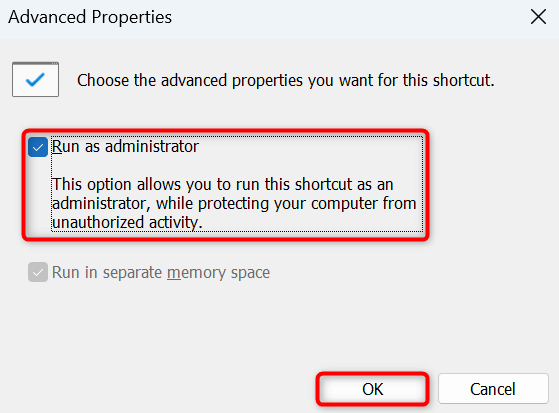
- Open the Shortcut tab and choose Advanced.
- Enable the Run as administrator option and choose OK.
- Select Apply followed by OK to save your changes.
From now on, double-click your desktop Steam shortcut to launch the app with admin privileges.
2. Add Steam to Your Firewall’s Whitelist
If your PC’s firewall has restricted Steam’s access to the internet, that may be why the app’s update feature isn’t working as expected. Add Steam to your firewall’s safelist, so your app can always make all the required connections.
- Open the Start menu, find Windows Security, and launch the app.
- Select Firewall & network protection in the app.
- Choose Allow an app through firewall on the following screen.
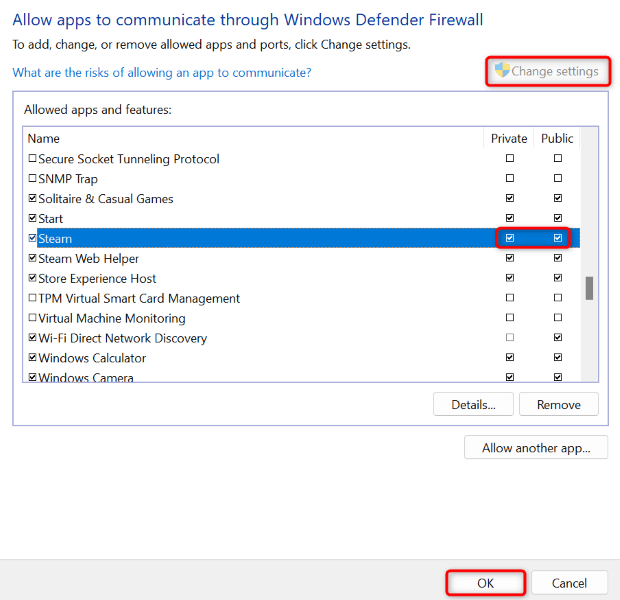
- Select Change settings at the top.
- Turn on both Private and Public checkboxes next to Steam.
- Select OK to save your changes.
- Launch Steam.
3. Prevent Steam From Running on Your PC’s Startup
If Steam automatically launches and updates when you turn on your computer, the app is in your startup programs list. You can remove the app from this list to avoid seeing the app’s update progress when you boot up your machine.
You can then update the app manually by launching the app on your system.
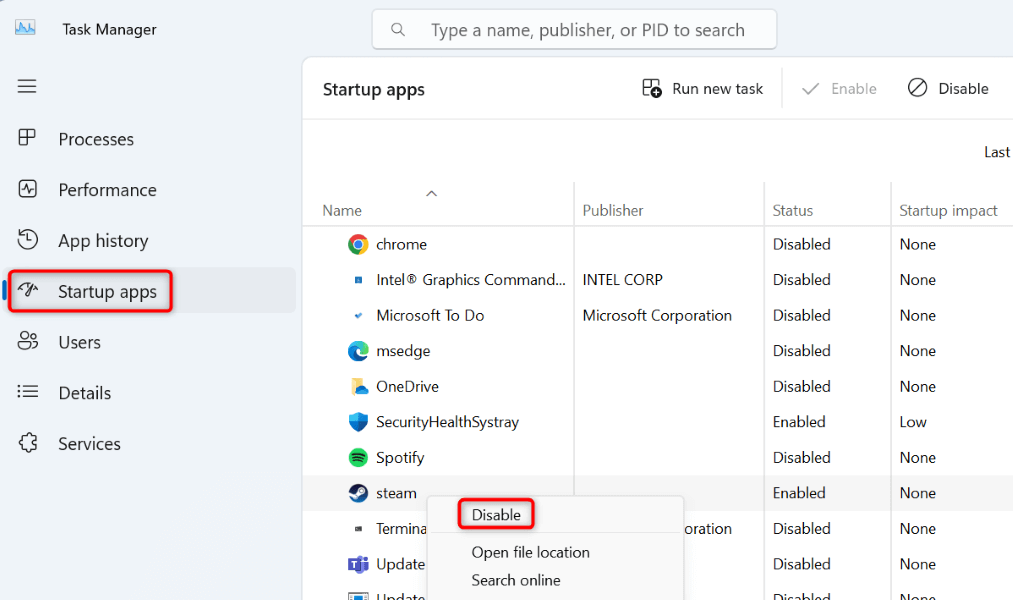
- Right-click the Windows taskbar and select Task Manager.
- Access the Startup apps tab in Task Manager.
- Find steam, right-click the app, and select Disable.
4. Change Your Steam Update Settings
In case you aren’t aware, Steam allows you to tweak your update settings so the app only downloads and installs available updates during your specified schedule. You can configure this option from within the Steam app, and we’ll show you how.
- Launch Steam on your computer.
- Select Steam > Settings in the menu bar.
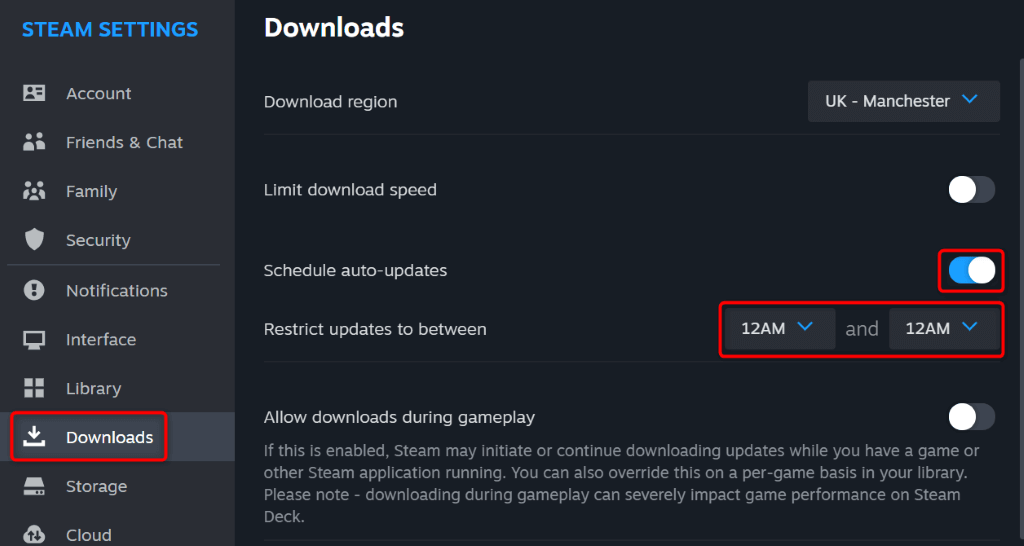
- Choose Downloads in the left sidebar.
- Enable the Schedule auto-updates option on the right.
- Choose a time from the Restrict updates to between drop-down menus.
5. Turn Off Updates for Your Steam Games
Instead of Steam updates, your downloaded games may be updating via Steam, displaying an update dialog box. If you’d like to prevent your games from automatically updating, you can configure an option in your Steam client as follows.
- Launch Steam on your computer.
- Select Library at the top and find the game you want to turn off the updates for.
- Right-click your game and select Properties.
- Choose Updates in the left sidebar.
- Select the Automatic Updates drop-down menu on the right and choose Only update this game when I launch it.
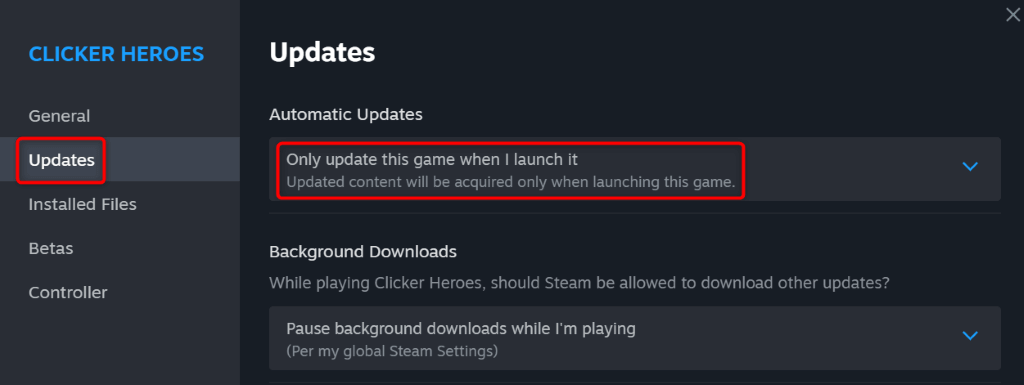
Steam will now update your game only when you run the game in your client. Repeat the above steps for all your games so your games don’t update automatically.
6. Uninstall the Games You No Longer Play
If you’ve installed many games via Steam, the app may try to find and install the updates for all your games. If you don’t play all your installed games, removing those games is a good idea so Steam doesn’t look for updates for those items.
You can always re-download a game if you want to play the game in the future.
- Open Steam on your computer.
- Select Library and find the game to delete.
- Right-click the game and select Manage > Uninstall.
- Choose Uninstall in the prompt to remove the game.
Repeat the above steps to remove all unwanted games from your Steam library.
7. Remove and Reinstall Steam on Your Computer
If your Steam update issue remains unresolved, you can use the final solution: delete and reinstall the Steam app on your computer. This is because your app may be facing a core file issue, leading to various problems.
Uninstalling and reinstalling the app fixes all the file problems, allowing you to use your app normally.
Note that Steam removes your installed games when you uninstall the app. You can retain your games by making a backup of the steamapps directory located in your Steam installation folder. This way, you don’t have to download your games again.
On Windows 11
- Right-click the Start menu icon and select Settings.
- Navigate to Apps > Installed apps in Settings.
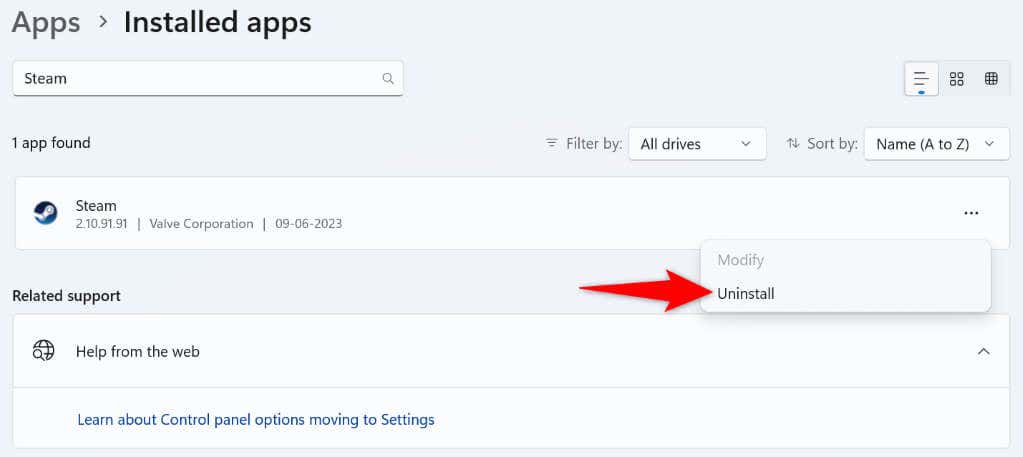
- Find Steam, select the three dots next to the app, and choose Uninstall.
- Select Uninstall in the prompt to remove the app.
On Windows 10
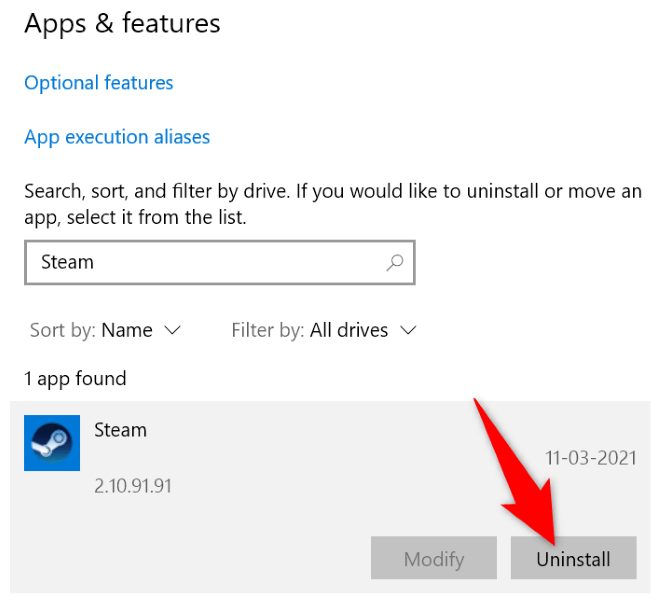
- Open Settings by pressing Windows + I.
- Select Apps in Settings.
- Choose Steam on the list, select Uninstall, and choose Uninstall in the prompt.
Now that you’ve deleted Steam, head to the official Steam website and download and install a fresh version of the app on your computer.
Resolve Steam’s Constant Update Issue on Your Computer
There are many reasons Steam starts updating as soon as you launch the app. Luckily, fixing the issue isn’t as hard as you may think. You can use the methods outlined above to resolve issues with your Steam app, which will prevent the app from constantly updating on your machine. You can then enjoy your favorite games in the app without any interruptions.
