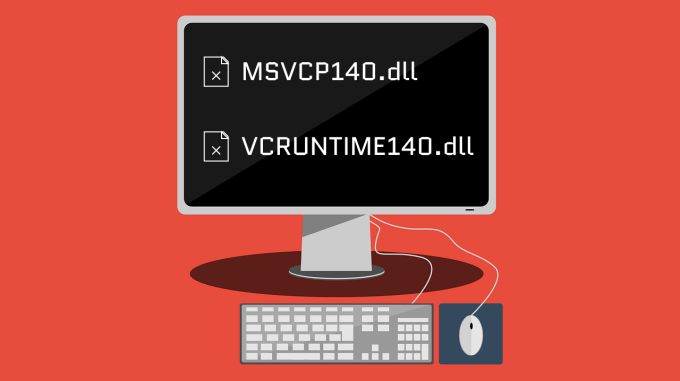
Dynamic Link Library (DLL) files are critical system files that power several functionalities in Windows applications. Your PC might fail to run some programs if vital DLL files are corrupt or missing. If your Windows computer fails to launch an app because “MSVCP140.dll” or “VCRUNTIME140.dll” are missing, we’ll show you how to restore the files.
On the error message, you should see a directive to reinstall the affected app. While that might resolve the problem, some less drastic troubleshooting steps are worth trying.
For instance, a virus may delete the files from your device. We recommend running a virus scan using Windows Defender or your preferred antivirus software. Then, proceed to the troubleshooting steps below if your device is malware-free.
Repair Microsoft Visual C++ Redistributable
The Microsoft Visual C++ Redistributable contains data needed by Windows to efficiently install and run applications written in C++, i.e., a type of programming language. Both DLL files (MSVCP140.dll and VCRUNTIME140.dll) constitute a part of the Visual C++ Redistributable.
If these redistributables are corrupt or buggy, some apps may fail to start on your PC. We discovered that some Dell users fixed the issue by repairing the 2015-2019 version of the Microsoft Visual C++ Redistributable. Windows devices usually have two versions of the Visual C++ 2015-2019 Redistributable. A 32-bit (x84) and 64-bit (x64) version. Repair both versions and restart your computer.
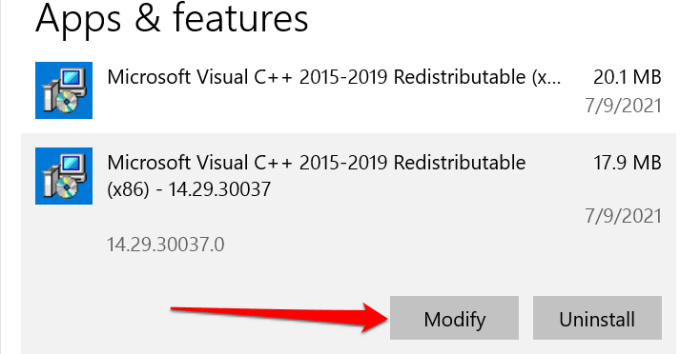
- Launch the Windows Settings app, go to Apps > Apps & features > Microsoft Visual C++ 2015-2019 Redistributable and select Modify.
Note: You may find two versions of the Microsoft Visual C++ 2015-2019 Redistributable—the 32-bit (x84) and 64-bit (x64) versions. Repair both versions of the redistributable.
- Select Repair on the new window that pops up.
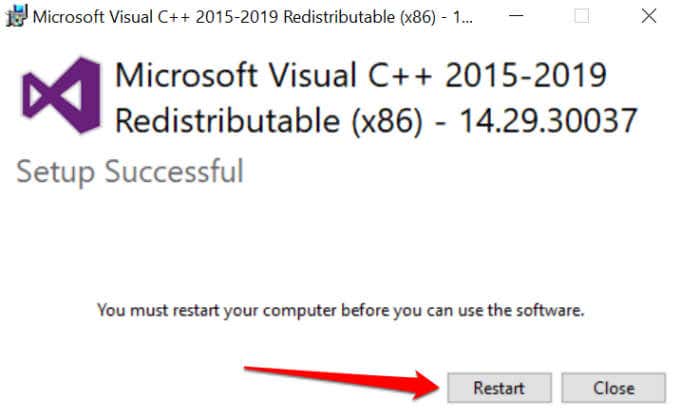
- Restart your computer to complete the repair.
Remember to repeat the process for all versions of the 2015-2019 Visual C++ library. If the error persists after repairing the distributable, reinstall both libraries from Microsoft’s website.
Reinstall Microsoft Visual C++ Redistributable
Reinstalling the Visual C++ Redistributable resolved the problem for many Windows users in this Microsoft Community thread.
Uninstall Microsoft Visual C++ Redistributable
First, remove the libraries and restart your PC.
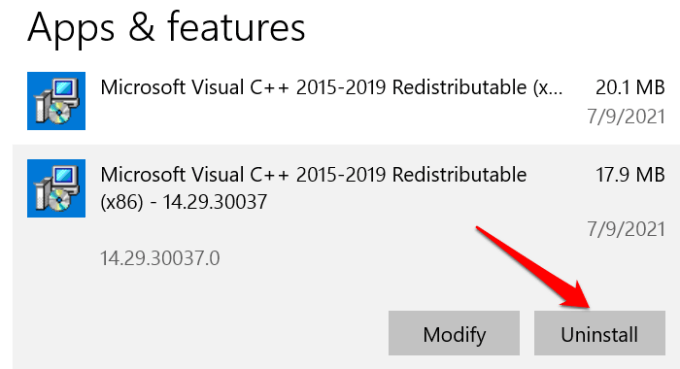
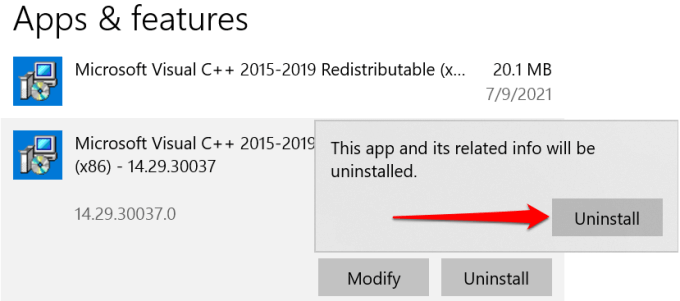
- Head to Settings > Apps > Apps & features > Microsoft Visual C++ 2015-2019 Redistributable and select Uninstall.
- Select Uninstall to proceed.
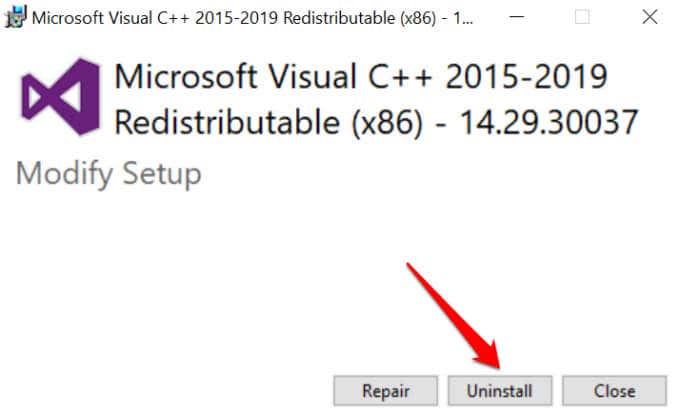
- Again, select Uninstall on the new window and restart your PC when the operation reaches completion.
Repeat the procedure for all versions of the Visual C++ 2015-2019 Redistributable on your computer.
Install Microsoft Visual C++ Redistributable
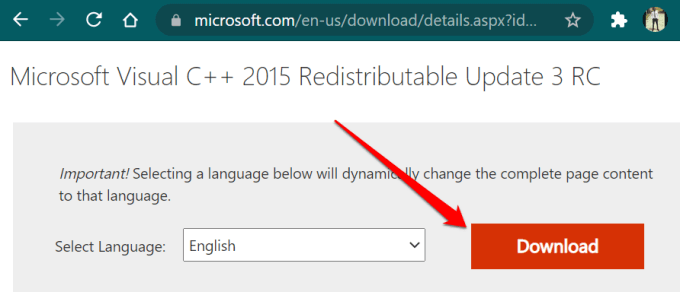
To reinstall the libraries, head to the Visual C++ 2015 Redistributable download page on Microsoft’s website and follow these steps.
- Select a language and click the Download button.
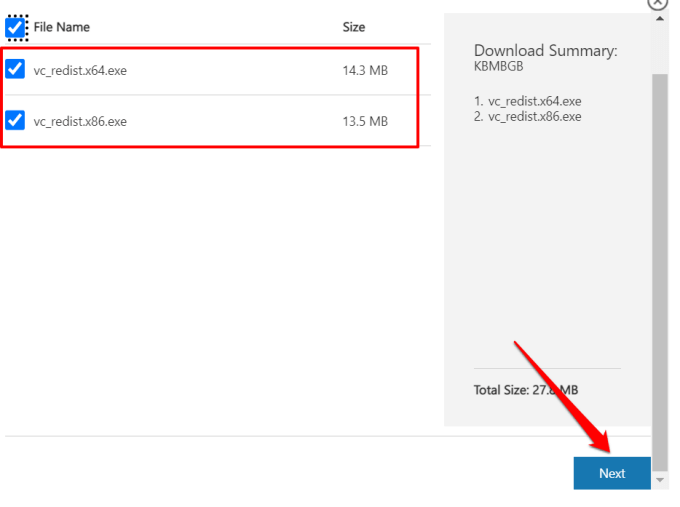
- Select both versions of the files and select Next.
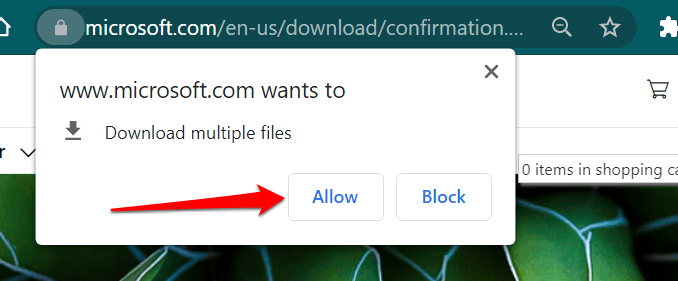
- Your browser may display a notification notifying you that microsoft.com wants to download multiple files simultaneously. Select Allow and save the executable files on your PC.
Head to the folder housing the downloads and install the redistributables one at a time.
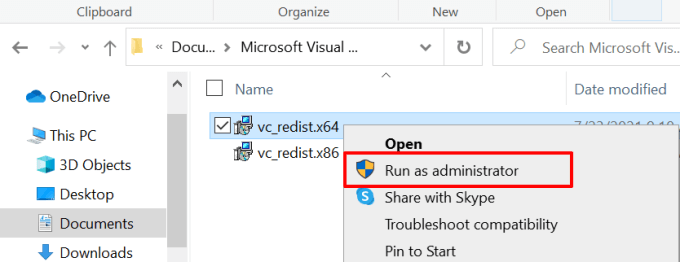
- Right-click the files (vc_redist.x64 or vc_redist.x86), click Run as administrator, and follow the prompt.
Repair the Affected Program
Windows 10 ships with a tool that repairs programs that aren’t working correctly on your PC. This tool will attempt to fix problems causing the app to malfunction without deleting or modifying the app’s data.
Note that this tool doesn’t support all applications. From our research, the Windows 10 repair tool only works with built-in apps and programs you install from the Microsoft Store.
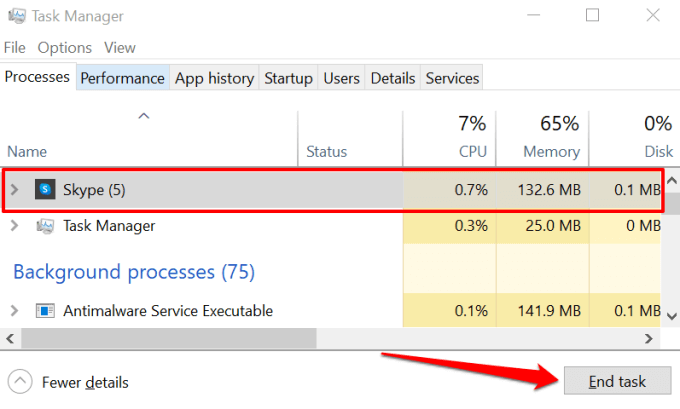
- Before anything, force-close the app in the Windows Task Manager. Press Ctrl + Shift + Esc to launch the Task Manager, select the app and select End task.
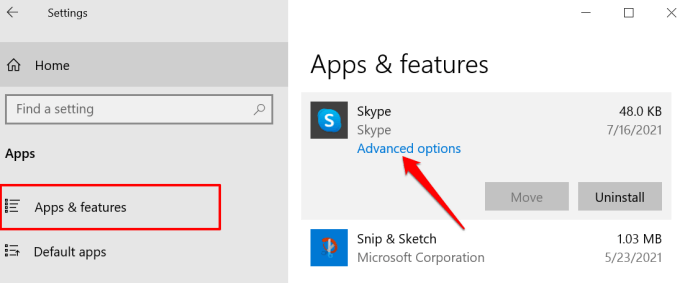
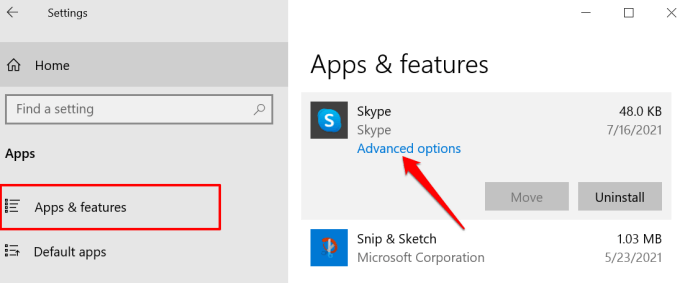
- Go to Settings > Apps > Apps & features, select the affected program, and select Advanced options.
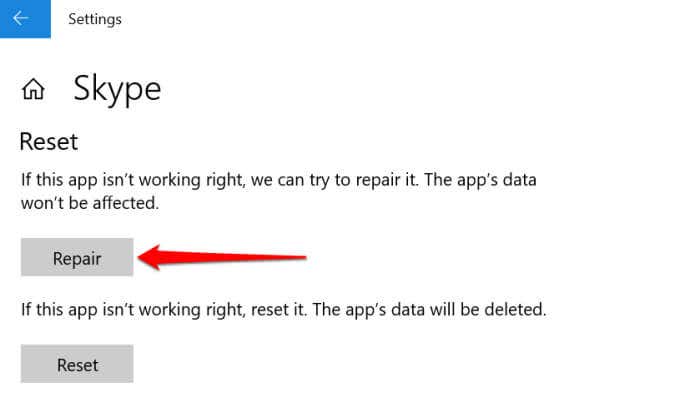
- Scroll down the page to the “Reset” section and select the Repair button.
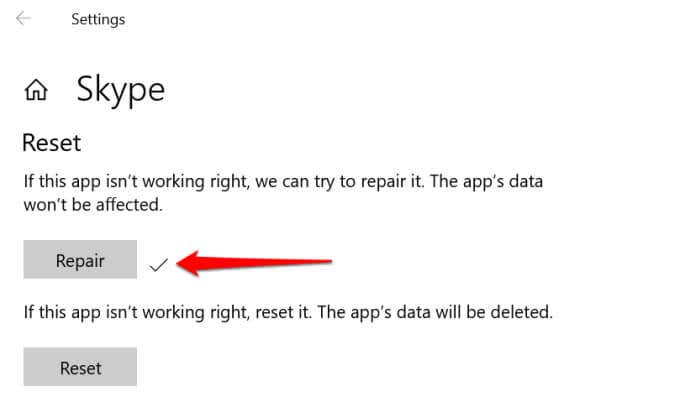
Wait until a check mark appears next to the Repair button. That indicates a successful repair operation.
Repair Windows Apps From the Control Panel
If you don’t find the option to repair the application in the Windows Settings menu, check the Control Panel.
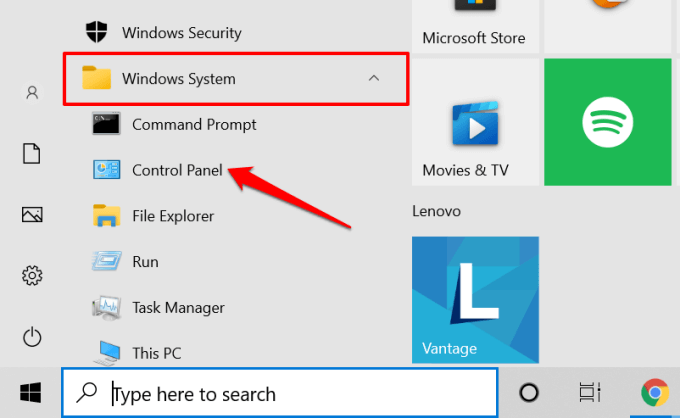
- Press the Windows key to launch the Start Menu. Expand the Windows System folder and select Control Panel.
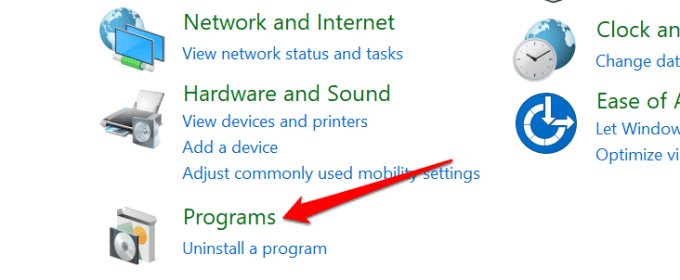
- Select Program.
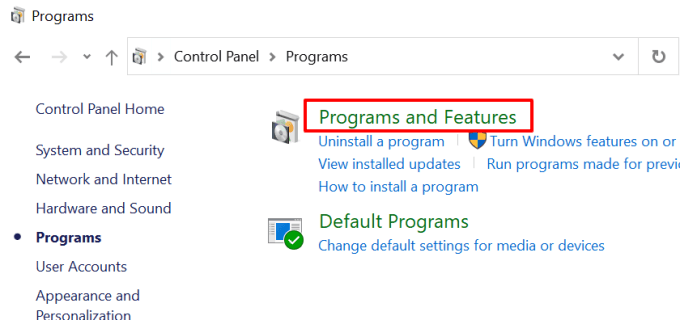
- Click the Programs and Features header.
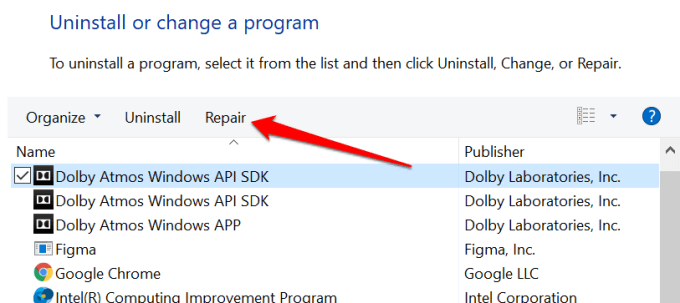
- Select the problematic app and select Repair.
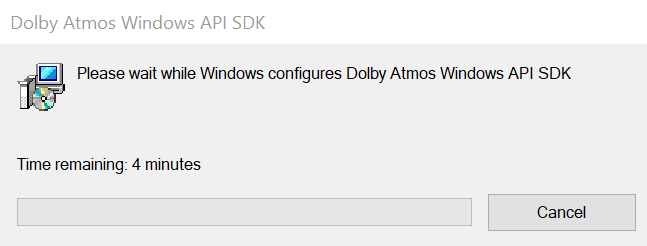
Grant the repair tool administrative access when prompted and wait until you get a success message. You should see a time estimate of how long the operation will take. Depending on the program you’re repairing, you may also be required to restart your PC afterward.
Run Windows Advanced System Cleanup Commands
The System File Checker (SFC) and Deployment Image Servicing and Management (DISM) are tools that constitute the advanced system commands in Windows. They check your device for file system corruption and restore missing system files.
If your PC still fails to launch the program because MSVCP140.dll or VCRUNTIME140.dll is missing, run the SFC and DISM commands via the Command Prompt.
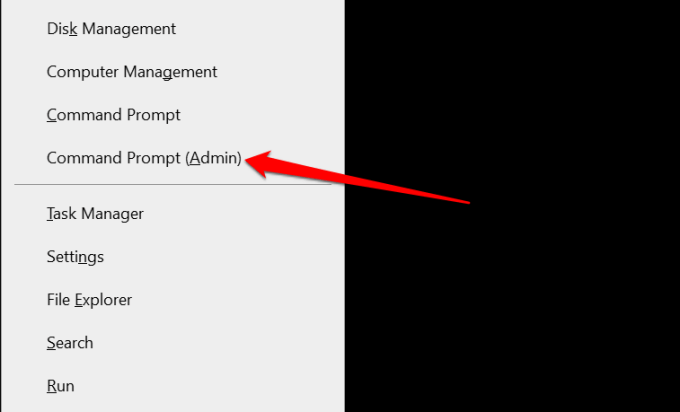
- Press the Windows key + X and select Command Prompt (Admin).
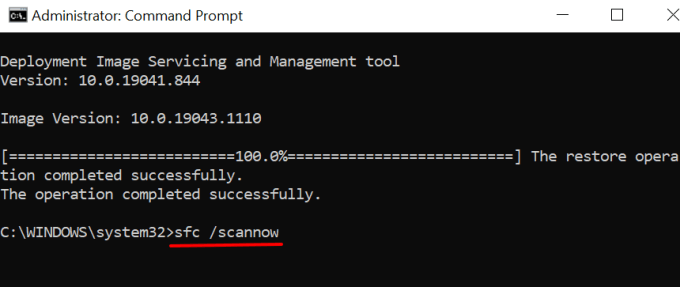
- Paste DISM.exe /Online /Cleanup-image /Restorehealth in the terminal and press Enter.
The DISM tool repairs system files by copying the files from Microsoft’s servers. Ensure your PC is connected to a Wi-Fi or Ethernet network while you run the command. You should also note that it takes the DISM tool several minutes to execute this operation. Wait until you get a success message and proceed to the next step.
- Paste sfc /scannow in the terminal and press Enter.
This command will replace corrupt or missing system files with the cached copies (downloaded by the DISM) from Microsoft’s servers.
- When the progress bar hits 100%, paste exit in the terminal and press Enter.
Restart your computer and check if you’re able to use the affected app(s).
Reset the Affected Application
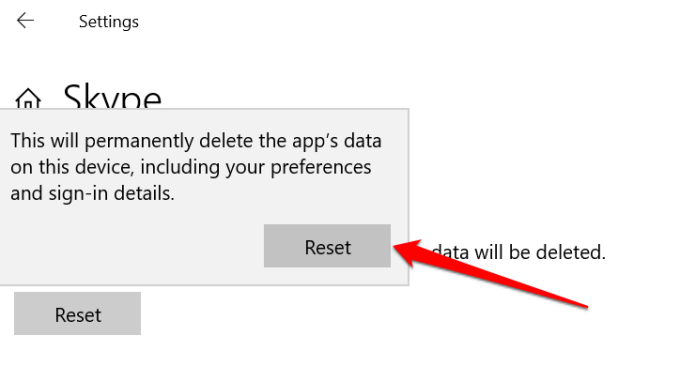
Resetting applications can fix performance issues and eliminate annoying errors. But, there’s a catch: The operation will permanently delete the app’s data from your PC and revert settings to factory default.
- Go to Settings > Apps > Apps & features, click the affected program, and select Advanced options.
- Scroll to the “Reset” section and select the Reset button.
- Select Reset again.
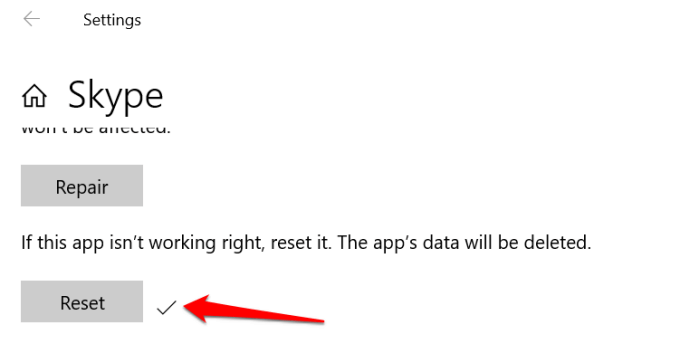
- Launch the app when a checkmark icon appears next to the Reset button.
Re-Install the Program
If the error(s) persist after resetting the app, removing the app entirely from your device should help.
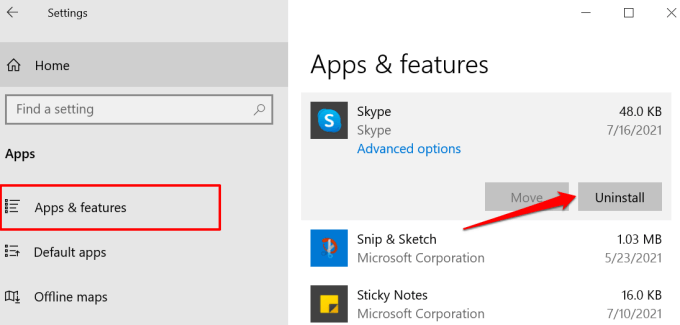
- Go to Settings > Apps > Apps & features, click the affected program, and select Uninstall.
- Select the Uninstall button again to confirm the app removal.
Restart your computer and head to the Microsoft Store or the developer’s website to redownload the app.
Restore Missing DLL Files
When push comes to shove, and none of these recommendations fix the problem, you may be tempted to download the missing DLL files from third-party websites. Well, don’t—at least not before exhausting all available options.
There are security risks attached to sourcing DLL files from unofficial platforms. For one, they may fix the problem only temporarily or don’t fix it at all. Even worse, they’re sometimes outdated or infected with viruses.
Removing and reinstalling the Visual C++ 2015-2019 library from Microsoft’s website is a much better and safer way to restore these missing DLL files. You should also consider performing a System Restore or updating Windows to the latest version.
Related Posts
- Preparing for Windows 10 End of Support: Upgrading to Windows 11
- How to Fix a “This file does not have an app associated with it” Error on Windows
- How to Fix an Update Error 0x800705b4 on Windows
- How to Resolve “A JavaScript error occured in the main process” Error on Windows
- How to Fix the Network Discovery Is Turned Off Error on Windows
Sodiq has written thousands of tutorials, guides, and explainers over the past 4 years to help people solve problems with Android, iOS, Mac, and Windows devices. He also enjoys reviewing consumer tech products (smartphones, smart home devices, accessories, etc.) and binge-watching comedy series in his spare time. Read Sodiq’s Full Bio
