Windows 10 taskbar not working is one of the common issues you can encounter while using your Windows computer. When it occurs, you’ll find that your taskbar just stops responding to your actions. Sometimes, it may get frozen as well and you won’t even be able to bring your cursor there.
If you’re experiencing the Windows 10 taskbar not working issue on your machine, there are a few ways you can use to possibly get around the issue. These methods fix the elements that sit behind the feature and try to get your taskbar to work again.

Restart Windows Explorer To Fix Windows 10 Taskbar Not Working
Windows Explorer is one of the core utilities in which a number of small items reside. Your taskbar is actually part of the Explorer, and you can restart it which in turn will give a fresh start to your taskbar. It’ll likely fix the issue for you and the following are two methods to do it. You can use either of these to get the task done.
Use Task Manager To Restart Windows Explorer
Task Manager helps kill unresponsive programs on your computer and you can use it to kill and restart Windows Explorer as well.
- Press the Ctrl + Shift + Esc keys at the same time to launch Task Manager.
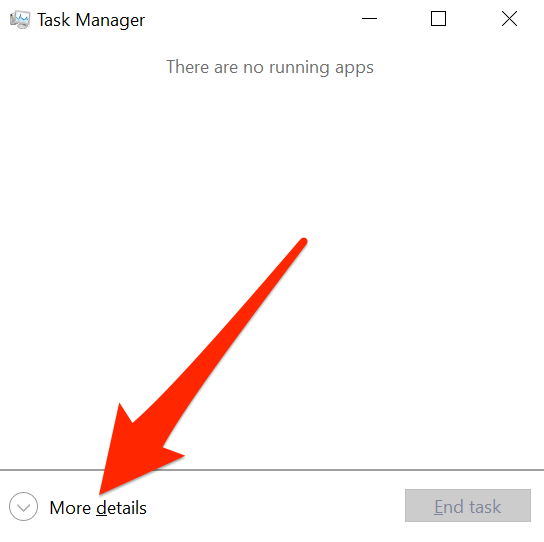
- Click on More details if you don’t already see your processes.
- Click on the Processes tab at the top and you’ll find all of your running programs.
- Find the process that says Windows Explorer, right-click on it, and select Restart.
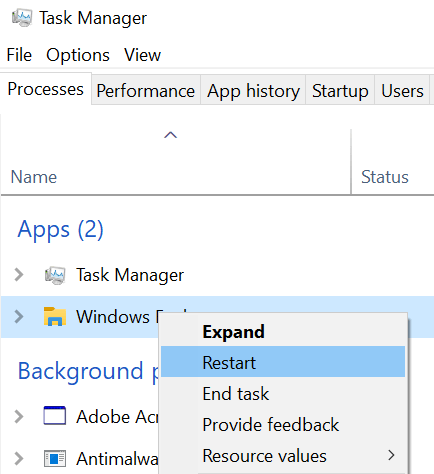
- It’ll restart the Explorer and your taskbar should work then.
Restart Windows Explorer Using Command Prompt
Another way to relaunch Windows Explorer is to use the Command Prompt utility on your PC.
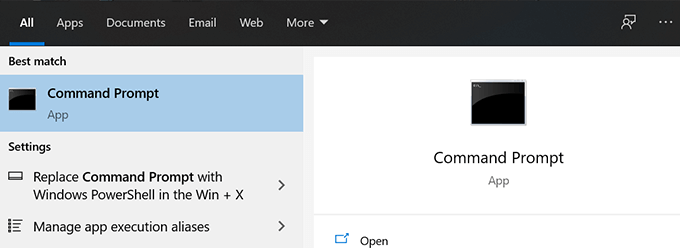
- Use the Cortana search to search for and open Command Prompt.
- Type in the following command and press Enter.
taskkill /f /im explorer.exe

- You should find that everything on your screen is gone. Type in the following command to bring it all back.
explorer.exe

Fix Windows 10 Taskbar Issues By Re-Registering The Taskbar
Your taskbar may have been deregistered from your system and that’s why it’s acting the way it is. If that’s the case, you can re-register the utility using PowerShell and that will restore the functionality when your Windows 10 taskbar isn’t working.
All you basically need to do is run a command in PowerShell and you’re good to go.
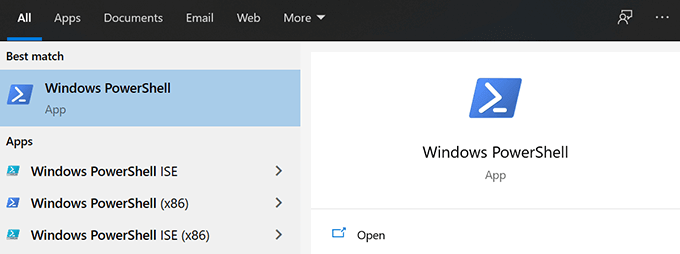
- Press the Windows key, search for Windows PowerShell, and launch it.
- Enter in the following command into the PowerShell window and press Enter.
Get-AppXPackage -AllUsers | Foreach {Add-AppxPackage -DisableDevelopmentMode -Register “$($_.InstallLocation)AppXManifest.xml”}

- Close the PowerShell window.
- Ensure your computer shows hidden files. Then head to the following path using the File Explorer.
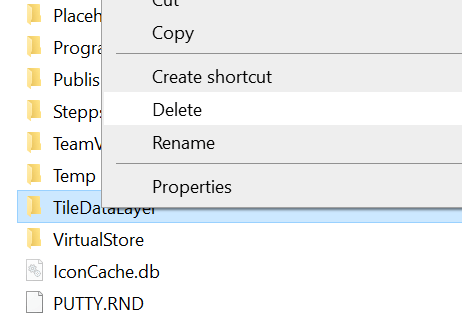
C:Users<your-username>AppDataLocal - Find the folder named TileDataLayer, right-click on it, and select Delete.
Prevent Certain Apps From Launching At Startup
A possible reason why the Windows 10 taskbar is not working is because there are certain apps that launch at the start of your computer and interfere with the workings of the taskbar. If you think this could be a possible reason for the issue, you can go ahead and get those apps disabled from being launched at the startup of your computer.
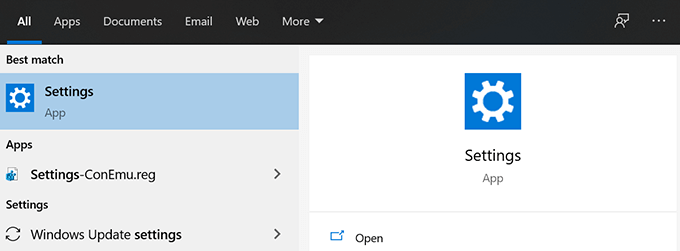
- Launch the Settings app using the Cortana search.
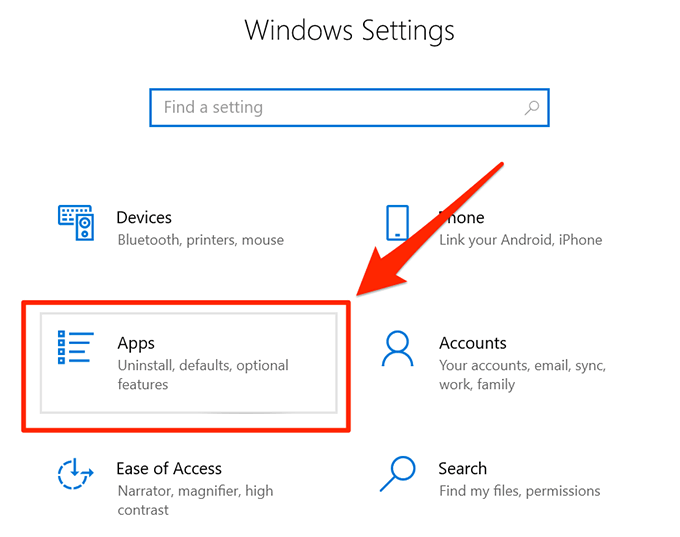
- Click on the option that says Apps to manage your app settings.
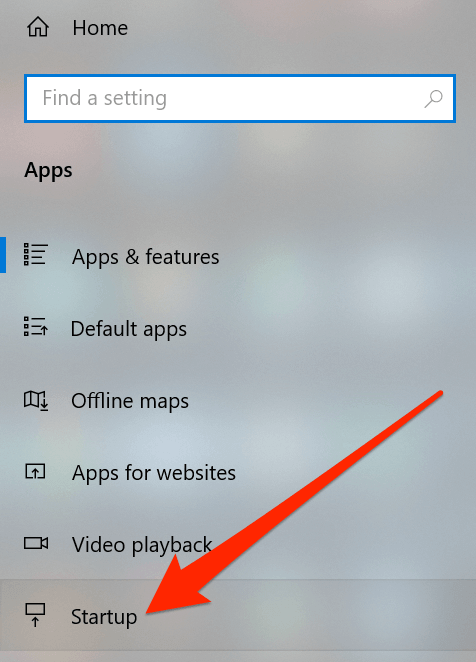
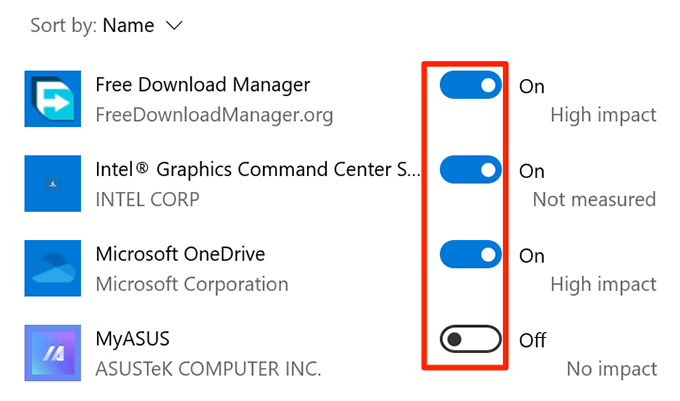
- Select Startup from the left sidebar to view a list of apps that open at startup.
- On the right-hand side pane, you’ll see a list of apps that are allowed to run at the boot of your computer. If you believe a certain app may be causing the taskbar issue, you can turn its toggle to the OFF position to disable the app.
Rollback a Recent Windows Update To Fix The Taskbar Issues
The main purpose of a Windows update is to fix existing bugs and give you new features. However, certain updates may break the existing features including the taskbar on your computer. In that situation, rolling back the update is a good way to fix the problem.
- Open the Settings app.
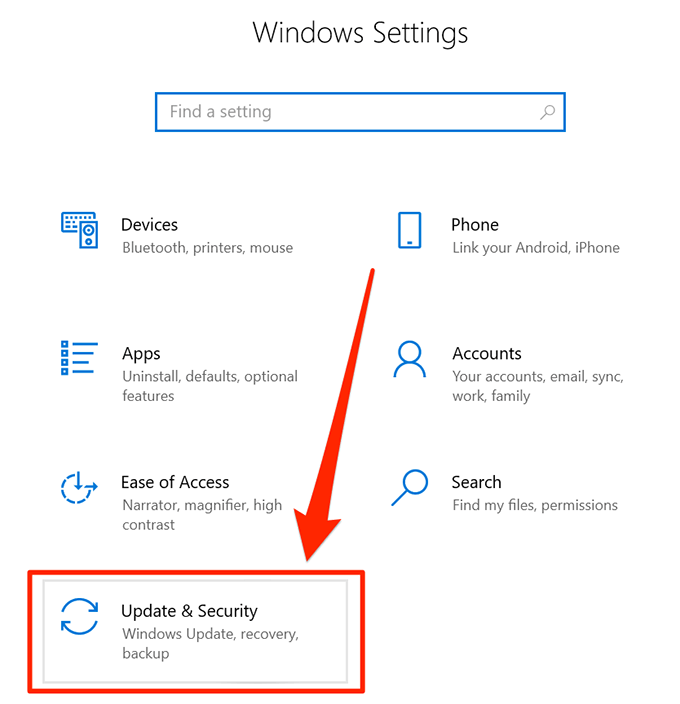
- Click on the option that says Update & Security to view your updates.
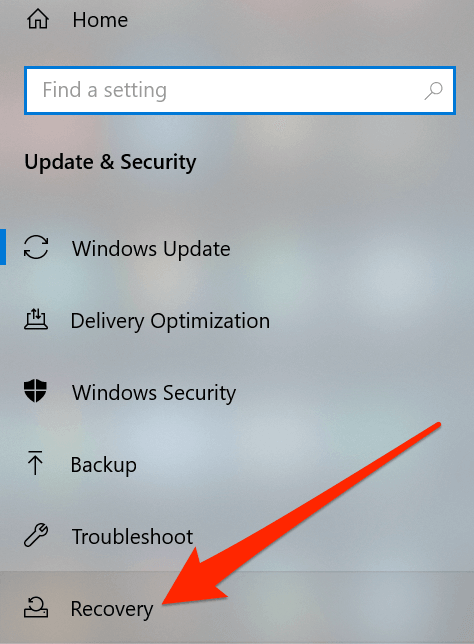
- Click on Recovery in the left sidebar menu.
- Click on the Get started button under the Go back to the previous version of Windows 10 section. Then follow the on-screen instructions to finish the task.
Use Another User Account On The Computer
Sometimes, some unintentional tasks may end-up causing damage to the core features of the system. Your Windows 10 taskbar not working could be the result of an action like that.
In these cases, it’s worth checking if the taskbar works in another user account on your computer. It’ll then give you an idea as to what caused the issue and you can undo your action to fix it.
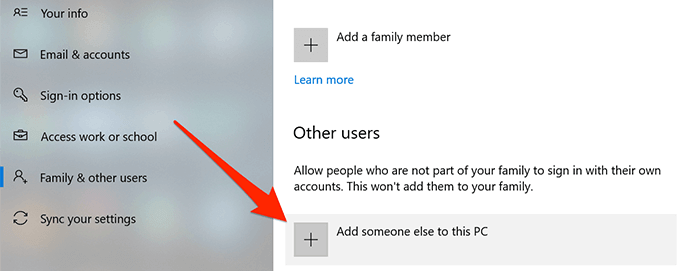
- If you don’t already have a secondary account on your PC, create one by going into Settings > Accounts > Family & other users and clicking on Add someone else to this PC.
- Once the account is all set up, press the Windows button, click on your profile icon, and select Sign out.
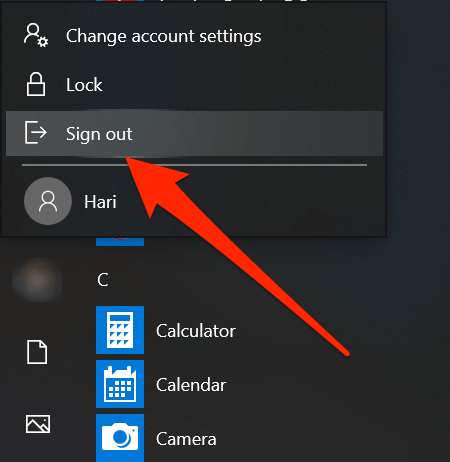
- Log-in to your secondary account and see if the taskbar works.
Rollback To a System Restore Point
Restoring a system restore point helps you undo any significant changes you may have recently made on your computer. This should bring your machine back to what it was before you made any changes to it.
- Search for System Restore in Cortana and open it.
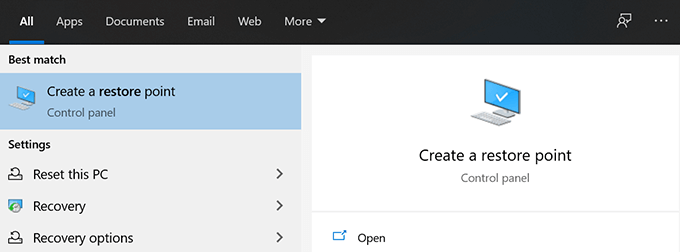
- Click on the System Restore button.

- Hit Next, choose your restore point, and click on Next once again.
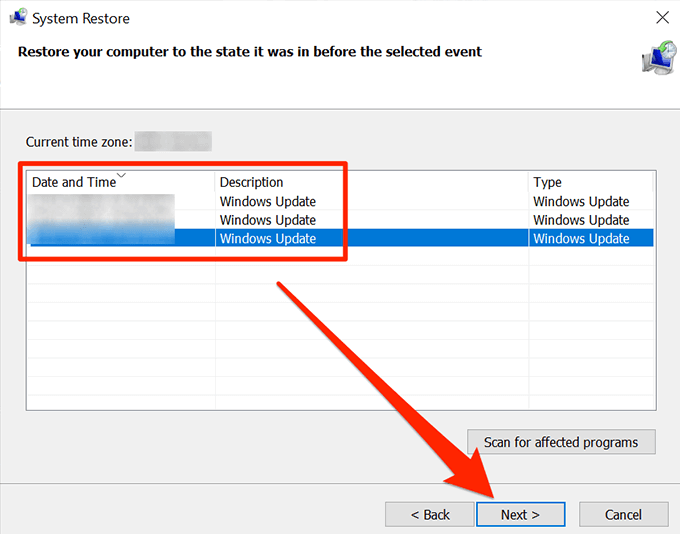
- When the restore point is restored, your taskbar should be working.
Taskbar is one of the important elements of a Windows computer and it not working is a huge inconvenience to the users. We hope the guide helped you fix it on your computer, and if it did, please let us know which method worked for you.
Related Posts
- Preparing for Windows 10 End of Support: Upgrading to Windows 11
- How to Fix a “This file does not have an app associated with it” Error on Windows
- How to Fix an Update Error 0x800705b4 on Windows
- How to Resolve “A JavaScript error occured in the main process” Error on Windows
- How to Fix the Network Discovery Is Turned Off Error on Windows