If screen mirroring is not working with your Windows 10 PC, several reasons could be behind it. Maybe a setting isn’t correct, or the right input mode on the TV isn’t selected, and so on.
Luckily, you can fix most of these issues by tweaking a few options here and there on your PC. We’ll show you how.
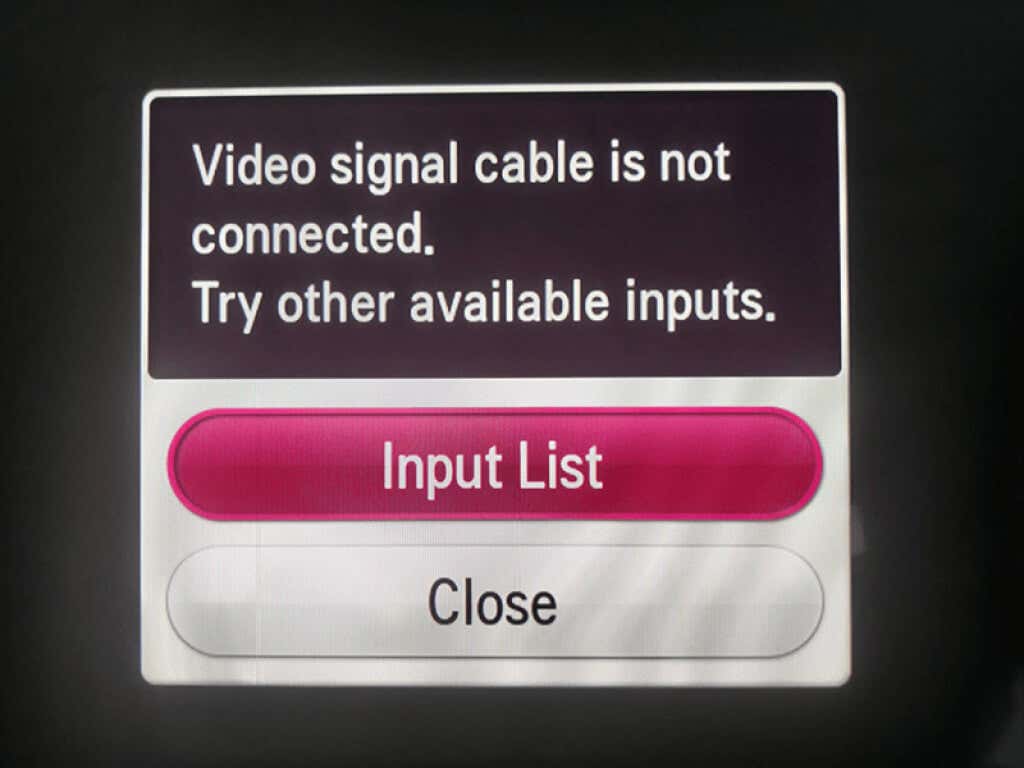
Use the Correct Input Mode on Your Screen/TV
Most monitors and TVs have multiple input modes that you can choose from. First, you need to select the mode that your Windows 10 PC is connected to.
For example, if your PC is connected to HDMI port number 2 on your TV, you should select that input mode number in the settings on your TV. This tells your TV what source to get the content from and display it on the screen.
Most TV remotes have an Input Mode or Source button. Press that button, choose the correct mode, and you’ll be good to go.
Restart Your Windows 10 PC to Get Around Screen Mirroring Problems
Sometimes, minor glitches on your Windows 10 PC that causes screen mirroring to not function. In these cases, a simple reboot usually fixes the problem.
To reboot your Windows PC, open the Start menu, select the power icon, and choose the Restart option.
When your PC restarts, reconnect your PC to your monitor, and screen mirroring should hopefully work.
Use Hardware and Devices Troubleshooter to Fix Screen Mirroring Not Working
An easy way to deal with most types of issues on your Windows 10 PC is to use a built-in troubleshooter. Windows 10 has many troubleshooters, and one of them is a Hardware and Devices troubleshooter. You can use this to find and fix issues with your devices, ultimately fixing your screen mirroring problems.
To use that troubleshooter:
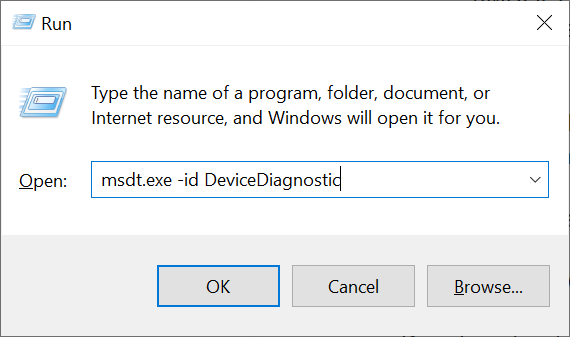
- Open the Run box by pressing Windows + R keys simultaneously.
- Type the following command in the Run box and press Enter:
msdt.exe -id DeviceDiagnostic
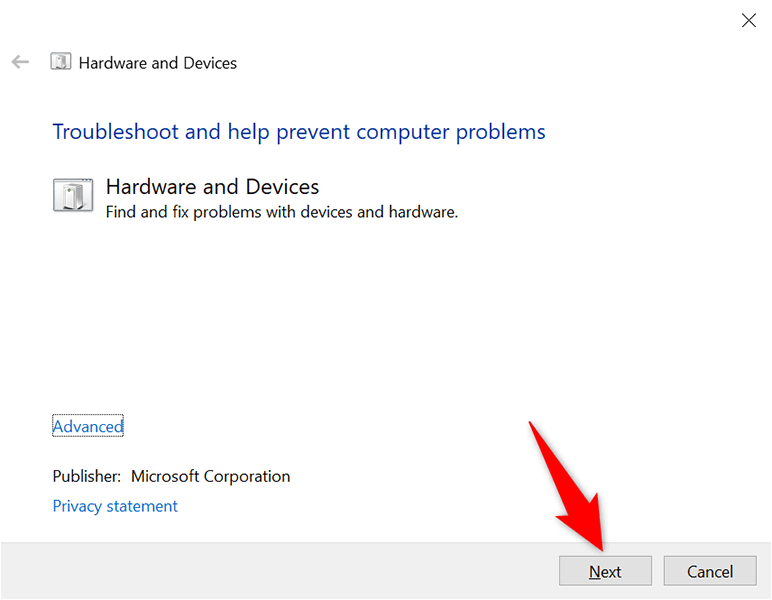
- Select Next on the Hardware and Devices troubleshooter screen.
- Wait for the troubleshooter to find issues with your devices. The troubleshooter will then offer to fix those issues.
Once the issues are fixed, start screen mirroring, and it should work just fine.
Check If Your Windows 10 PC Supports Miracast
If you’re trying to mirror your Windows 10 PC’s screen to a wireless display, make sure your PC supports Miracast. Your PC must have this feature to cast the screen to external wireless displays.
There’s an easy way to check if your PC supports that feature:
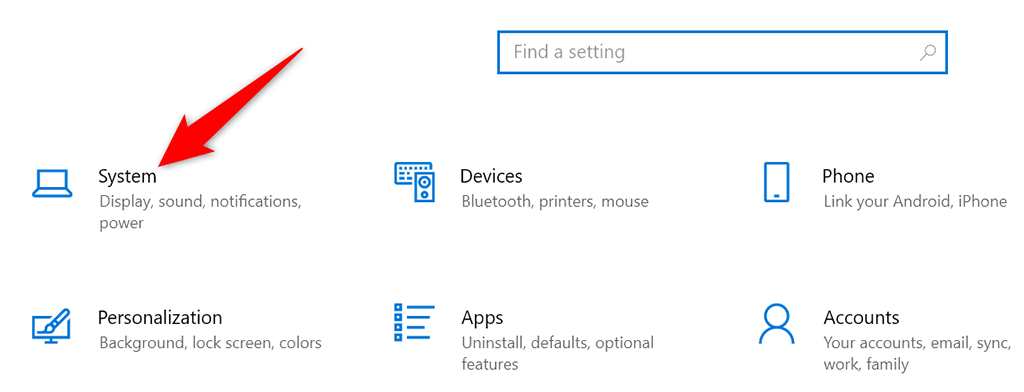
- Open the Settings app by pressing Windows + I keys simultaneously.
- Select System on the Settings window.
- Choose Display from the left sidebar.
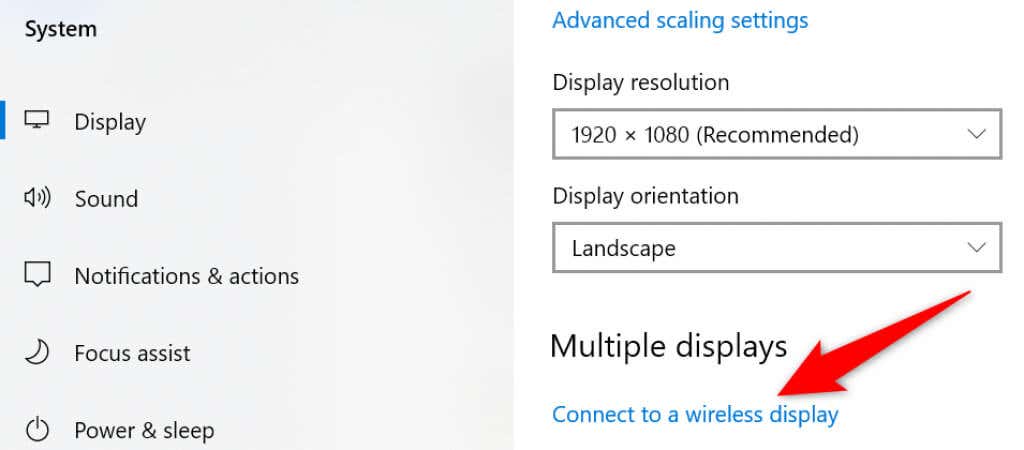
- Scroll down the right pane to the Multiple displays section. If you see a Connect to a wireless display option here, that means your PC supports Miracast.
- If you don’t see that option, your PC doesn’t support Miracast.
If your PC doesn’t support Miracast, you don’t have to be disappointed. You can still mirror your PC’s screen to your monitor but use a physical cable connection.
To do so, check the back of your monitor and see what cable types it supports. In most cases, you’ll find an HDMI port on your monitor. If this is the case, get an HDMI cable and use the cable to connect your PC to your monitor.
Then, instantly, you’ll see your PC’s screen on your connected monitor.
Enable Wi-Fi to Fix Screen Mirroring Issues
To wirelessly mirror your PC’s screen to a display, you must have Wi-Fi enabled on your PC. This is an essential prerequisite, yet many people forget about it. This will lead to screen mirroring not working.
To enable Wi-Fi on your PC:
- Open the Settings app by pressing Windows + I keys together.
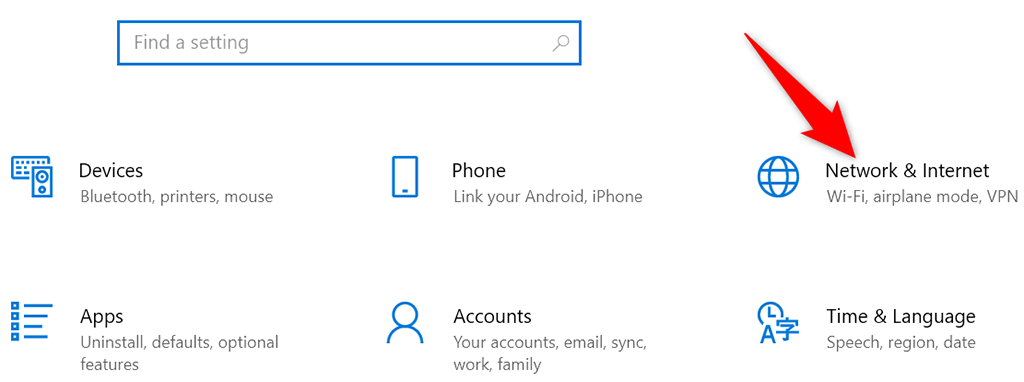
- Select Network & Internet on the Settings window.
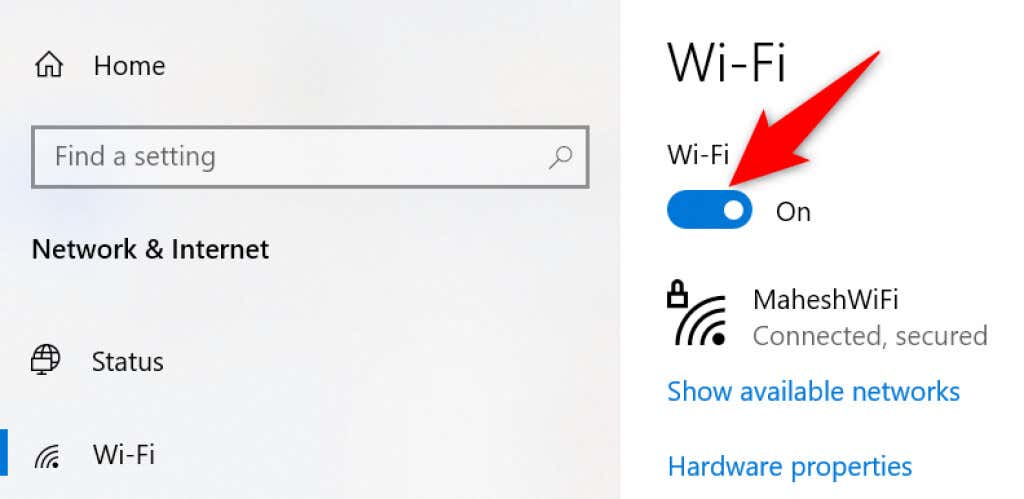
- Choose Wi-Fi from the sidebar on the left.
- Toggle on the Wi-Fi option on the right pane.
You’ll need to connect your PC to the same Wi-Fi network as your external wireless display to enable screen mirroring.
Update the Graphics Card Drivers
Outdated or faulty graphics card drivers cause various issues, including causing screen mirroring not to work on your PC. If this is the case with you, update the graphics card drivers to the latest versions, which should fix your problem.
The good thing is you can update the drivers automatically on your Windows 10 PC:
- Open the Device Manager by accessing the Start menu, searching for Device Manager, and selecting that tool in the search results.
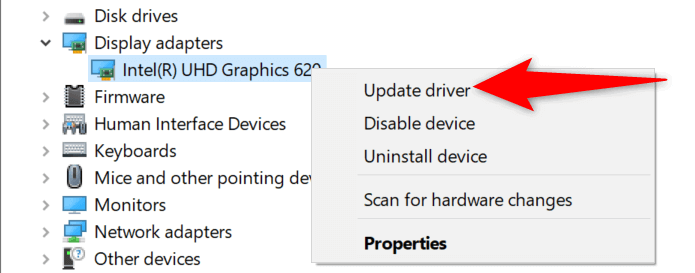
- Find your graphics card in the Display adapters section on the Device Manager window.
- Right-click your graphics card and choose Update driver from the menu.
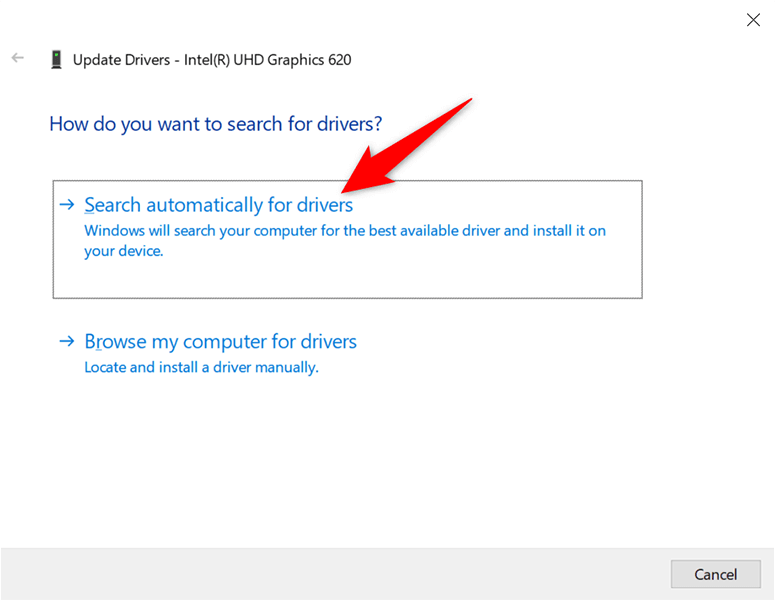
- Select Search automatically for drivers on the following screen.
- Wait for Windows 10 to find and install newer drivers for your graphics card.
- Restart your PC when the drivers are installed.
If you have an Nvidia graphics card, you can update your graphics card drivers manually, too.
Remove the Screen and Re-Add It
When screen mirroring stops functioning on your PC, it’s a good idea to remove the external display from your PC and then re-add it. This should fix any minor issues with the display and allow you to mirror the screen from scratch.
- Press the Windows + I keys to open the Settings app.
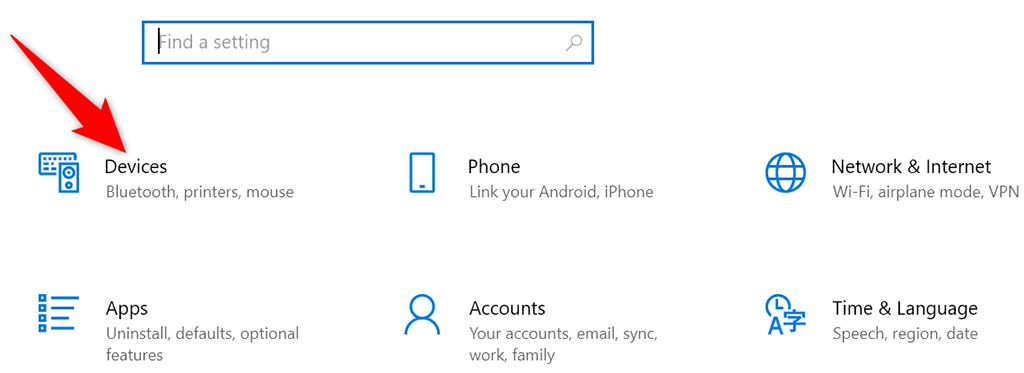
- Select Devices on the Settings window.
- Find and select your external display.
- Choose Remove device beneath your selected display.
- Select Yes in the prompt that opens to remove the selected display from your PC.
- Re-add the display to your PC as you did earlier.
It’s Easy to Deal With Screen Mirroring Not Working on Windows 10
If you can’t get your PC’s screen to mirror to your external monitor, there’s a good chance an option is off on your PC. Using the methods outlined above, your screen mirroring issues should be gone. You’ll then have all your PC’s content appear on your connected TV or monitor.
Related Posts
- Preparing for Windows 10 End of Support: Upgrading to Windows 11
- How to Fix a “This file does not have an app associated with it” Error on Windows
- How to Fix an Update Error 0x800705b4 on Windows
- How to Resolve “A JavaScript error occured in the main process” Error on Windows
- How to Fix the Network Discovery Is Turned Off Error on Windows

