If you’re trying to install or open an application and you see the “Error opening file for writing” message, there’s a big problem. This error will stop you in your tracks—you can’t progress until the problem is fixed.
This message is usually caused by incorrect file permissions, but that isn’t the only cause. Corrupt setup files, existing (and running) applications, your user account settings, and more could all be at fault.
Thankfully, there are some steps you can try to help resolve the problem. If you’re looking to fix the “error opening file for writing” error on Windows, follow these steps.
1. End the Application in Task Manager
For most users, there’s one obvious problem that causes the error opening file for writing error—an open application. If you’re trying to update an existing application, for instance, but that application is running, it can’t install itself as the files are still in use, causing the error.
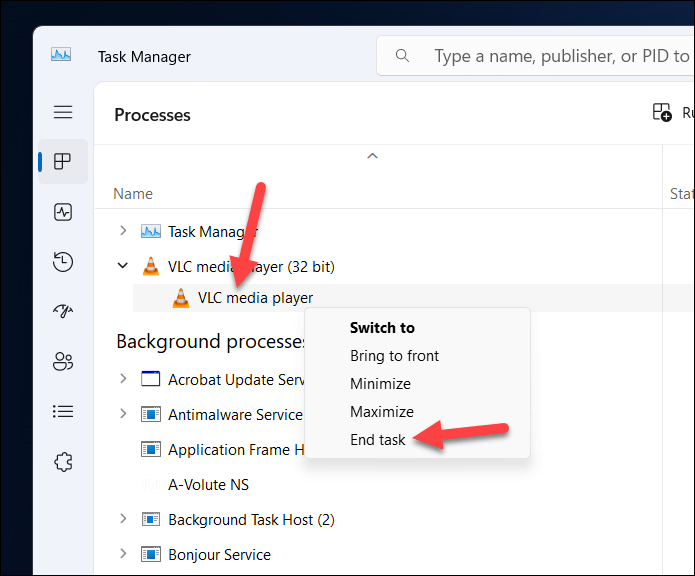
To fix this issue, you’ll need to close the application and stop any related processes using the Task Manager. To do this, follow these steps.
- Right-click the Start menu or the taskbar and select Task Manager.
- In the Task Manager window, look for the application name of the app you’re trying to install or any related processes in the Processes tab. For example, if you are trying to install VLC Media Player, look for vlc.exe or any other processes that start with vlc.
- Right-click on each process and select End task from the menu.
- If prompted, press Yes to confirm the termination.
Once the applications have stopped, try the installer again to see if the problem is fixed.
2. Run the Installer File with Administrator Rights
File permissions can sometimes cause problems with installing applications. If you’re using a standard user account on your PC, for instance, you may need to run an installer file with administrator rights to give it the necessary permission to install itself (and access or overwrite any existing files).
This will give the installer full access to write to any file or folder on your system. To do this, follow these steps.
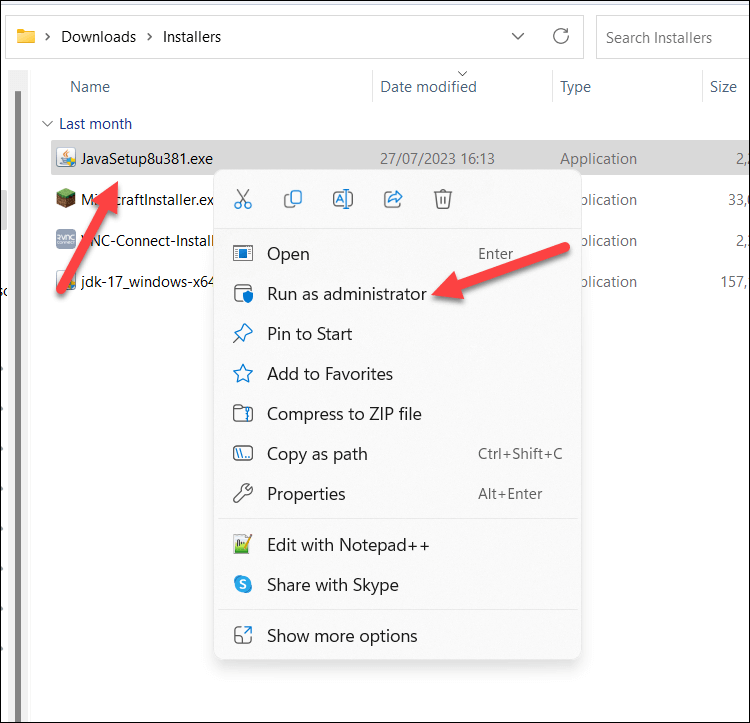
- Locate the program’s setup file in File Explorer.
- Right-click the file and select the Run as administrator option.
- When prompted, select Yes in the User Account Control pop-up window. Alternatively, if you’re running with a basic user account, you may be prompted to insert your username and password here.
The file will open with administrator privileges—continue with the installation process as usual at this point.
3. Change a Standard User Account to An Administrator
A standard user account shouldn’t have the necessary permissions to make system changes, which includes installing applications. If you find that you can’t run the app installer as an admin, you’ll need to change your user account type from a standard account to an administrator.
An admin account will give you full control over your PC, allowing you to install any application without any restrictions. The best way to do this is still to use the older Control Panel in Windows 11. To change your user account type, follow these steps.
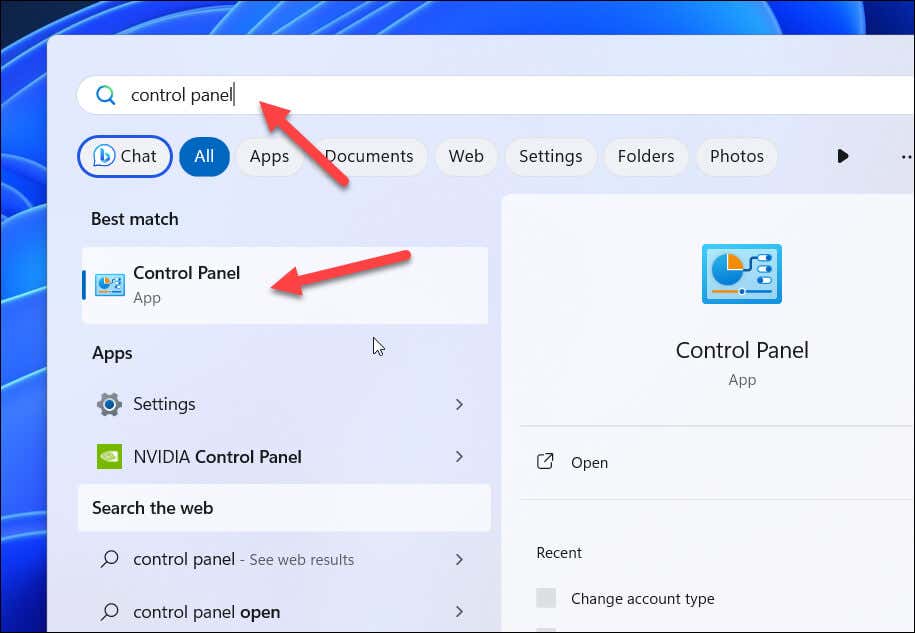
- Open the Start menu, search for control panel, and select the top (Best Match) result.
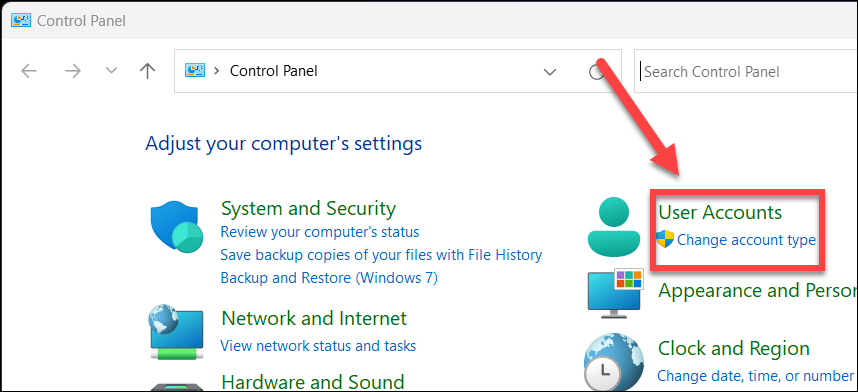
- In the Control Panel menu, select Change account type under the User Accounts section.
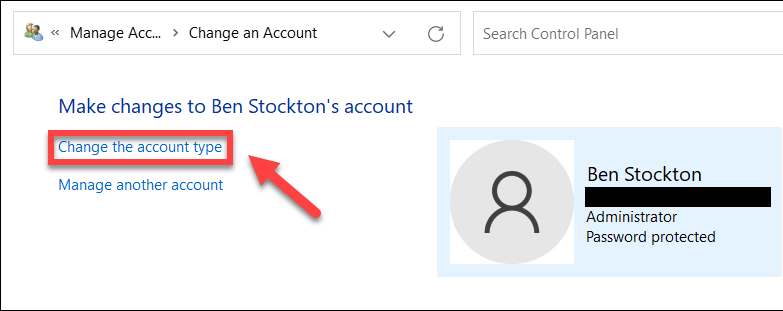
- Select your user account and press Change the account type.
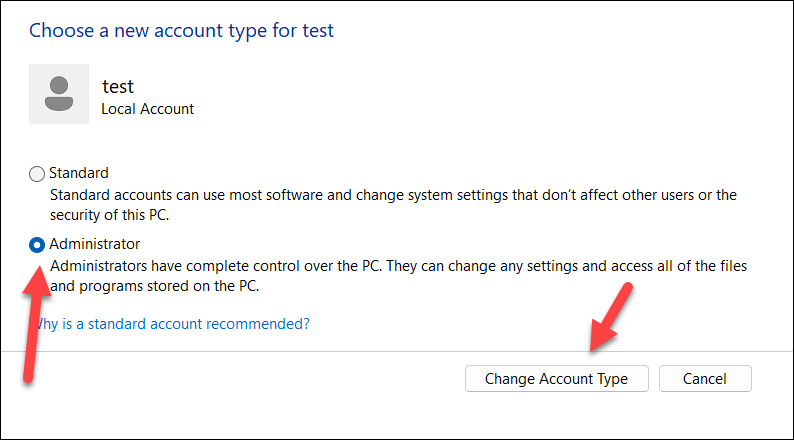
- From the options, choose Administrator. If this is grayed out, you don’t have the necessary permissions to make the change—you’ll need to switch to another user account and try again.
- Press Change Account Type to confirm the change, then restart your PC.
- Once you’ve restarted, log back into your user account. It should now have elevated administrator privileges, allowing you to begin the installer again.
4. Change the Installation Location or Drive
Another possible solution is to change the installation drive for the application you’re trying to install. You may be running out of disk space on your main C: drive, or you may prefer to offload certain applications onto a second hard drive or partition.
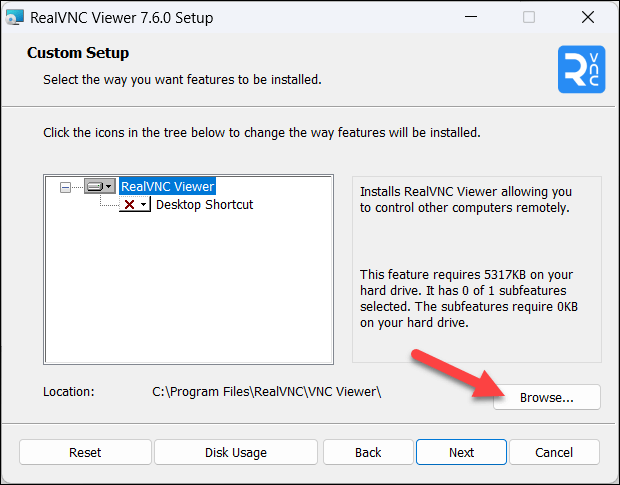
To do this, make sure you choose Browse (or similar) during your application installation process. You’ll need to choose your new installation location, making sure that it’s on a different drive. Failing that, you should make sure it’s in a different location to any existing applications.
Once you’ve done that, proceed with the installation as normal. If the installation completes successfully, you’ve been able to bypass the error.
5. Run the Compatibility Troubleshooter for the Installer File
If the application you’re trying to install is older, you may find that compatibility issues between the installer file and your current Windows version are preventing the installation from succeeding. If this is the case, you can run the Compatibility Troubleshooter tool to try and fix the problem.
The troubleshooter will automatically identify compatibility issues between the file and your PC. If it can resolve them (for instance, by running the file in compatibility mode), it’ll do it for you automatically.
To run the Compatibility Troubleshooter, follow these steps.
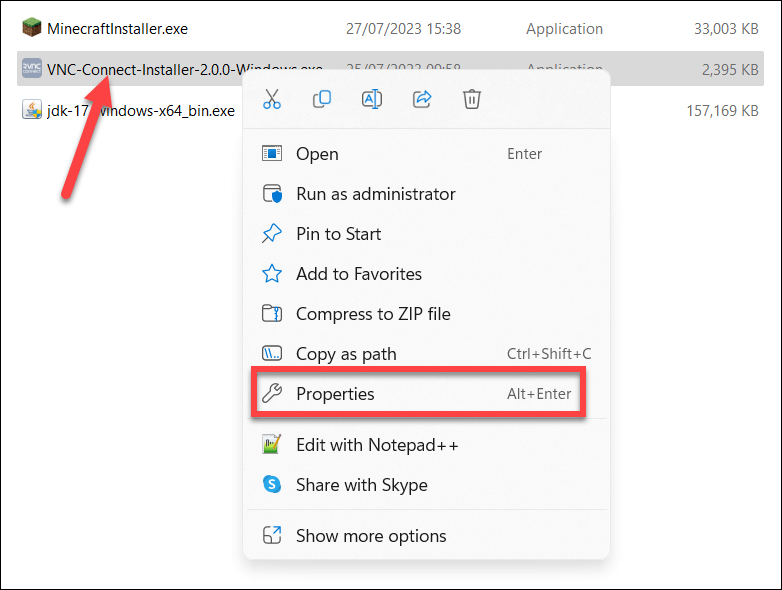
- Right-click on the installation file in File Explorer and select Properties.
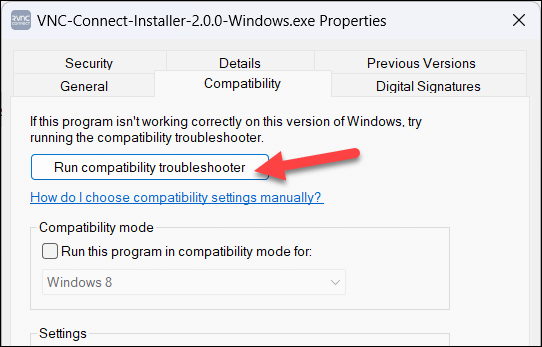
- In the Properties window, select the Compatibility tab and press the Run compatibility troubleshooter option.
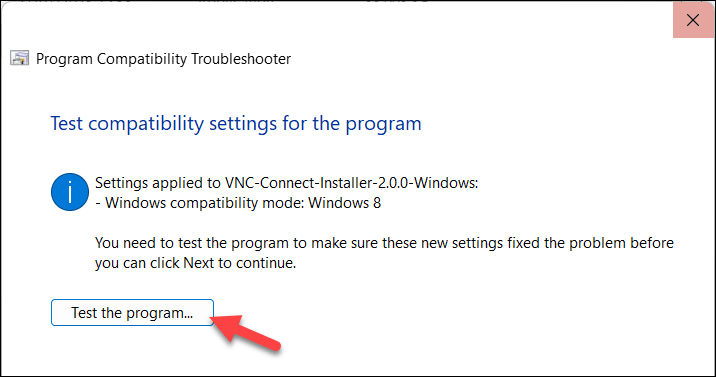
- The troubleshooter will begin to search for recommended settings automatically. If it finds any, press Test the program to check that it works.
- If it works, press Next.
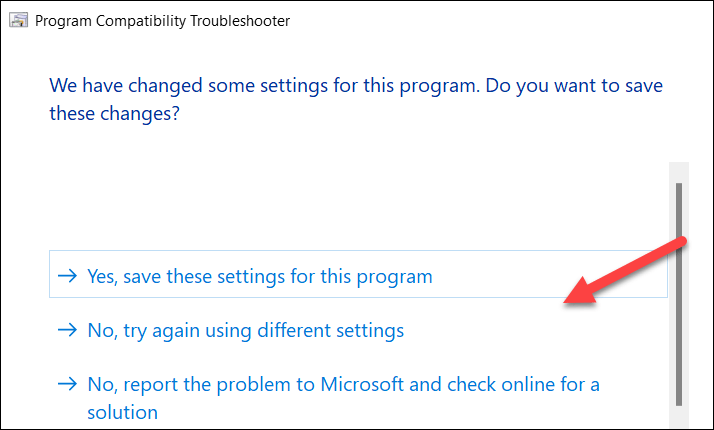
- Choose Yes, save these settings for this program.
- Otherwise, choose No, try again using different settings to find another solution or No, report the program to Microsoft and check online for a solution instead.
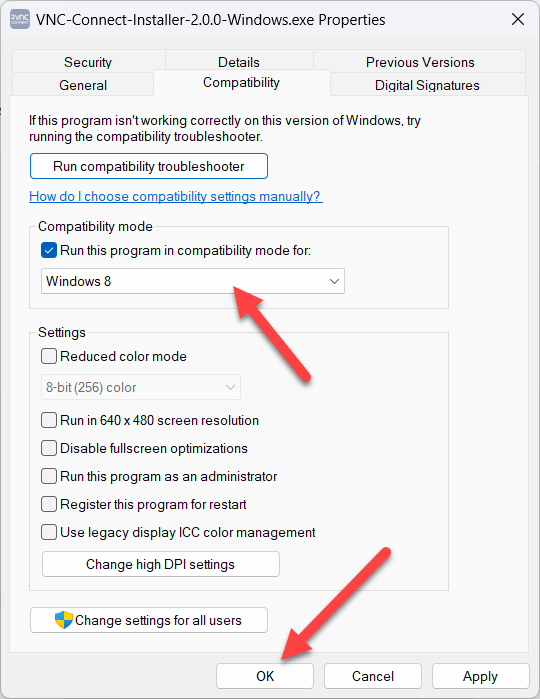
- You can also apply a custom compatibility setting using the Compatibility mode and Settings options in the Properties window.
- If you’ve applied the new settings, make sure to press OK in the Properties box to save them.
6. Try a Different Installation File
While it might be uncommon, you may need to consider trying a new copy of the installation file. If the file has been corrupted or is missing a crucial part of the setup process, the installation will fail.
To fix this issue, you’ll need to try and download a newer copy of the file from a reputable source. You should try a manufacturer or developer’s website in the first instance, as downloading files from less-reputable sites could put your PC at risk from a malware infection.
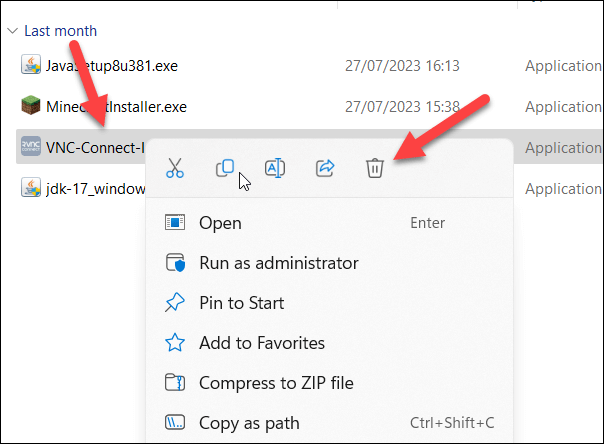
Once you have the file, delete the original from your PC by right-clicking it in File Explorer and selecting Delete. You can then run the new file, as normal, to see if it resolves the issue.
Remember to run it as an administrator using the steps we’ve outlined above if you run into any problems.
7. Remove Older Versions of the Application
If you’re trying to manually update an older application, you may need to consider uninstalling the older version first. These older applications may have their own file protections in place to prevent you from overwriting them—antivirus software being a common example.
To uninstall older applications, follow these steps.
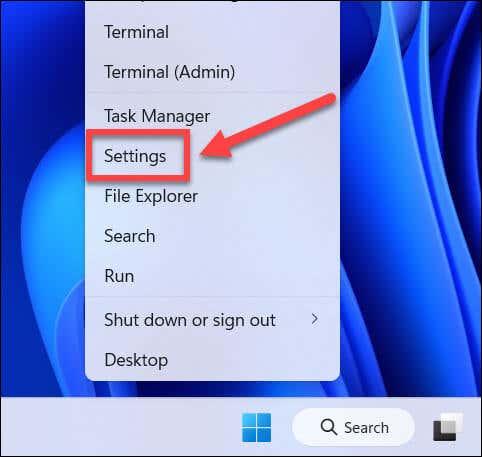
- Right-click the Start menu and select Settings.
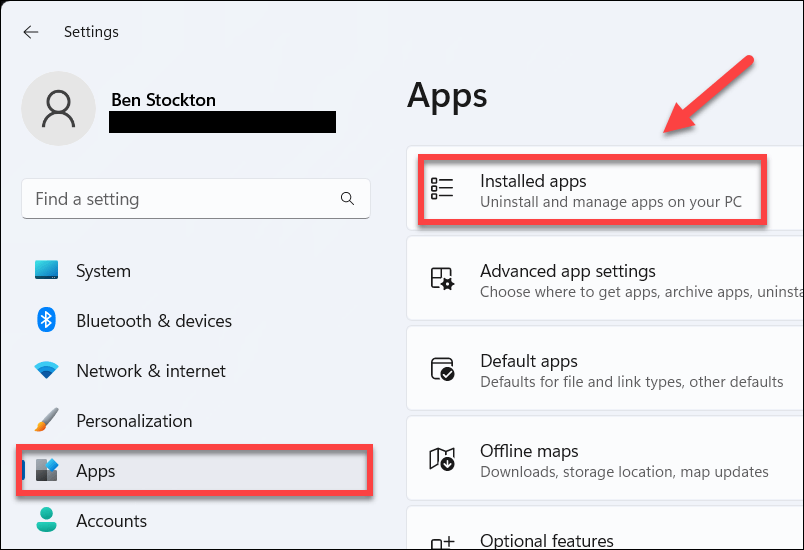
- Select Apps > Installed Apps in the Settings menu.
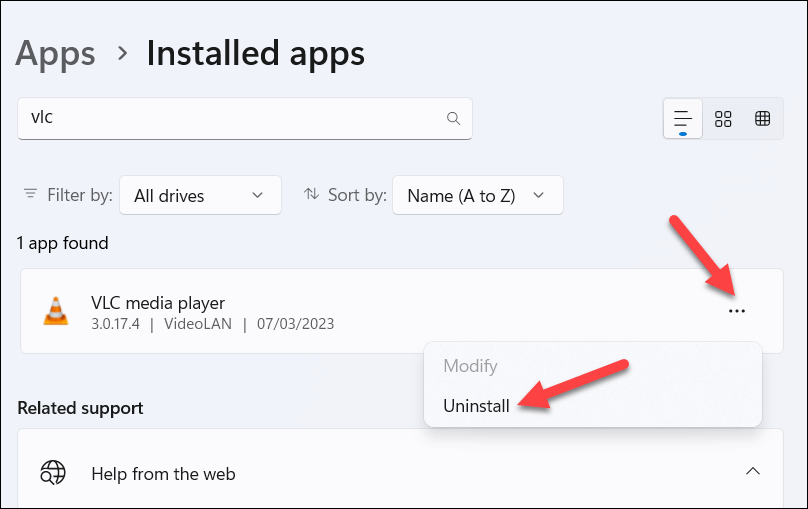
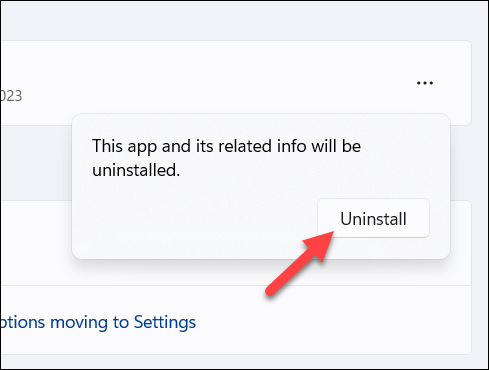
- Locate the older version of the application or use the search bar to narrow the search. Once you locate it, press the three-dots menu icon next to it, then press Uninstall.
- You’ll be asked to confirm your choice—press Uninstall to continue.
- If the application has any further removal settings or options, follow the on-screen instructions to complete this process.
Once the application is removed, restart your PC and try the newer installation file again to see if the problem is resolved.
Successfully Installing Applications on Windows 11
The “error opening file for writing” error on Windows isn’t a common one, but if you encounter it, the steps above should help you to fix the problem. Make sure to check that you’re not trying to overwrite any running applications and ensure your user account has the right permissions to make changes to your system.
Need to remove an app you installed from the Microsoft Store? The process for uninstalling Microsoft Store apps is a little different—you’ll need to do this via the Settings menu or the Store itself.
Want to try a particular mobile app on your PC? You can install Android apps on Windows 11 to allow you to do just that.
Related Posts
- Preparing for Windows 10 End of Support: Upgrading to Windows 11
- How to Fix a “This file does not have an app associated with it” Error on Windows
- How to Fix an Update Error 0x800705b4 on Windows
- How to Resolve “A JavaScript error occured in the main process” Error on Windows
- How to Fix the Network Discovery Is Turned Off Error on Windows
Ben Stockton is a freelance technology writer based in the United Kingdom. In a past life, Ben was a college lecturer in the UK, training teens and adults. Since leaving the classroom, Ben has taken his teaching experience and applied it to writing tech how-to guides and tutorials, specialising in Linux, Windows, and Android. He has a degree in History and a postgraduate qualification in Computing. Read Ben’s Full Bio
