Are you trying to launch an app, game, or file but keep getting a “This file does not have an app associated with it” error? This error usually occurs when your PC doesn’t have the app required to open your specific file type. There are other reasons this issue occurs, and we’ll show you how to resolve this problem on your Windows 11 or Windows 10 computer.
Some other reasons the above error appears are that your app or game shortcut is corrupted, Windows’ system files are damaged, a system change you made to your PC is faulty, and more.
Delete and Re-Create Your App or Game Shortcut
If you get the above error while launching an app or game using a shortcut, that shortcut might be corrupted. This happens for various reasons, including a virus or malware corrupting your shortcut.
You can get around that by removing the current shortcut and adding a new shortcut.
- Remove the existing shortcut by right-clicking the shortcut and choosing Delete.
- Launch File Explorer using Windows + E and locate your app or game’s folder. Windows installs most items in the following directory:
C:\Program Files - Find your app or game’s executable file.
- Right-click the file and select Show more options > Send to > Desktop (create shortcut).
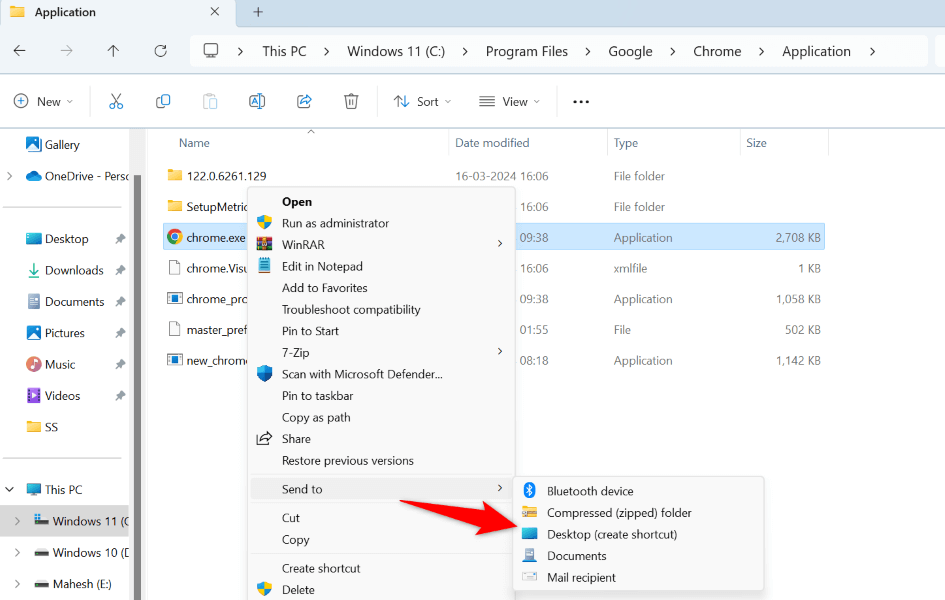
- Access your desktop using Windows + D and double-click the newly created shortcut.
Ensure the App for Your File Type Is Installed
Your PC might not have the app required to open your specific file type. For example, you need the Photoshop app to open PSD files, and so on. In this case, get the app required to access your file, and your issue will be resolved.
First, find your file’s type as follows:
- Right-click the file and select Properties.
- Access the General tab.
- Your file’s extension appears next to Type of file.
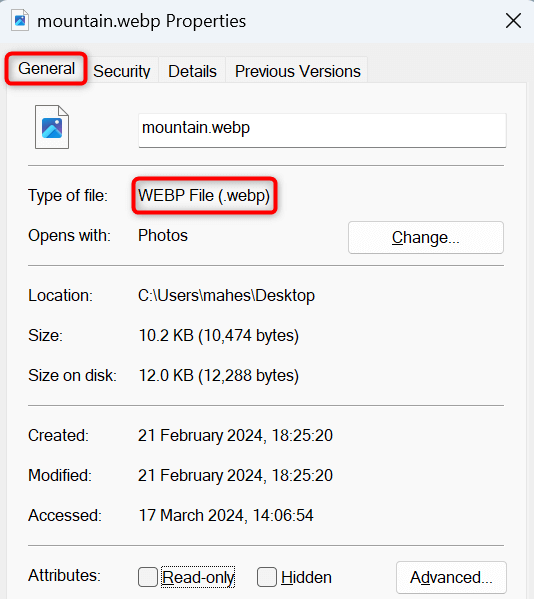
If your PC doesn’t have the app needed to open your specific file type, search your file’s extension on Google, and you’ll find the apps that can open your file. Download and install one of those apps, then do the following:
- Right-click your file and select Open with > Choose another app.
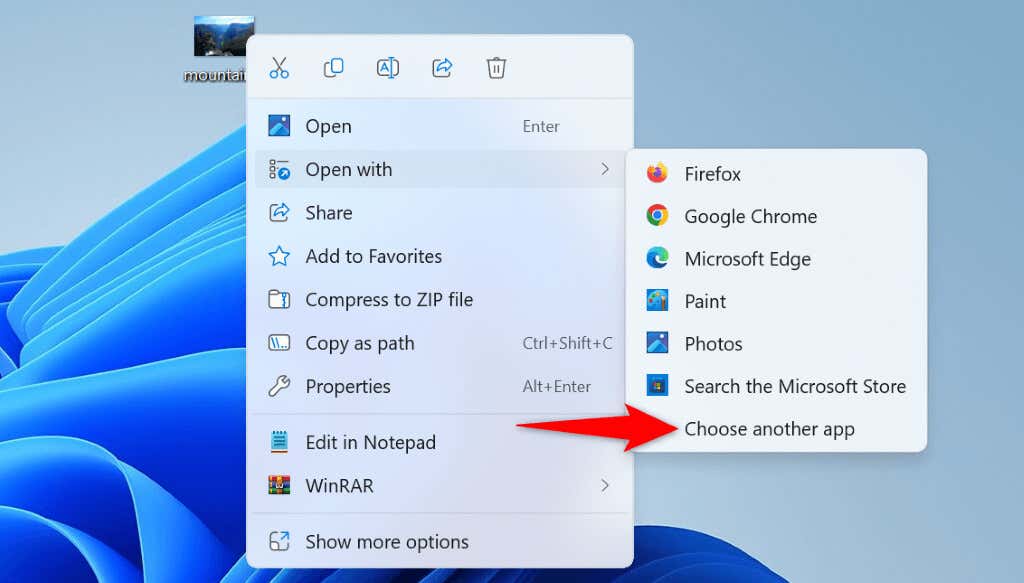
- Choose the newly-installed app to launch your file with.
Set the Default App for Your File Type
Another fix to use is to set the default app for the file type you’re trying to open. For example, set a media player as the default app for MP3 files if you’re trying to launch an MP3 file. This tells Windows what application to open your file with.
On Windows 11
- Launch Settings by pressing Windows + I.
- Select Apps in the left sidebar and Default apps on the right pane.
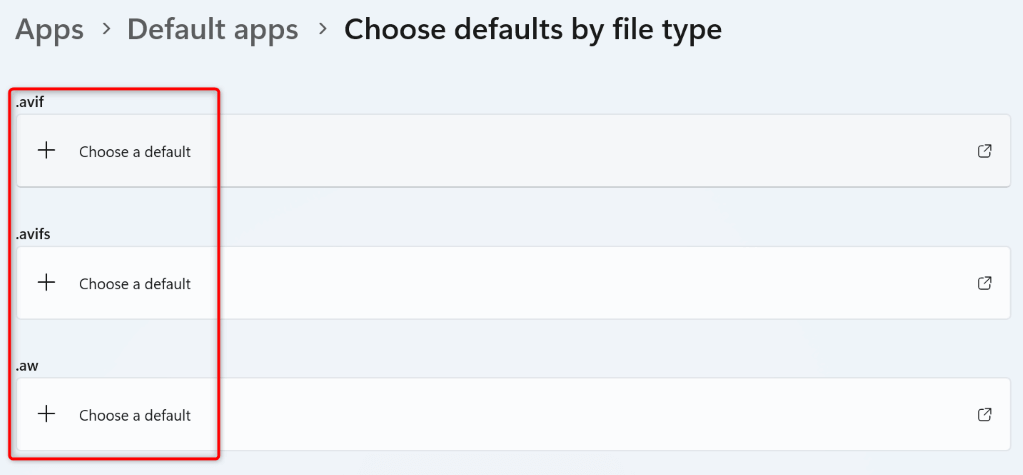
- Scroll down the open page and select Choose defaults by file type.
- Select your file’s format on the list, choose the app you want to set as the default and select Set default.
On Windows 10
- Open Settings using Windows + I.
- Select Apps in Settings.
- Choose Default apps in the left sidebar.
- Select Choose default apps by file type on the right pane.
- Find your file’s extension on the list and select Choose a default next to the extension.
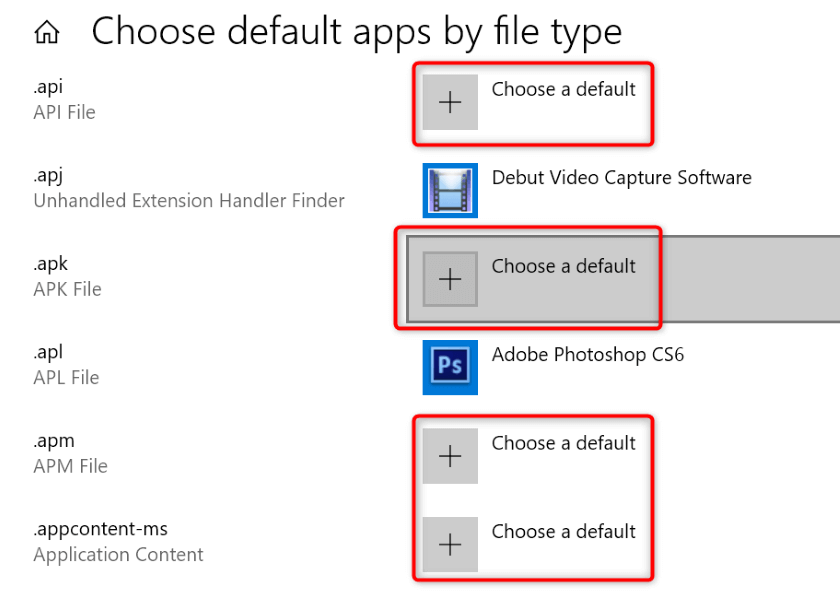
- Select the app you want to make the default for your chosen file type.
- Access your file.
Repair or Reinstall the App You Use to Open Your File With
If you’ve already installed the required app but the file still doesn’t open, the installed app might be faulty. In this case, repair the app and see if the app works. If the issue persists, remove and reinstall the app on your PC.
Repair the App
Both Windows 11 and 10 include the option to repair apps; use this option to see if you can fix problems with your app.
On Windows 11
- Access Settings by pressing Windows + I.
- Select Apps > Installed apps in Settings.
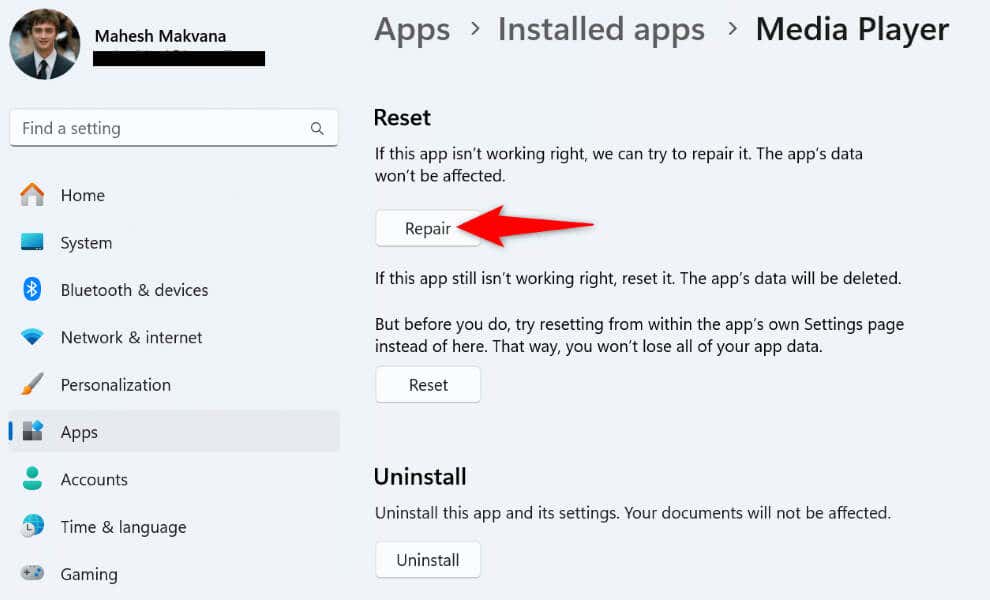
- Find the app on the list, select the three dots next to the app, and choose Advanced options.
- Select Repair in the Reset section.
On Windows 10
- Launch Settings using Windows + I.
- Select Apps in Settings.
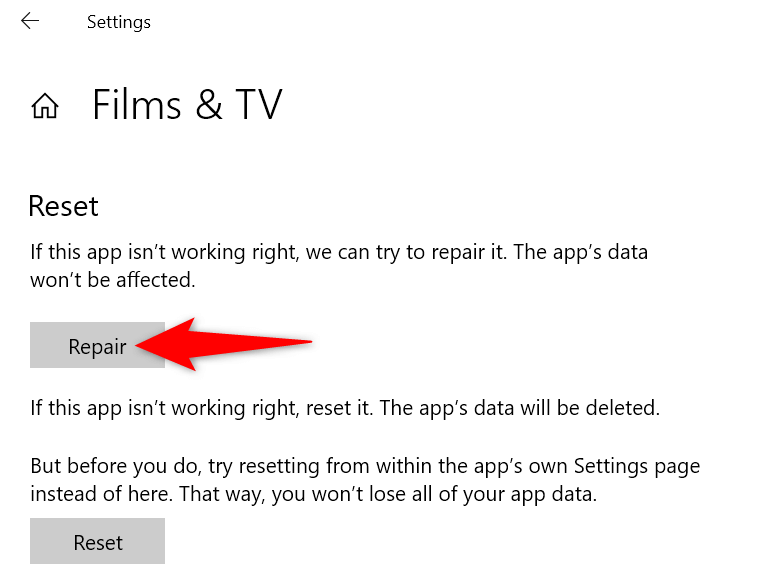
- Select the app on the list and choose Advanced options.
- Choose Repair in the Reset section.
Reinstall the App
If Windows couldn’t repair the app, uninstall and reinstall the app to fix the problem. Depending on how your app functions, you might or might not lose your data stored in the app.
On Windows 11
- Access Settings using Windows + I and navigate to Apps > Installed apps.
- Find the app on the list, select the three dots next to the app, and choose Uninstall.
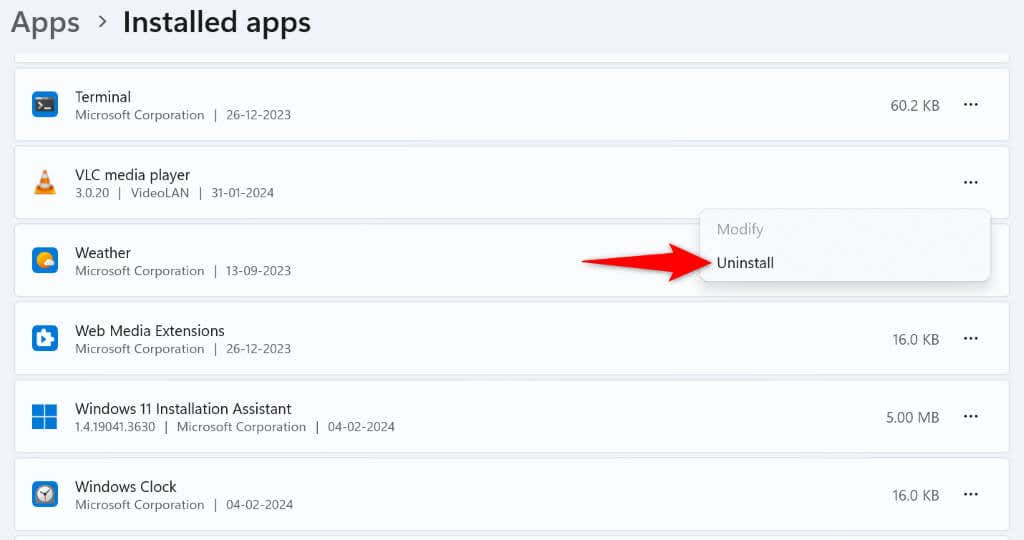
- Select Uninstall in the prompt.
- Launch the app developer’s site and download and install the app.
On Windows 10
- Launch Settings using Windows + I and select Apps.
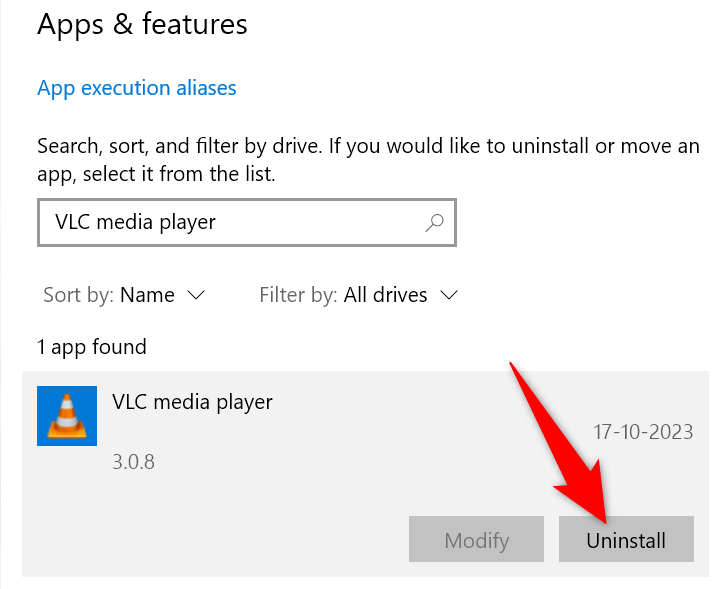
- Find and select the app on the list, choose Uninstall, and select Uninstall.
- Access the app developer’s site and download and install the app.
Repair Windows’ Damaged System Files
Sometimes, corruption in Windows’ core operating files causes a specific file type not to launch. In this case, fix those damaged system files using Windows’ built-in System File Checker (SFC) tool. This tool automatically finds the damaged files and replaces those files with working ones.
- Open the Start menu, find Command Prompt, and select Run as administrator.
- Choose Yes in the User Account Control (UAC) prompt.
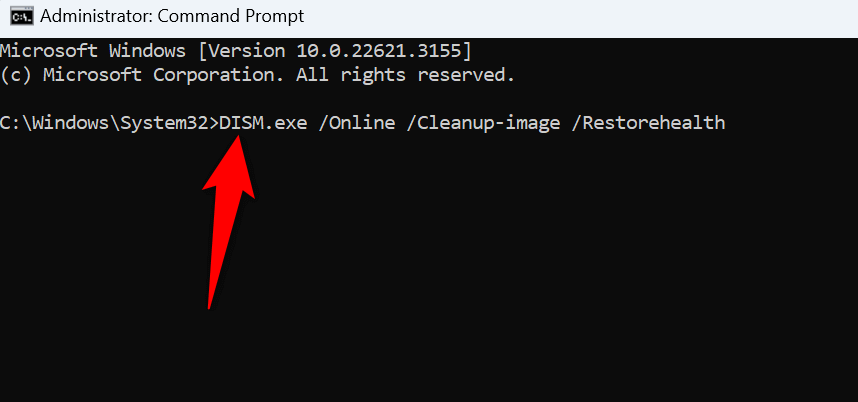
- Type the following command on the open window and press Enter:
DISM.exe /Online /Cleanup-image /Restorehealth
- Next, run the following command to begin fixing the corrupted files:
sfc /scannow - Restart your PC after fixing the faulty files.
Use System Restore
If the issue persists, roll back the recent changes you might have made to your system. These changes might be interfering with your specific file type, causing the file not to launch.
You can use the built-in System Restore utility to undo system changes.
- Open the Start menu, find Recovery, and select the item with that name.
- Select Open System Restore.
- Choose Next on the utility’s first page.
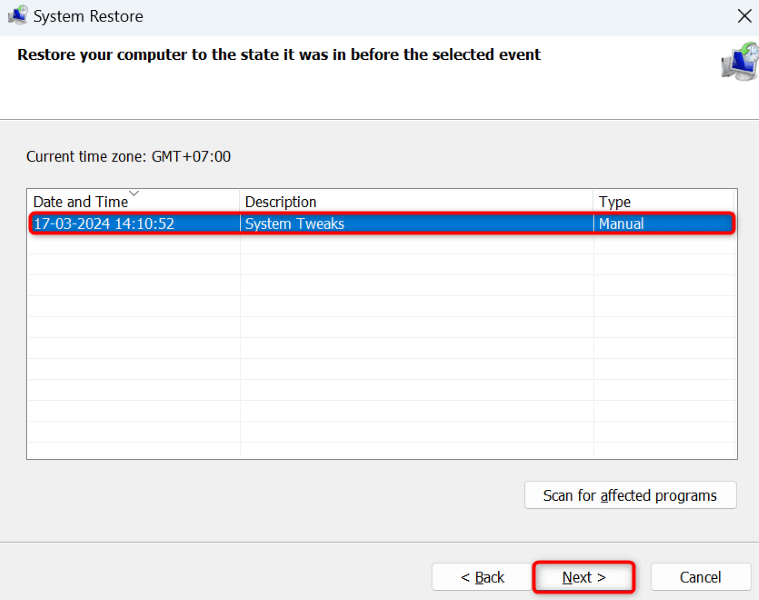
- Select the most recent restore point on the list and choose Next.
- Select Finish to start undoing the system changes.
Fix the Issue That Prevents You From Opening Your File on Windows
Many items can prevent you from opening a specific file type on your Windows PC. Whether it’s the lack of the required app or corruption in your system, the methods we’ve outlined above will help you fix the problem so you can access your file without problems. We hope the guide helps you out.