
Your CD or DVD drive won’t open, the disc is stuck and the eject button does nothing. Most of the time it’s a software or power issue, not a broken drive, and one of these fixes will get it out without touching a screwdriver. (This guide focuses on Windows PCs.)
Before you start: Don’t stick a screwdriver, knife, credit card, or anything flat into the drive slot to pry it open. You’ll damage the laser head or snap the tray mechanism, turning a fixable problem into a dead drive.
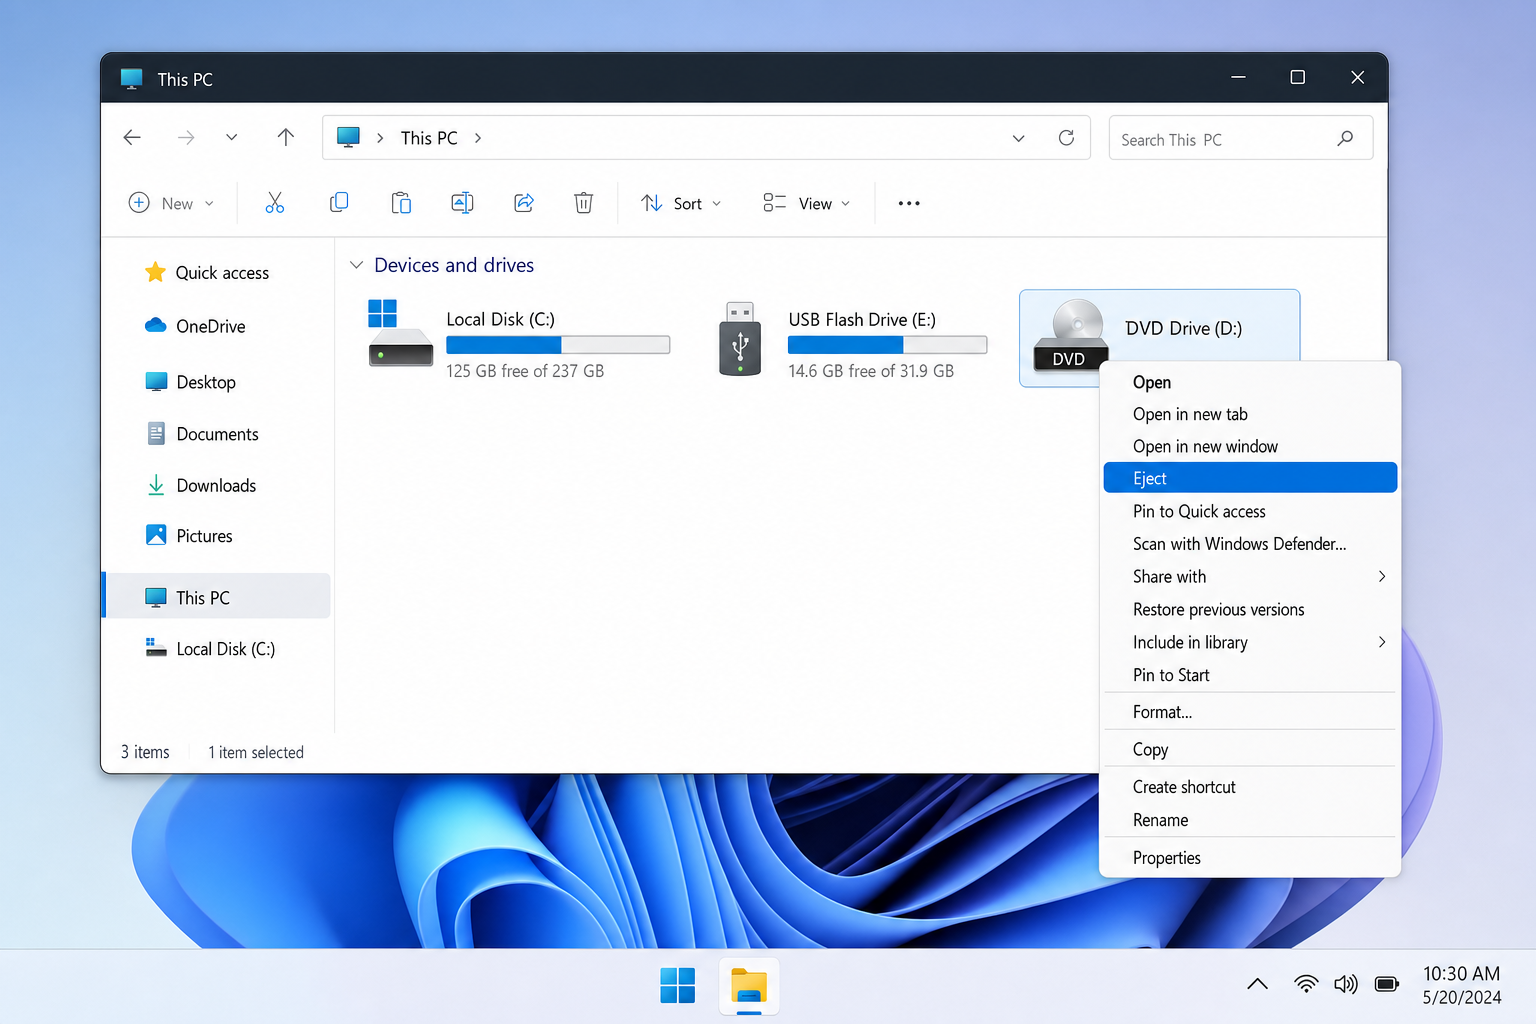
Fix #1: Eject from File Explorer (Windows)
This is the first thing to try. If an app is holding the disc open, a software eject command will release it cleanly.
- Press
Windows + Eto open File Explorer. - In the left panel, find your CD/DVD drive under This PC.
- Right-click the drive and select Eject.
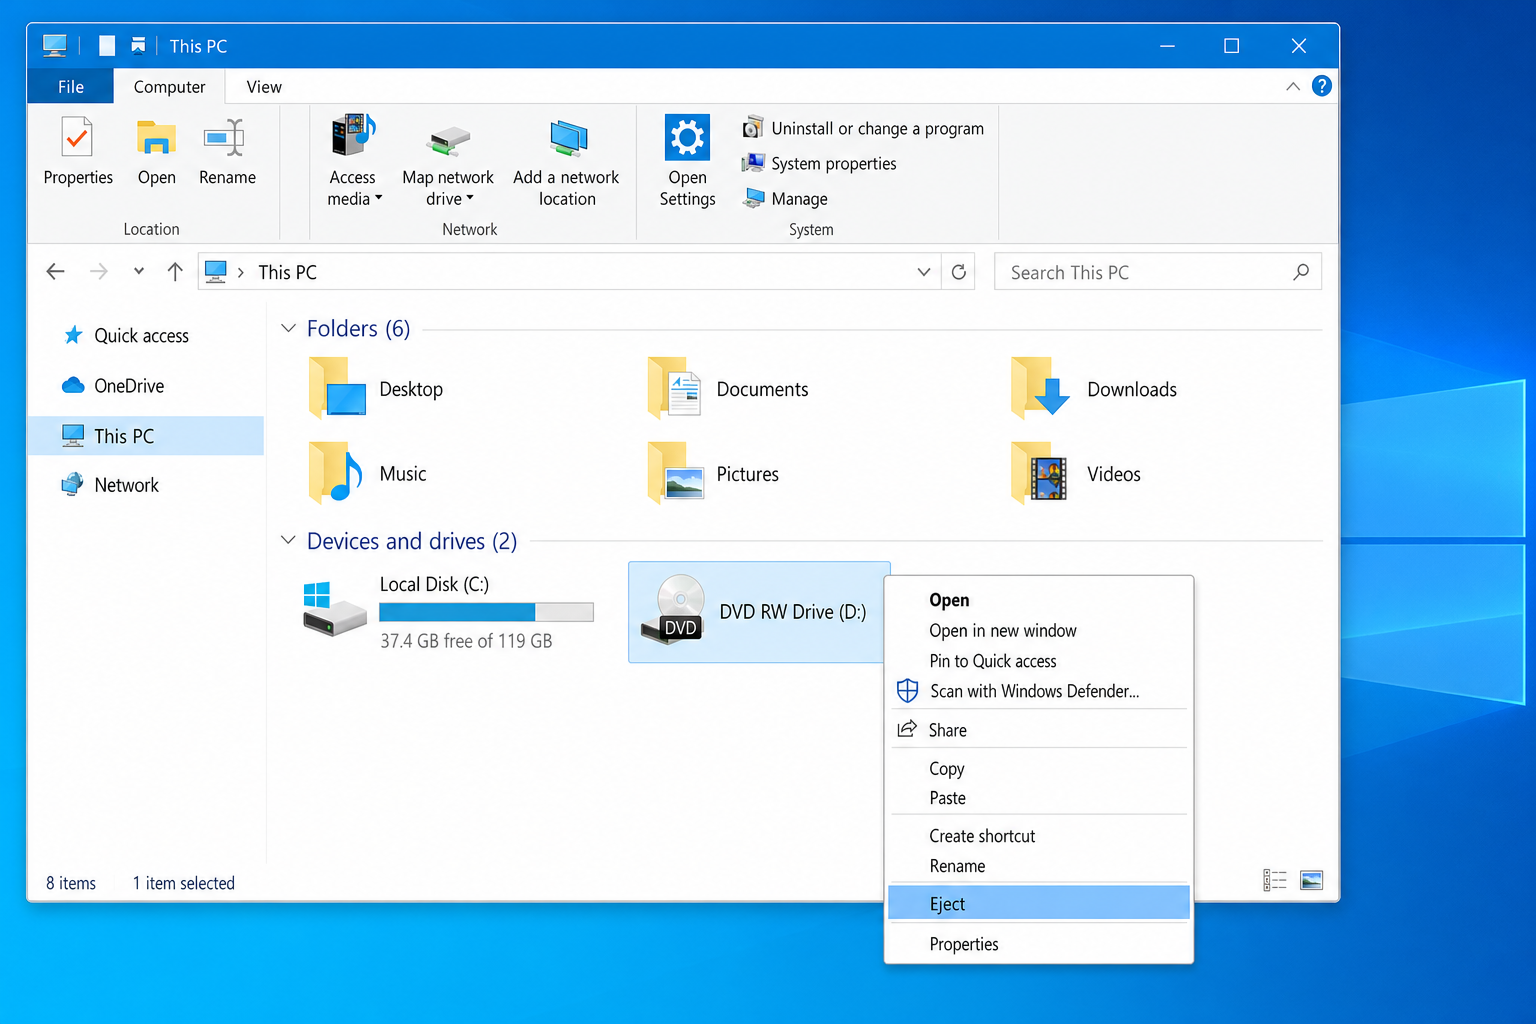
If the tray doesn’t move, a running application is still locking the disc. Close any media players (VLC, Windows Media Player), disc burners (ImgBurn, Nero), or backup tools, then try again. Check the system tray for any disc-related icons, right-click them and choose Exit.
Fix #2: Restart into BIOS and press Eject
Restarting the PC clears any software lock on the drive. Pressing the eject button during the BIOS phase, before Windows loads, bypasses any driver conflict entirely.
- Save any open work and restart your PC.
- As soon as the screen goes black, start pressing the physical eject button on the drive repeatedly. Don’t hold it; tap it quickly and often, about once per second.
- If the tray doesn’t open before Windows starts loading, let Windows boot fully, then try Fix #1 again.
If the tray does open during the BIOS phase but not inside Windows, you have a driver conflict. Jump to Fix #4.
Fix #3: Power-cycle the drive (especially for external USB drives)
External USB optical drives are the most common source of ejection problems in 2026, and the fix is usually a power issue rather than a software one.
- Shut down your PC completely. Not restart, full shutdown.
- Unplug the drive’s USB cable from the PC.
- Wait 30 seconds.
- Plug the drive back into a USB 3.0 port (usually marked with a blue tab) directly on the PC, not through a hub.
- Power the PC back on and try ejecting again via File Explorer (Fix #1).
If your external drive came with a Y-cable (two USB-A connectors on one end), plug both ends into the PC. The second connector lets the drive draw power from two USB ports simultaneously (each port supplies up to 2.5W on USB 2.0 or up to 4.5W on USB 3.x), which is often exactly what the drive needs to run the eject motor reliably.
Fix #4: Reinstall the drive driver in Device Manager
A corrupted or outdated driver can lock the drive in a state where the eject command never reaches the hardware. Uninstalling it forces Windows to install a clean copy on reboot.
- Press
Windows + Xand select Device Manager. - Expand DVD/CD-ROM drives.
- Right-click your drive and select Uninstall device. Confirm if prompted.
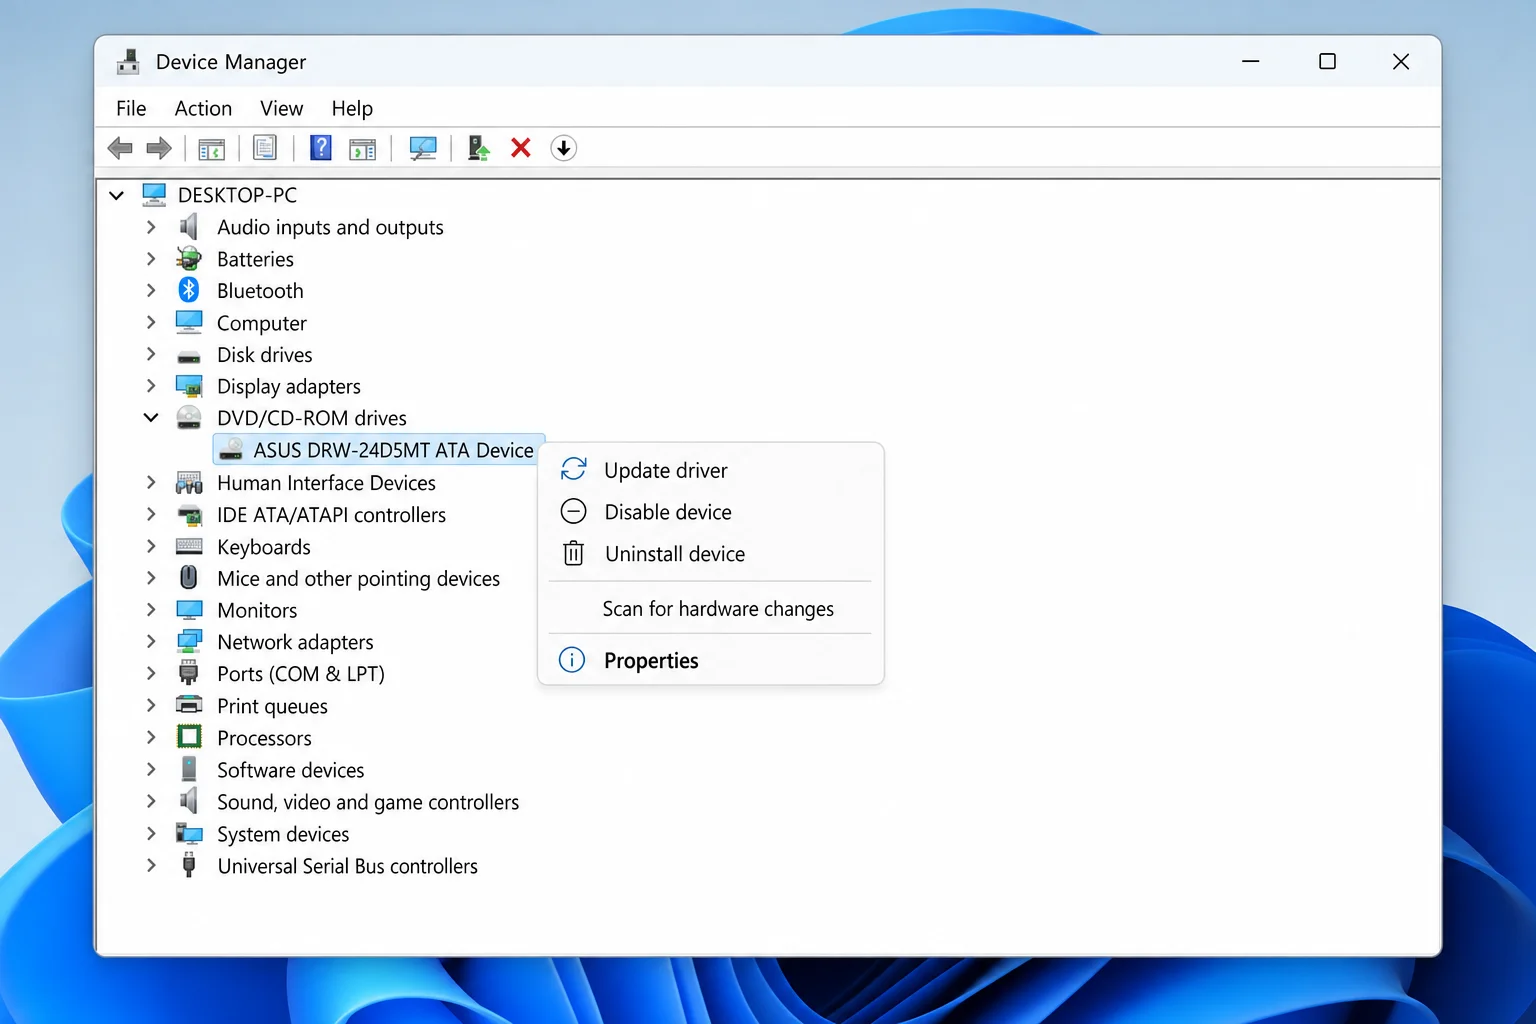
- Restart your PC. Windows will automatically reinstall the driver on boot.
- Once back in Windows, try ejecting from File Explorer.
If Windows Update hasn’t run recently, go to Settings > Windows Update and check for updates. An updated chipset or USB driver can also resolve this.
Fix #5: Clear the UpperFilters / LowerFilters registry entries
Third-party disc software (old versions of Nero, Roxio, iTunes, or virtual drive tools) sometimes leaves registry entries called UpperFilters and LowerFilters that interfere with how Windows communicates with the drive. Removing them is safe and reversible.
Warning: You’re editing the registry. Follow these steps exactly. Deleting the wrong key can cause other devices to stop working.
- Press
Windows + R, typeregedit, and press Enter. Click Yes if UAC prompts. - Navigate to this key:
HKEY_LOCAL_MACHINE\SYSTEM\CurrentControlSet\Control\Class\{4D36E965-E325-11CE-BFC1-08002BE10318} - In the right pane, look for entries named UpperFilters or LowerFilters.
- If either exists, right-click it and select Delete. (If neither exists, skip this fix, as it doesn’t apply to your situation.)
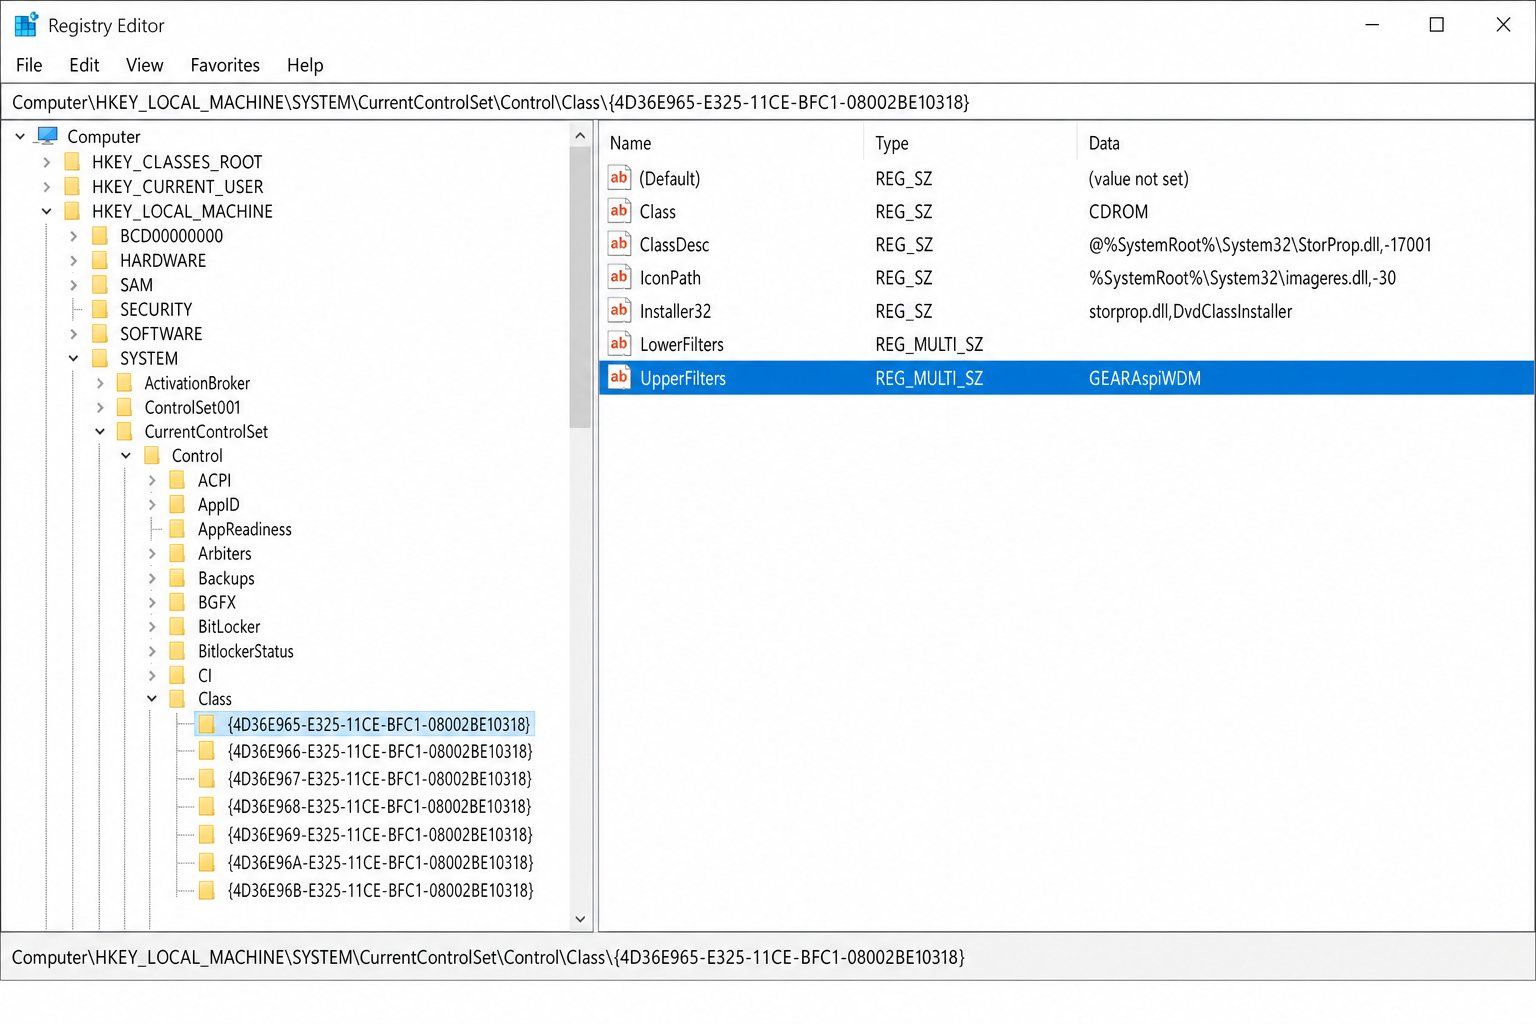
- Close Registry Editor and restart your PC.
- Try ejecting the drive again.
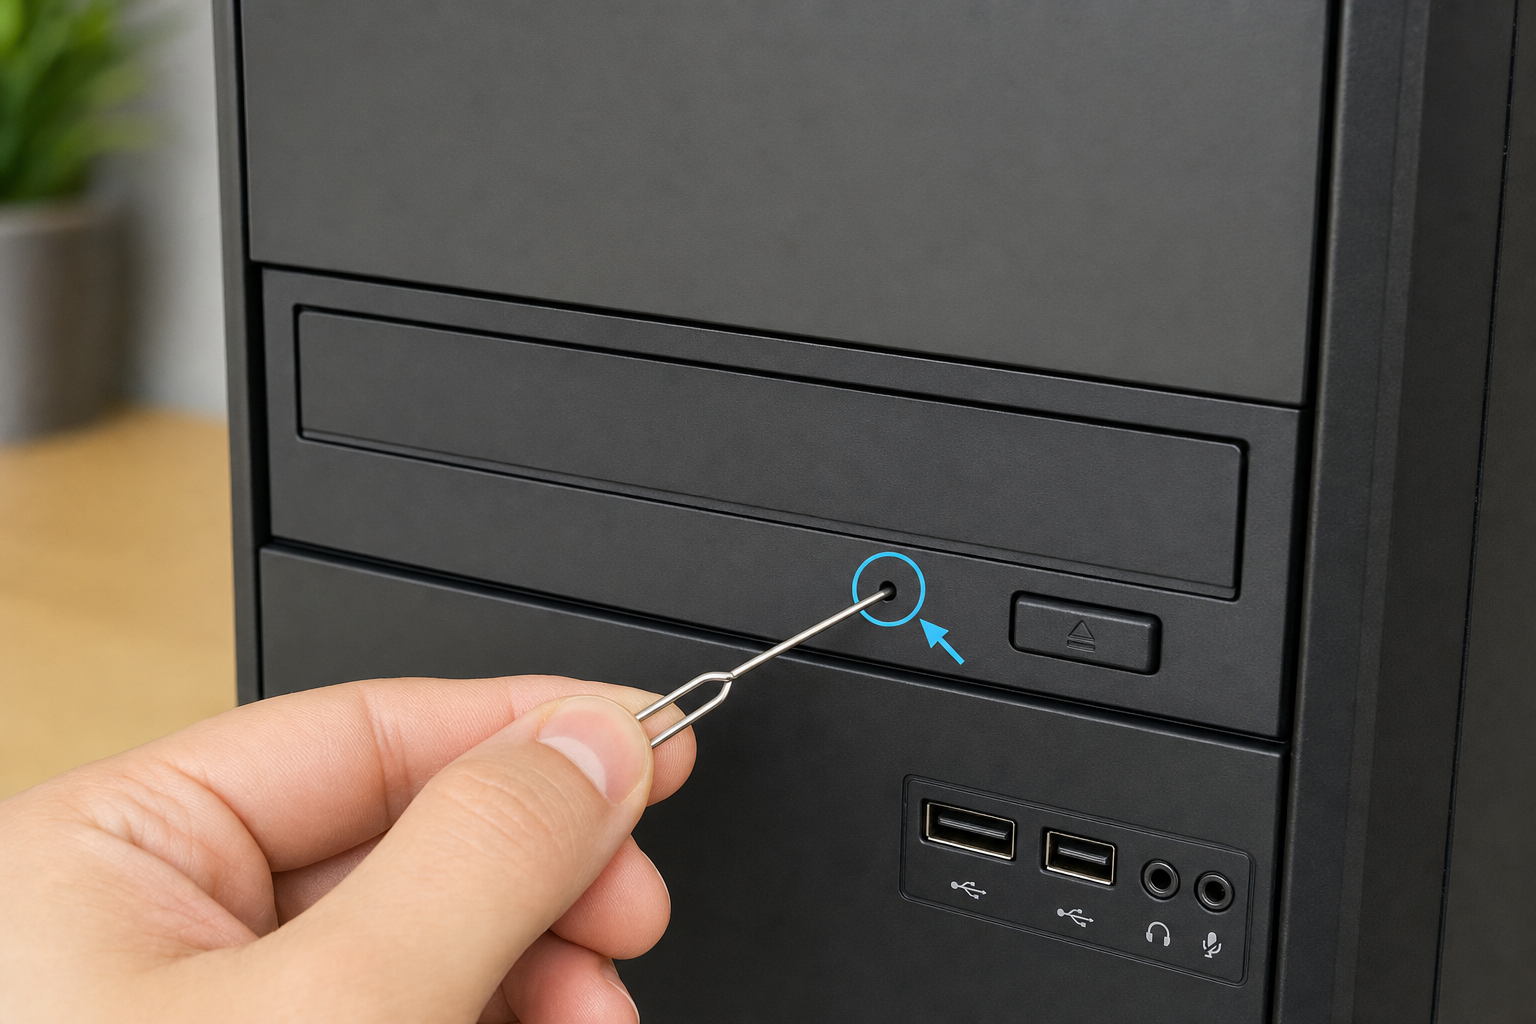
Fix #6: Use the emergency eject pinhole (hardware last resort)
Tray-loading drives have a small emergency eject hole on the front face. It’s a mechanical override that works even with no power, and this is your last software-free option before declaring the drive dead.
This only works on tray-loading drives. Slot-loading drives (common in older laptops and some all-in-ones) don’t have a pinhole. If yours is slot-loading and nothing else worked, the drive likely needs professional service or replacement.
- Shut down the PC completely and unplug it from power.
- Find the small pinhole on the front of the drive. It’s usually near the bottom edge of the tray, about 1–2mm wide.
- Straighten a paperclip, leaving a small bend at one end as a handle.
- Insert the straight end firmly into the pinhole and push steadily inward about 1–2cm until you feel a click and the tray pops out slightly.
- Gently pull the tray out the rest of the way by hand.
Remove the disc, then push the tray closed. Power the PC back on and test whether the drive works normally. If it ejects fine now, a one-time mechanical jam was the culprit. If it jams again within a few uses, the drive’s internal belt is likely worn. See the note below.
When none of these fixes work
If you’ve tried everything above and the tray still won’t move, the drive’s internal rubber belt has probably slipped or degraded. This is common in drives that are 10+ years old. Replacement belts cost under $5 on Amazon or eBay, but fitting one requires partial disassembly of the drive. If you’re not comfortable with that, the practical answer today is replacement: external USB optical drives (LG, Pioneer) run $25–$80 and are far more reliable than aging internal mechanisms. If your PC doesn’t have a disc drive at all anymore, a USB external is the right long-term solution anyway.
Conclusion
Fix #1 (right-click Eject in File Explorer) resolves this for most people. A media app was holding the disc and just needed to be told to let go. For external USB drives, Fix #3 (power-cycling with a direct USB 3.0 connection or Y-cable) is the fix that catches people by surprise and works more often than it should. If the drive keeps jamming after you get the disc out, the belt is going. Budget for a replacement drive rather than fighting it repeatedly.