As the cheerful old saying goes, there are only two things certain in life – death and taxes. And it pays to be extremely prepared for both, especially if you are very active online. After all, if the Grim Reaper touched you on the shoulder tomorrow, think about all your accounts sitting there online still churning on without someone to switch them off.
Google has tried to address this problem by having a feature called “Inactive Account Manager”. This feature has been around for years but I am constantly amazed at the number of people who have no idea that it exists. So this article is here to right that and hopefully get a few more of you to think about online life after death.

Inactive Account Manager – Is Anyone There?
Google’s Inactive Account Manager works along the same principle as you checking in on your elderly relative to make sure they’re still breathing. Basically, Google will monitor your Google account for signs of inactivity such as not logging in for months on end, not using the account for anything, that sort of thing.
After checking with you a few times and not receiving a reply, Google will assume you are in the next life and send an email to a “trusted contact” you specified during setup, with details on how to access the account. That contact can then either shut down the account or keep it going. Whatever they (or you in your will) prefer.

Even if you keep the account active, making it obvious you’re still alive, Google will send you regular reminders that Inactive Account Manager is running. So if you’ve fallen out with your trusted contact, these reminders can push you to change the contact to someone else.
How To Set It Up
Setting up Inactive Account Manager is very easy. Here’s how to do it.
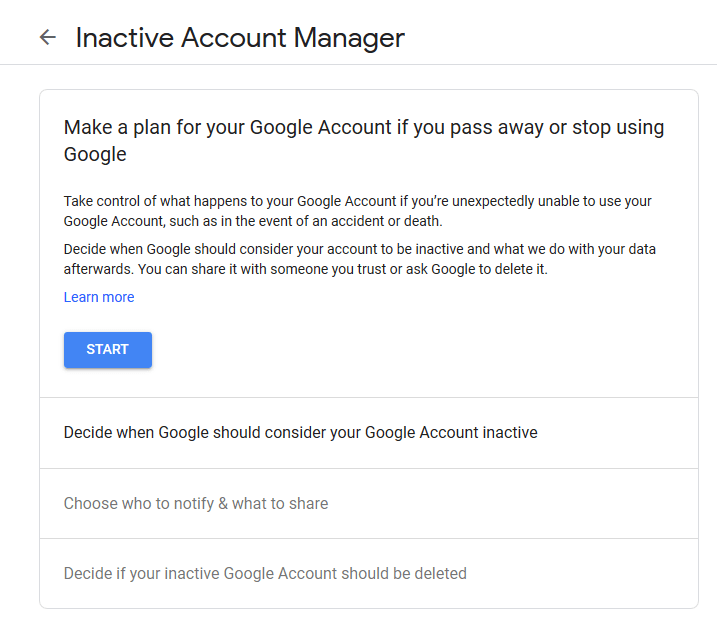
First of all, go to this link and sign in. You will then see this screen. Click the blue “Start” button to begin the process.
You first have to decide the parameters of what Google should consider as “inactive”.
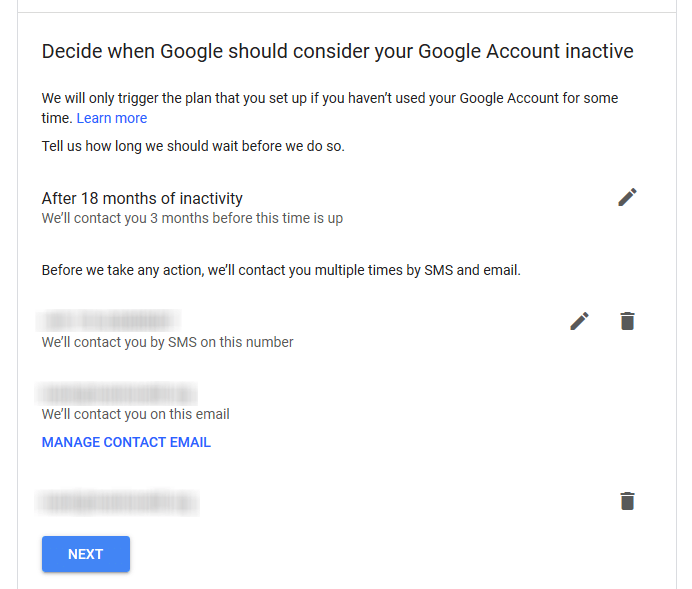
By default they set it at 18 months of inactivity but if you decide that is too long, you can change it by clicking on the little pencil arrow to the right and some more options appear.

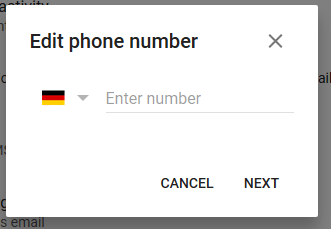
Moving on, you are asked to enter a mobile phone number. After emailing you to check on your life status and getting no reply, Google will send you an SMS to make sure before contacting your trusted contact. A verification SMS will be sent to your phone to confirm the number.
You also need to provide another email address for checking on you. This will require a verification code which will be sent to that email address to confirm it is valid.
After clicking the blue “Next” button, we come to the “Choose who to notify & what to share” section.

As the screen says, you can choose up to ten people to notify and they will have access to some of your data. Gmail will also set an auto-reply (which you write) which will notify people the account is inactive and they should stop mailing you at that address.
So click “Add Person” and a box will come up.
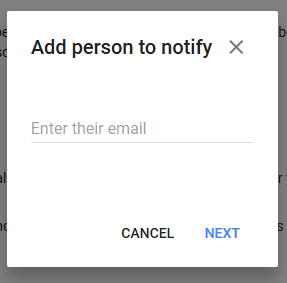
Honestly I am only going to add my wife. The thought of adding nine other people to read my email is too much for me to think about! But you may have kids, parents, close relatives, etc, who you want added.
After adding someone, you then need to choose which Google accounts of yours you want to share with them. There’s a big list so just tick the ones you feel have relevant information you want them to have.
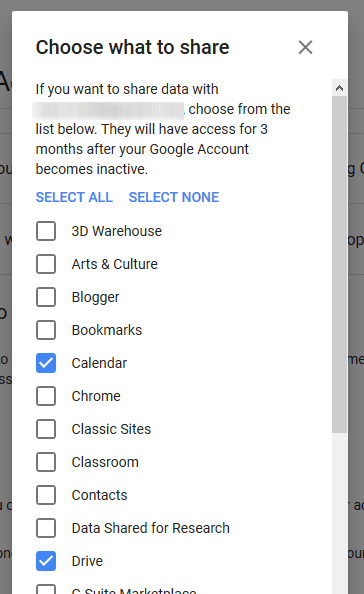
You can choose to add their phone number so they can verify their identity first as well as add a personal message. Then you will see their email sitting on the screen as a trusted contact.

In the next phase, you need to decide if Google should automatically delete your inactive account. I’ve decided to let my wife decide so I switched this off. You may think differently.

Now click “Review Plan” to make sure everything is as it should be. Also make sure to switch on email reminders.

All looking good. Click “Confirm Plan” to switch Inactive Account Manager on.
If you decide in the future to switch it off, you can come back to this page and click “Turn Off My Plan”.

Related Posts
Mark O’Neill is a British award-winning fiction author now living in Würzburg, Germany. He is the creator of the acclaimed Department 89 spy thriller series and the Scorpion novels. Read Mark’s Full Bio
