In the era of cloud and portable USB flash storage, storing videos on DVDs can seem a little out of date. But you might be looking at it from a wrong angle. DVDs still offer a good way to store content you rarely use for the long term. Unlike flash storage, there’s a much lower chance of your files being corrupted.
The same applies to your media files. If you have lots of home movies or you’re looking to burn copies of your own DVD collection, you might want to burn that disc with subtitles. You can burn a DVD disc on any platform, as long as you have a DVD drive capable of writing to DVDs, as well as a DVD-R or DVD-RW disc.

Finding Subtitles For DVDs
Before you can burn a DVD with subtitles, you’ll need to find a correct subtitle file to burn with the disc. Subtitle files come in various formats, but the most common formats are SRT, WebVTT, or TXT.
If you’re burning media content that is well known (for instance, a movie), you can find and download subtitles online in various different languages. This is useful for foreign language content, but you could also use subtitles to help hearing-impaired viewers watch your video content.
For home movies, you can generate video subtitles automatically using YouTube, which you can then export to PC. This is probably only a useful option for you if you have crisp, clear audio. Auto-generated YouTube subtitles are good, but you may need to double-check the accuracy of any subtitles it generates.
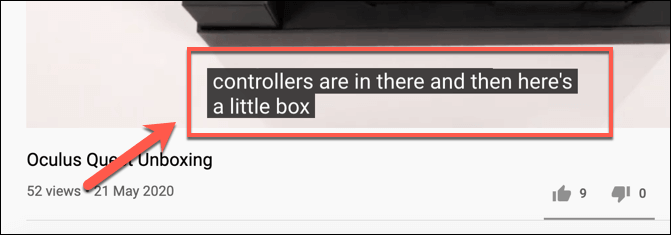
You can test the accuracy of the subtitles by loading the subtitle file into VLC to check it works. If it does, you can then proceed to burn the DVD with the subtitles attached.
Adding Subtitles To Videos
For most users, the best platform for creating media files with subtitle tracks is to use Handbrake, an open source video transcoder. You can use Handbrake to rip DVDs, but you can also use it to add subtitle tracks to media files in video file formats like MP4 and MKV.
You can then save it as a file or, in this case, burn it as a new DVD using third-party DVD burning software.
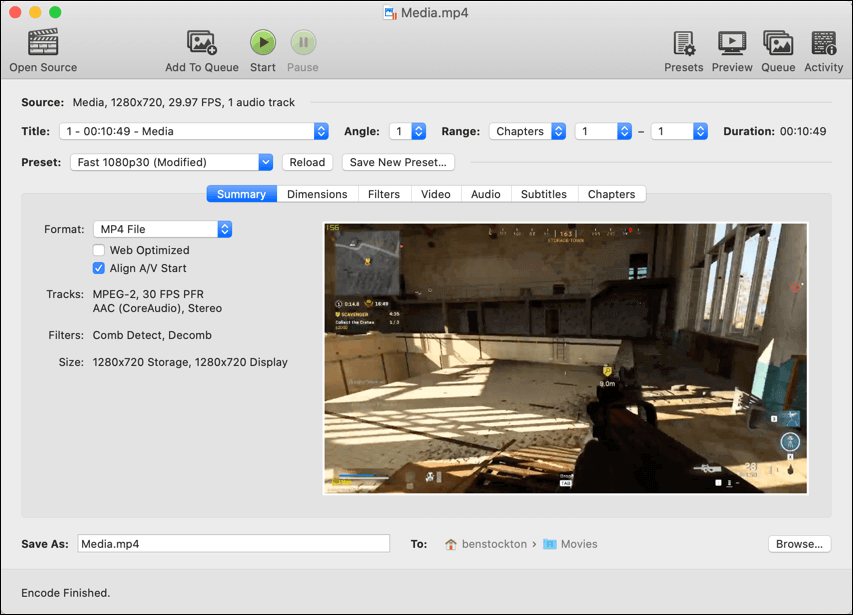
- Download and install Handbrake on your Windows/Linux PC or Mac to begin. Load your media file or existing DVD by pressing the Open Source button. Handbrake will scan the media, loading appropriate preset options based on the existing content. You can edit these settings if you want to convert your media content to another format.
- Assuming your Handbrake media settings are correct, press the Subtitles tab. This allows you to add subtitles to your media content. To do this, press Tracks > Add External Subtitles Track.
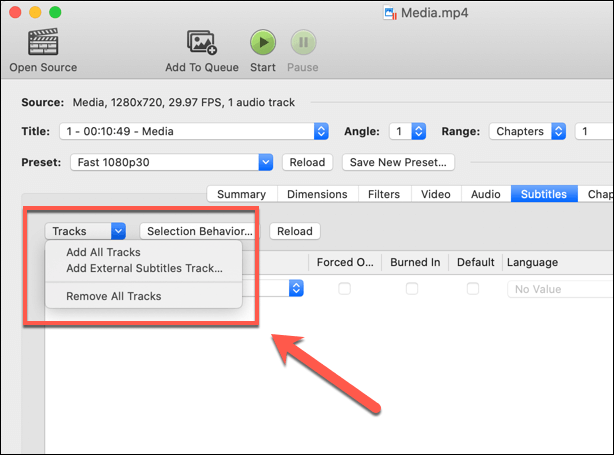
- Locate and add the subtitle track for your media and insert it. The subtitle track will then appear in the subtitles list. You can set the correct language for this subtitle track under the Language column.

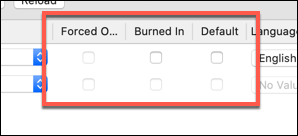
- If your media content has multiple languages, press the Forced Only checkbox next to your subtitle track. This will ensure subtitles appear for sections of the video where another language is used.
- By default, the subtitle track will be turned off when you play your DVD. If you want to change this so that your subtitles are turned on and visible during playback, press the Default checkbox. While they will appear automatically, you can disable this in your media player during playback.
- If you want to force subtitles to appear over your video (without the option to disable it), press the Burned In checkbox.
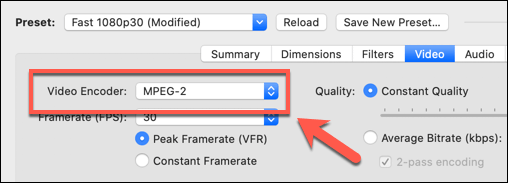
- For maximum compatibility with older standalone DVD players, you’ll need to change your video encoder type to MPEG-2. You can do this from the Video tab.
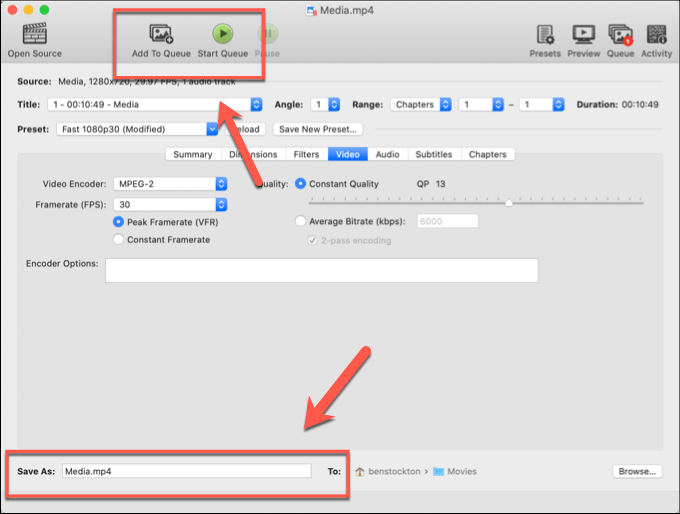
- Once your subtitle track has been added to your media content, set your file name under the Save As box, then press Add to Queue > Start Queue.
Burn a DVD With Subtitles
Once you have a video file with a suitable subtitle track, you can burn it to DVD. Various third-party DVD burning software exists to do this, but the best options are Imgburn on Windows and Burn on macOS.
Unfortunately, the official Imgburn website now runs an adware-supported installer for Windows users. This is not uncommon. You’ll find similar adware bundled with most free DVD burning software available to Windows users. Thankfully, you can download a copy without this adware included from the MajorGeeks website.
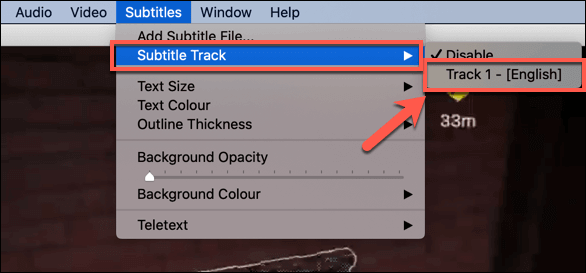
- It’s worth checking that your subtitle track has been correctly added to your media file before you burn the DVD. To do this, open VLC and press File > Open File. Once the media file has loaded, you can enable subtitles by pressing Video > Subtitle Track (or Subtitles > Subtitle Track on other platforms) and select one of the available subtitle tracks.
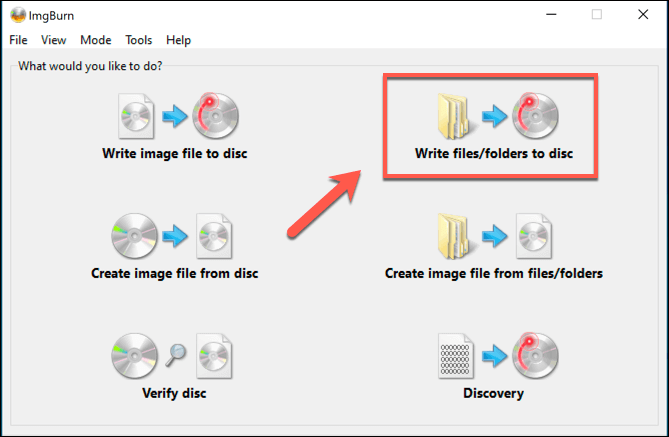
- Assuming the video file is ready, you can burn the DVD on Windows by loading Imgburn and pressing the Write files/folders to disc option.
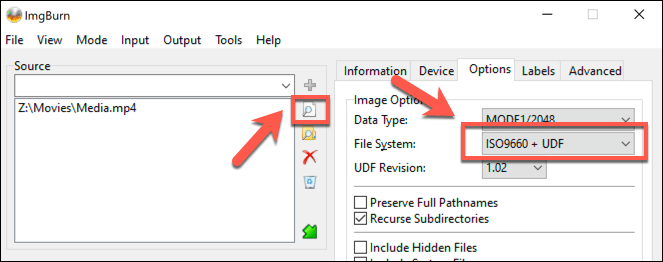
- Press the Browse for a file button in the Imgburn screen to locate your media file. This will load it into the burn list. You’ll need to switch to the Options menu and set the file system to ISO9660 + UDF.
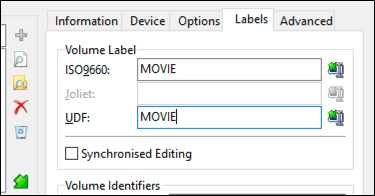
- In the Labels tab, add a name for your DVD under the ISO9660 and UDF sections.
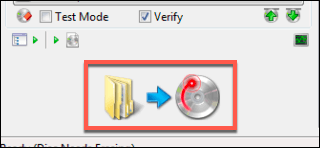
- Under Device, set the write speed to 4x to ensure a smooth burn process. Press the Burn button to begin the burn process, then OK to confirm.
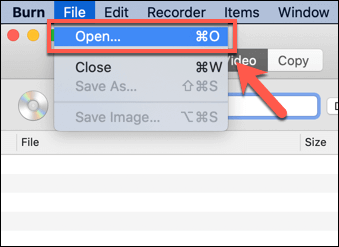
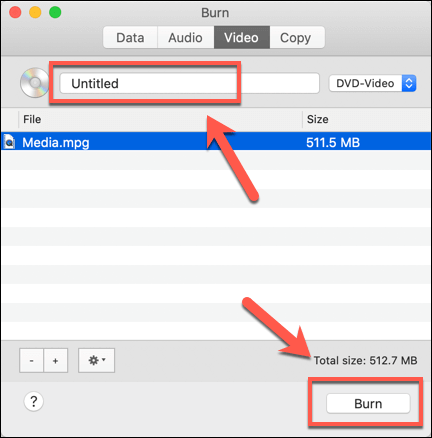
- To burn the DVD on macOS, load Burn and press the Video tab, then select DVD-Video or DivX from the drop-down menu. Once you’re ready to load your file, press File > Open to load it.
- You can add a label to your DVD by replacing the Untitled text to a label of your choice. Once you’re ready to burn the file to DVD, press the Burn button to start the process.
Playing Your New DVD With Subtitles
With your DVD successfully created, you should be able to play it on your PC, Mac, or on standalone media devices (depending on the capabilities of that device). By burning a DVD with subtitles, you’ve created video content that can be better understood by different audiences.
As we’ve mentioned, this can be a good way to enjoy foreign language films, especially if you’re trying to build up your own language skills, as well as to add context to home movies. Of course, you can only do this if your DVD drive is working correctly, so make sure to check the drive is clean and working correctly first.
Related Posts
- How to Repair a Corrupted User Profile in Windows 11
- Preparing for Windows 10 End of Support: Upgrading to Windows 11
- How to Access and Change Your WiFi Router Settings (2025 Edition)
- How to Install the Latest Large Language Models (LLMs) Locally on Your Mac
- How to Find Circular References in Microsoft Excel
