Google Docs is a full-featured word processor. Unlike simple text editors like Notepad, you can use various formatting functions to make your document look exactly the way you want it to look.
There are two ways you can better format any document. The first is changing the margins on the sides, top, and bottom of the document. The second is adjusting both line spacing and paragraph spacing.

In this article you’ll learn how to change margins in Google Docs, as well as how to double space in Google Docs.
How To Change Margins In Google Docs
Adjusting the margins of a document in Google Docs isn’t quite as simple as you might think. The feature to adjust margins isn’t found in the Format menu like you might think.
- Instead, you need to select File from the menu.
- Then, select Page Setup.
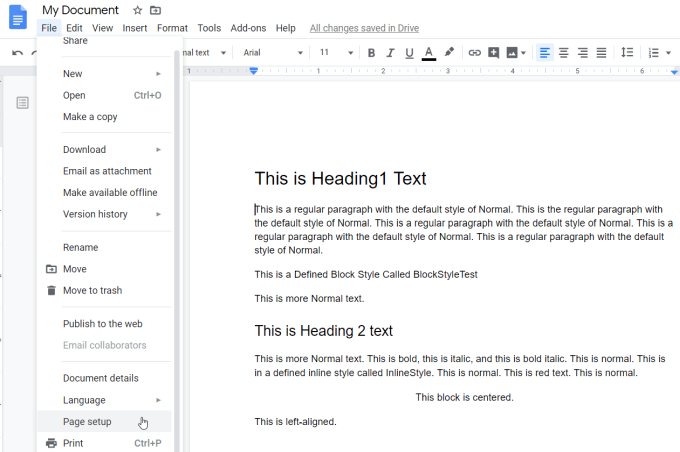
- In the Page setup window, you’ll see the Margins setting along the right side. Here, you can adjust the top, bottom, left, or right margin. Margin size is in inches and defaults to 1.
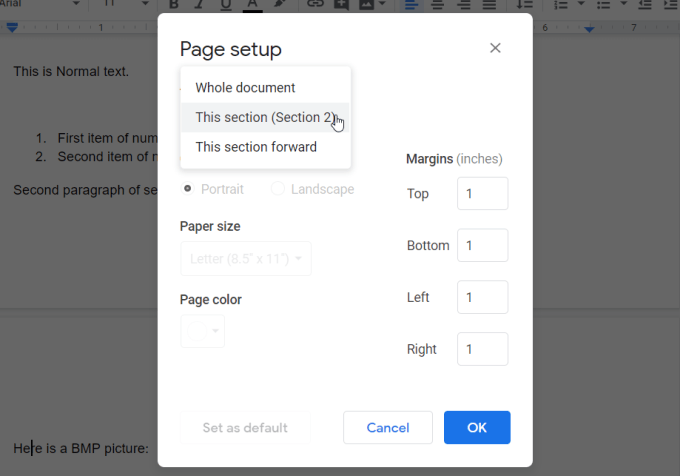
- Just select OK when you’re done and the margins throughout your document will automatically adjust.
Change Margins In Google Docs Of Just One Page
The approach above works great for when you want the same margins on all pages of your document. But, what if you want larger margins on just one page?
Thankfully, you can do that by inserting section breaks into the document. Section breaks allow you to vary page formatting from section to section.
To do this, place your cursor at the top of the page where you want to start with a different margin format. Then select the Insert menu, select Break, and select Section break (continuous).
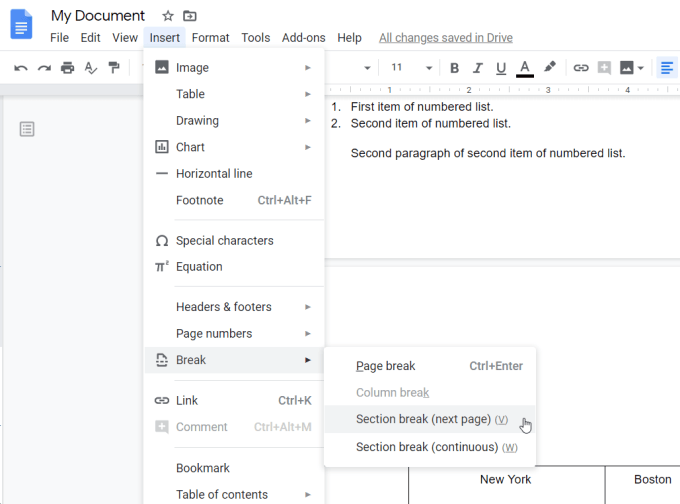
The “next page” option will push the text below your cursor down to the next page. The “continuous” option keeps all text in the same place, but inserts the formatting break where your cursor is located.
Now, with your cursor placed inside the second section of text after the section break, repeat the Page Setup process above to adjust the margins.
When you get to the Page setup window, you’ll see that it now displays a dropdown where you can select the section of the document that you want to format.
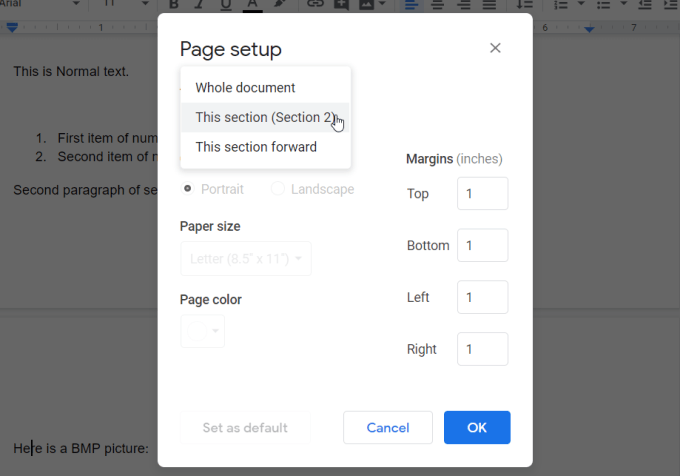
When you’re done, you’ll notice that the different margin formatting starts in your new section, and leaves the formatting in the previous section unchanged.
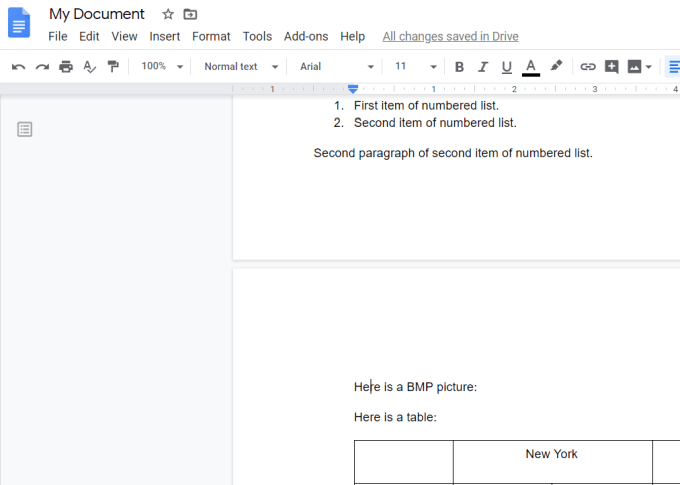
To set the formatting on the next page back to normal, just create a new continuous section break, and set the margins of that next section to the same as the margins in the original section.
Change Margins In Google Docs For Indenting
When most people want to change the margins for bullet lists (known as “indenting”), they will use one of the two indenting buttons in the ribbon bar.
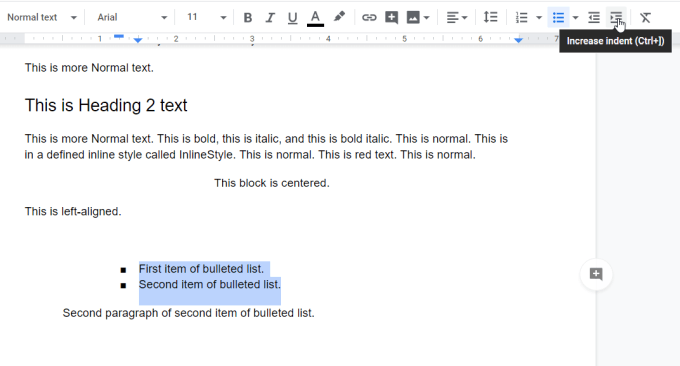
The left indent button moves the highlighted list to the left, and the right indent button moves it to the right.
The problem with using the indent buttons to do this is that it also modifies the bullet point formatting. You also have to do it for every list.
You can get around this by modifying the indentation formatting for all bullet lists in your document. To do this, select Format from the menu. Then select Align & indent, and select Indentation options.
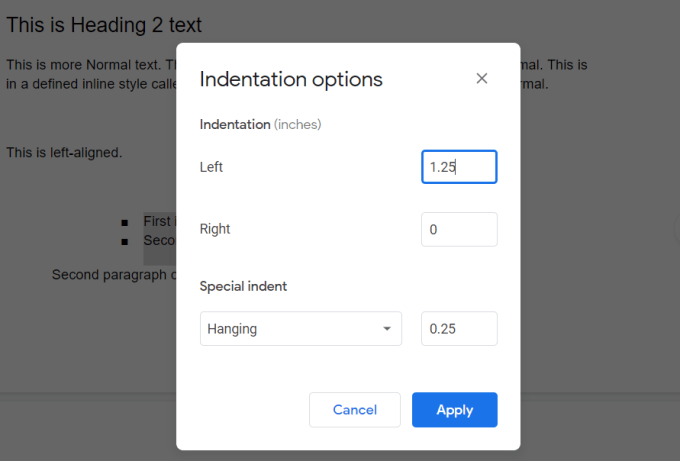
In the Indentation options pop-up window, use the Left or Right fields (displayed in inches) to set the distance from the margin you’d like bullet lists to go.
This will also be the distance the bullet lists move when you use the left or right indent buttons.
Set Double Space and Paragraph Space In Google Docs
There could be multiple reasons someone may think they want to set the double space distance in Google Docs. Maybe the lines in the document are already too close together. Maybe the space between paragraphs is too large.
In this section, you’ll not only learn how to set double space in Google Docs, but also how to adjust line spacing and paragraph spacing.
Set Double Space In Google Docs
Setting double space mode in Google Docs is easy.
Just select Format from the menu. Then select Line spacing and Double.
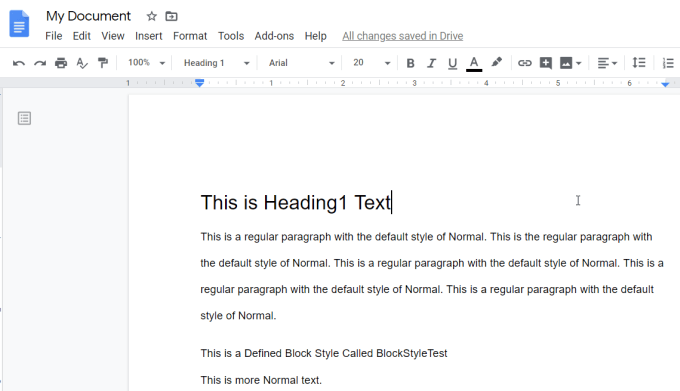
This will adjust all of the single spaced lines you had in your document to double spacing. There’s no need to select the text you want to double space since it applies to the entire document.
If you don’t like the distance of the pre-set double-spacing, you can customize your own. To do this, select Format from the menu, select Line spacing, and select Custom spacing.
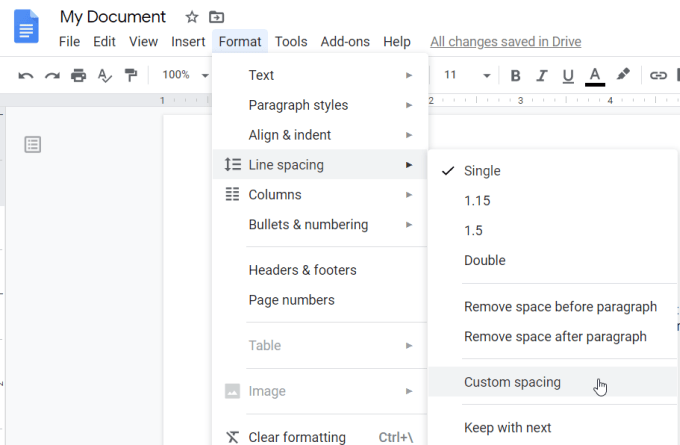
This opens a new Custom spacing window where you can set the specific spacing between either individual lines or paragraphs in your document.
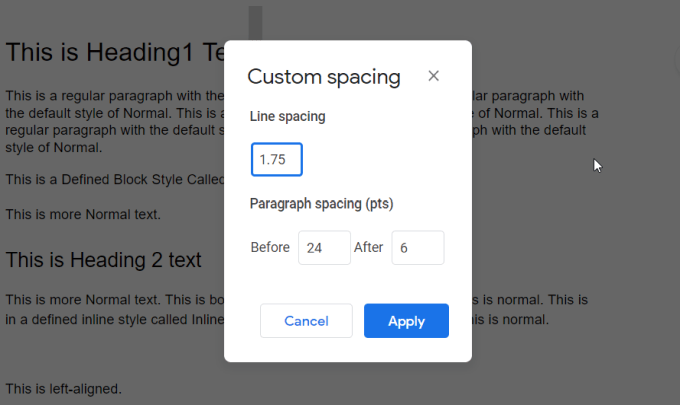
The line spacing measurement is in inches, and paragraph spacing is in points (72 points are 1 inch).
Once you select Apply, the new spacing will apply to your entire document.
Now you know how to apply margins to sections of your document and fixed or custom spacing to the lines throughout the pages. With this knowledge you should be able to fully customize the look of all of your Google Docs documents.
You can also save time by using templates for your documents, like resume templates or meeting minute templates.
Related Posts
Ryan has been writing how-to and other technology-based articles online since 2007. He has a BSc degree in Electrical Engineering and he’s worked 13 years in automation engineering, 5 years in IT, and now is an Apps Engineer. Read Ryan’s Full Bio
