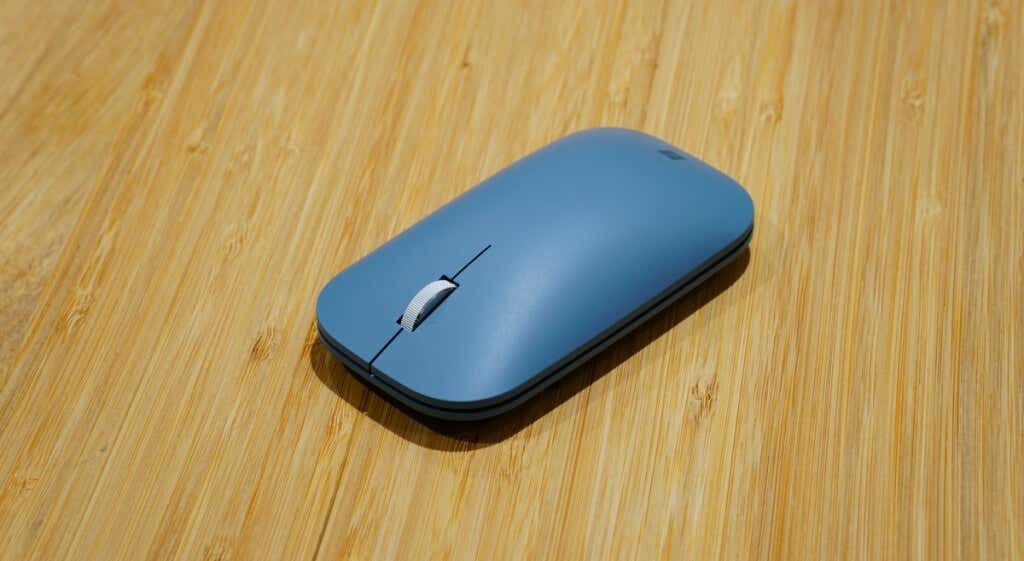
Switching to a wireless mouse will improve your productivity if your Chromebook has a terrible or sluggish trackpad. Plus, external mice are also more ergonomic and comfortable. This tutorial highlights ways to connect a wireless mouse to your Chromebook.
We also included troubleshooting fixes for issues you might encounter when connecting a wireless mouse to your Chromebook.
Connect Wireless Mouse Mouse Using a Dongle
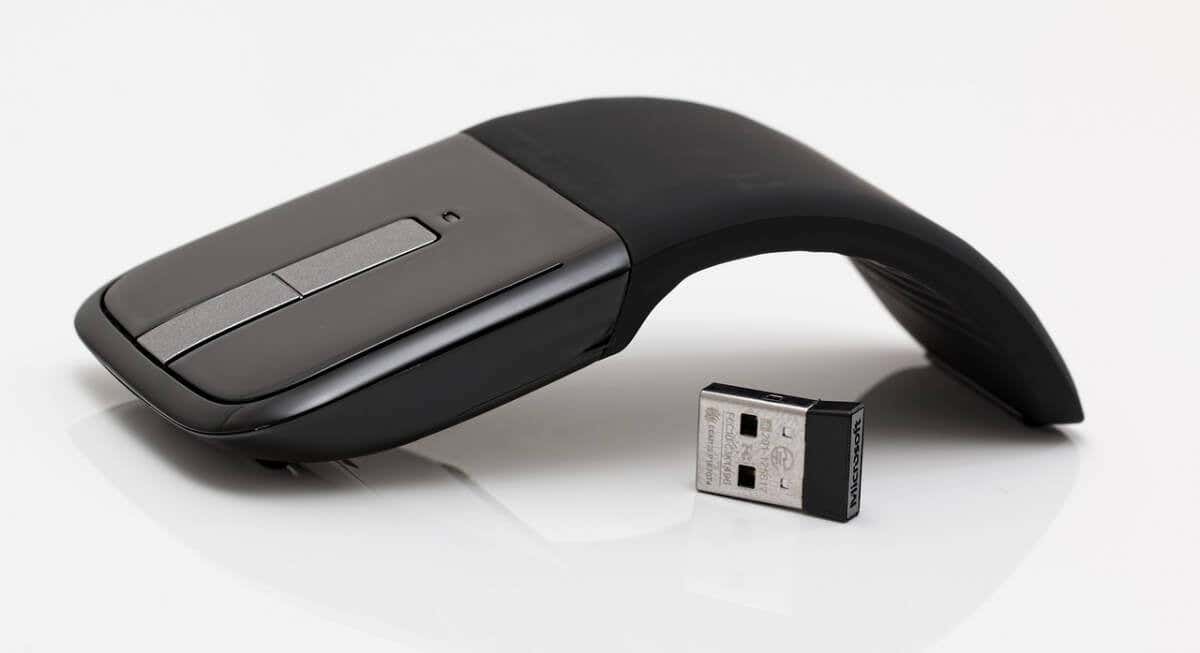
Wireless mice with a USB receiver/connector or Radio Frequency (RF) dongle have a plug-and-use setup. The USB dongle transmits signals from the mouse to your Chromebook.
Turn the mouse on and plug its USB receiver into your Chromebook’s USB port. Your Chromebook should detect the mouse instantly.
If your mouse doesn’t connect, check that it’s powered on and charged—wireless mice usually have their power switch on the bottom or side.
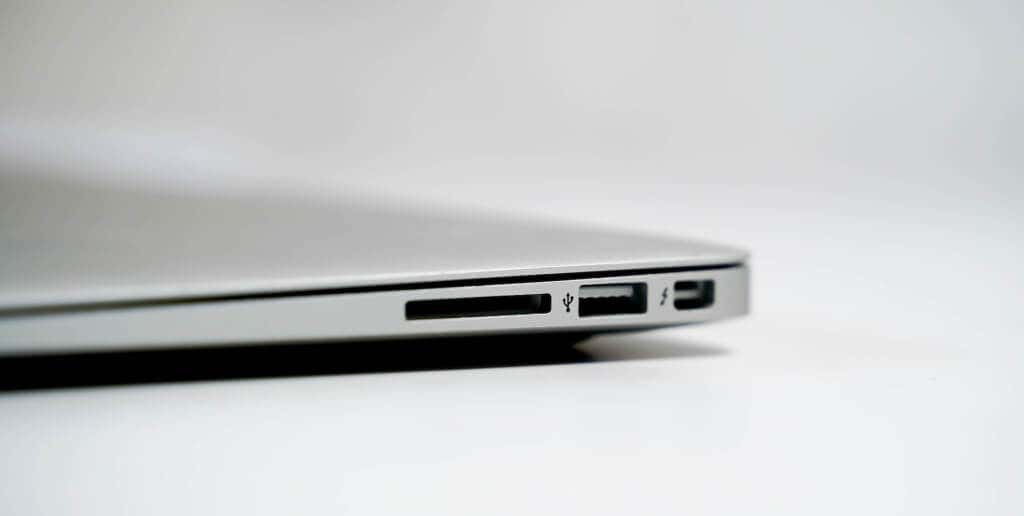
Also, ensure the receiver’s connection isn’t loose. Mouse wireless receivers typically require a USB Type-A (or USB-A) connection. Plug your mouse RF receiver into a USB hub or adapter if your Chromebook lacks a USB-A port.
Connect a Wireless Bluetooth Mouse
These mice transmit signals to your Chromebook via Bluetooth. Unlike RF mice, Bluetooth mice require more time to set up, but the process is relatively straightforward.
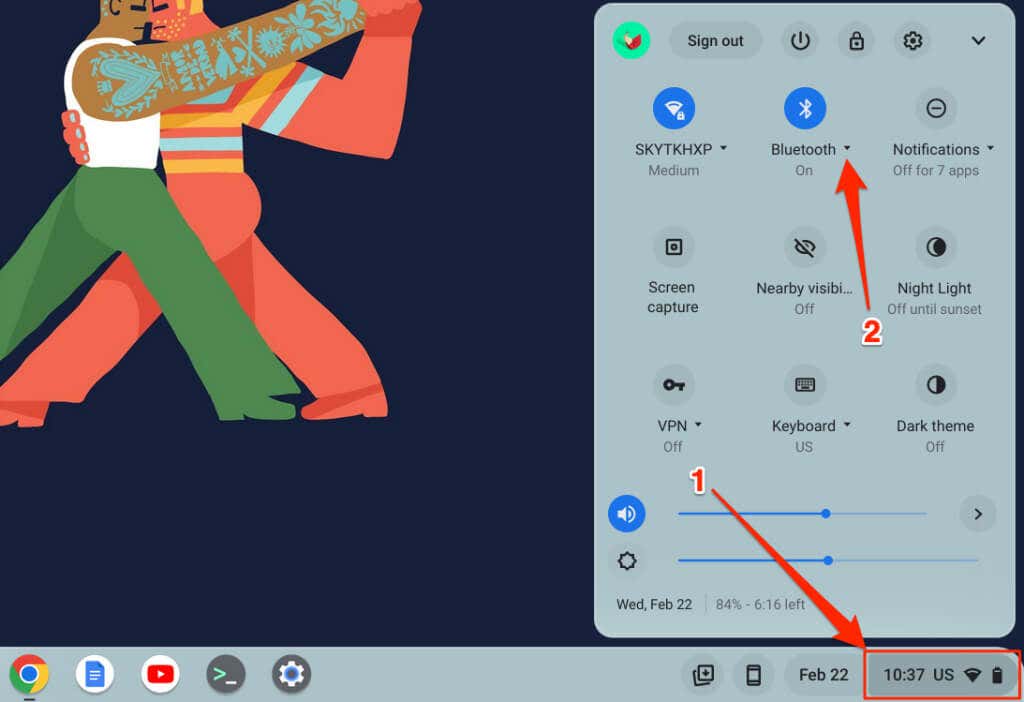
- Select the time or Wi-Fi icon in the bottom-right corner of your Chromebook’s screen. You can also use the Shift + Alt + S keyboard shortcut to open the status area.
- Select the drop-down arrow below the Bluetooth icon.
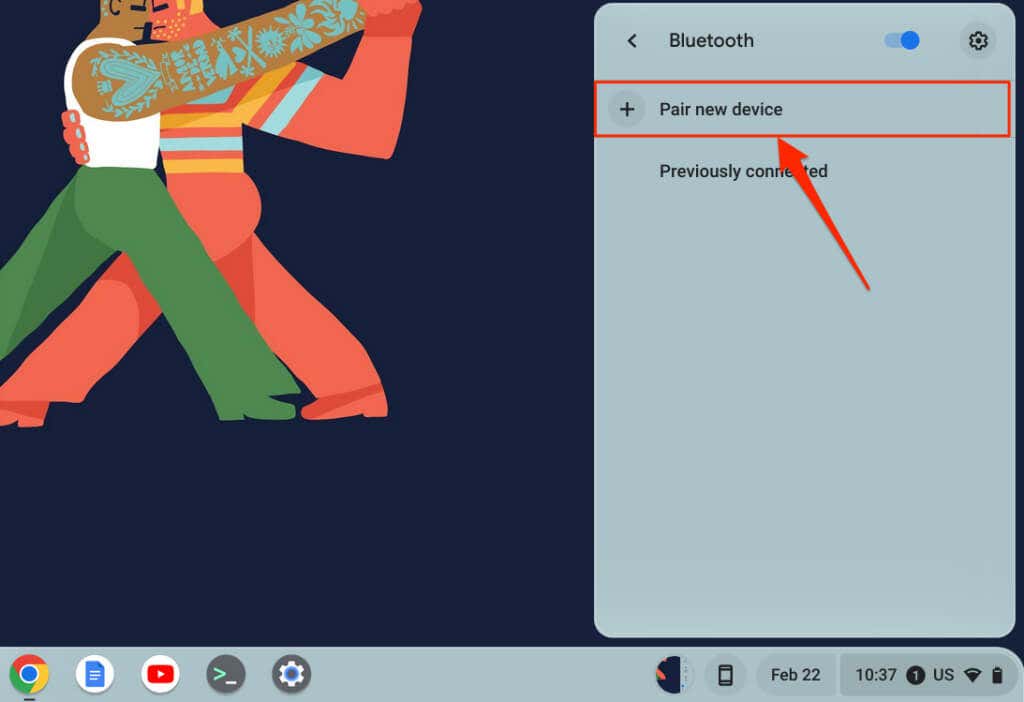
- Next, select Pair new device.
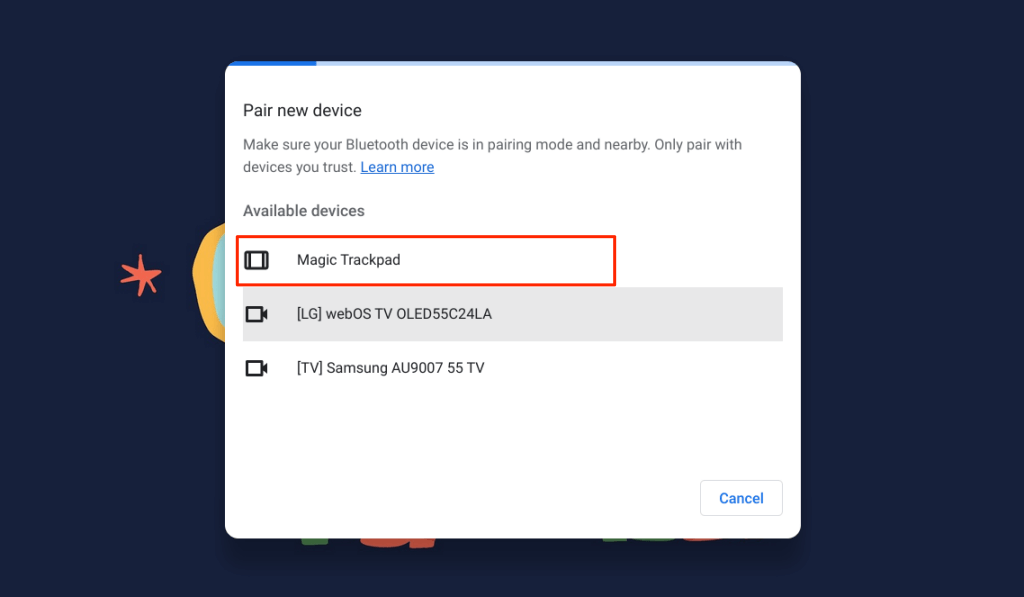
- Put your Bluetooth mouse in pairing mode and wait for it to appear on the device list. Select your wireless mouse to connect it to your Chromebook.
You’ll see a success message at the bottom of your screen when the wireless mouse connects to your Chromebook. The Bluetooth mouse might take a few seconds to start working—i.e., moving your cursor, clicking, scrolling, etc.
Unpair or Disconnect Bluetooth Mouse from Chromebook
Removing the USB receiver instantly unpairs and disconnects an RF mouse from your Chromebook. Toggling off the mouse’s power switch also does the trick—for RF and Bluetooth mice. Some wireless mice also disconnect automatically when idle or unused for a specific period.
You can also disconnect or unpair a Bluetooth-powered mouse from your Chromebook’s settings menu.
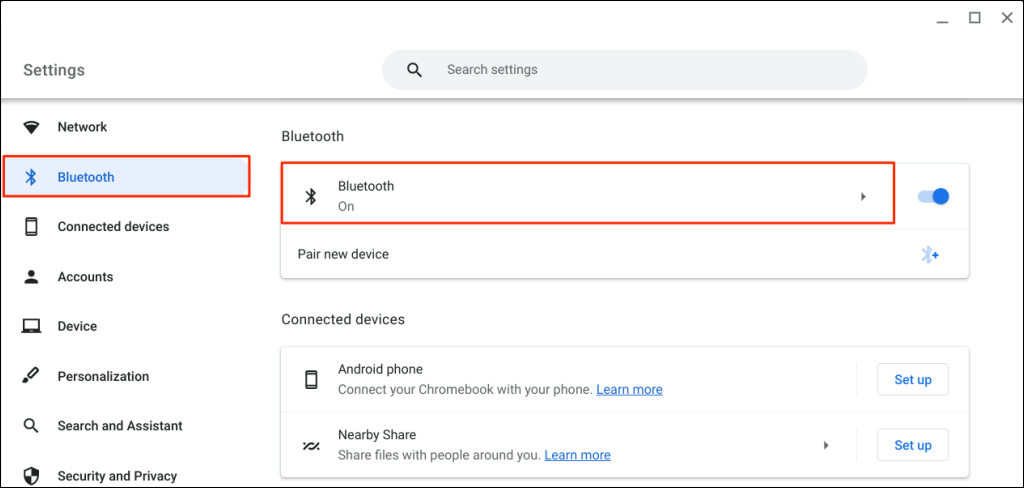
- Open the Settings app, select Bluetooth on the sidebar, and select Bluetooth again.
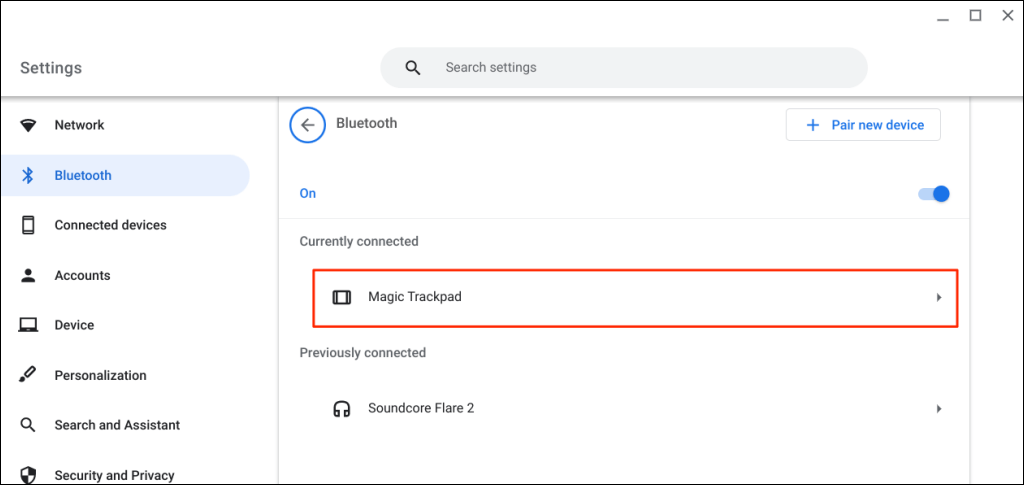
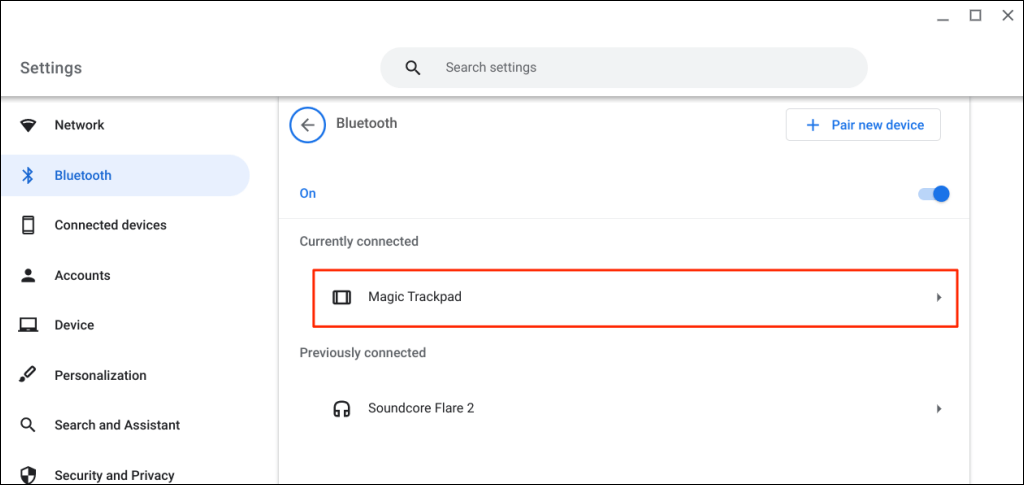
- Select your wireless mouse in the “Currently connected” or “Previously connected” section.
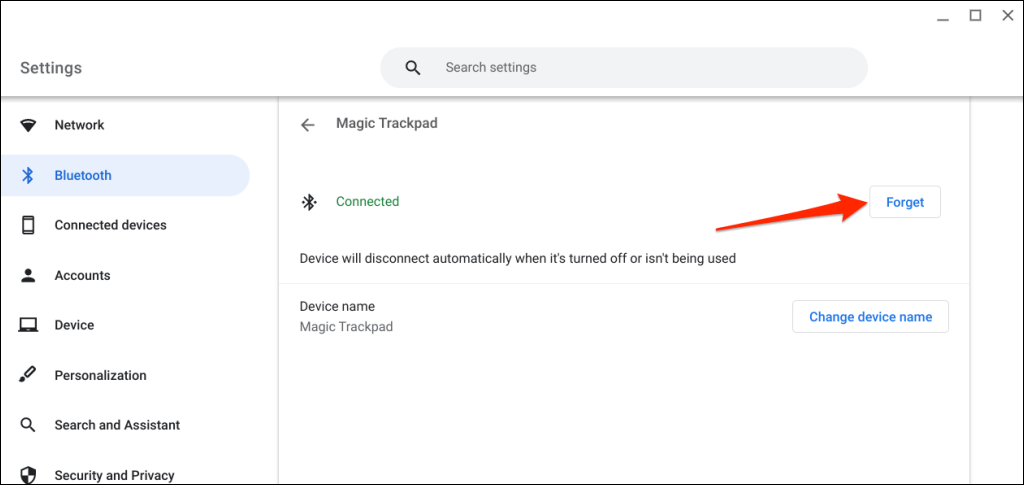
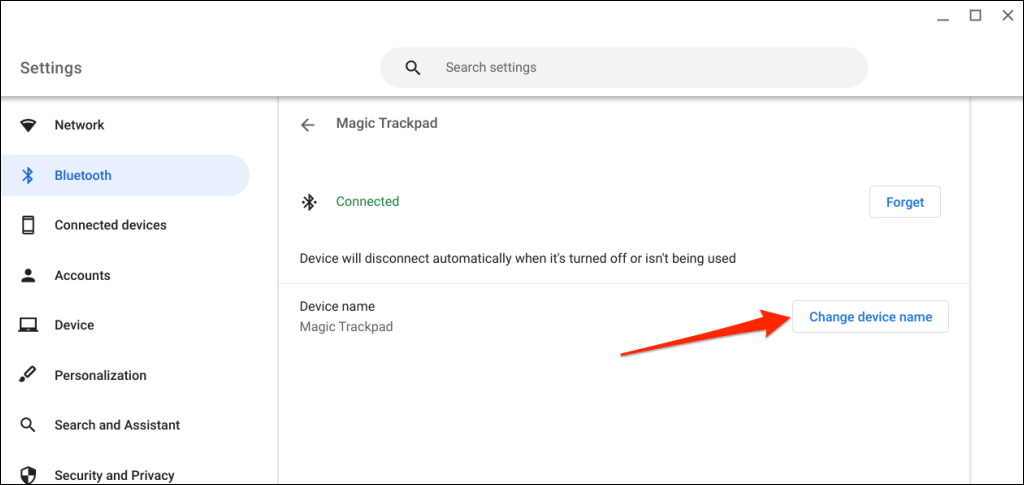
- Select the Forget button to remove the mouse from your Chromebook.
Change Your Wireless Mouse Name
ChromeOS allows you to customize the name of Bluetooth devices and accessories. If you don’t like your Bluetooth mouse factory-set name, change its name in the ChromeOS Bluetooth settings menu.
- Open the Settings app, select Bluetooth on the sidebar, select Bluetooth again, and choose your wireless mouse.
- Select the Change device name button in the “Device name” row.
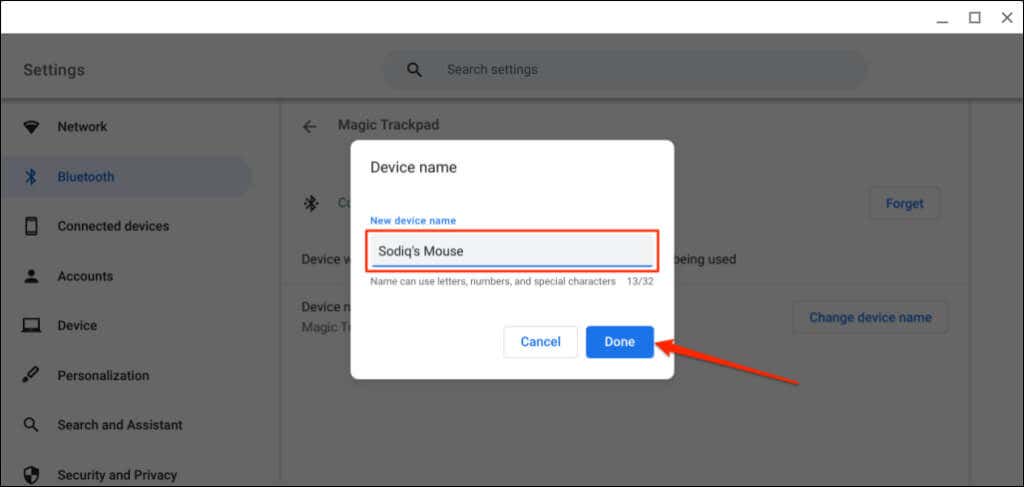
- Type a preferred name in the “New device name” dialog box and select Done.
Can’t Connect Wireless Mouse to Chromebook? Try these 5 Fixes
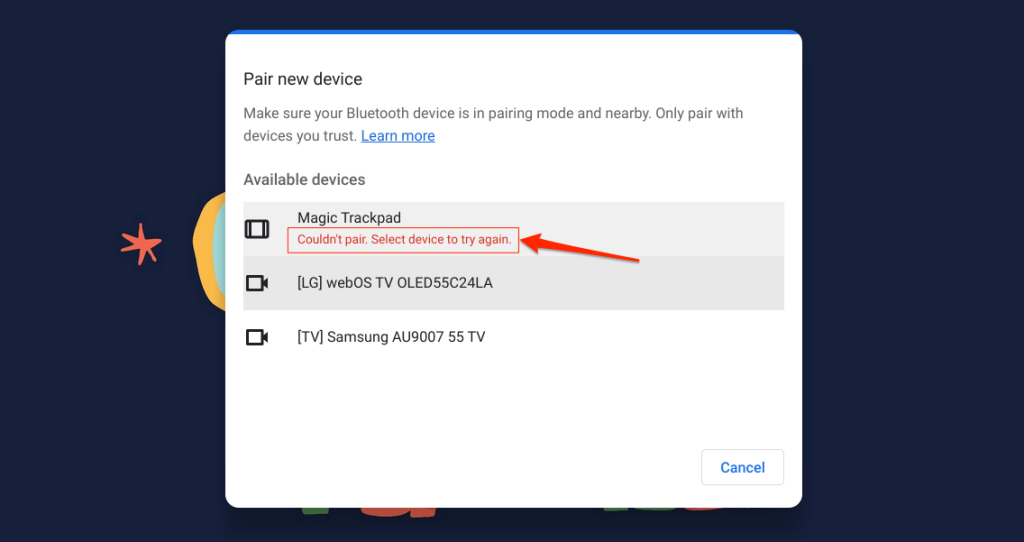
Do you keep getting a “Couldn’t pair” error when connecting a Bluetooth mouse to your Chromebook? Does your RF mouse lag or occasionally disconnect when paired?
Your mouse won’t connect to your Chromebook if it’s out of Bluetooth range or not in pairing mode. Power-related issues can also prevent your wireless mouse from connecting to your Chromebook.
This section covers troubleshooting fixes to try if your Chromebook fails to connect a wireless mouse.
1. Try A Different USB Port
A loose USB connection might cause an RF mouse to disconnect occasionally from your Chromebook. Sometimes, the mouse won’t work if the receiver’s plugged improperly.
Unplug the mouse USB receiver and plug it back into your Chromebook’s USB port or external USB hub. Proceed to the next troubleshooting fix if your mouse still doesn’t work.
2. Move the Mouse Closer to Your Chromebook
If your wireless mouse is too far from your Chromebook, moving it closer should fix input lag issues.
Wireless mice (RF or Bluetooth-powered) have a maximum operating system beyond which they won’t work. Depending on your mouse, the distance varies between six to 33 feet (two to 10 meters).
Refer to your mouse’s instruction manual or the manufacturer’s website for operating distance specifications.
3. Check for Interference
Metal objects, Wi-Fi routers, and poorly shielded cables can interfere with your wireless mouse’s signal and cause malfunctions. Radiation-transmitting electronic devices (microwave, external displays, headphones, etc.) operating on the 2.4GHz frequency band also produce interference.
Keep your mouse and its receiver at least three feet (one meter) away from other wireless devices and metallic objects for a lag-free connection. Switching your router’s channel to 5GHz can also minimize potential Wi-Fi interference.
The placement of your mouse’s USB receiver impacts its susceptibility to interference. Some manufacturers recommend plugging your USB receiver on the same side as the mouse.
If you’re right-handed, for instance, it’s best to connect the receiver to a USB port on the right side of your Chromebook.
This whitepaper from Logitech has more practical recommendations on optimizing your wireless mouse connection against interference.
4. Restart the Mouse
Locate your mouse’s power button and turn it off for a few seconds. Turn it back on and try connecting it to your Chromebook again.
5. Charge Your Mouse or Replace Its Battery
Wireless mice often malfunction when their batteries get low or damaged. RF mice typically use removable batteries, and the battery life varies based on usage, battery type, capacity, and other factors.
It can be difficult to tell when your mouse’s removable batteries need replacement, especially if it lacks an LED indicator. Refer to your mouse’s instruction manual or manufacturer’s website for battery management information.
Mice models with LED indicators flash red when their batteries get low. Turn off the mouse, change the batteries, turn it back on, and try connecting it to your Chromebook again. If the mouse won’t turn on or pair with your Chromebook, check the battery compartment and ensure the batteries are fixed correctly.
If your mouse has a built-in rechargeable battery, connect it to a power source and charge it for a few minutes. Unplug the mouse when charged, put it in pairing mode, and connect it to your Chromebook.
6. Update and Reboot Chromebook
Installing the latest ChromeOS update can fix connectivity-related issues on your Chromebook.
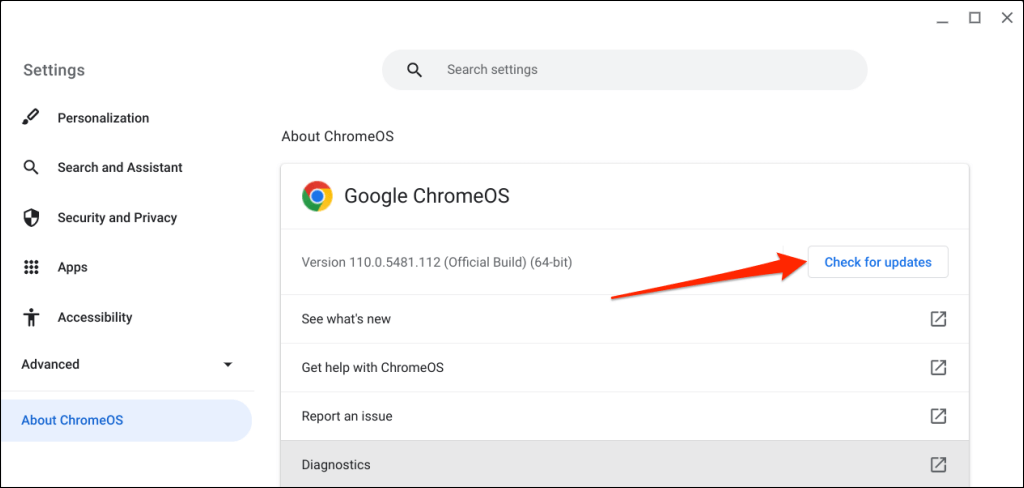
Open your Chromebook’s Settings app and select About ChromeOS on the sidebar. Select Check for updates to find available updates or Restart to install pending updates.
Go Wireless
Connecting a wireless mouse to your Chromebook is straightforward. If you don’t have a wireless mouse, review our ergonomic mice buying guide for recommendations.
