AirPods work on Apple and non-Apple devices. You can connect and use AirPods on Windows devices just like regular Bluetooth headphones. This tutorial shows you how to connect AirPods to your Microsoft Surface Pro and Surface laptop.
Connect AirPods to Your Microsoft Surface
- Press Windows + I to open the Windows Settings app.
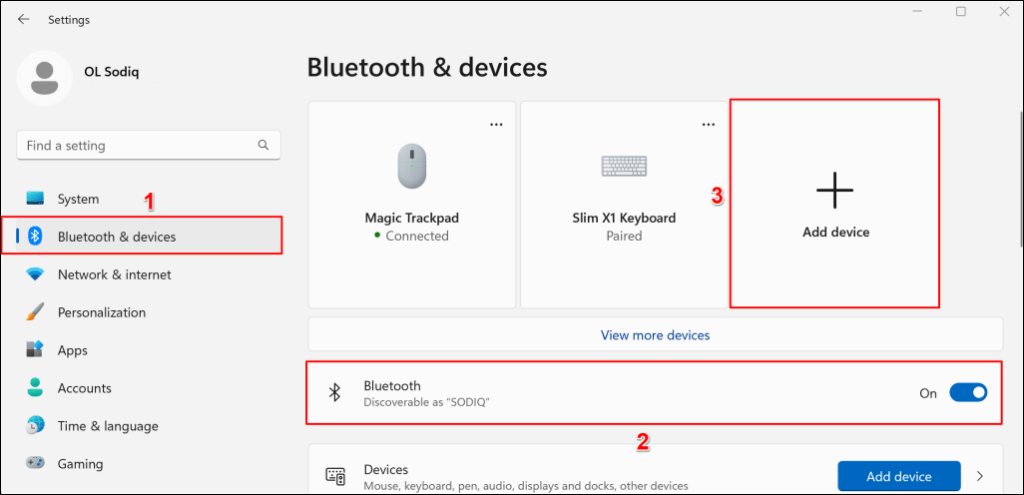
- Select Bluetooth & devices on the sidebar, toggle on Bluetooth, and then select Add device.
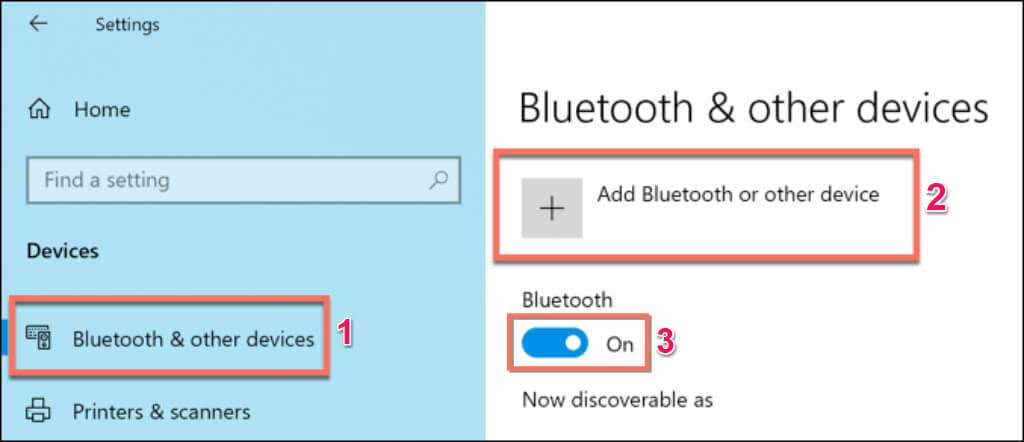
Note: If your Surface runs Windows 10, head to Settings > Devices > Bluetooth & other devices, turn on Bluetooth, and select Add Bluetooth or other device.
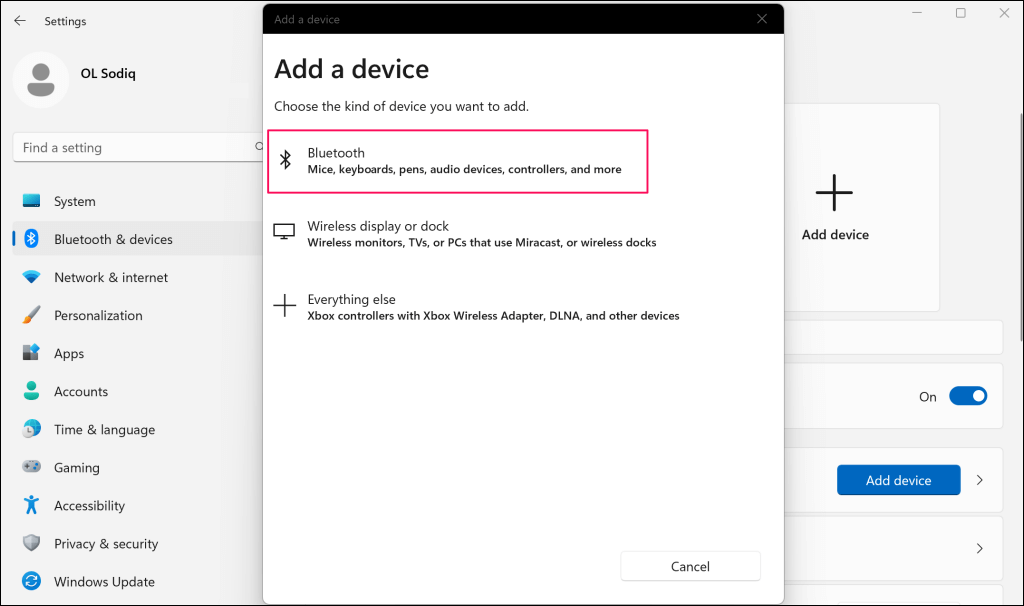
- Select Bluetooth on the “Add a device” pop-up.
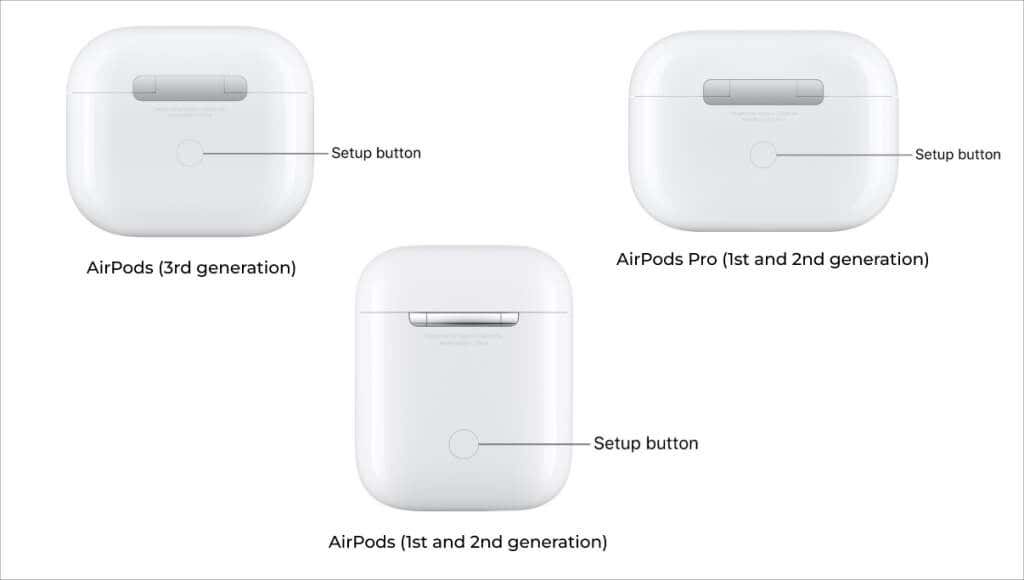
The next step is to put your AirPods in pairing mode. Put both (left and right) earbuds in the charging case and keep the lid open.
- Press and hold the Setup button on the back of the case for about 5 seconds. Release the Setup button when the status light on the front of the AirPods case flashes white.
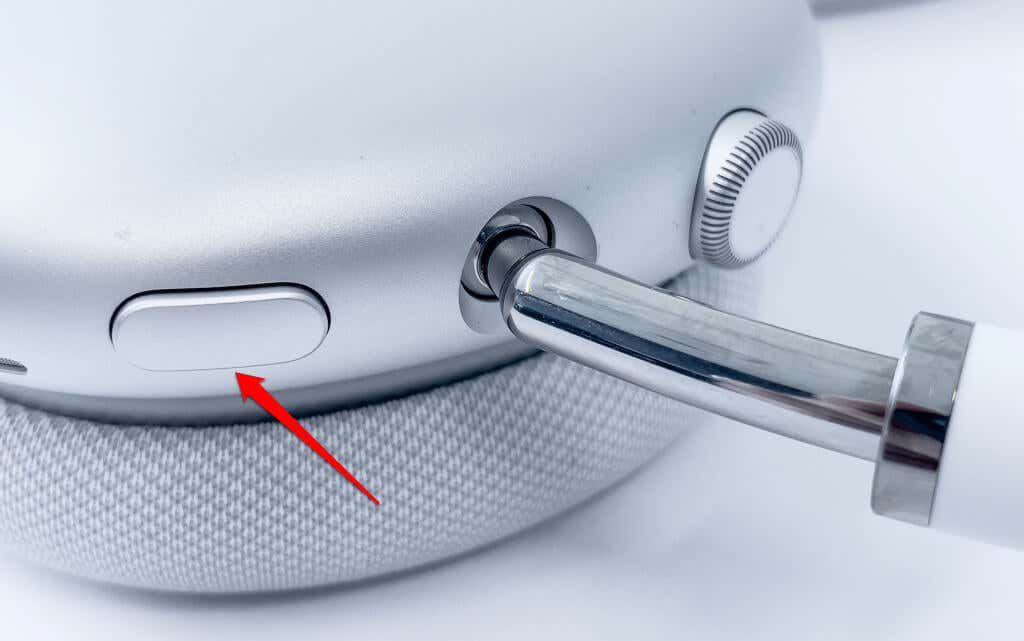
Note: If you have the AirPods Max, press and hold the Noise Control button for about 5 seconds to put it in pairing mode.
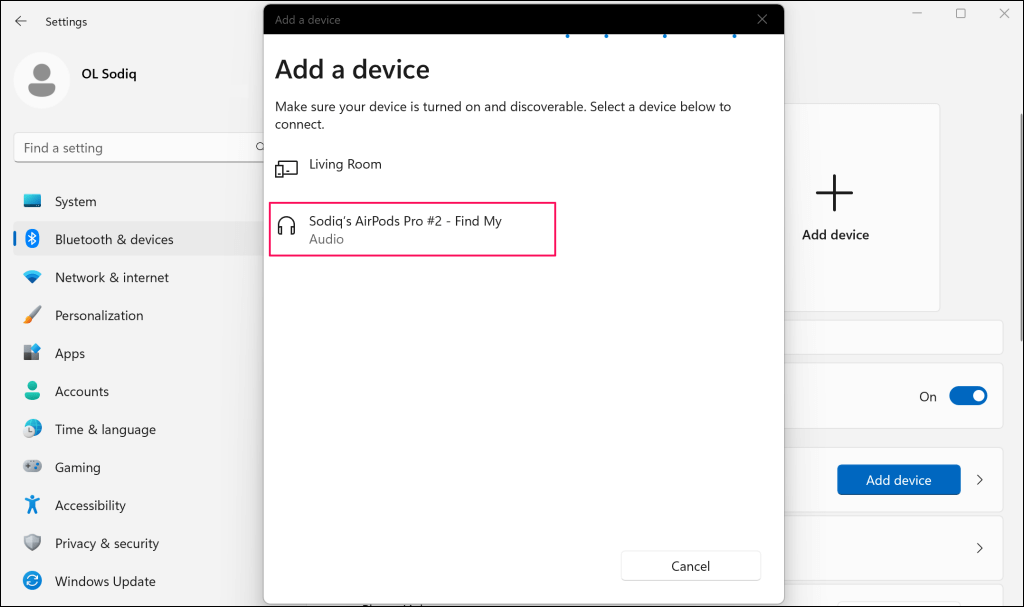
- Wait 5-10 seconds for your AirPods to appear on the list of available Bluetooth devices. Select your AirPods to connect them to your Surface Pro or laptop.
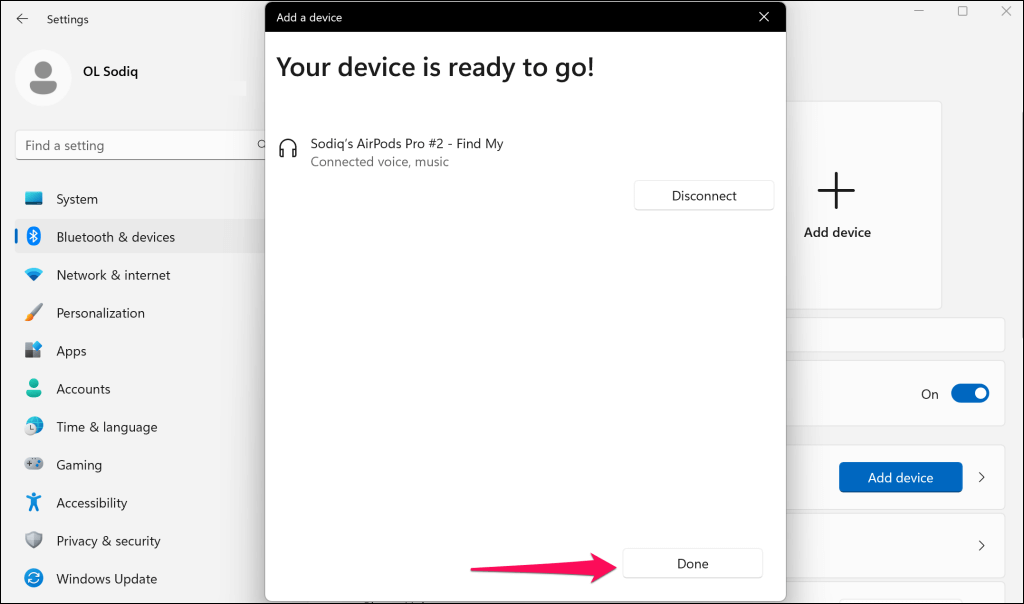
- Select Done when you see a “Your device is ready to go!” success message.
Your AirPods may not connect or go into pairing mode if the batteries are low. Charge your AirPods for a few minutes and try pairing them to your Surface again.
Make AirPods the Active Output Device on Your Surface
When you connect your AirPods to your Surface, Windows automatically makes them the primary audio device. Change Surface’s sound output settings if Windows doesn’t route audio output to your connected AirPods.
Use AirPods for Sound Output (via Quick Settings Menu)
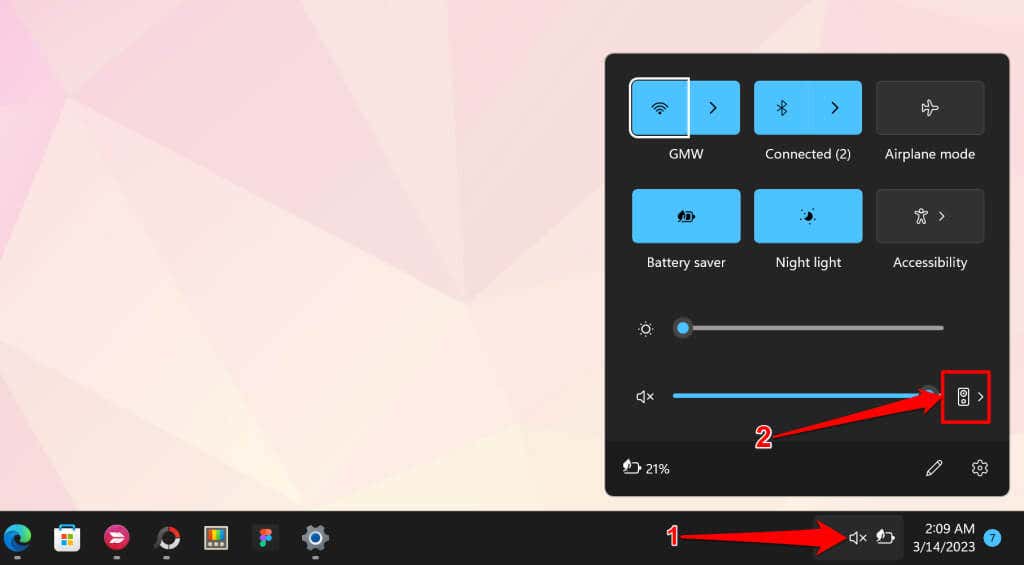
- Select the speaker icon (or press Windows + A) in the bottom-right corner of your Surface taskbar.
- Select the Sound Output icon next to the volume slider.
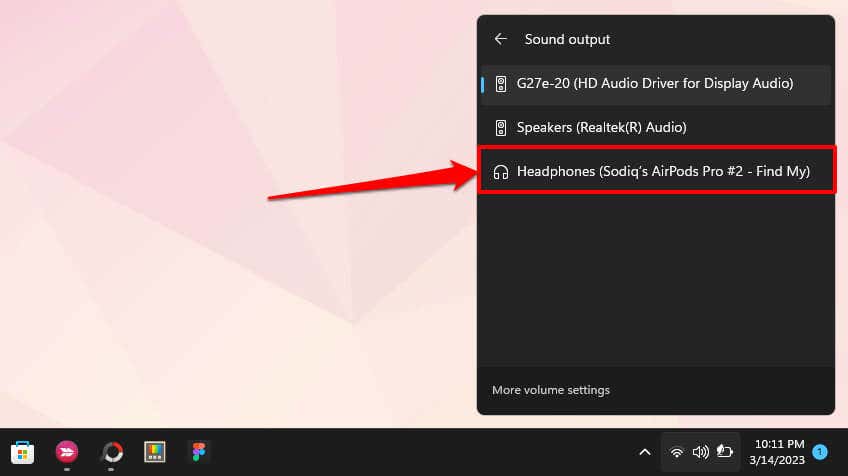
- Select your AirPods to make them the active device for sound output.
Use AirPods for Sound Output (via Windows Settings)
You can also make your AirPods the active audio output device for your Surface through the Windows Settings app.
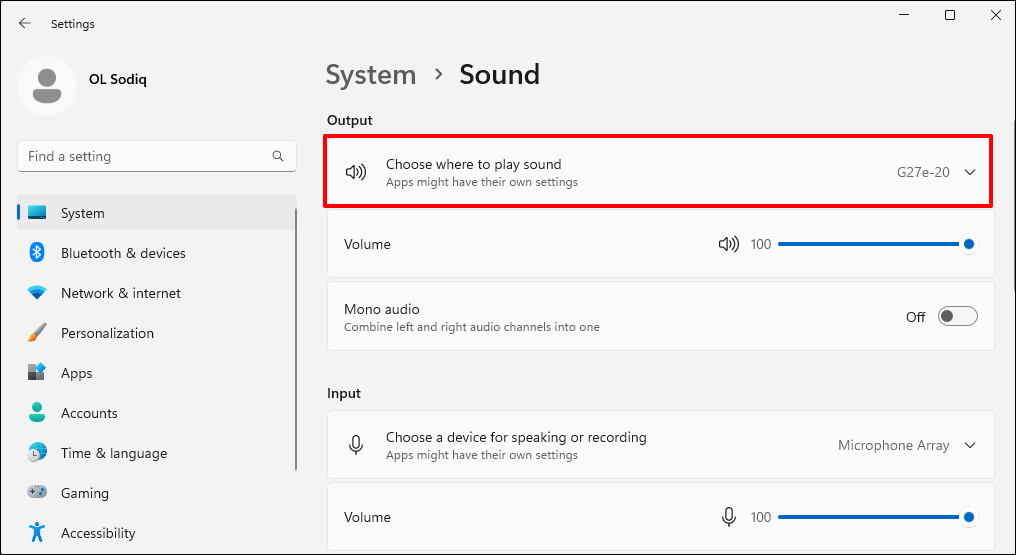
- Open the Settings app, go to System > Sound, and expand the Choose where to play sound drop-down menu.
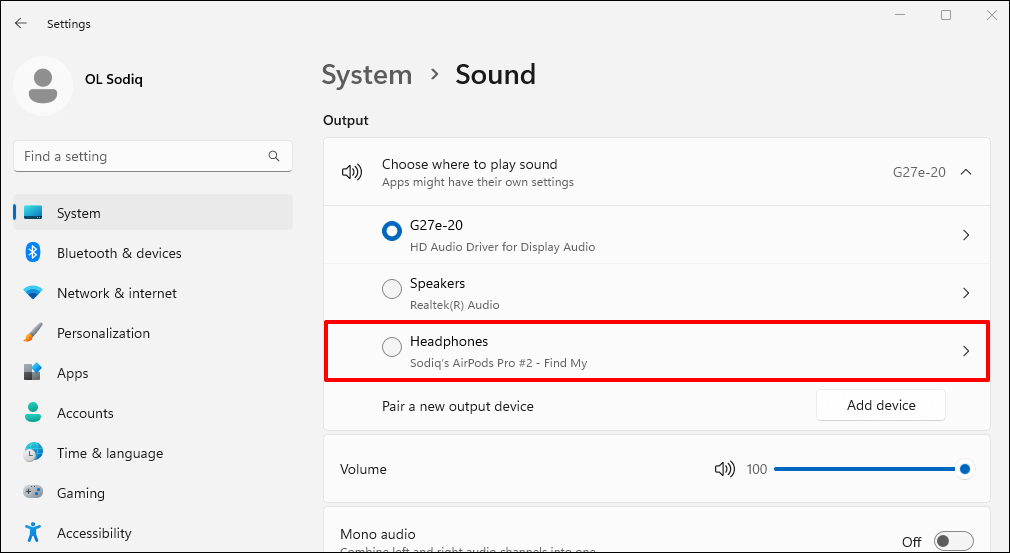
- Select your AirPods to make them the active output device.
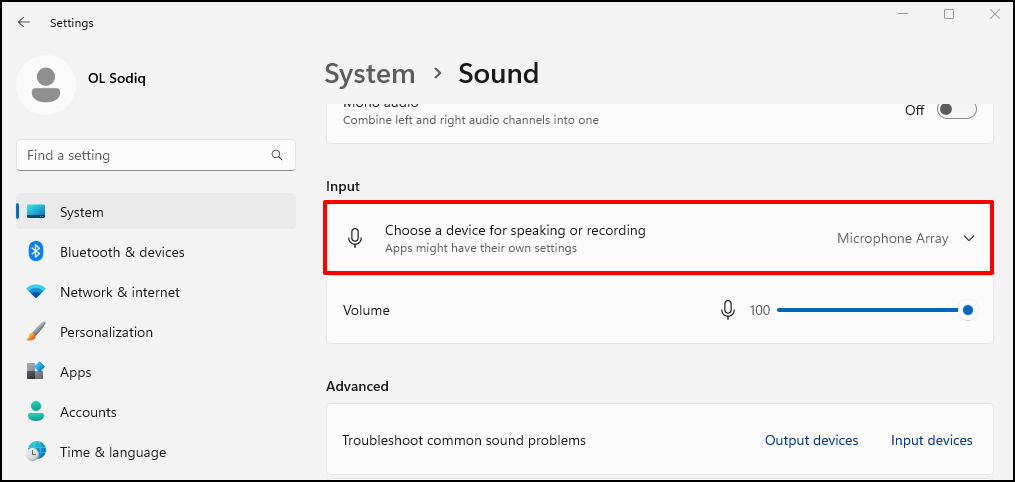
- Next, scroll to the “Input” section and expand the Choose a device for speaking or recording drop-down menu.
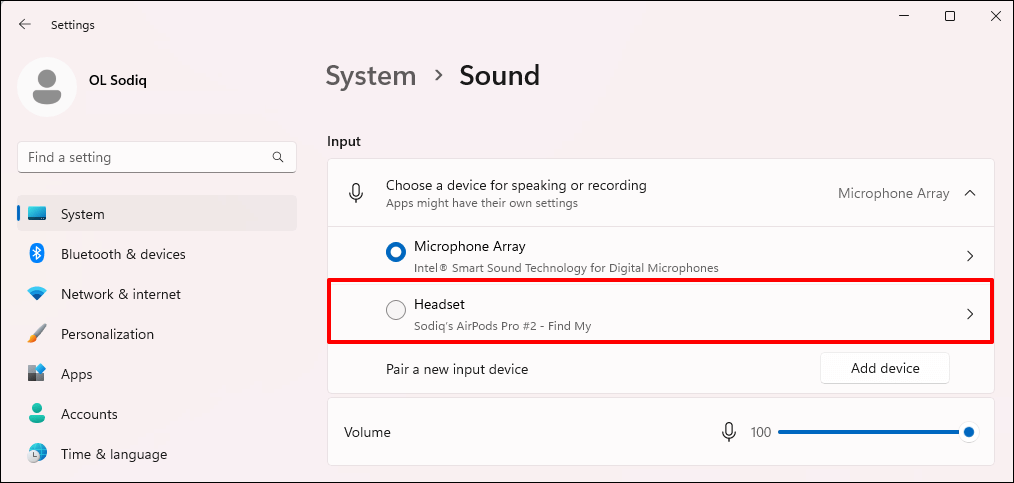
- Select your AirPods to use them for audio input on your Surface device.
Disconnect or Unpair AirPods from Surface
You can disconnect your AirPods from your Surface through the Quick Settings or Bluetooth Settings menu.
To use Quick Settings, follow these steps:
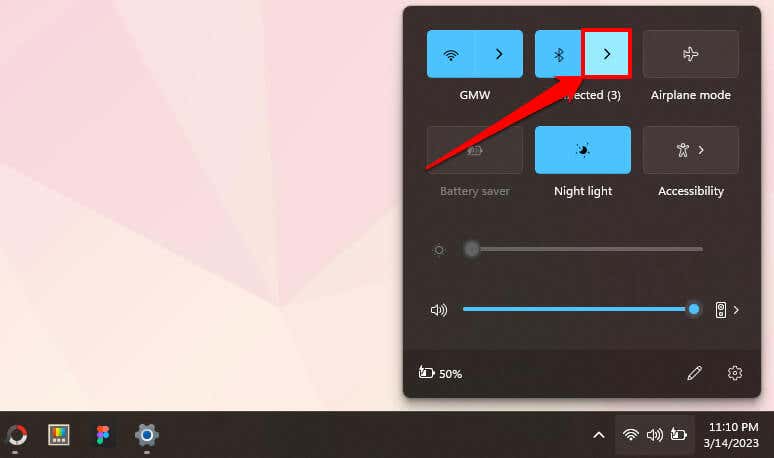
- Select the speaker icon on the taskbar or press Windows + A to open the Quick Settings menu.
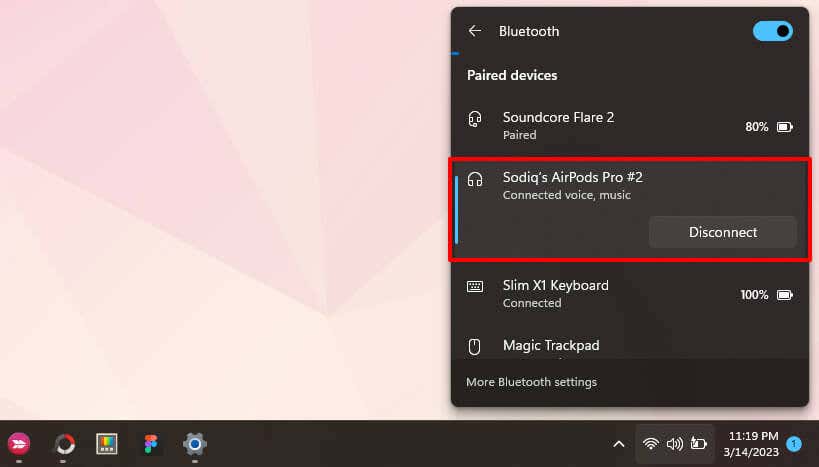
- Select your AirPods on the list and select the Disconnect button.
To use the Bluetooth Settings menu, follow these steps:
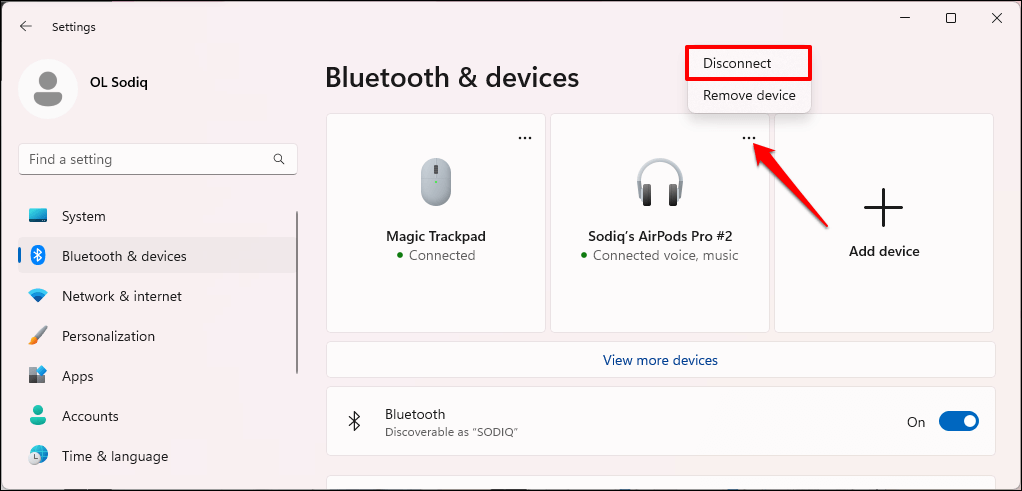
- Go to Settings > Bluetooth & devices, select the three-dot menu icon on your AirPods, and choose Disconnect.
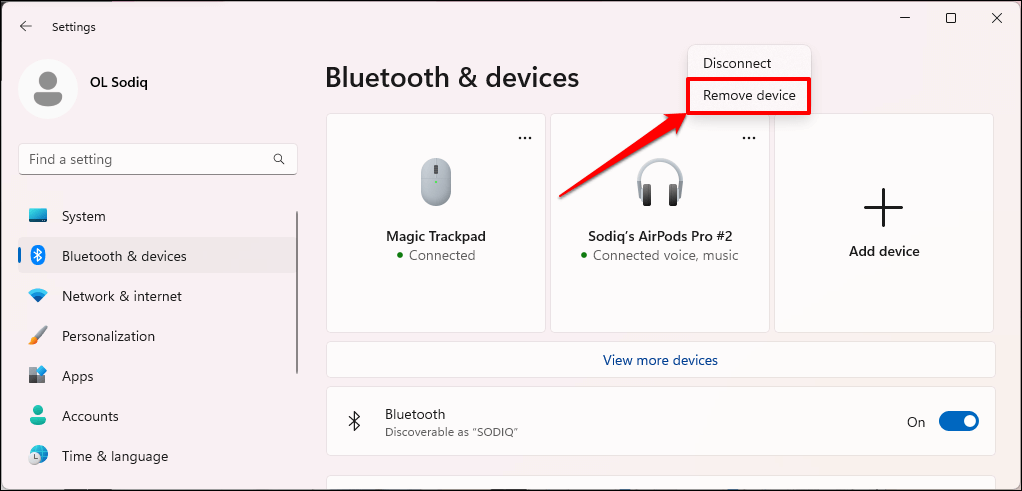
- Select Remove device to unpair the AirPods from your device.
Use AirPods on Your Surface
Although AirPods work on non-Apple devices, their features and functionalities are limited. For example, you can’t use Conversation Boost in Windows, nor can you run an ear tip fit test. You also can’t use Siri or check the headphones’ battery, but there’s an unofficial workaround—see how to check AirPods battery in Windows and Android.
Interestingly, AirPods’ noise-control functions (Active Noise Cancellation and Transparency mode) work in Windows. On AirPods Pro models, press and hold the force sensor on the stem of one AirPod to switch between noise-control modes. Release the force sensor when you hear a chime.
If you use the AirPods Max, press the Noise Control button to switch between Transparency and Active Noise Cancellation modes.
