If you’re working with numbers in Word but prefer to switch to Excel, you can do just that. There are a few easy methods you can try to switch from Word to Excel, whether manually copying the data or converting the file type.
If you want to know how to convert a Word file to Excel, try the steps outlined below.

Copy and Paste
The simplest way to convert a Word document to Excel is to copy and paste the data manually. This works best when your data is in a table format, as the rows and columns easily match the Excel layout.
- To do this, open the Word document that contains the table you want to convert to Excel.
- Select the entire table by clicking and dragging over it. Alternatively, press the Select icon in the top-left corner of the table.
- Press Ctrl + C to copy the table to the clipboard (or Cmd + C on Mac).
- Next, open a new or existing Excel workbook where you want to paste the table.
- Select the cell where you want to paste the table or click anywhere on the worksheet to create a new table.
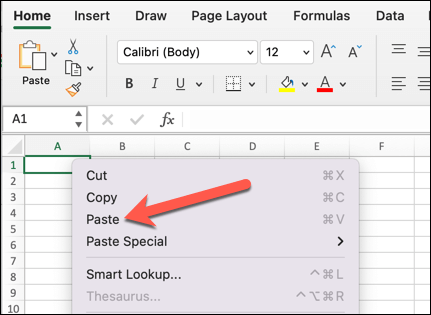
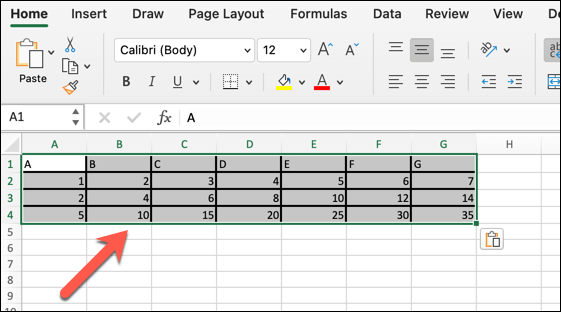
- Press Ctrl + V (or Cmd + V on Mac) to paste the table from the clipboard, or right-click and press Paste.
Excel automatically adjusts the column widths and formatting to match the Word table.
You can then make further changes to the data to fit your spreadsheet (such as changing the font, color, or sizing).
Save as a Text File and Import into Excel
Another way to convert a Word document to Excel is to save the file as a plain text file and then import it into Excel. This works best when your data is in a list format, with each entry separated by a delimiter character such as a comma, tab, or space.
Excel will convert each bit of data between each delimiter character as a cell, with each line as a separate row.
- To do this, open the Word document that contains the list you want to convert to Excel.
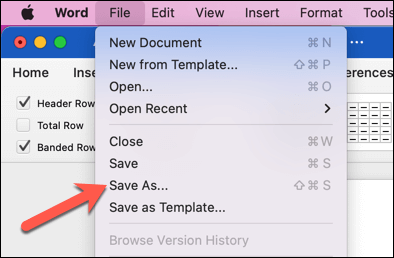
- Click File > Save As and choose a location where you want to save the text file.
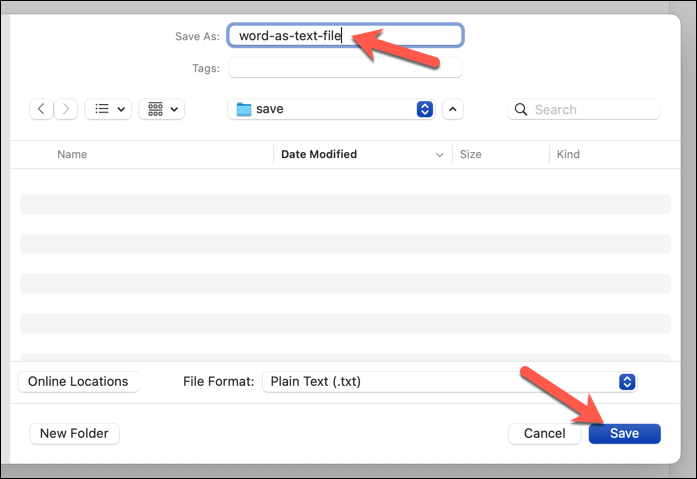
- In the Save as type drop-down list, select Plain Text (*.txt).
- Press Save to save the file.
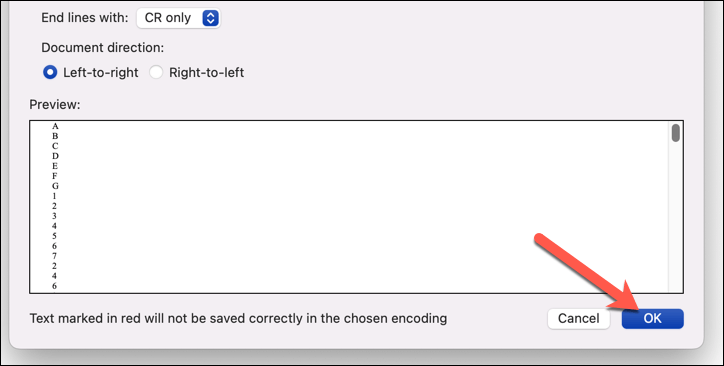
- A File Conversion dialog box will appear — leave the default settings and click OK.
- At this point, close the Word document (or minimize it) and open Excel.
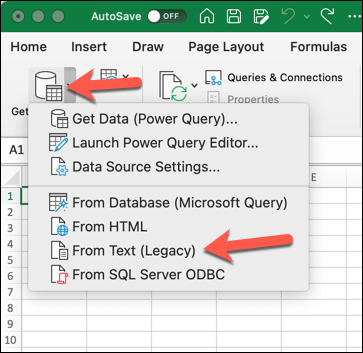
- In Excel, press Data > From Text/CSV (or Data > Get Data > From Text (Legacy)) and browse to the location where you saved the text file.
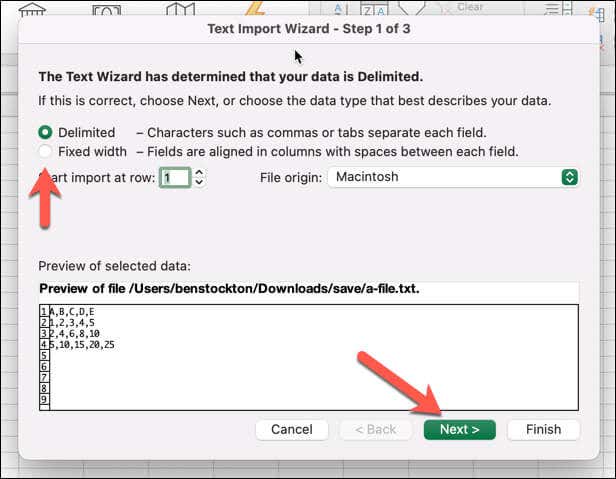
- Choose your text file and select Import or Get Data (depending on your Excel version). Excel will open a Text Import Wizard to help specify how your data is delimited and formatted.
- In step 1 of 3 of the Text Import Wizard, choose Delimited if your data is separated by characters such as commas or tabs, or Fixed width if your data is aligned in columns with spaces between them.
- Click Next to continue.
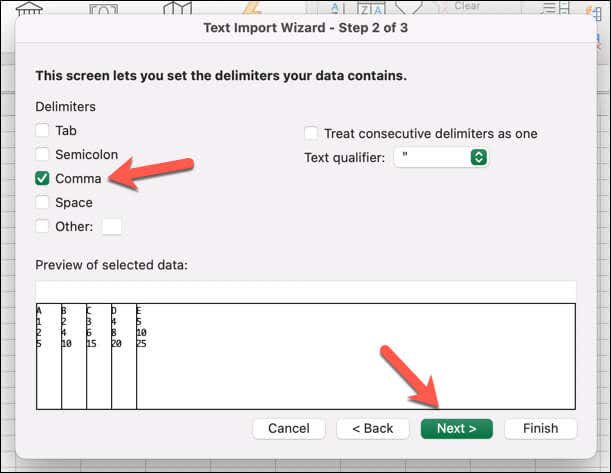
- In step 2 of 3, check the boxes next to the delimiter characters that apply to your data, such as Tab, Comma, Space, etc. You can also specify other characters in the Other box. Finally, in the Data preview window, you can preview how Excel will split your data into columns.
- Click Next to proceed.
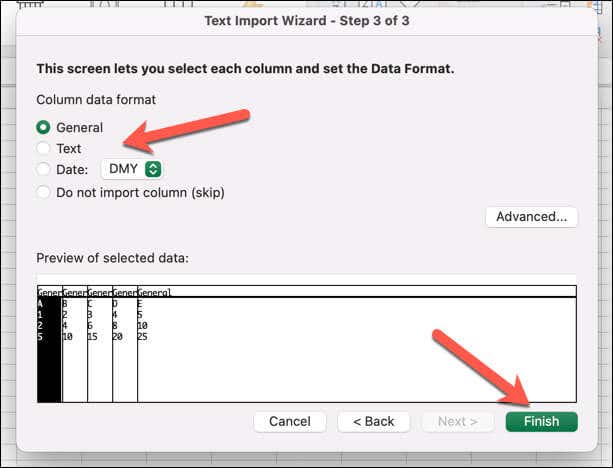
- In step 3 of 3, you can choose how each column of data will be formatted, such as General, Text, Date, etc. You can also skip importing any column by selecting the Do not import column (skip) option instead.
- Click Finish to end the process.
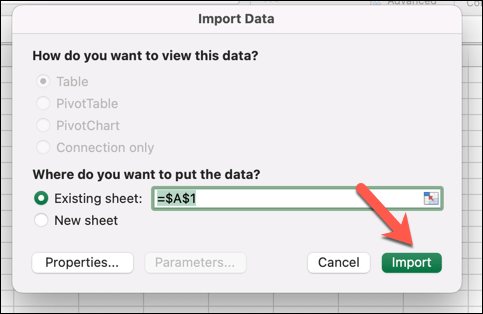
- Choose where to place your imported data (either in an existing or new worksheet) and then press Import.
Your data will then be imported into your Excel workbook. Double-check that the data has been imported correctly before you save. If it hasn’t, you may need to clear the data, repeat the process, and tweak your settings.
Use an Online Word to Excel Converter
A third way to convert a Word document to Excel is to use an online converter tool that can handle different file formats. This works best when you can’t access Microsoft Office or want a quick and easy solution to your problem.
Several of these tools exist online—a quick Google search will list potential options. We’ll explain how to do this using the Convertio Word to Excel conversion tool below, but many of these tools should work similarly.
- Open the Convertio Word to Excel tool in your web browser (or open your preferred alternative instead).
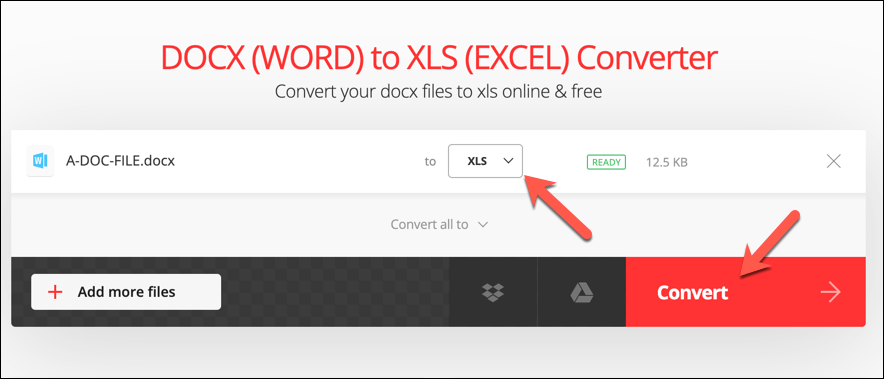
- Press Choose Files to select a Word file to convert from your PC or Mac. Alternatively, drag and drop the file onto the page to upload it instead.
- Next, select either XLS or XLSX as the output format for your Excel file.
- Press the Convert button to begin the conversion process.
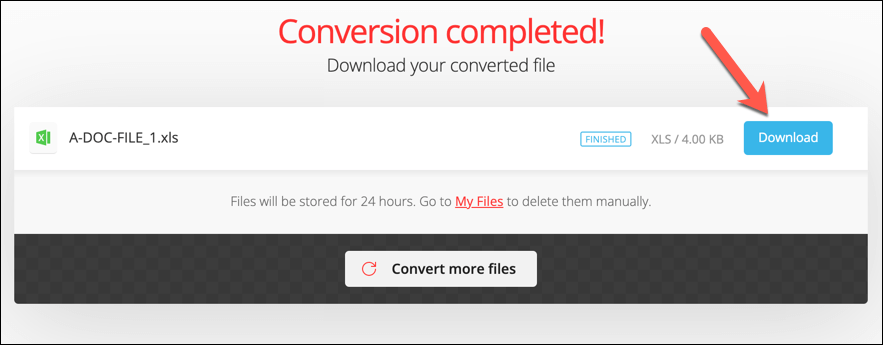
- Once the process is complete, press the Download Now button to download the converted XLS or XLSX file to your PC or Mac.
Open the file to double-check that the contents have been converted correctly. If they haven’t, you may need to change the format of your document first (such as using correctly formatted tables) before retrying the process.
Switching to an alternative tool may also provide a better result.
Converting Microsoft Office Documents
As we’ve shown above, there are a few different ways you can convert or import information from a Word document to an Excel spreadsheet, depending on how your data is structured and what you want to achieve with it.
If your data is in other file formats, you can switch between them, too. For instance, you can convert PDFs to Word documents using various tools (including Word itself). You can also save web pages as Word documents.
If you’re switching to Office from LibreOffice or OpenOffice, you can convert your ODT files to Word files quickly and easily.

