Razer Synapse is a cloud-based manager for your Razer peripherals. It comes with tons of neat features, among them the configurator that lets you customize all your Razer hardware. To increase the functionality of your Razer ecosystem, you can program each keyboard or mouse button with macro commands. You can also create custom and complex macros that you can use by pressing a combination of keys on your gaming keyboard.
When you create macros through Razer Synapse 3, they’ll be stored in the cloud. That means that no matter where you find yourself, you’ll be able to use the same macros as if you were home. It also allows you to share your settings with other people with Razer peripherals, or to import other people’s macros into your Razer Synapse software.
You’ll also be able to access them easily even if you replace your old Razer mouse and keyboard with new Razer products. Just follow the tutorial in this article and you’ll learn how to create, assign, and delete Razer Synapse macros in no time.
What’s a Macro?
Simply put, a macro is a script that plays an action, or a series of actions, when activated with a keyboard shortcut (or a mouse shortcut). That means that you can assign one button or a sequence of buttons to commit an action for which you would normally need several keystrokes or mouse clicks. This is extremely helpful to people who need to use repetitive keystrokes a lot. It helps them finish their work quicker, or play their games better.
You can use macros when you have long and repetitive tasks to perform on your computer. Instead of you doing a whole sequence of actions, press one key or a combination of macro keys to do it fast and hassle-free.
Adding a Macro Module
Before you can configure macros in Razer Synapse, you’ll have to add the Macro Module. It’s possible you already have it. If you do, you’ll find the Macro option at the top toolbar of Synapse.
But if you just installed Synapse, it’s possible you’ll have to install the Macro module first. Here’s how:
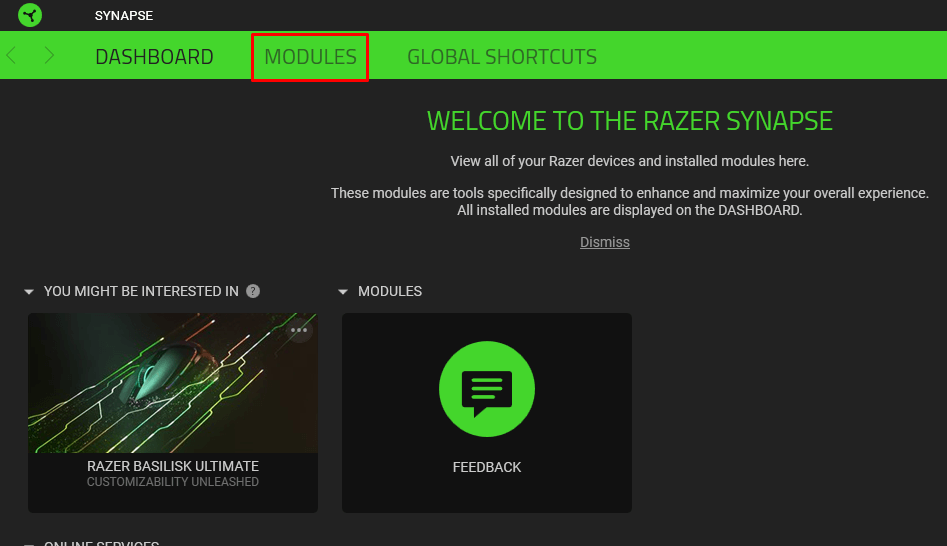
- Select Modules from the dashboard.
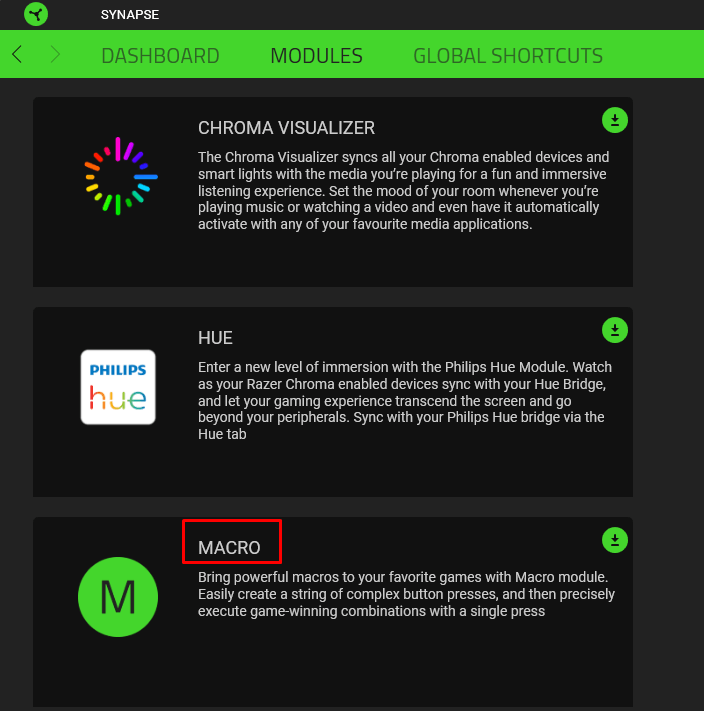
- Scroll down until you find Macro.
- Place your mouse over it and click the Add button.
- Select the Install & Reset option.
The Macro Module will be added to your toolbar. You can now access it easily.
Creating a Razer Synapse Macro
Now that you added Macro Module to your Razer Synapse dashboard, you can start creating some keyboard or mouse macros. To be able to do it, you’ll have to make sure your Razer Synapse 3 compatible product is plugged into your PC. Then:
- Open the Razer Synapse.
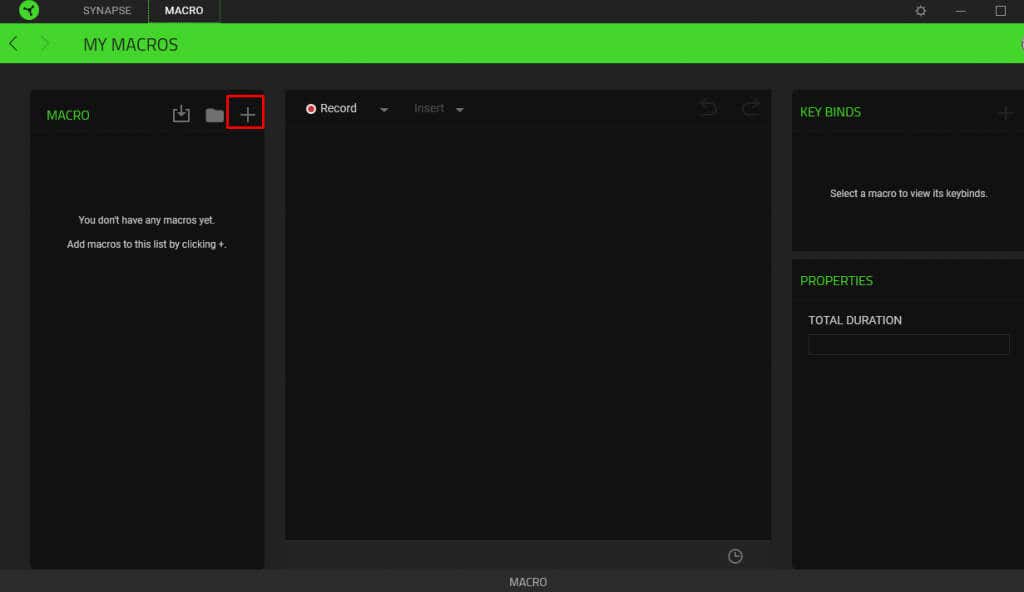
- Select Macro from the top Toolbar.
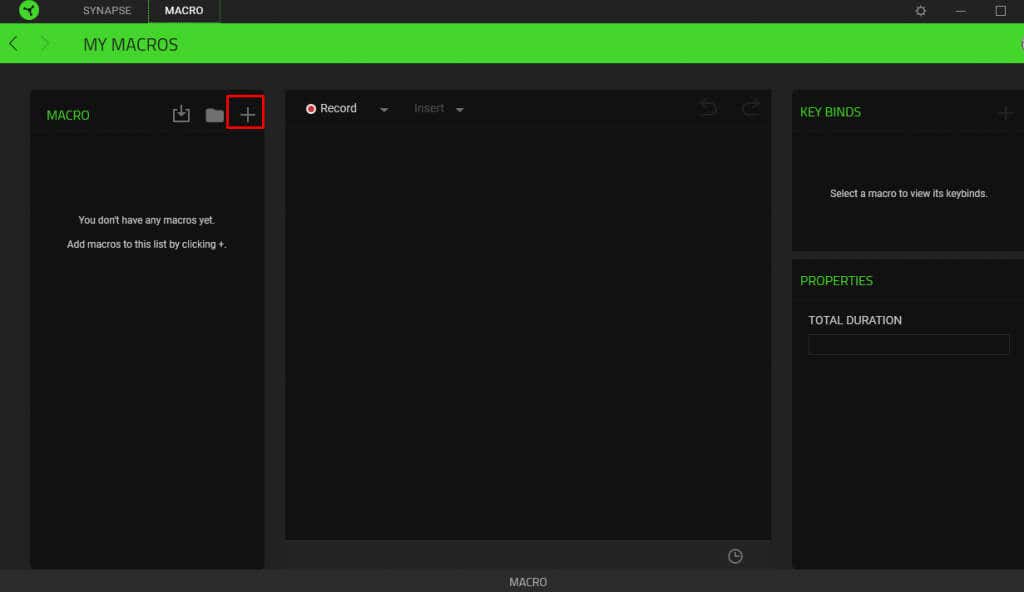
- Click the Plus icon (+) at the top left-hand sidebar.
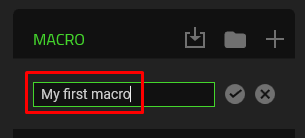
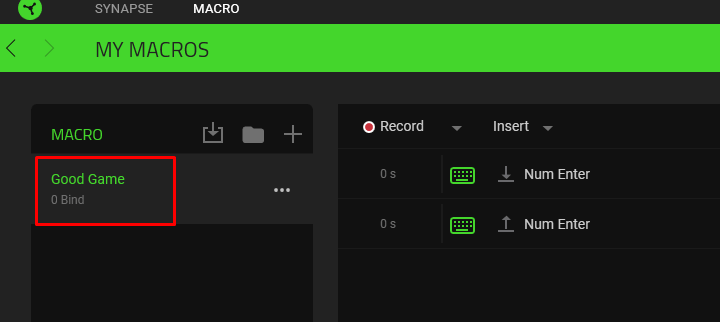
- You’ll notice that Macro 1 was created right underneath. This is a default name, and not very descriptive. You can click on it to change its name.
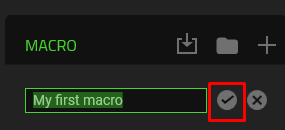
- To save the new name, click the checkmark next to it.
- Select this newly created macro to start adding the input sequence.
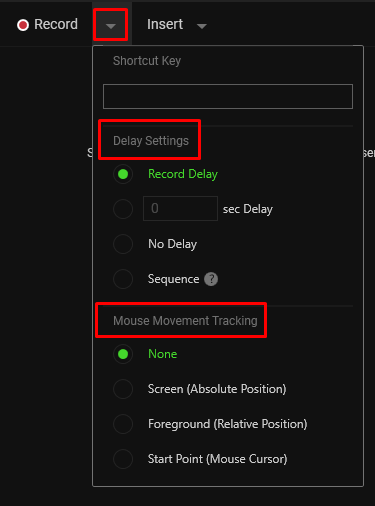
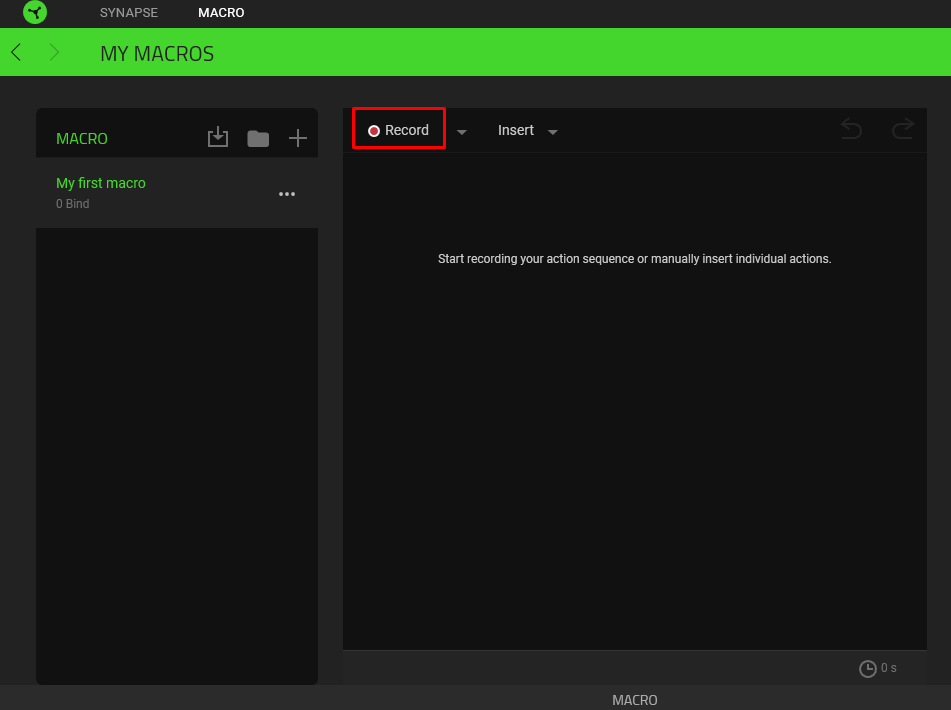
- Go to Record and click the little down arrow next to it to open the drop-down menu.
- You’ll have to set the Delay functions and the recording of Mouse Movement. Record Delay means there’ll be a three-second delay by default before Razer Synapse starts recording your macro. You can add more seconds, or remove the delay altogether. That gives you enough time to prepare yourself.
- When you’re ready to record the macro, select Record.
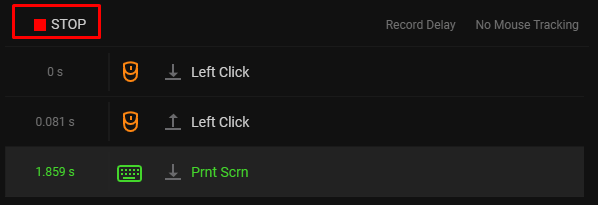
- Press the keys on your Razer keyboard or mouse and those keystrokes will be recorded.
- When you’re done, click Stop to end the recording session.
Your macro will automatically be saved in Razer Synapse. After the macro is created, you’ll have to assign it to any Razer Synapse-enabled peripheral.
Another way of creating the macro is to insert it, instead of recording it. The steps to do it are the same, until the Record point. To insert the macro instead:
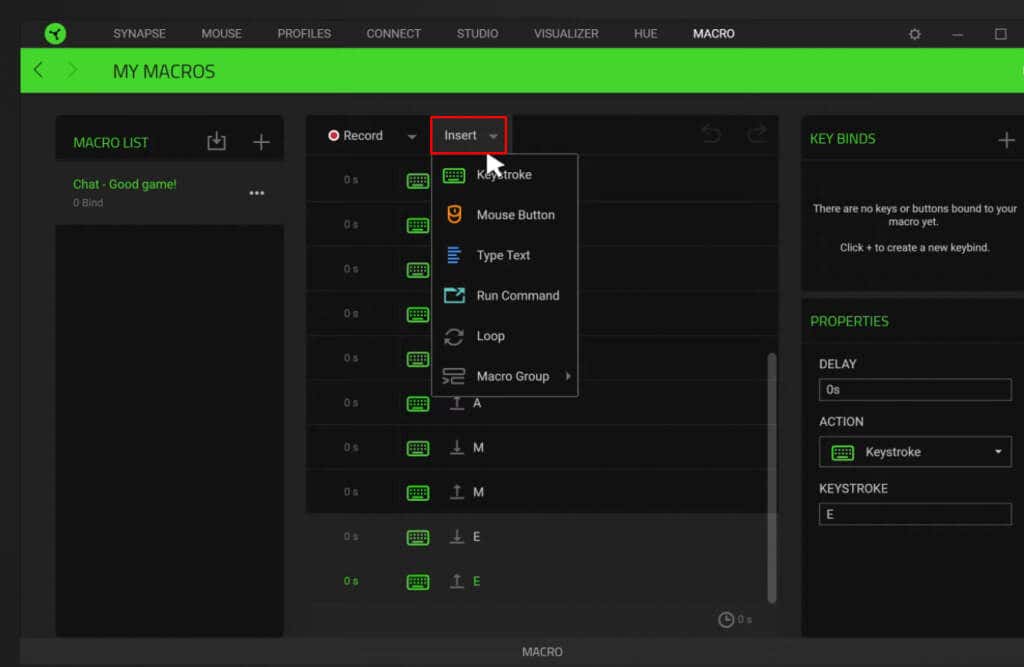
- Go to Insert.
- Select an action from the drop-down menu. If you want to create a Keystroke macro, a Mouse Button one, Type Text, or Run Command.
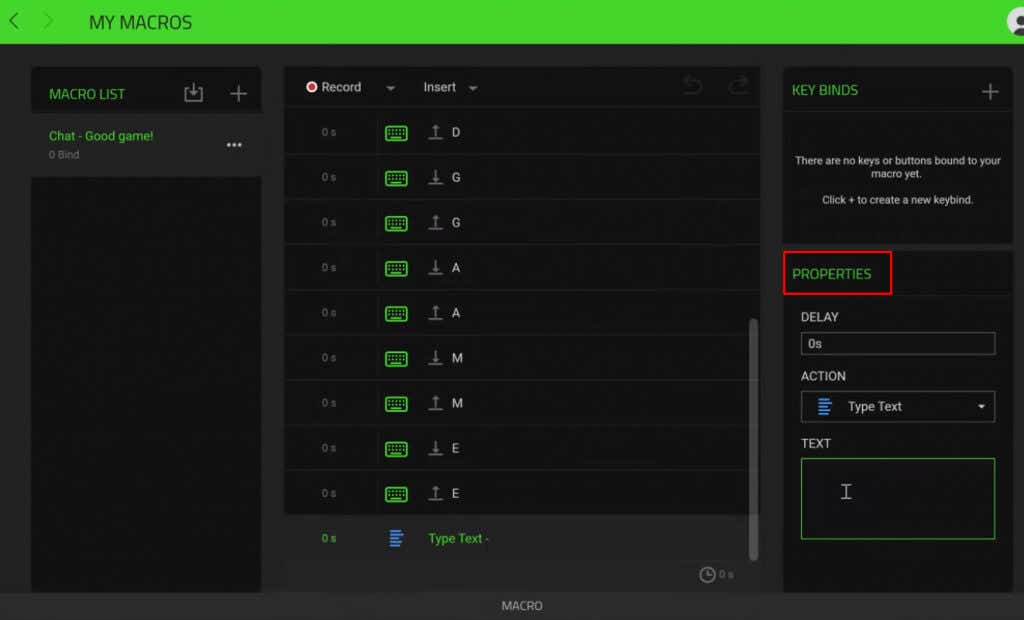
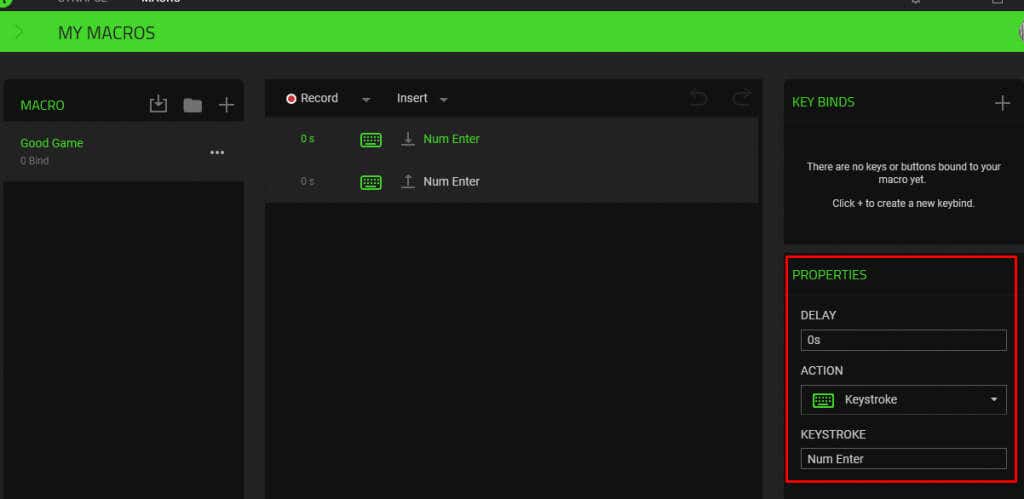
- On the right-side panel, find Properties. Here you’ll input the macro function, and you can set the delay before the next action is initialized.
Your macro will be automatically saved and then you can proceed to assign it to a Razer Synapse 3-compatible device.
Assigning a Razer Synapse Macro
Now that you created a macro in Razer Synapse, you can assign it to the Razer device. Remember that you have to have a Razer Synapse-enabled keyboard or a mouse plugged into your computer before you can do this.
Follow these steps to assign a macro:
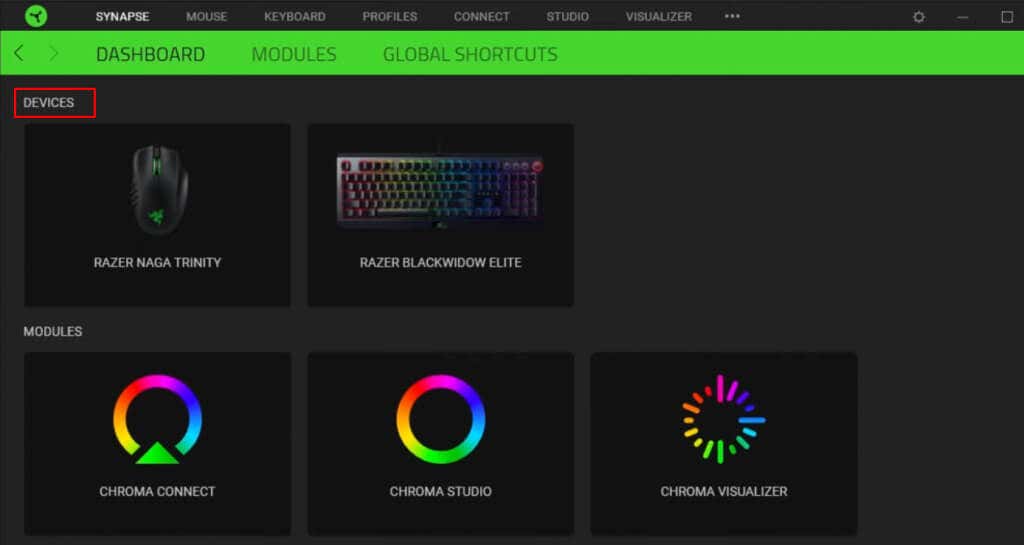
- Open Razer Synapse.
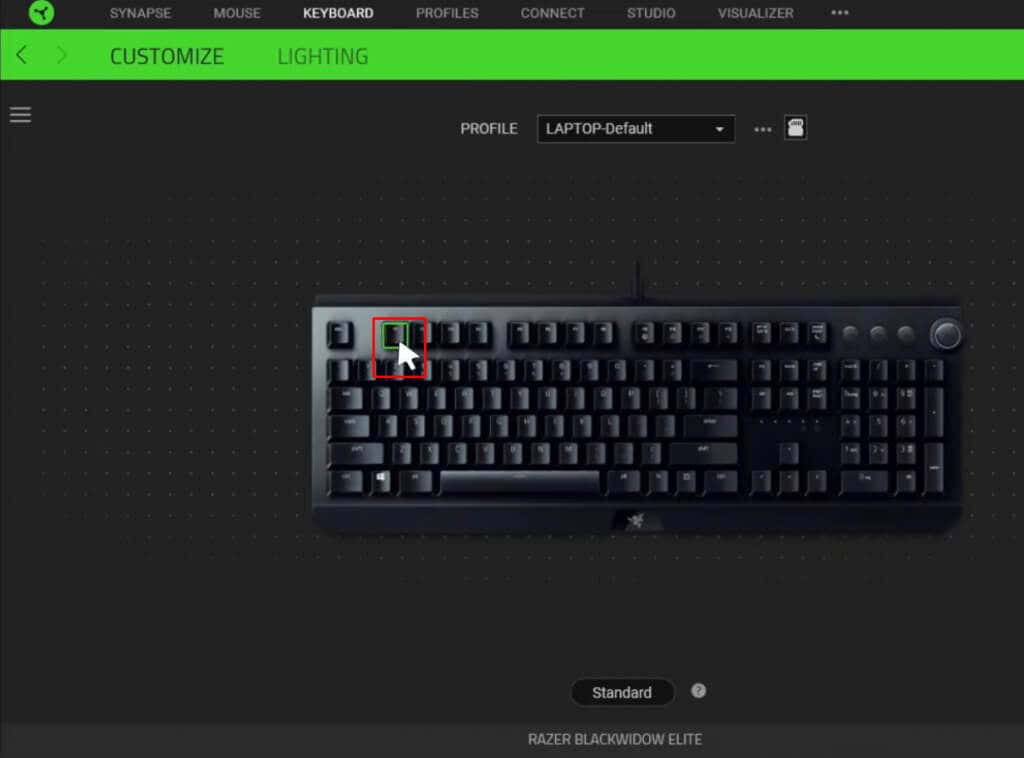
- Select the device you wish to assign the macro to.
- Select the key you want to assign the macro to.
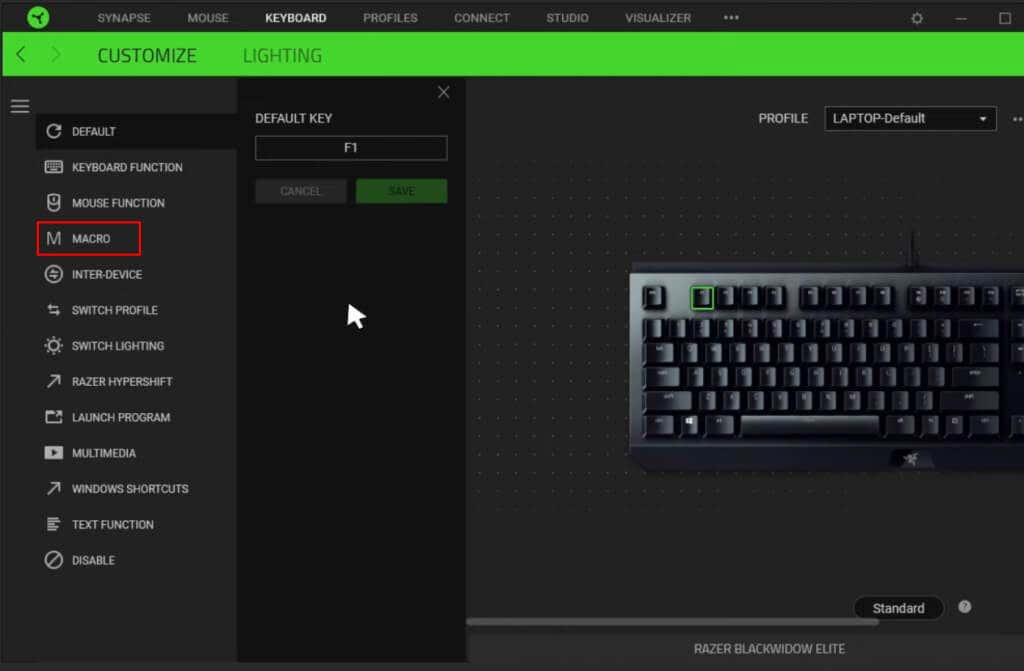
- From the left sidebar menu select Macro.
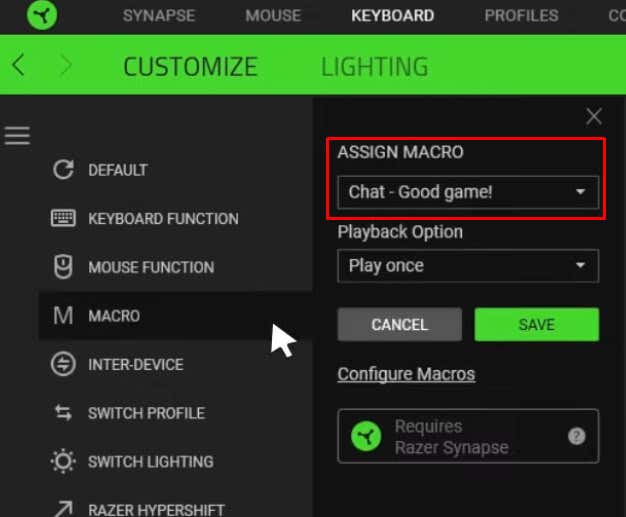
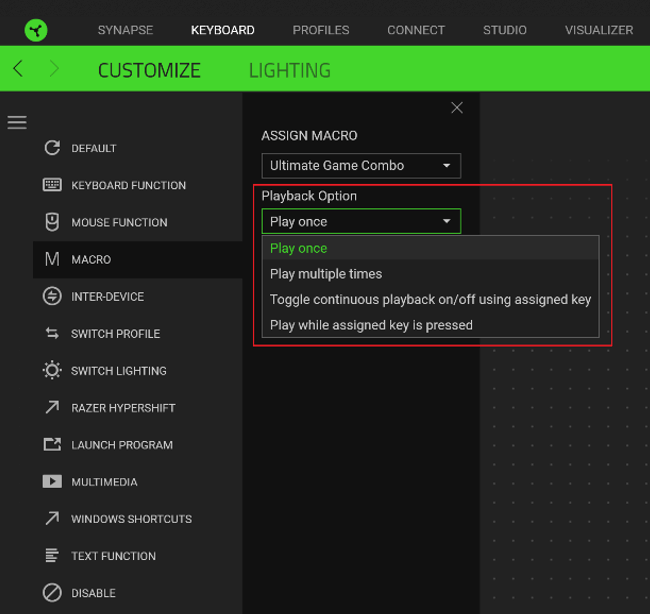
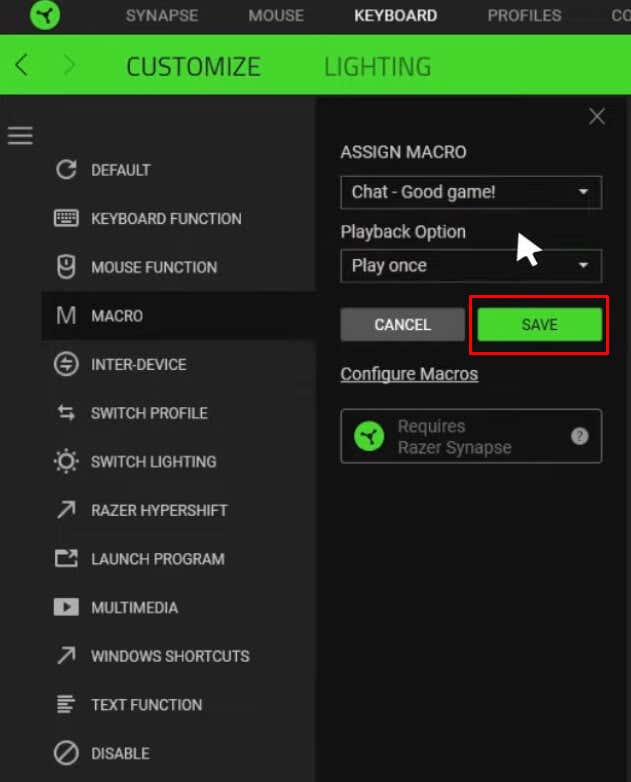
- Find Assign Macro and click it to open the drop-down menu. Select the macro you want to assign.
- Under the Playback option, you can set how you want the macro’s action to be played back. Select the option that suits your needs.
- Once you’re done, click the Save button.
And that’s it! Your macro is assigned to the specific button. You can go on and use it how you intended to.
Editing a Razer Synapse Macro
You can edit the Razer macros you created and assigned at any point. This allows you to adjust their function or the playback speed. Any change you make to the macro will automatically be saved, and you won’t need to reassign the key bind.
Here’s how you can edit Macros:
- Open the Razer Synapse Software.
- Go to Macro in the toolbar.
- From the left side menu select the macro you want to edit.
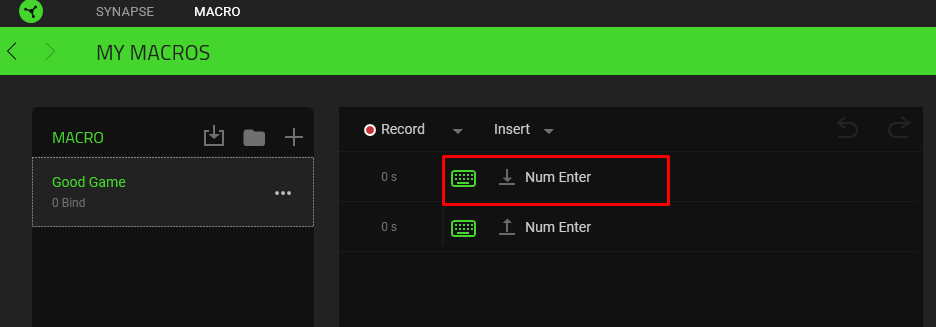
- Selecting any action (Event) in the menu will open the properties panel on the right side.
- Adjust the Properties to change the event delay or the action of the macro.
Once you make changes the macro script will be automatically updated, so you can immediately go ahead and use the updated version of the macro.
Deleting Razer Synapse Macro
All macros you create and assign in Razer Synapse can be easily deleted. Perhaps you made a mistake while creating it, or you simply don’t use it anymore. Whatever the reason, follow these steps to delete a macro:
- Launch Razer Synapse 3 software.
- Select Macros from the top toolbar.
- In the left side menu find the macro you want to delete and select it.
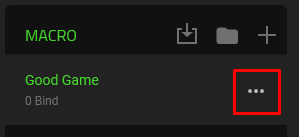
- Click the three dots next to the macro.
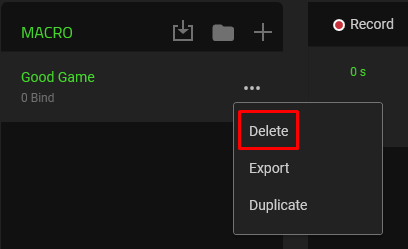
- Select the Delete option from the menu.
- Confirm you want to delete the macro by clicking the DELETE button when prompted.
And that’s all it takes to create macros in Razer Synapse. Using Razer gear without taking advantage of this awesome tool is a waste of a great feature. Think of the most common actions you perform when you work or play games and turn them into macros. Also, check out our articles on how to create a macro in Word and how to record a macro in Excel to speed up your workflow.
