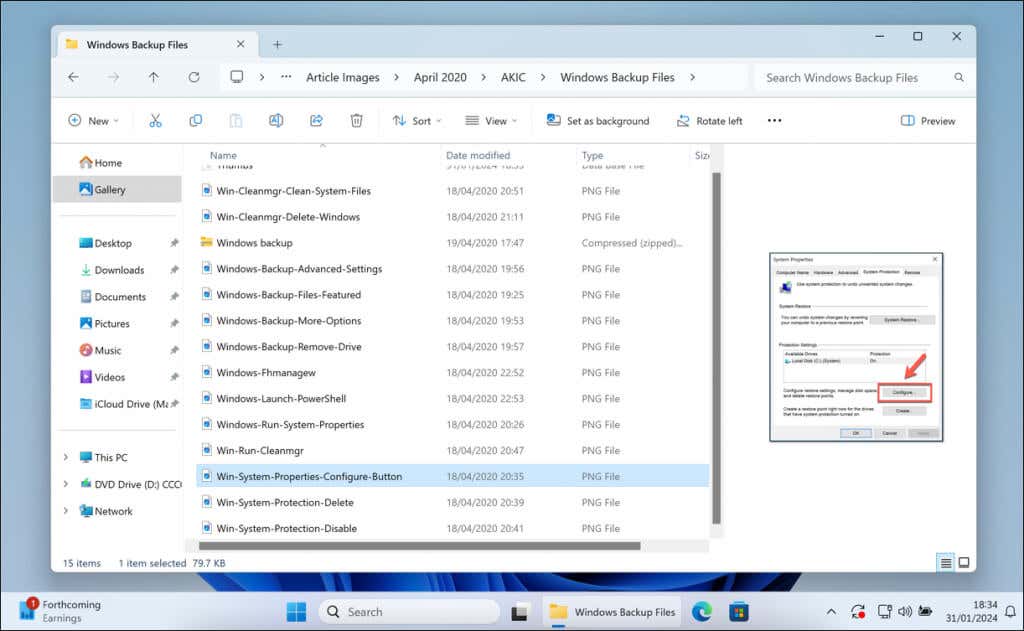
Your Windows operating system understands that not every file type is the same. For instance, how you want to view your audio files differs from how you might want to view a list of your text files.
There are different types of folder views that you’ll be able to see in File Manager using five default templates. You can customize the default folder views in Windows to let you view your files how you want to, tweaking these templates to suit your preferences using the steps below.
What Are the Five Windows Folder Templates?
Windows offers a variety of folder templates, each designed to display your files (and information about them) efficiently based on their file type. There are five typical templates that you’ll see in File Explorer, including:
- General Items: Ideal for assorted file types, this template offers a middle ground that fits various kinds of data. When in doubt, File Explorer will default to this template.
- Documents: If you’re dealing with text files, spreadsheets, presentations, or other office-related formats, this is the one to go for. It might reveal document author information and last edit dates, for instance.
- Pictures: This template arranges thumbnails visually for your image files so you can quickly sort through and preview your photos.
- Music: This is tailored for audio files, possibly displaying details like song artist, publisher, and album information for better organization.
- Videos: As you might expect, this template focuses on large thumbnails and details that’ll give you information about videos, such as creator data.
Each template modifies the folder view in File Explorer to explore those files better. For example, the Pictures template allows larger thumbnails to preview images, while the Documents template might focus more on list details for file type, size, and author data. You can also customize these five templates to suit your needs better.
Step One: Customize a Folder Using the Template You Want to Change
When you’re looking to tailor the viewing experience of your folders in Windows, you’ll first need to set a single folder as your model. This is because Windows allows you to use a template to govern the look and feel of similar folders.
For instance, you might prefer larger thumbnails if you’re organizing images. If it’s documents, perhaps detailed lists are more your style. Begin with a folder that typifies the content you’re working with.
An excellent way to do this is to customize the folder view in a single folder. You can then apply the layout to other folders later, but only the currently active folder will change for now. To customize your folder’s view in File Explorer, follow these steps.
- Open the folder that contains the content you’re working with.
- Select the View button at the top of the File Explorer window.
- Experiment with the available options, such as Extra large icons or Details. You can also apply other settings, such as the ability to view hidden folders.
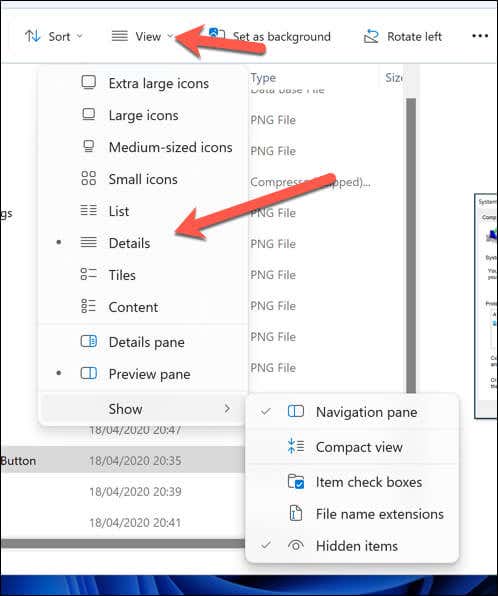
Any changes you make will apply immediately and only to your current folder. If you want to apply it to all your folders for that view type, you must change your folder settings using the steps below.
Related: Did you know that you can change the default system desktop icons (like Recycle Bin) in Windows?
Step Two: Apply The Customization to All Folders Using the Same Template
Once you’ve fine-tuned a folder’s view to your liking, it’s time to extend those settings across other folders sharing the same type. This will provide a consistent look and feel for your files when viewing them in File Manager. To apply your customized view to all similar folders, follow these steps.
- Open the folder you’ve customized in File Explorer.
- After you’ve adjusted the view settings, press the Options button. This is located on the right-hand side of the ribbon, but if you can’t see it, press the three-dots button to select it in the drop-down menu instead.
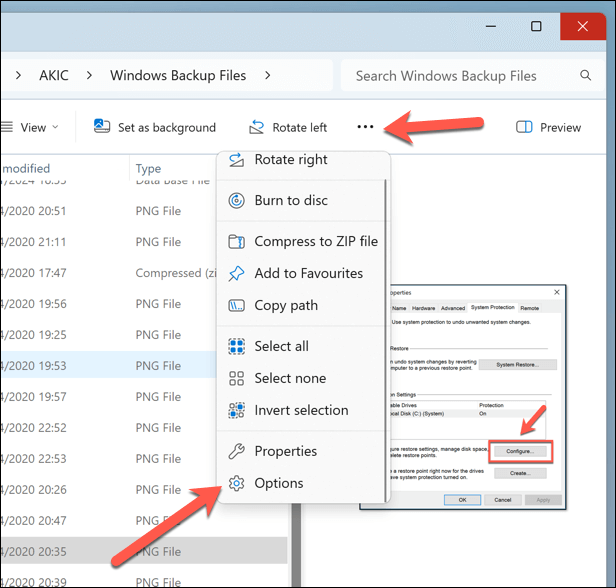
- In the Folder Options menu, select the View tab.
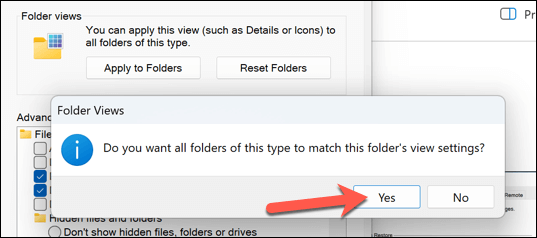
- Press Apply to Folders. This will set your current folder’s view as the default for all folders with the same template.
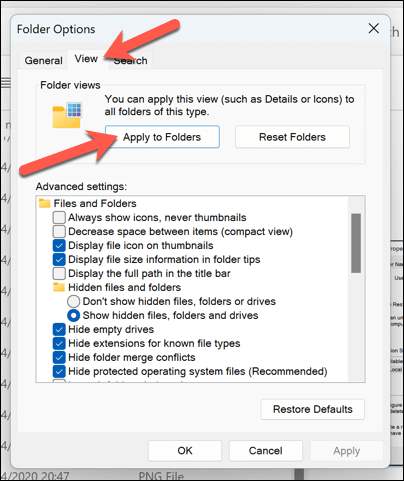
- A confirmation dialog will appear. Click Yes to confirm your choice.
- Click OK to exit the menu.
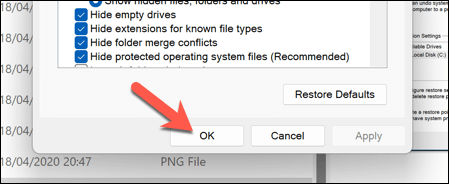
This process updates the view settings across all folders categorized under the same template type. If you’ve arranged a music folder by artist name and album title, this setup will be replicated wherever your folders are optimized for music content. It’ll also apply to specific changes, such as turning off file grouping.
If you want to repeat this process for other folder types, open a new folder that uses that template and make any necessary changes. You’ll then need to repeat these steps to apply the change globally to all other folders with the same template.
Managing Your Files on Windows
You can customize how your files appear in File Manager by customizing the default folder views on your Windows PC. If you want certain information about your files to appear, such as the author of a text file or the release date for a song, you can set this up by using the steps above to help you.
Can’t find your files? Don’t panic—you can use the built-in Windows search tools to help you customize the search features to your requirements.
Related Posts
- Preparing for Windows 10 End of Support: Upgrading to Windows 11
- How to Fix a “This file does not have an app associated with it” Error on Windows
- How to Fix an Update Error 0x800705b4 on Windows
- How to Resolve “A JavaScript error occured in the main process” Error on Windows
- How to Fix the Network Discovery Is Turned Off Error on Windows
