If you’ve used the Google Chrome browser before, then you’ve probably already encountered one of its biggest problems—memory usage. Chrome has always been a browser that consumes a lot of active RAM. While Google has improved Chrome’s memory usage over the years, the problem has never fully gone away.
Thankfully, Windows is one step ahead with a system feature that helps to reduce the demand for apps like Chrome on your system memory. This energy efficiency mode can help you save energy and improve overall system performance by reducing the CPU and RAM usage of your browser tabs.
However, this can slow down your browser, so you may want to switch it off. If you want to disable efficiency mode for Google Chrome in Windows, follow these steps.
What Is Efficiency Mode and Why Might You Want to Disable It?
Efficiency mode is a feature that was introduced in Windows 11. It’s a system feature that automatically adjusts the resource usage of system apps based on their usage and overall priority. It’s switched on by default for certain applications, including browsers like Chrome.
For example, if you have multiple tabs open in Chrome, but you’re only using one of them, efficiency mode can force the browser to disable some of them, placing them into a low-power state to save battery life and free up memory. However, this also means that those tabs may not be updated or responsive when you switch to them.
This creates some obvious advantages, but equally obvious drawbacks. Extra memory is great, but if your browser tabs aren’t loading or your websites keep crashing, it’s going to have an impact on how you use Chrome. It can also cause deeper issues with Chrome extensions or built-in functionality like notifications.
If you’re experiencing any of these issues with Chrome, or if you simply prefer to have full control over your browser tabs, you’ll need to switch efficiency mode off.
How to Check If Efficiency Mode Is Enabled on Your Chrome Browser
Your first step, before you try to disable the functionality, is to check whether or not it’s switched on or off. If you’ve updated Windows 11 to version 22H2 or higher, the chances are that Chrome already uses efficiency mode. You can check this for yourself via the Task Manager, however.
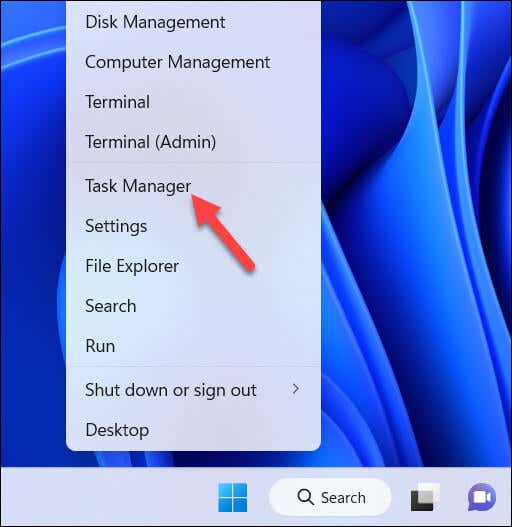
- First, right-click the Start menu and select Task Manager.
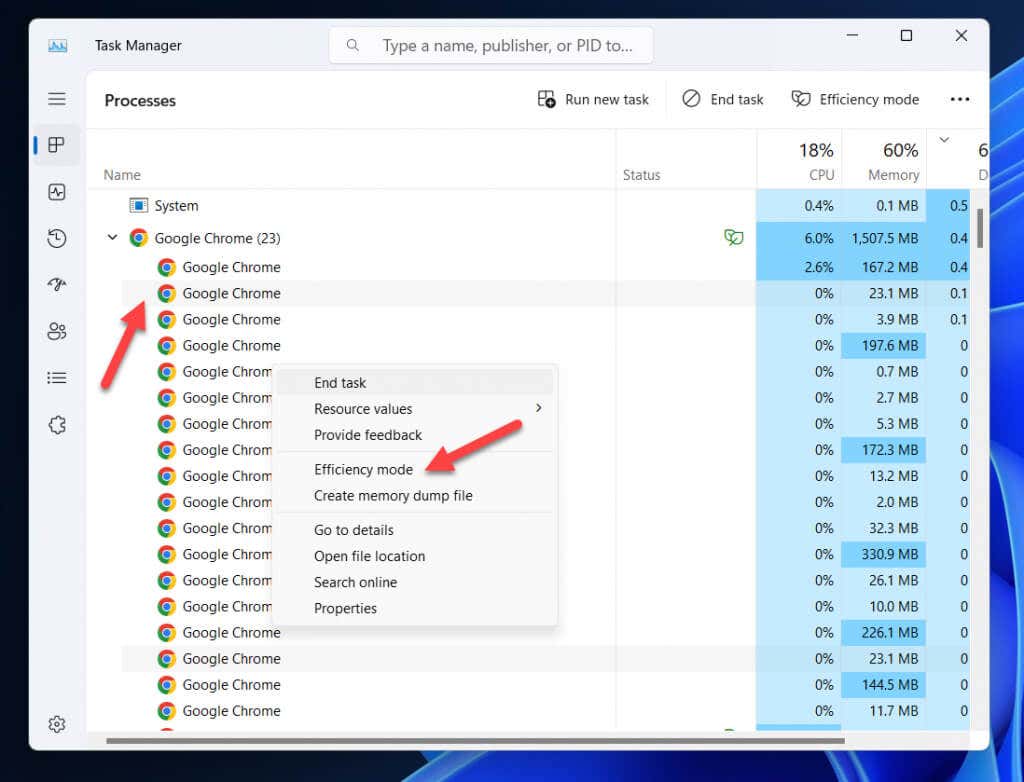
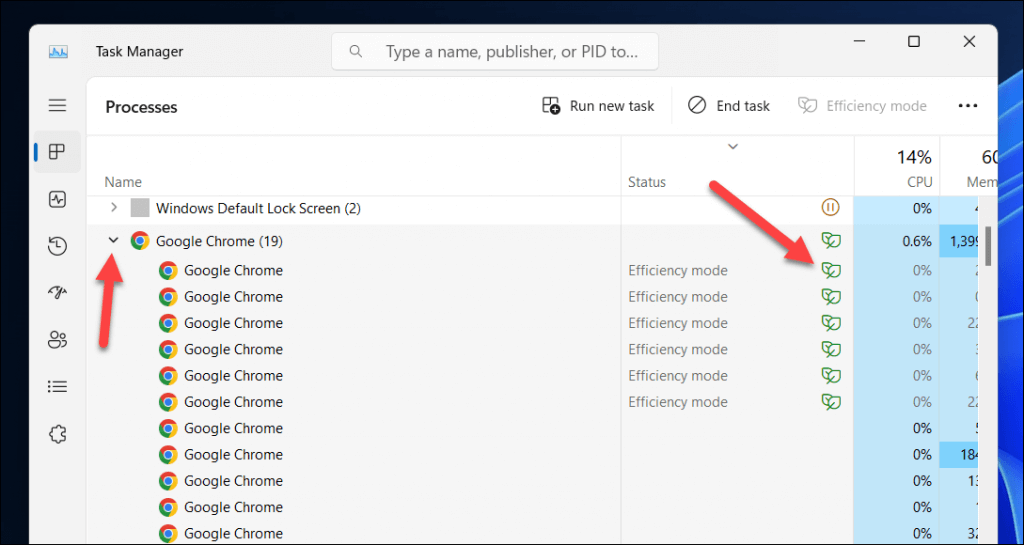
- In Task Manager, locate the Google Chrome process, selecting the arrow next to it to view the various chrome.exe processes in the list.
- You should see Efficiency Mode listed in the Status tab for any processes that have the feature enabled. If any of the chrome.exe processes have this label in this column, it means that efficiency mode is enabled for this process and is active overall for Google Chrome.
- You will also see a green leaf icon next to processes that have the feature enabled.
How to Temporarily Disable Efficiency Mode for Google Chrome in Windows 10 and 11
If you want to temporarily disable efficiency mode for Google Chrome in Windows 11, you can do so via the Task Manager. To do this, follow these steps.
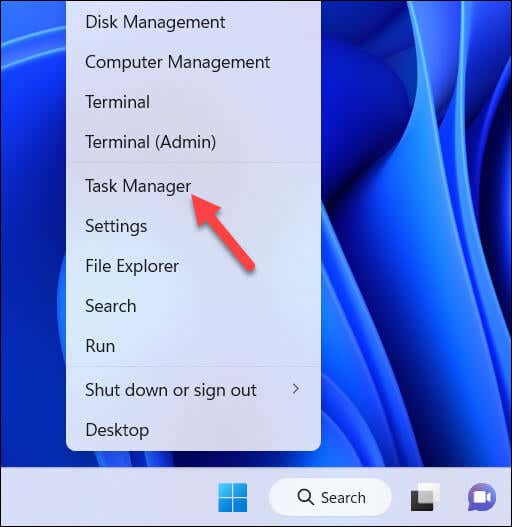
- Right-click the Start menu and select Task Manager.
- In Task Manager, expand the Google Chrome process group by pressing the arrow next to it. You should see several sub-processes with different names and icons under them.
- Right-click on any of the sub-processes that have Efficiency Mode value in the Status column and select Efficiency Mode from the menu, making sure that the checkbox is removed in the process.
- Repeat this step for all the sub-processes that have efficiency mode enabled to disable it.
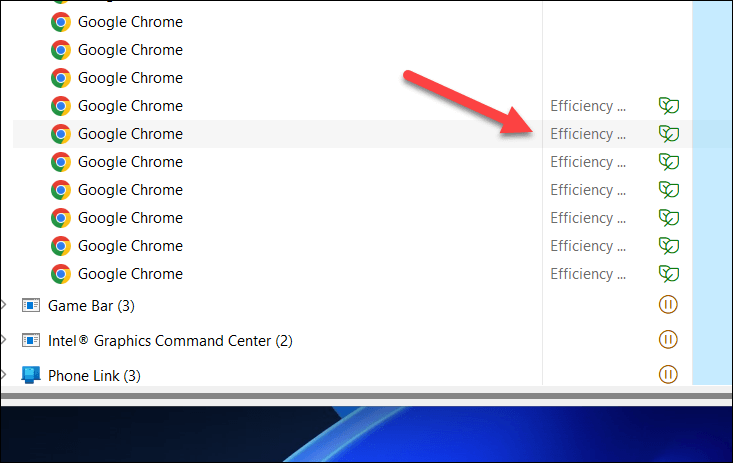
This will temporarily disable efficiency mode for those sub-processes until you close or restart Google Chrome. However, as your process list will change and update as you open and close new tabs, you may need to repeat these steps several times for the changes to remain in effect.
How to Permanently Disable Efficiency Mode for Google Chrome in Windows 11 Using a Shortcut Command
By default, Chrome will automatically use efficiency mode to try and keep system memory usage under control. If you want to disable it permanently, you’ll need to configure a desktop shortcut to launch Chrome using a special command that prevents it from using it while Chrome is running.
To permanently disable efficiency mode in Google Chrome, follow these steps.
- Make sure that Chrome isn’t running. If it is, make sure to exit it, ensuring that no chrome.exe processes are running in Task Manager.
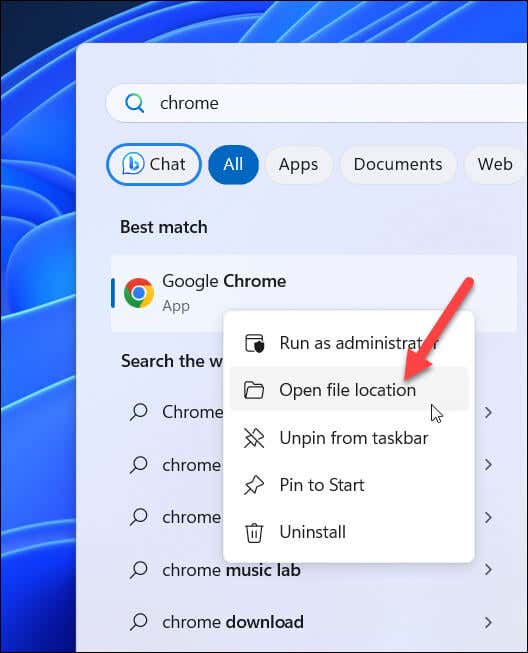
- Next, open the Start menu, locate Google Chrome, right-click the app, and press Open File Location.
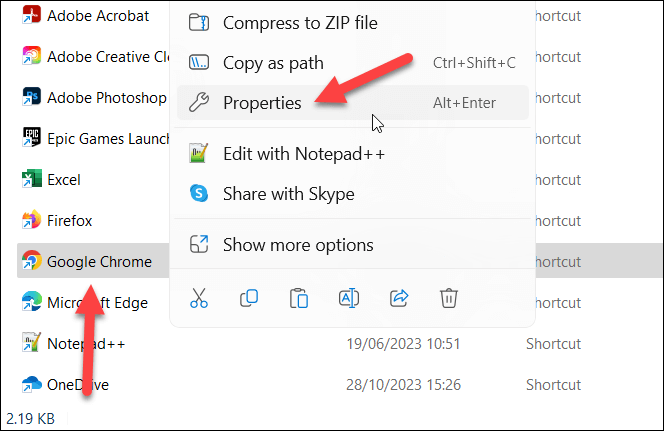
- Next, right-click the Google Chrome shortcut in the File Explorer window that opens and select Properties.
- In the Properties window, press the Shortcut tab at the top.
- In the Target field, add a space after the existing chrome.exe location.
- After the space, type –disable-features=UseEcoQoSForBackgroundProcess at the end of the existing text, making sure there is no quotation mark after the command.
- Click OK to save the changes and close the Properties window.
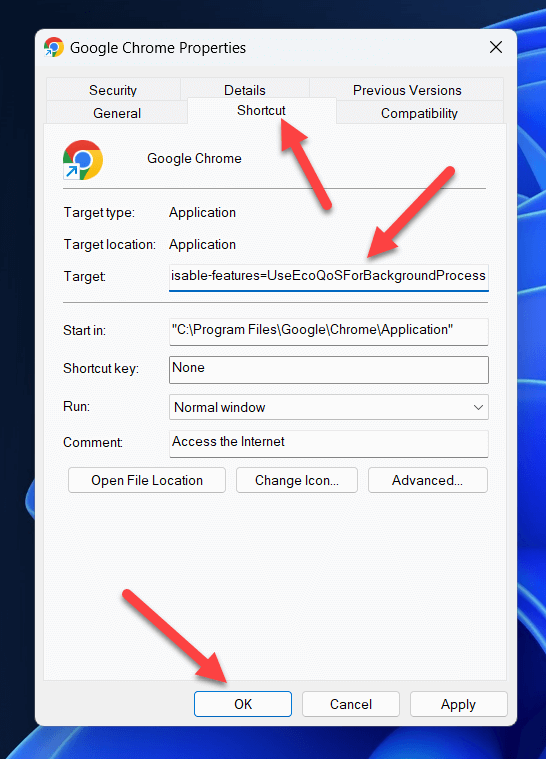
Thanks to this shortcut, whenever you launch Google Chrome using this shortcut, efficiency mode will be disabled for your browser.
Alternatives to Using Efficiency Mode with Google Chrome
If you want to save battery life and improve performance without using efficiency mode with Google Chrome, you can try some alternatives. For example, you can:
- Use the built-in battery saver mode in Windows 10 and 11, which can automatically reduce the brightness of your screens and limit the resource usage of your PC when your battery is low. You can enable or disable this feature by pressing the battery icon on the system tray and pressing the available toggle.
- Use the energy and memory saver modes of Google Chrome. These features reduce the power consumption of your browser by limiting some features and functions. They also disable memory usage for inactive tabs—similar to Windows’ efficiency mode. To enable or disable these features, press the three-dot menu icon in Chrome and select More tools > Performance, then tap the sliders next to the Energy saver and Memory saver options to enable those features.
- Use extensions effectively and disable any extensions that use a lot of active memory. The more active extensions your browser has, the more memory usage that it will use while your browser is running. If you run into issues, you can temporarily disable Chrome extensions by pressing the three-dot menu icon in Chrome and selecting Extensions, then tapping the slider next to any of the extensions listed to disable them.
Conserving Energy in Google Chrome on Windows
Thanks to efficiency mode, your Google Chrome browser experience might become less memory intensive. However, if you find that your tabs aren’t loading properly, or if you need Chrome to use more of your active memory, you can switch it off using the steps above.
If Chrome isn’t working properly, you can always switch to another browser. For example, you can export your Chrome bookmarks and import them into a browser like Firefox instead.
Related Posts
- 6 Ways to Enable Google Chrome’s Dark Mode in Windows
- Preparing for Windows 10 End of Support: Upgrading to Windows 11
- How to Fix a “This file does not have an app associated with it” Error on Windows
- How to Fix an Update Error 0x800705b4 on Windows
- How to Resolve “A JavaScript error occured in the main process” Error on Windows

