Steam’s “Could not connect to the Steam network” sometimes appears out of the blue and prevents you from using many app features. If you’ve encountered this error and the error doesn’t go away, you’ll have to follow a few troubleshooting tips to resolve your problem. These tips fix the items that may be causing your Steam network error, allowing your app to communicate with the platform’s servers and let you access the app features. Let’s find out the possible solutions to this problem.
If you’re curious why Steam displays the above error, some reasons are that your app has a minor technical problem, your internet connection isn’t working, Steam’s servers are down, your firewall has blocked Steam’s internet access, and more.

Force Close and Re-Open Steam on Your Computer
One method that can possibly resolve your Steam network error is force-closing and relaunching your Steam app. Doing so turns off and back on all your app features, resolving many minor problems.
- Right-click the Windows taskbar and select Task Manager.
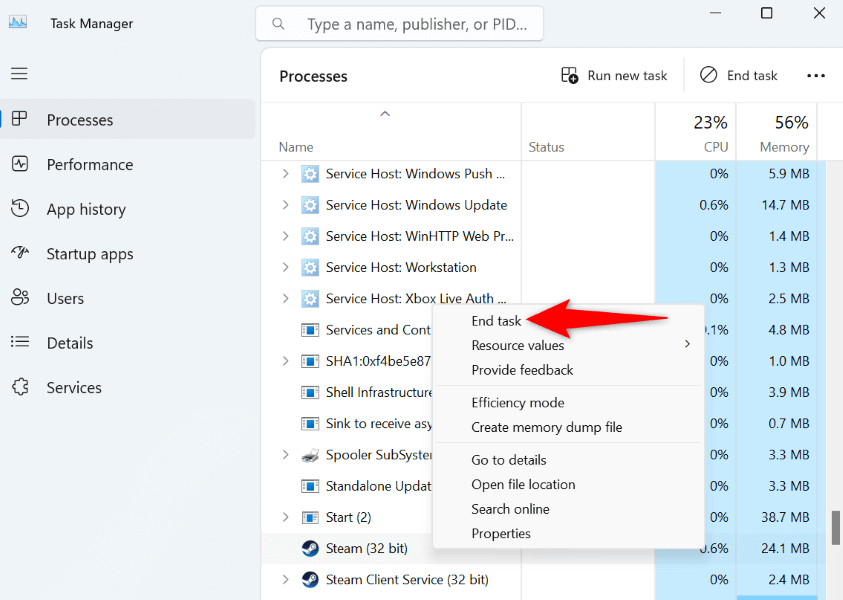
- Access the Processes tab, right-click Steam, and choose End task.
- Relaunch Steam from your desktop or Start menu.
Check Your Internet Connection
Another reason you get a “Could not connect to the Steam network” error is that your app is having trouble connecting to the company’s servers. This usually happens when your internet connection stops working.
In this case, check and fix the issues with your connection. You can check if your connection is faulty by opening a web browser and loading a site. If your site fails, that indicates your connection has issues.
You can reboot your router to possibly resolve your connection problem. If that doesn’t work, fix issues with your network adapter. Lastly, contact your internet service provider (ISP) for further help.
Check if Steam Is Down
If your internet connection is working, check if Steam’s servers are down. The platform’s servers may be experiencing an issue, causing your client to be unable to reach those servers.
You can check if Steam is down using the unofficial Steam Status site, the Downdetector site, or the unofficial Steam Status account on X (formerly Twitter).
If Steam is down, wait until the company fixes the issue. The company is likely aware of the problem you’re experiencing and may already be working on a solution.
Run Steam With Admin Privileges
One reason some apps fail to work properly on Windows PCs is that those apps may be lacking the required system permissions. This happens when you run your apps from a regular user account, not an admin one.
You can fix that by launching your Steam app as an administrator. This gives the app all the rights it requires to function.
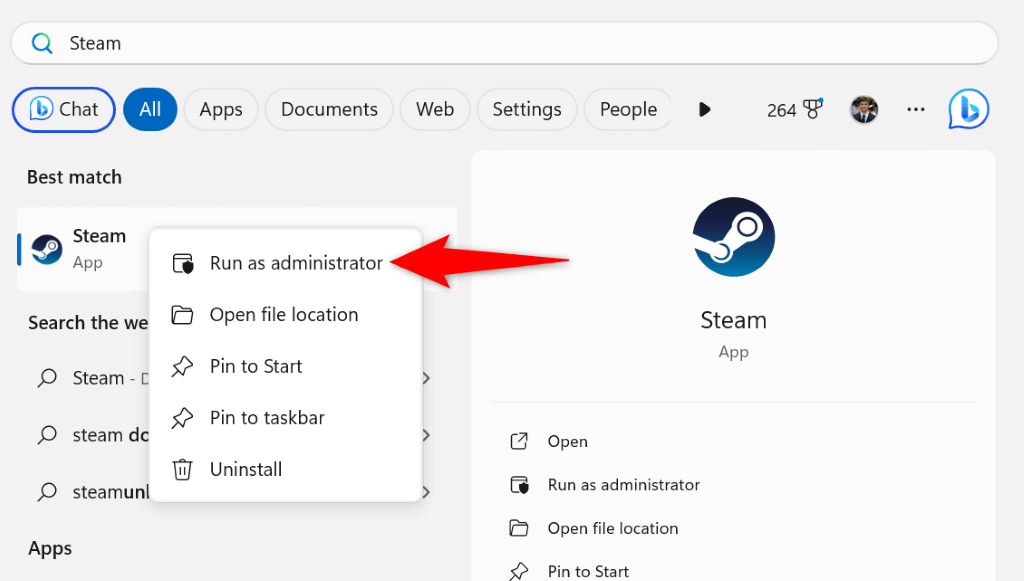
- Right-click the Steam app in your Start menu or desktop and choose Run as administrator.
- Select Yes in the User Account Control prompt.
Restart Your Computer
If your Steam network issue persists, your Windows operating system may be experiencing a problem. Such issues prevent your installed apps from working correctly.
You can resolve many minor issues with your system by rebooting your computer.
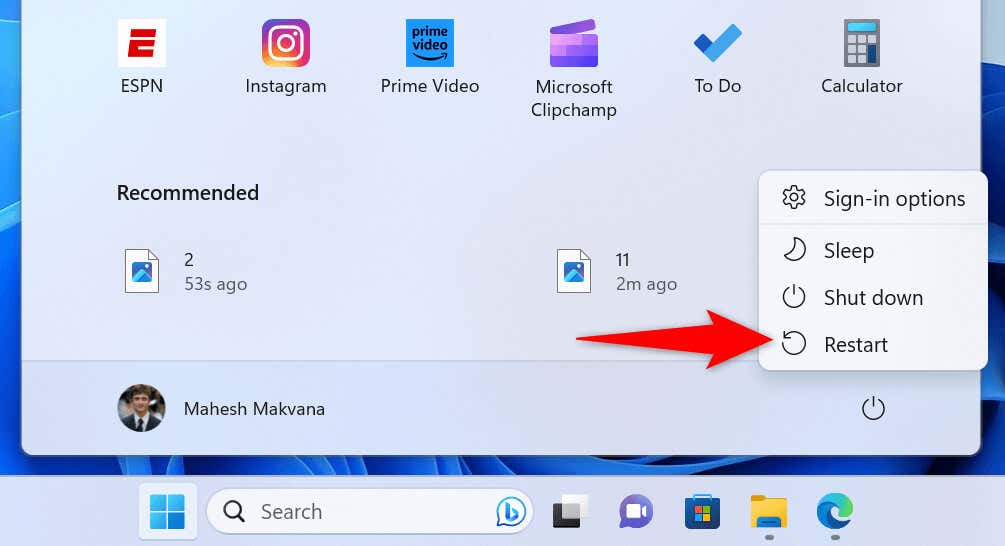
- Open the Start menu on your PC.
- Select the Power icon in the menu.
- Choose Restart in the menu to turn your machine off and back on.
Turn Off Your Antivirus and Firewall
If restarting your computer hasn’t fixed your Steam network error, your antivirus or firewall may have blocked Steam’s access to the internet. This happens when your antivirus or firewall detects your app to be a potential threat, which isn’t always true.
You can temporarily turn off your antivirus and firewall to see if that resolves your problem.
Turn Off Microsoft Defender Antivirus
- Open the Windows Security app on your PC.
- Select Virus & threat protection in the app.
- Choose Manage settings under the Virus & threat protection settings header.
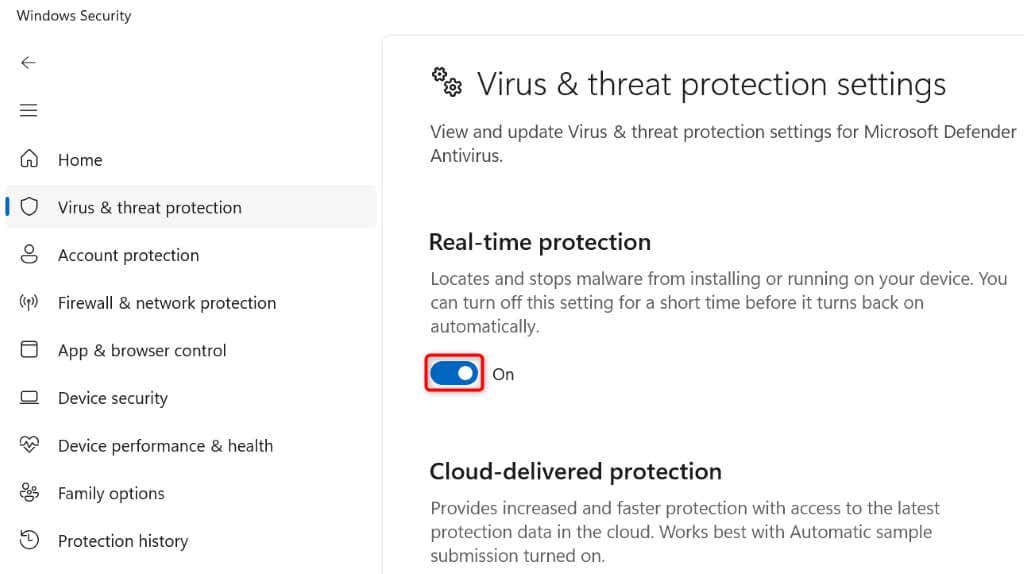
- Turn off the Real-time protection toggle.
- Select Yes in the User Account Control prompt.
Launch Steam and see if the app works. If your problem persists, disable your PC’s firewall as follows.
Turn Off Microsoft Defender Firewall
- Launch the Windows Security app on your PC.
- Select Firewall & network protection in the app.
- Choose the network that says (active).
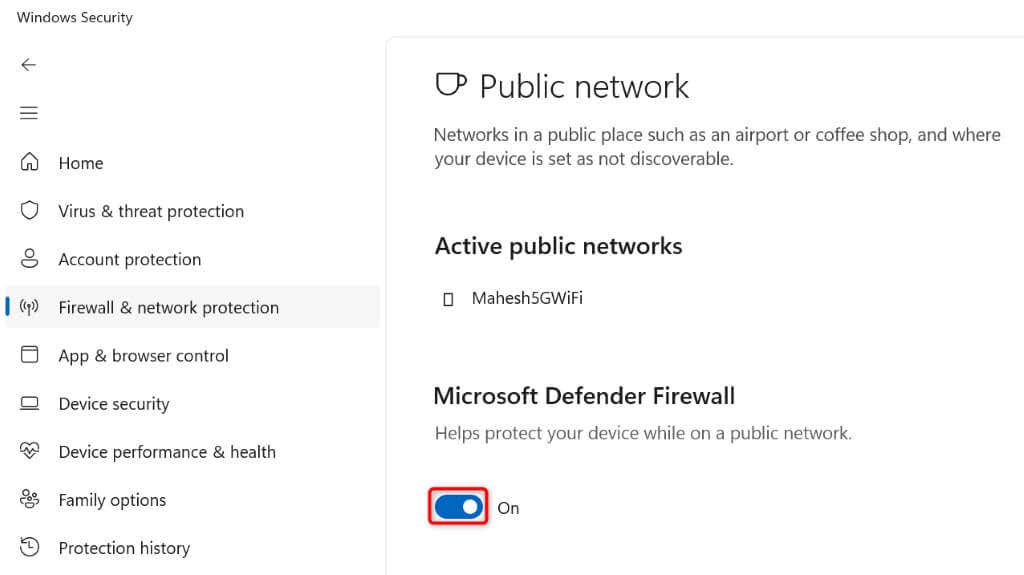
- Turn off the Microsoft Defender Firewall toggle.
- Select Yes in the User Account Control prompt.
Make Steam Use the TCP Protocol
Steam uses UDP as the default protocol to make network connections. When you experience network issues with the app, it’s a good idea to make the app switch to the TCP protocol, which can possibly fix your “Could not connect to the Steam network” error.
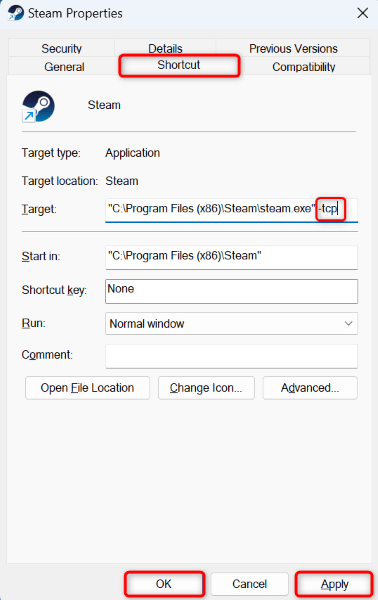
- Right-click the Steam shortcut on your desktop and select Properties.
- Open the Shortcut tab in Properties.
- Place your cursor at the end of the Target field, press Spacebar, and add the following parameter:
-tcp
- Select Apply followed by OK at the bottom to save your changes.
- Open Steam using your desktop shortcut.
Remove and Reinstall Steam on Your Computer
If none of the above methods fixed your Steam network issue, your last solution is to uninstall and reinstall the app on your computer. Your app may be experiencing a major core file problem, being unable to connect to the company’s servers. You can fix that by deleting and reinstalling your app.
Note that you lose your downloaded games, and the game progresses when you remove Steam. You can preserve that content by backing up the steamapps folder from your Steam app directory.
On Windows 11
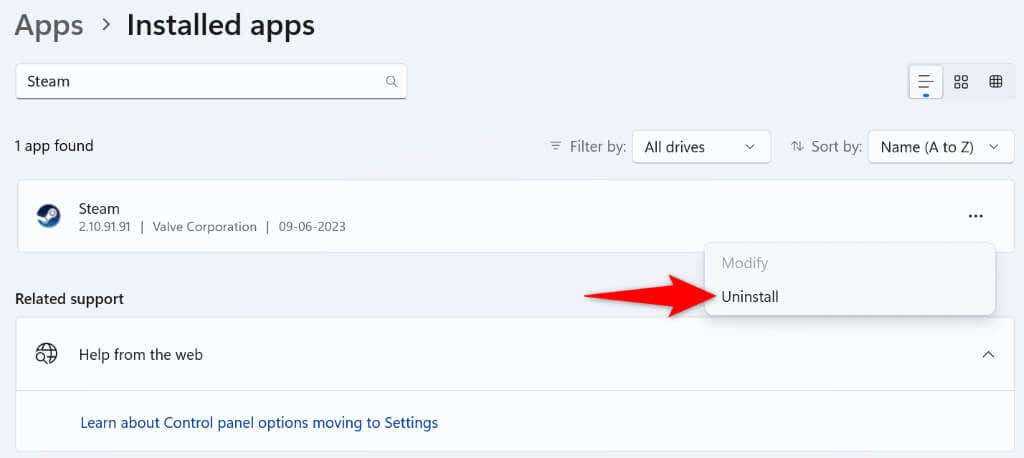
- Right-click the Start menu icon and select Settings.
- Select Apps > Installed apps in Settings.
- Select the three dots next to Steam, choose Uninstall, and select Uninstall in the prompt.
On Windows 10
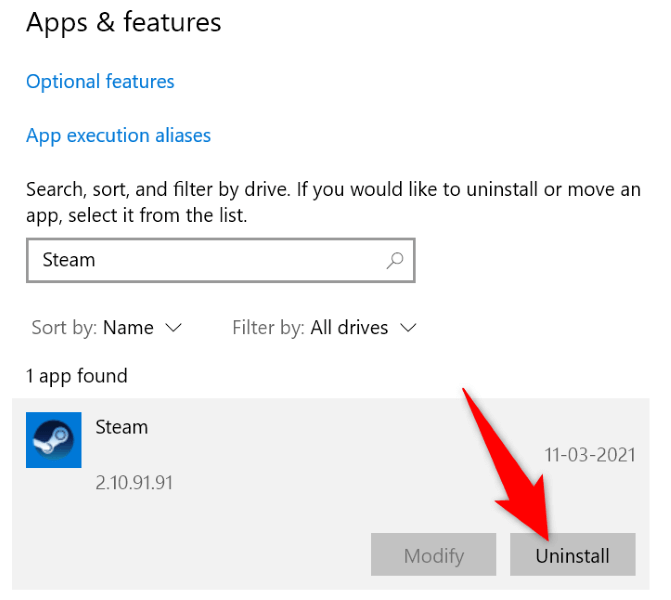
- Open Settings using your preferred method on your PC.
- Select Apps in Settings.
- Choose Steam on the list, select Uninstall, and choose Uninstall in the prompt.
After removing Steam, go to the Steam website and download and install a fresh copy of the app on your computer.
Troubleshooting Steam’s Network Connectivity Issue on Your Computer
Steam’s network issue prevents you from using many app features that rely on the internet. If your error doesn’t go away after multiple attempts to connect the app to the internet, use the above methods to resolve your issue.
The above methods fix nearly all the items that can cause your “Could not connect to the Steam network” error, allowing your Steam client to connect to the internet and give you access to all the web-enabled features.
