The Realtek Semiconductor Corp. Extension is a software component that enables Windows 11/10 to interact with Realtek’s audio and networking devices. It gets updated through Windows Update whenever Realtek releases newer versions.
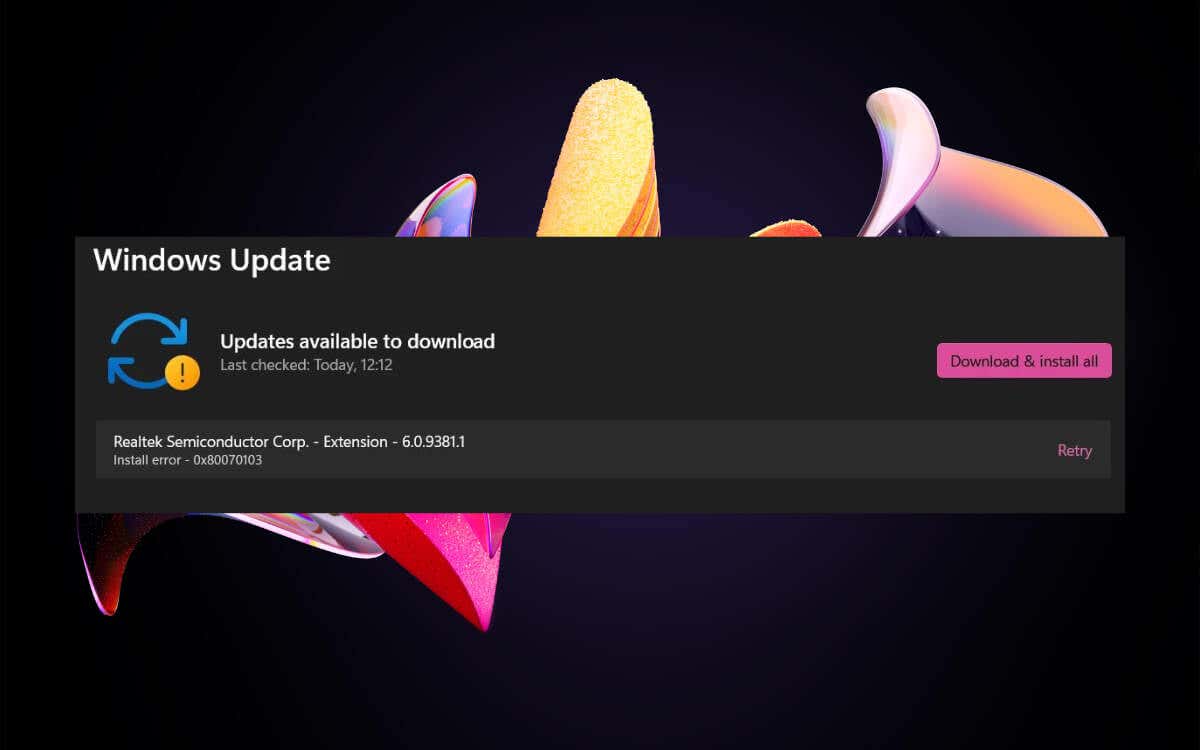
But what if Windows Update suddenly begins to display “Realtek Semiconductor Corp. – Extension Install error – 0x80070103” on repeat? Although this failing driver update shouldn’t interfere with your operating system’s ability to use Realtek’s hardware, continually seeing the error is unsettling and leads to problems later.
This troubleshooting guide has been created to help you resolve the Realtek Semiconductor Corp. Extension install error. You’ll learn multiple solutions, from basic troubleshooting steps to more advanced techniques, to fix this driver update issue on your Windows PC.
Reboot Windows Update
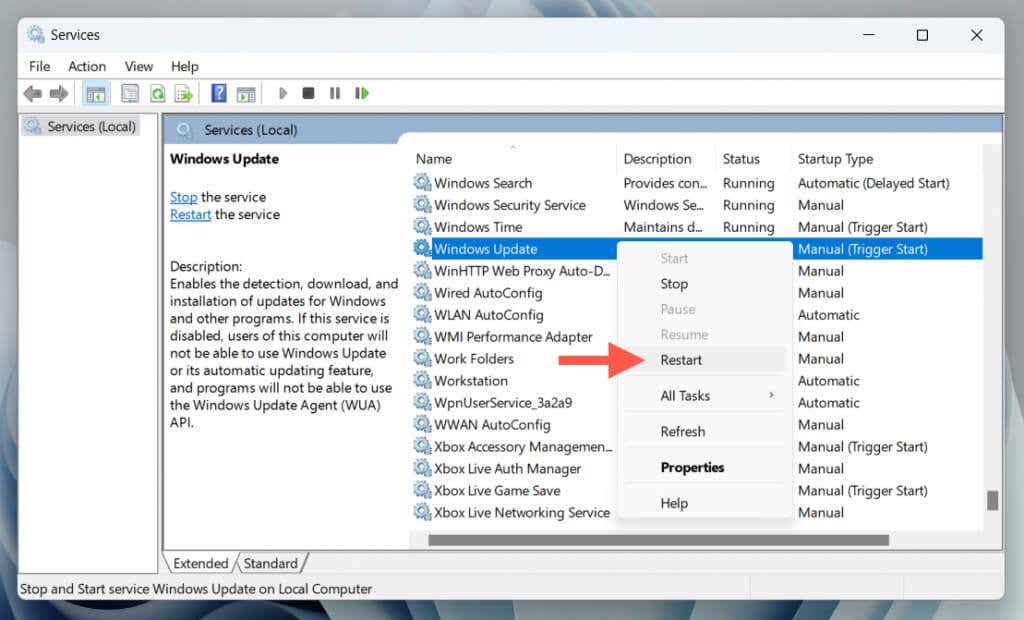
In most cases, an issue with a driver update in Windows is simply due to a temporary glitch, such as a network issue or a server-side problem from Microsoft. If hitting the Retry button causes the Realtek extension update to fail repeatedly, try rebooting Windows Update. To do that:
- Press Windows + R to open the Run box, type services.msc, and select OK.
- Scroll down the Services app and right-click Windows Update.
- Select Restart.
Restart Your PC
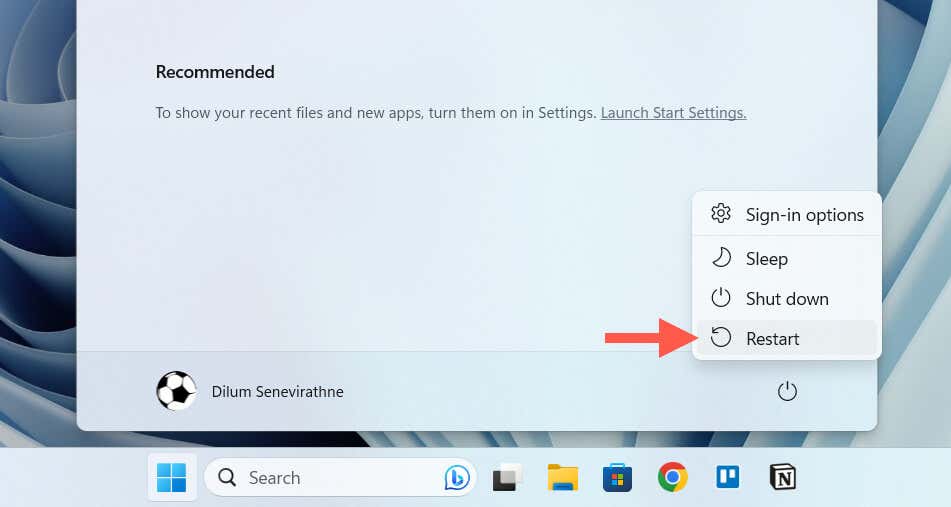
Restarting your PC is a quick and fast way to resolve loads of underlying issues with Windows. Just open the Start menu, select Power > Restart, and rerun Windows Update after you log back into the desktop.
Pause and Retry the Update
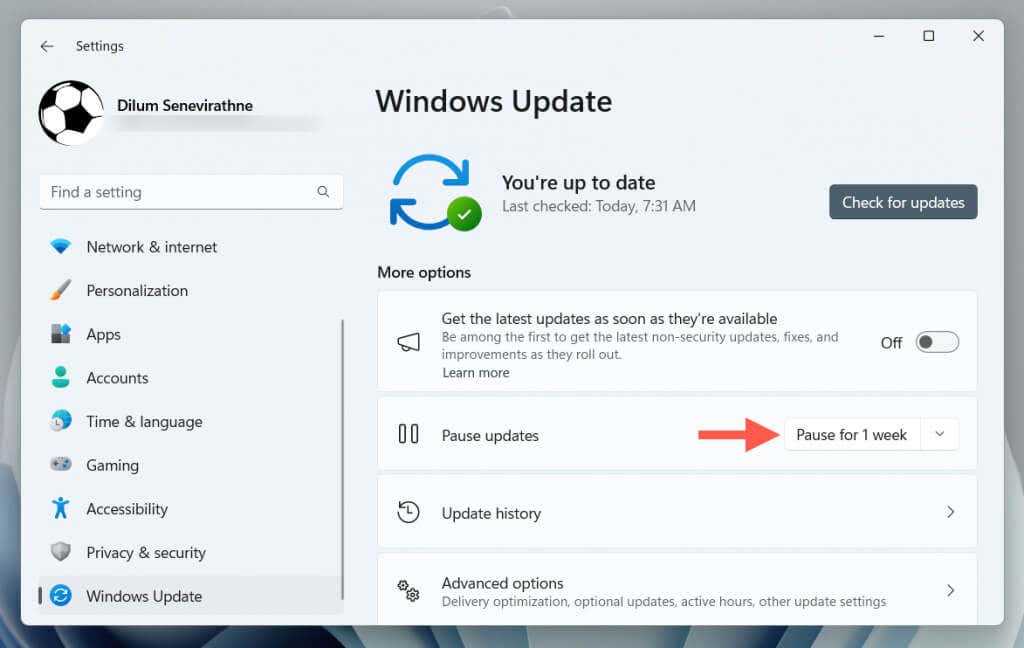
Another quick fix for the Realtek Semiconductor Corp Extension install error in Windows involves pausing Windows Update and re-enabling it. Here’s how:
- Open the Settings app and select Windows Update.
- Select the Pause for 1 week button.
- Restart your computer.
- Go back to Settings > Windows Update and select Resume updates.
- Wait until Windows Update automatically searches for and installs any pending updates it detects.
Run the Windows Update Troubleshooter
Windows has a built-in troubleshooter tool designed to identify and fix issues related to system and driver updates. It can suggest potential fixes and even auto-apply them.
To run the Windows Update troubleshooter:
- Open the Settings app and go to System > Troubleshoot (Windows 11) or Update & Security > Troubleshooters (Windows 10).
- Select Other/Additional troubleshooters.
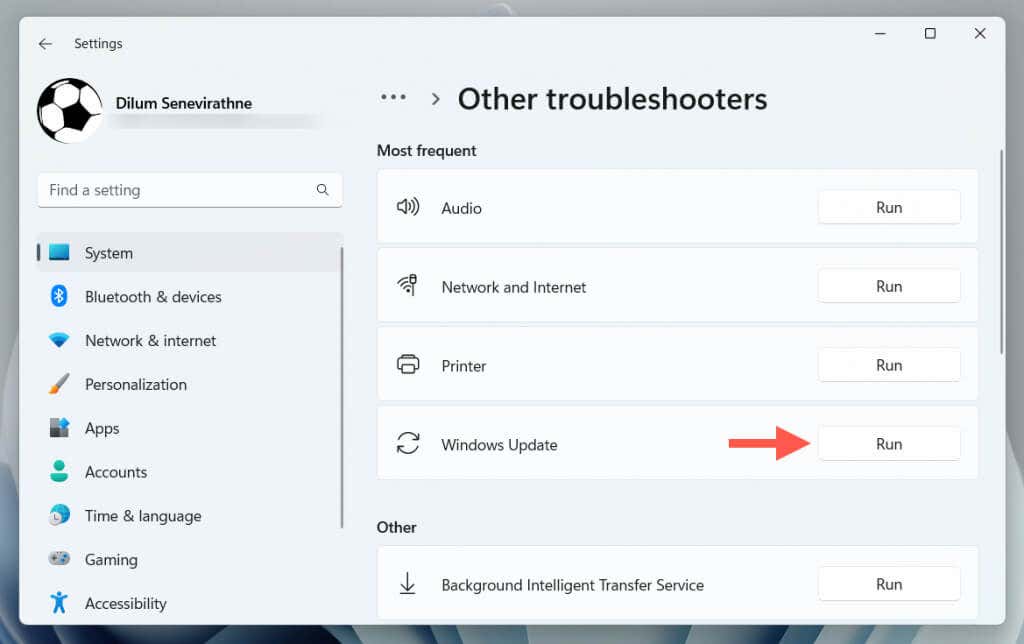
- Select Run next to Windows Update.
Use the Show or Hide Updates Troubleshooter
Show or Hide Updates is an alternative Microsoft troubleshooter that gives you control over which updates to install. Forum chatter indicates using the tool to hide, unhide, and reinstall the Realtek Semiconductor Corp Extension update as a viable technique to avoid install error 0x80070103.
Download the Show or Hide Updates troubleshooter from Microsoft, and then:
- Double-click the wushowhide.diagcab file within your PC’s Downloads folder.
- Select Next on the Show or Hide Updates troubleshooter’s Welcome screen.
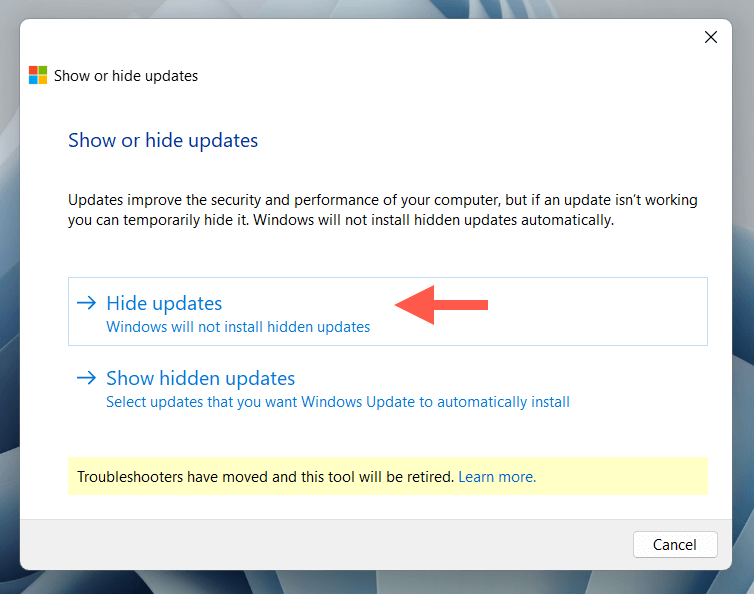
- Choose the Hide updates option.
- Hide the Realtek Semiconductor Corp. – Extension update.
- Open the Windows Setting app, go to Windows Update, and select the Pause for 1 week button.
- Restart your computer.
- Re-open the Show or Hide Updates troubleshooter and select Show hidden updates.
- Unhide the Realtek Semiconductor Corp. – Extension update.
- Revisit Windows Update, select Resume updates, and install updates for the Realtek Semiconductor Corp. Extension.
Reset the Windows Update Cache
Windows maintains a cache of partially downloaded update data to speed things up. Errors and corrupt files within the cached folders—SoftwareDistribution and catroot2—can result in persistent Windows Update errors.
To reset the Windows Update cache:
- Open the Start menu, type cmd, and select Run as administrator.
- Select Yes on the User Account Control (UAC) pop-up.
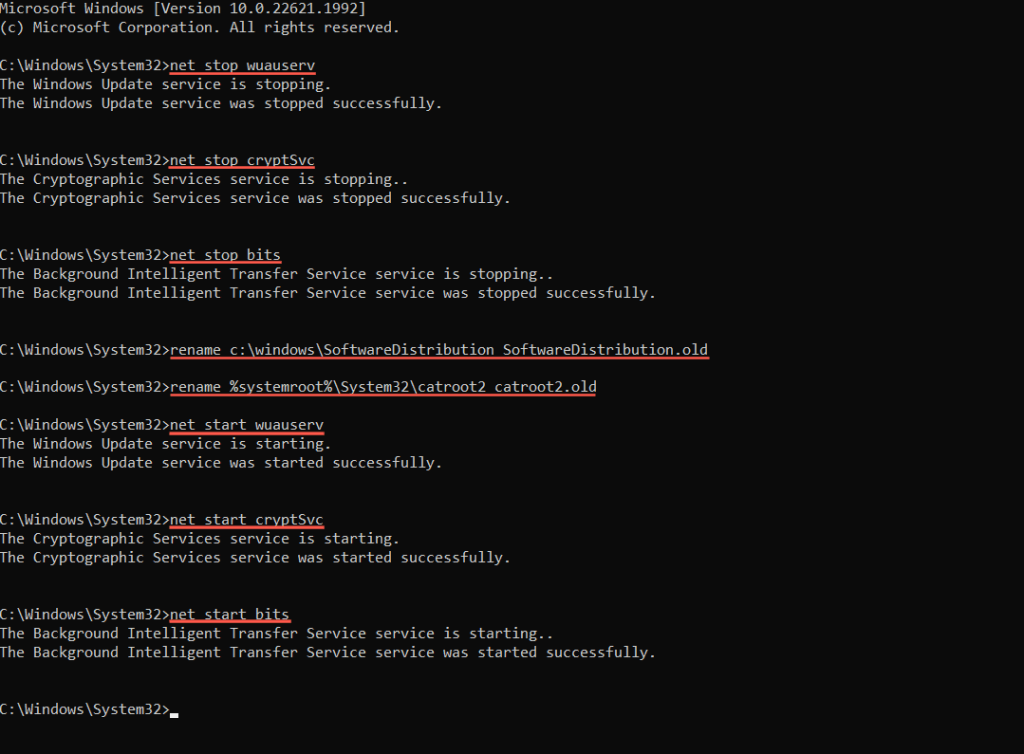
- Copy and paste the commands below one after the other and press Enter to execute them:
- net stop wuauserv
- net stop cryptSvc
- net stop bits
- rename c:windowsSoftwareDistribution SoftwareDistribution.old
- rename %systemroot%System32catroot2 catroot2.old
- net start wuauserv
- net start cryptSvc
- net start bits
- Exit the Command Prompt console and restart your computer.
- Go to Settings > Windows Update and check if the Realtek Semiconductor Corp. Extension install error recurs.
Repair Corrupt System Files
Next, run Windows’s System File Checker (SFC) and Deployment Image Servicing and Management (DISM) command-line tools. SFC scans and fixes corrupt or missing system files that could lead to Windows Update issues, while DISM improves system stability.
To run the SFC and DISM tools:
- Open an elevated Command Prompt console.
- Execute the two commands below one after the other—both tools can take several minutes to complete:
- sfc /scannow
- DISM /online /cleanup-image /restorehealth
Uninstall and Reinstall Realtek Devices
If everything fails, try removing and reinstalling the Realtek audio or network drivers on your Windows PC. This action eliminates potential driver corruption issues leading to update errors. To do that:
- Right-click the Start button and select Device Manager.
- Expand the Audio devices and Network adapters sections.
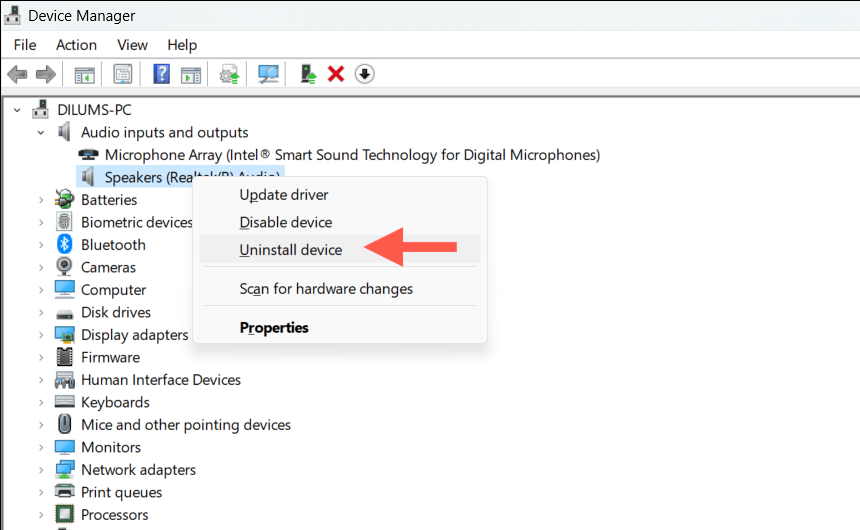
- Right-click any listed Realtek devices and select Uninstall device.
- Restart your computer.
- Revisit the Device Manager and select Scan > Check for Hardware Changes on the menu bar.
- Relaunch Windows Update and attempt to install all pending Realtek updates.
Install Updates From Computer Manufacturer
An alternative method to install Realtek drivers and components is to get the relevant drivers from your computer manufacturer—HP, Dell, ASUS, etc. It’s not convenient compared to Windows Update, but it helps resolve recurring Realtek extension update errors, at least for now.
After visiting the manufacturer’s website, search for your PC model, download the latest Realtek drivers, and install them. Then, re-run Windows Update.
Fix Error Code 0x80070103 in Windows Update
The Realtek Semiconductor Corp Extension install error is not straightforward to troubleshoot, but working through the fixes above should make it go away eventually. If none of these solutions work for you, wait until the next Realtek Semiconductor Corp Extension update hits Windows Update and install that instead. Or, if you’re up for it, reset Windows 11 or 10 to default settings, set up everything from scratch again, and check if that deals with any conflicts causing the error to pop up.
Related Posts
- Preparing for Windows 10 End of Support: Upgrading to Windows 11
- How to Fix a “This file does not have an app associated with it” Error on Windows
- How to Fix an Update Error 0x800705b4 on Windows
- How to Resolve “A JavaScript error occured in the main process” Error on Windows
- How to Fix the Network Discovery Is Turned Off Error on Windows
